-
| Smash Gate was Burnopedia's Featured Article in February 2010. |
|---|
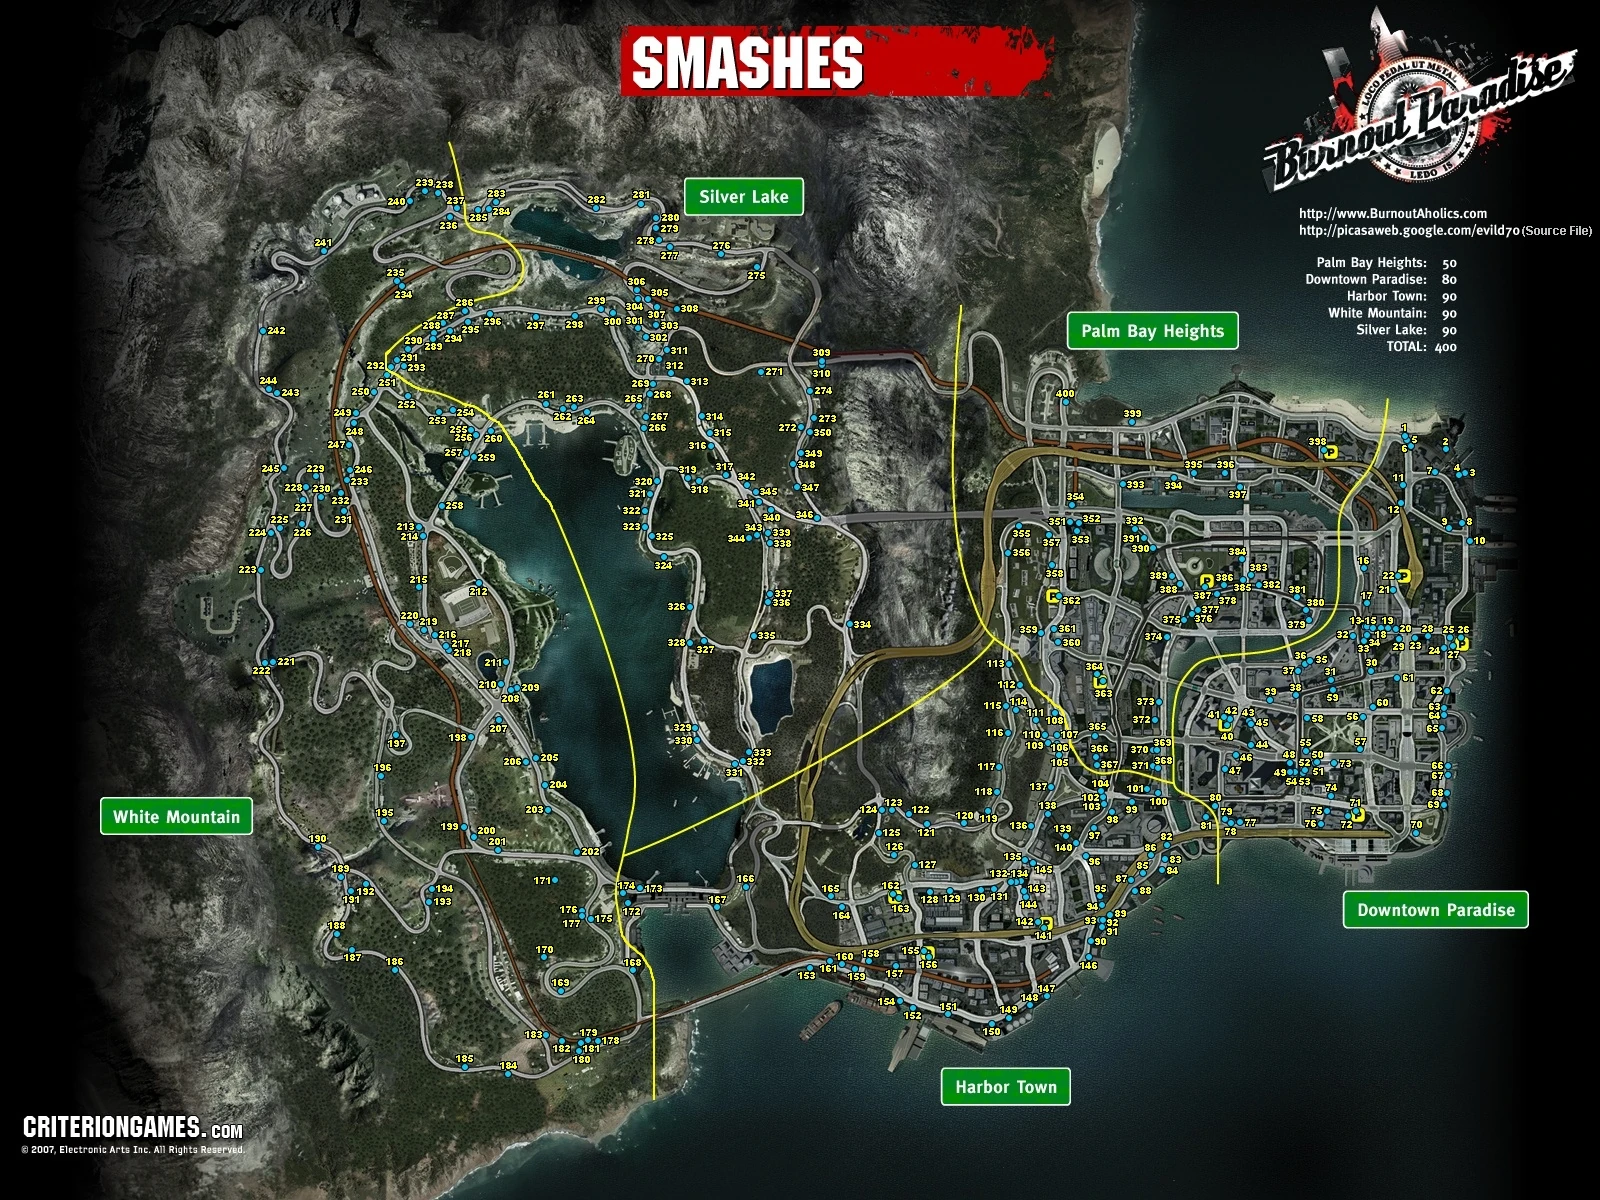
Smash Gates are Discoverables in Paradise City that lead towards Burnout Paradise game completion. There are 475 smashes in all, including both the orange Big Surf Island smash gates, and the yellow Paradise gates, which are only located on the mainland. They are represented by chain link fences with an orange or yellow "Private Property" sign on them. Smash Gates usually mark the entrance or exit to shortcuts and secret routes through the city, and once you've knocked down a Smash Gate it will be removed from the scenery to let you know you've earned it already. Most smashes consist of more than one fence panel, and while it is only necessary to knock down a single panel, it is recommended to clear them all in order to avoid being distracted by smashes you've already collected when hunting for the last few.
Paradise Smash Gates[]
Burnout Paradise Smash locations
These are the chain link fences with a yellow "Private Property" sign on them. There are 400 yellow smash gates to find all over Paradise City, with anywhere from 50 to 90 in each district. To check how many you have in each area, go to Driver Details in the Pause Menu, and select Discovery. With there being so many, this is probably the hardest discoverable to complete. Breaking through all 400 Paradise smash gates will unlock the Carson Carbon GT Concept.
Awards[]
There are 2 Paradise Awards available for the PC and PS3, 2 Achievements for the Xbox 360 and 3 Trophies for the PS3 concerning Paradise City Smash gates.
| Burnout Paradise Awards | |||
|---|---|---|---|
| Image | Criteria | Type | Award |
| Collect 25 Smashes. | Award | - | |
| Collect all 400 Smashes. | Award | - | |
| Collect 25 Smashes. | Achievement | 10 | |
| Collect all Smashes. | Achievement | 20 | |
| Drive through 10 sets of Yellow Smash Gates. | Trophy | Bronze | |
| Drive through 50 sets of Yellow Smash Gates. | Trophy | Bronze | |
| Drive through 200 sets of Yellow Smash Gates. | Trophy | Silver | |
Smash Gate Walkthrough[]

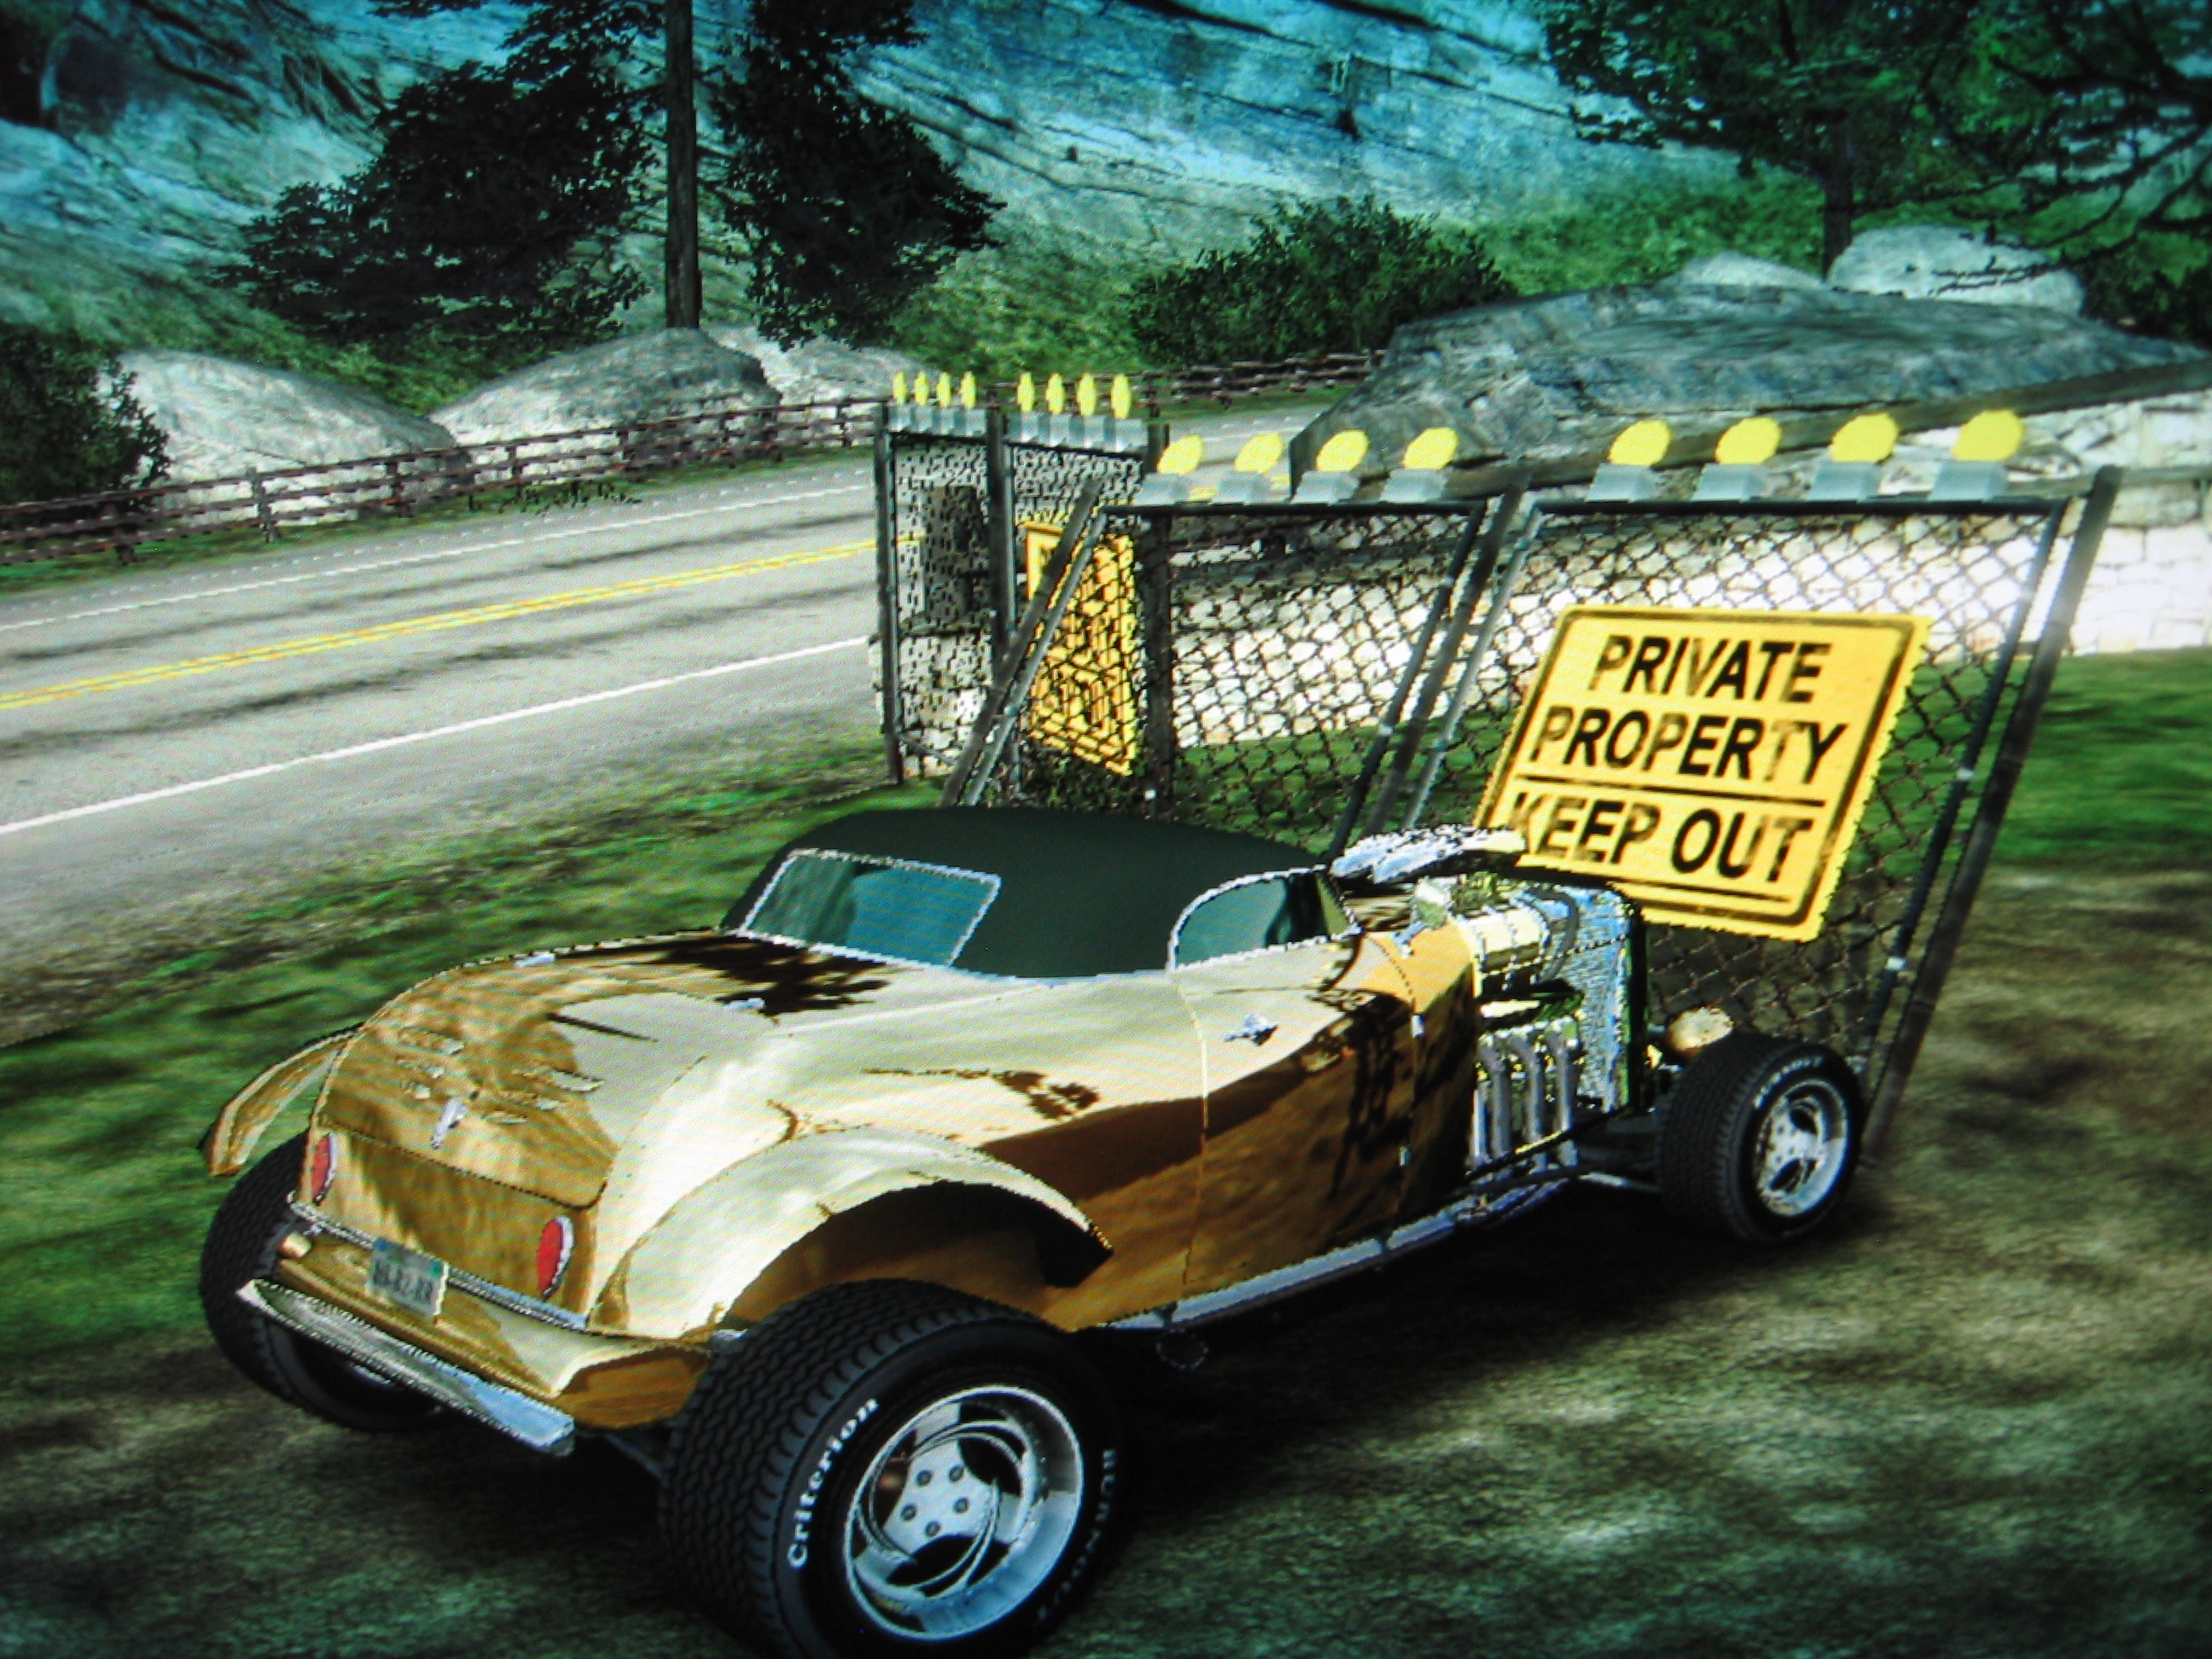
A Carson Hot Rod Coupe with a gold finish smashing some Gates.
The following table gives an efficient route to complete the Smash Gates and unlock the smash Gate award. The route is planned to avoid backtracking and provide some guidance on how the smash gates can be used. But, some backtracking is inevitable. There may well be better routes, but this one works. Assume you are in sameway traffic when completing the guide, unless specified otherwise.
Be careful because sometimes gates do not span the entire opening, or do not register, so if you are off from the count shown in the walk-thru, you might need to backtrack to make sure the game did not miss one. (Also sometimes the game does not register the smash even though the gate was completely knocked down - nothing much you can do then except start over and lose all your previous progress).
This is optional, but it is likely best to do the Smash Gate walkthru early in your exploration of the game. Unlike the Super Jumps and Billboards, the gates do not re-spawn, so once you have knocked down all the gate segments, there is no indication that the gate was ever there, and it can be hard to verify that you are in the correct location.
| Paradise City Smash Gate Walkthrough | |||
|---|---|---|---|
| # | Location | Description | Image |
| 1 | Downtown Paradise Motor City |
Start at the Junkyard by the Coastguard HQ. Head north and turn right just before the sign across the road for the Coastguard HQ. There are three smash gates here that provide a convenient shortcut between the Coastguard HQ and the Waterfront Plaza. Smash Gate 1 is the extreme northern one under a metal gate and near the lighthouse. Smash through it and continue through the dock area. | 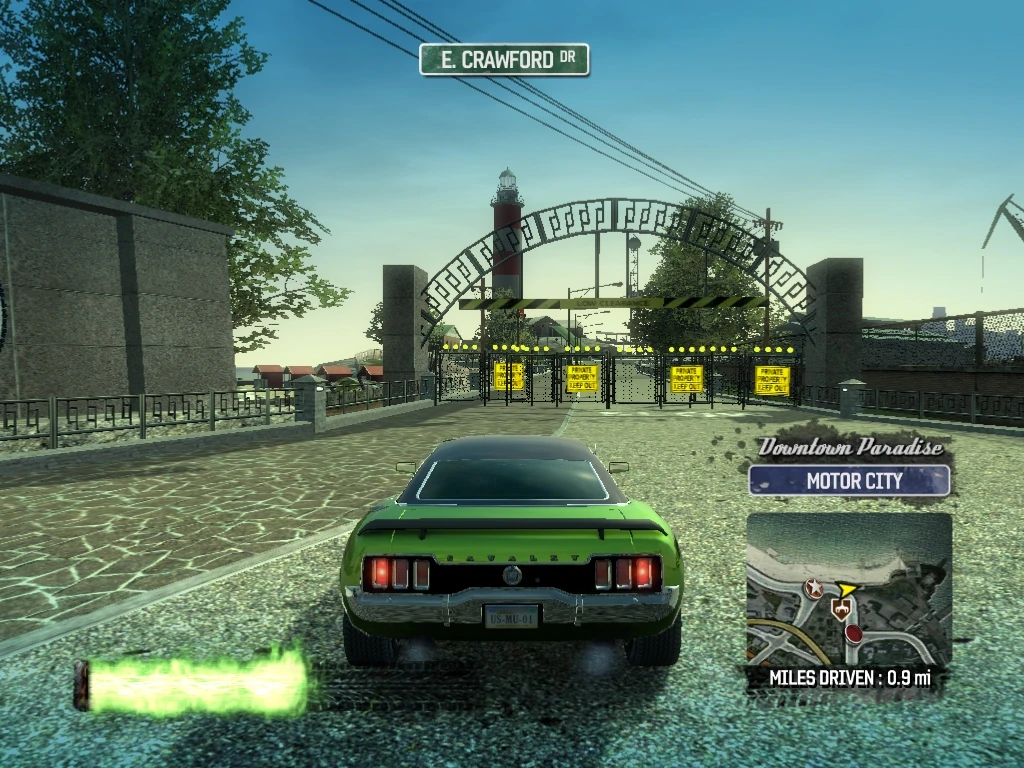
|
| 2 | Downtown Paradise Motor City |
Smash Gate 2 is down the pathway and just before the road starts turning South. | 
|
| 3 | Downtown Paradise Motor City |
Smash Gate 3 is after the path turns south - you will see a billboard ahead in the distance. Smash Gate 4 is parallel and just to the east of it, so spin to the right and smash through it next. | 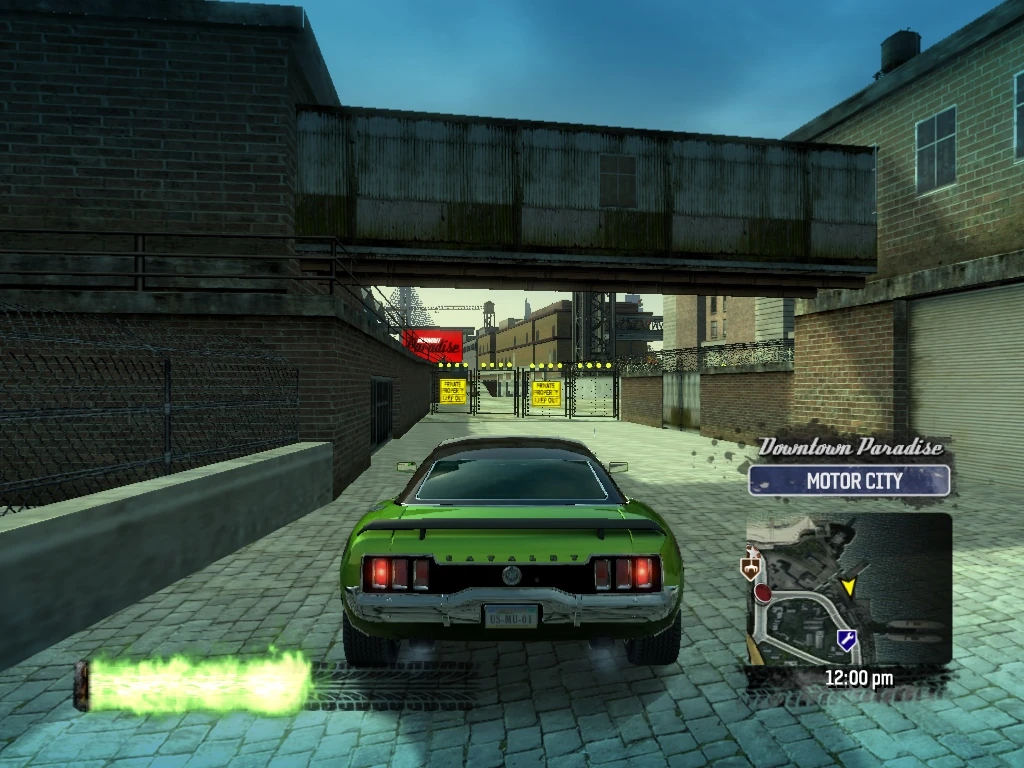
|
| 4 | Downtown Paradise Motor City |
Drive through Smash Gate 4 and continue North down the path toward Smash Gate 5. | 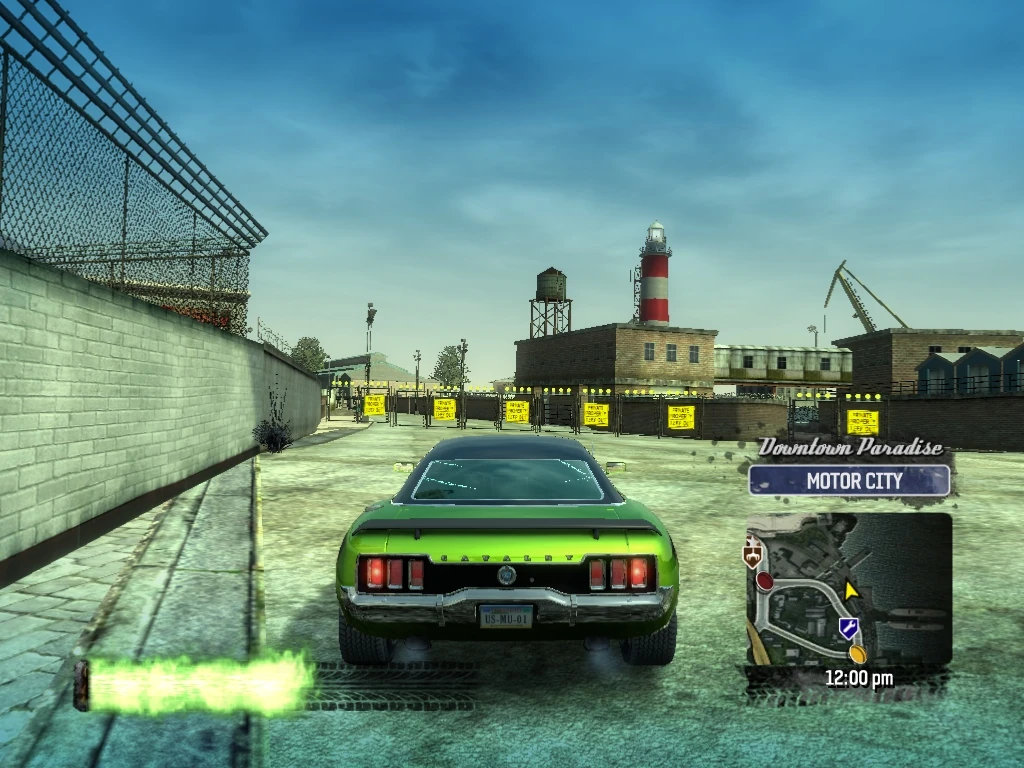
|
| 5 | Downtown Paradise Motor City |
Smash Gate 5 is where the path enters East Crawford Drive. Go through it and make a U-turn to the left to find Smash Gate 6. | 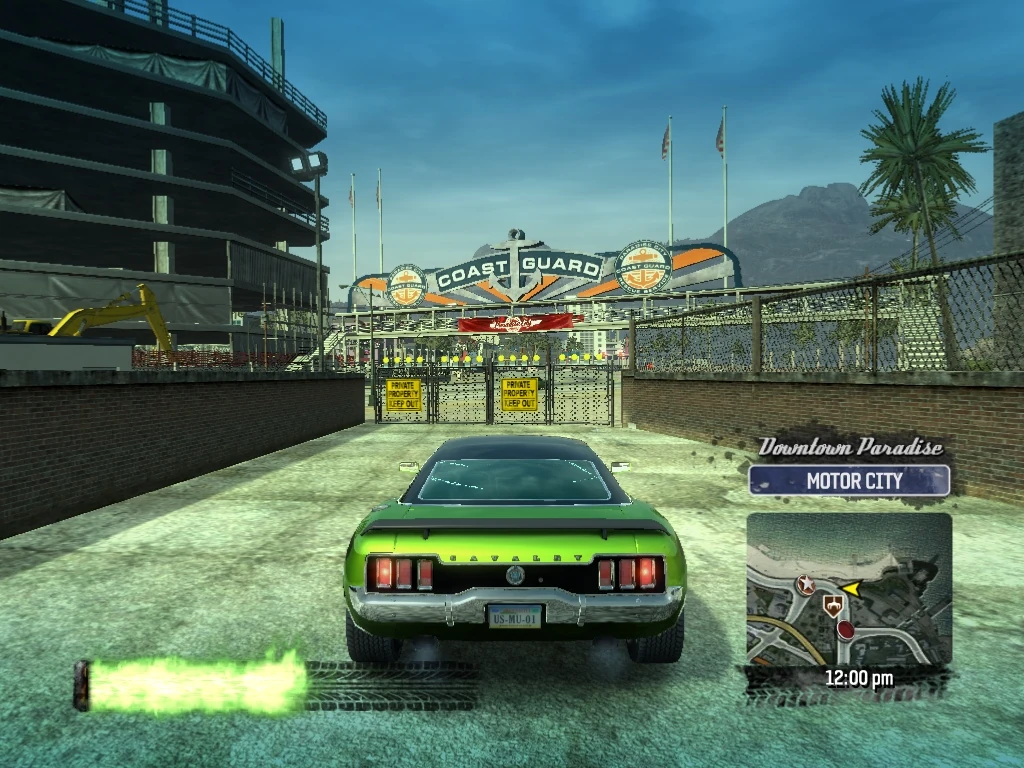
|
| 6 | Downtown Paradise Motor City |
Smash Gate 6 is a wide gate across the front of the warehouse area. Smash through it and follow the path southeast. | 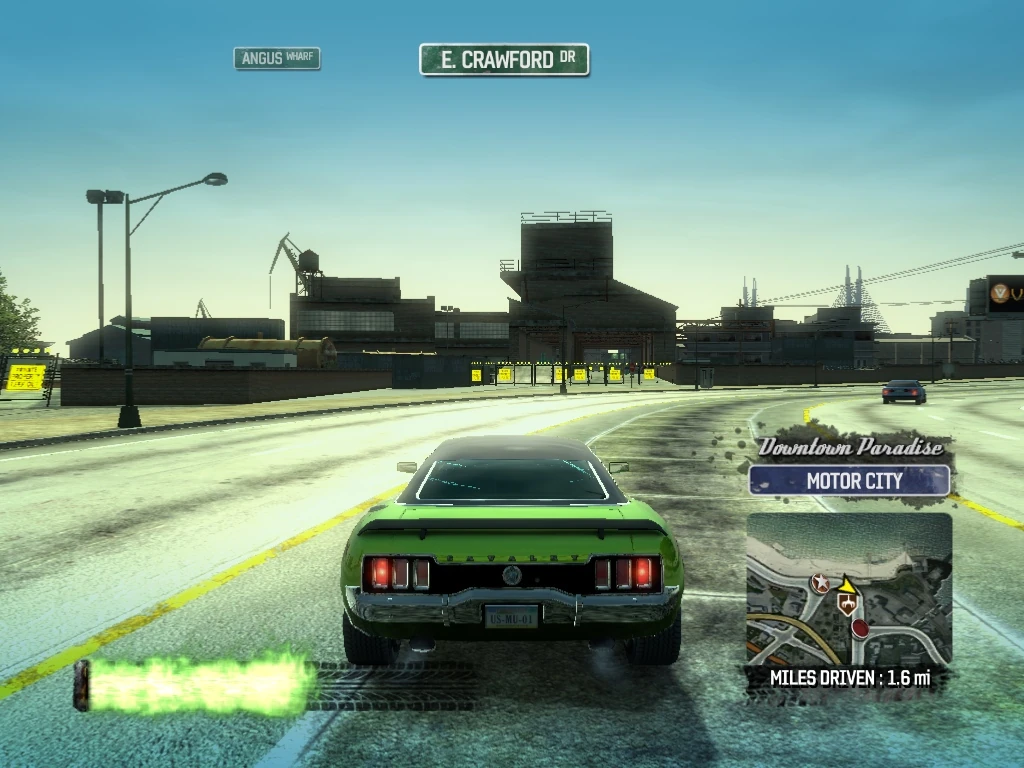
|
| 7 | Downtown Paradise Motor City |
Smash Gate 7 is a wide gate at the end of the path where it meets Angus Wharf. Smash through it and head south down Angus Wharf. | 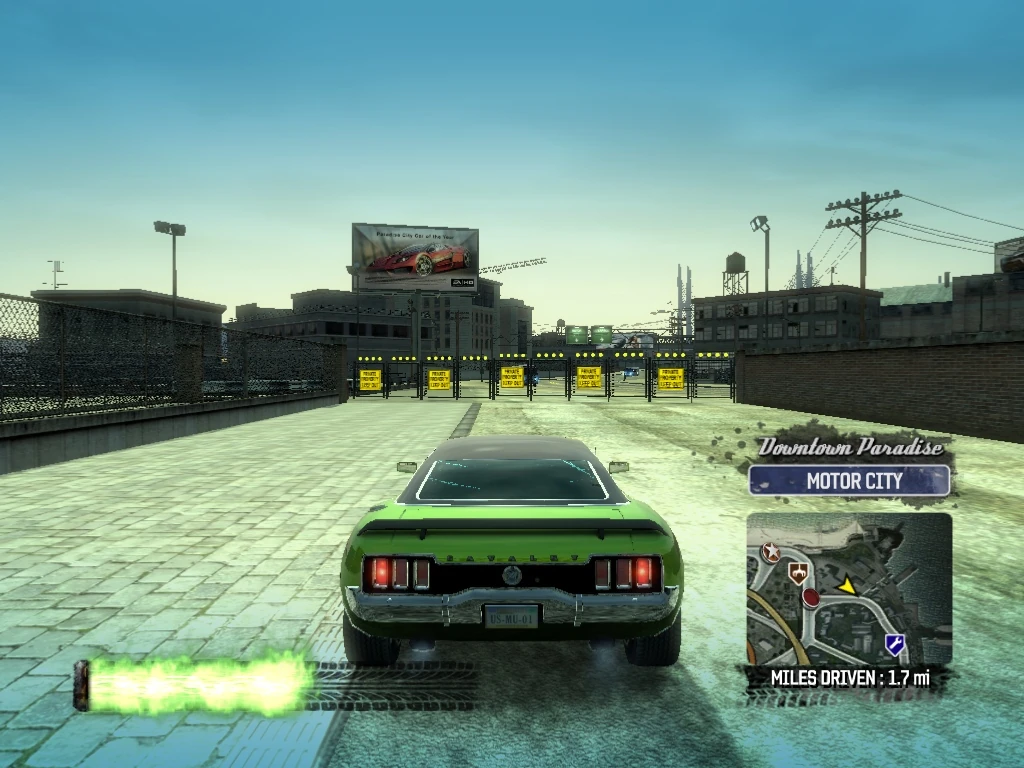
|
| 8 | Downtown Paradise Motor City |
Smash Gates 8 and 9 provide a convenient way to cut the corner between Angus Wharf and Watt Street. Just after the Auto Repair, you will see Smash Gate 8 on the right. Drive through it and follow the short path. | 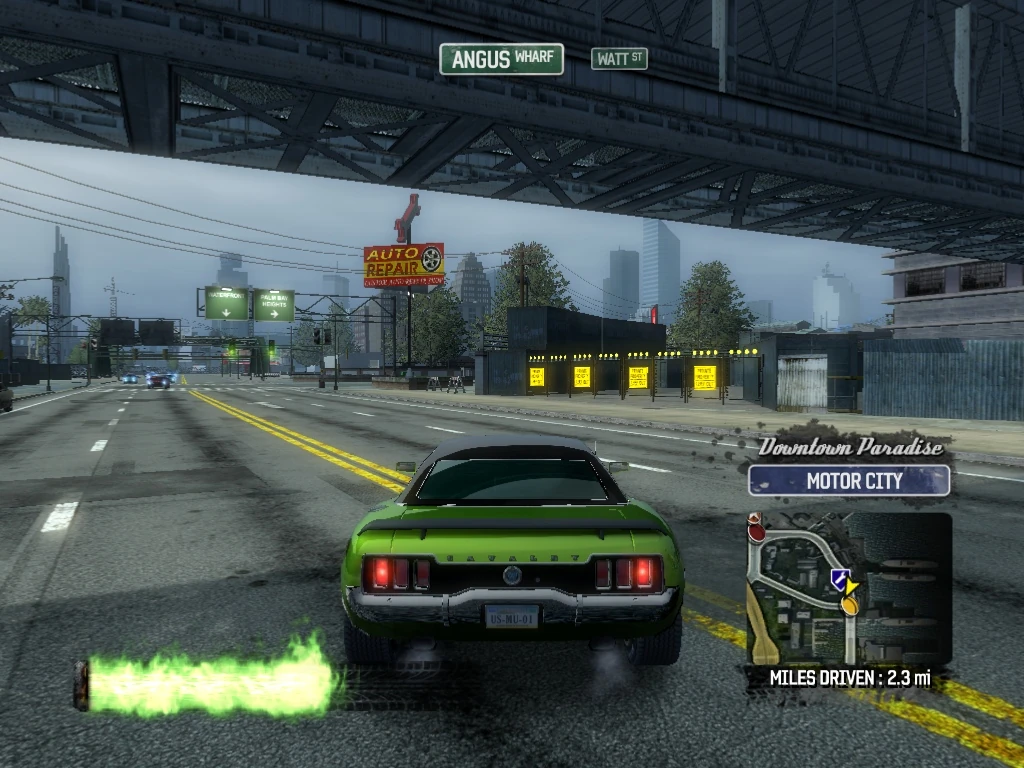
|
| 9 | Downtown Paradise Motor City |
Drive through Smash Gate 9 and then turn left on Watt Street. | 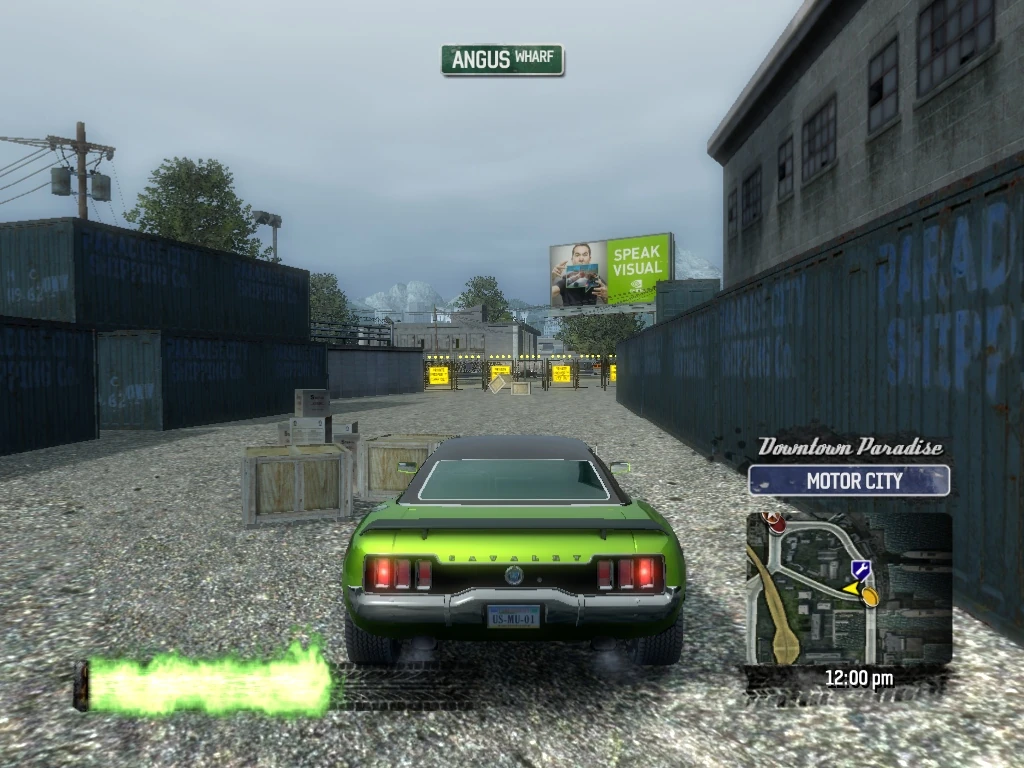
|
| 10 | Downtown Paradise Motor City |
Smash Gate 10 is a large gate across Angus Wharf from Watt Street. It leads to the dock area behind Angus Wharf, but for now, just smash through it and turn around and head down Watt Street toward the Junkyard. | 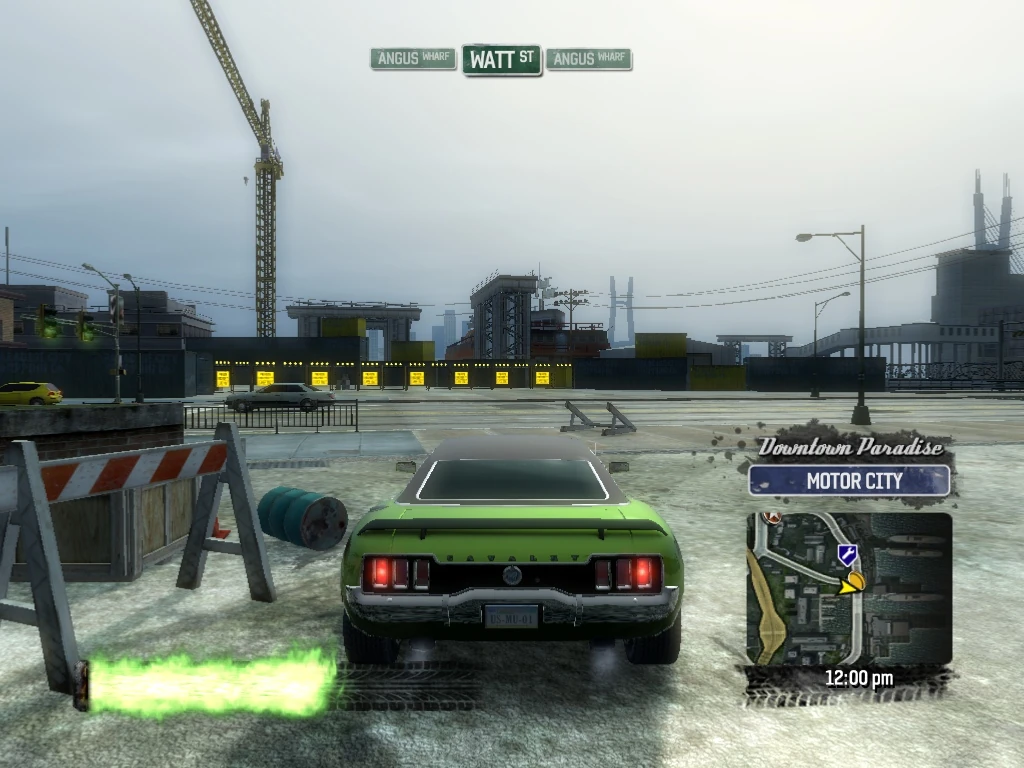
|
| 11 | Downtown Paradise Motor City |
Turn right from Watt Street onto East Crawford and make a U-Turn to the left just after the large Junkyard sign and before the entrance to the Junkyard. Smash Gate 11 is behind some shipping containers in the Junkyard, in front of a path that leads South and Up to I-88. Smash through the gate and head up the path. | 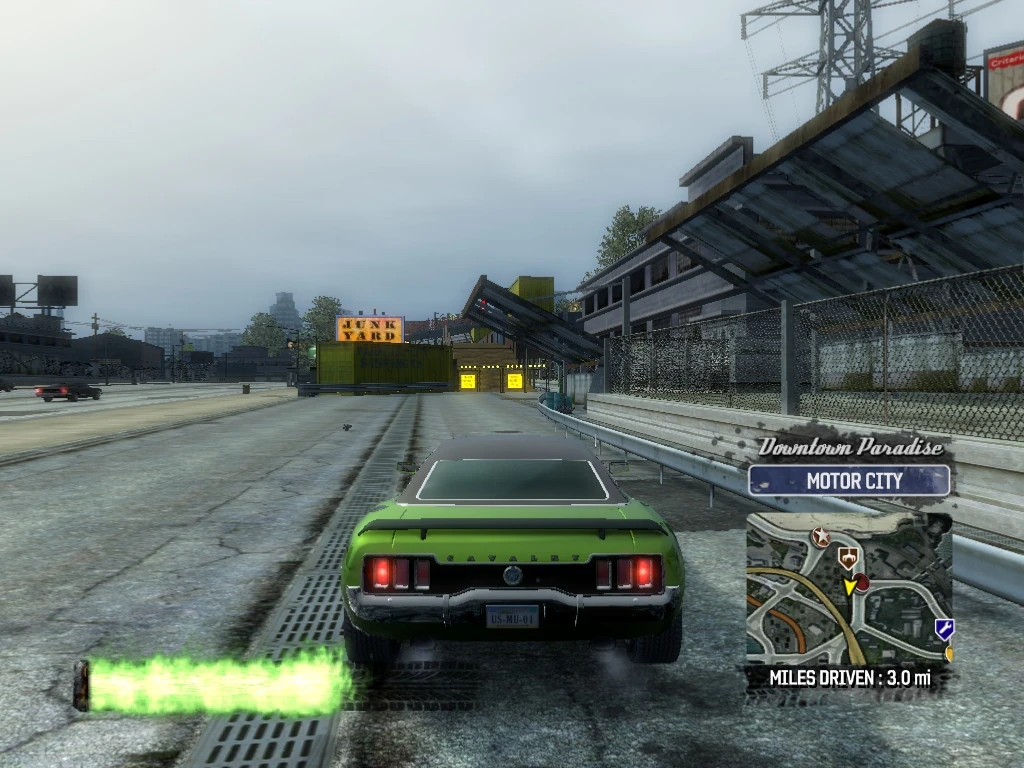
|
| 12 | Downtown Paradise Motor City |
Smash Gate 12 is at the end of the path, at the entrance to I-88. For now, drive through the gate and directly across I-88 to the yellow flashing barricades and drop back down onto E. Crawford Drive/Webster Avenue. | 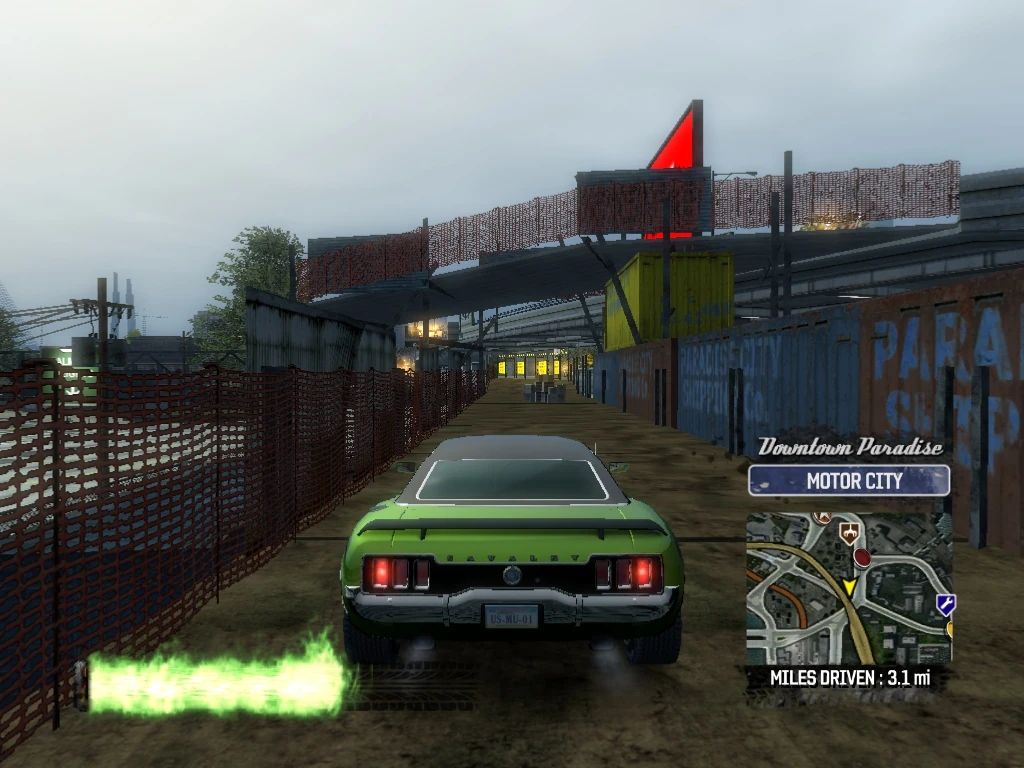
|
| 13 | Downtown Paradise Downtown |
Go west on 7th Street, past the Paint Shop, and take the next left onto Glancey Avenue. After you reach the Elevated Railway and just before you get to 4th Street, you will see Smash Gate 13 on the left. Drive through it. | 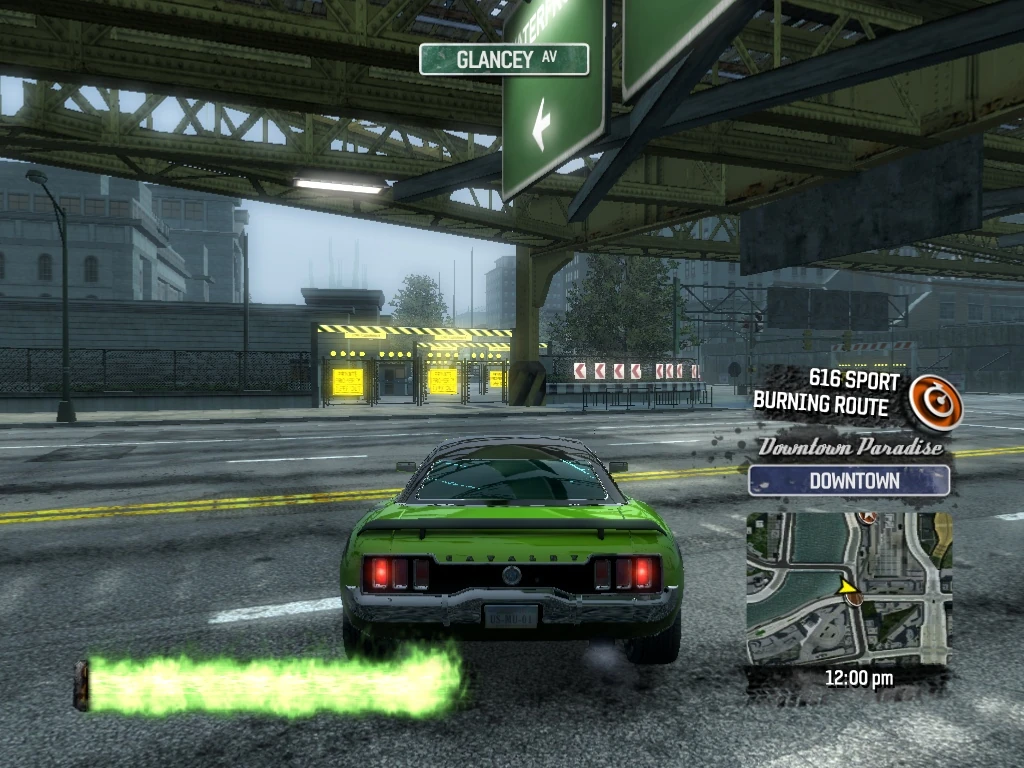
|
| 14 | Downtown Paradise Downtown |
Smash Gate 14 is almost immediately after Smash Gate 13. Drive through it and you will see Smash Gate 15 on your left. | 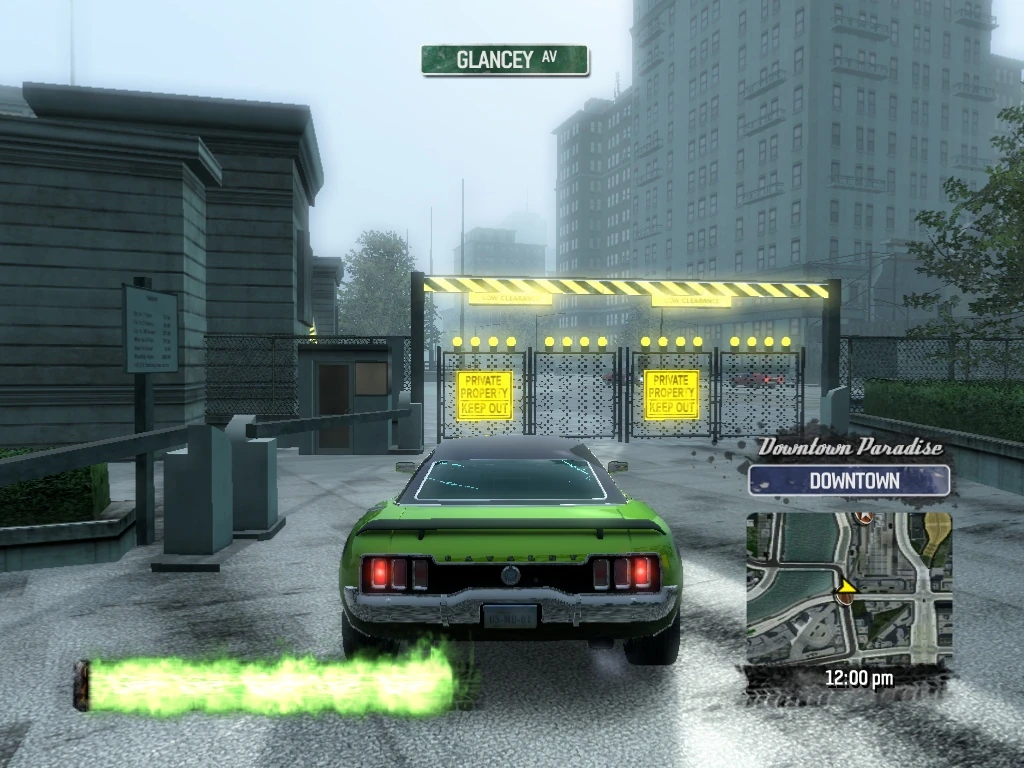
|
| 15 | Downtown Paradise Downtown |
Turn left and head north through Smash Gate 15 and into the train yard. | 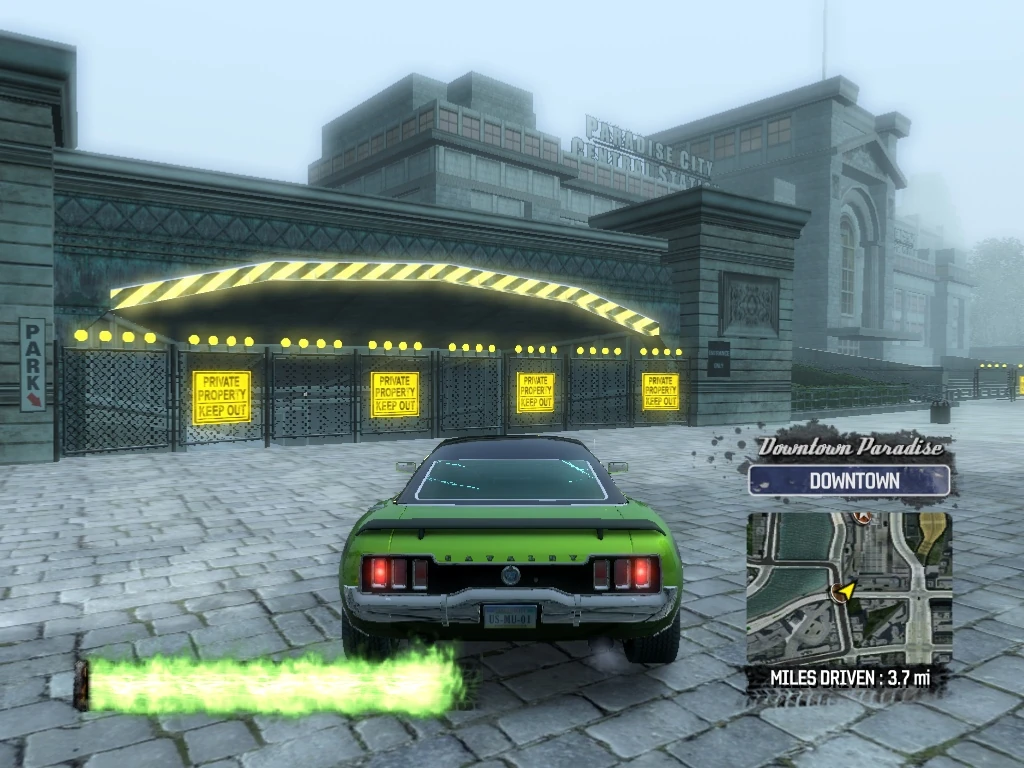
|
| 16 | Downtown Paradise Motor City |
Drive north through the train yard and you will see a tank car on the left and Smash Gate 16 just beyond it. The Smash Gate leads to a billboard smash, but for now, just drive though it and turn around to head for Smash Gate 17. | 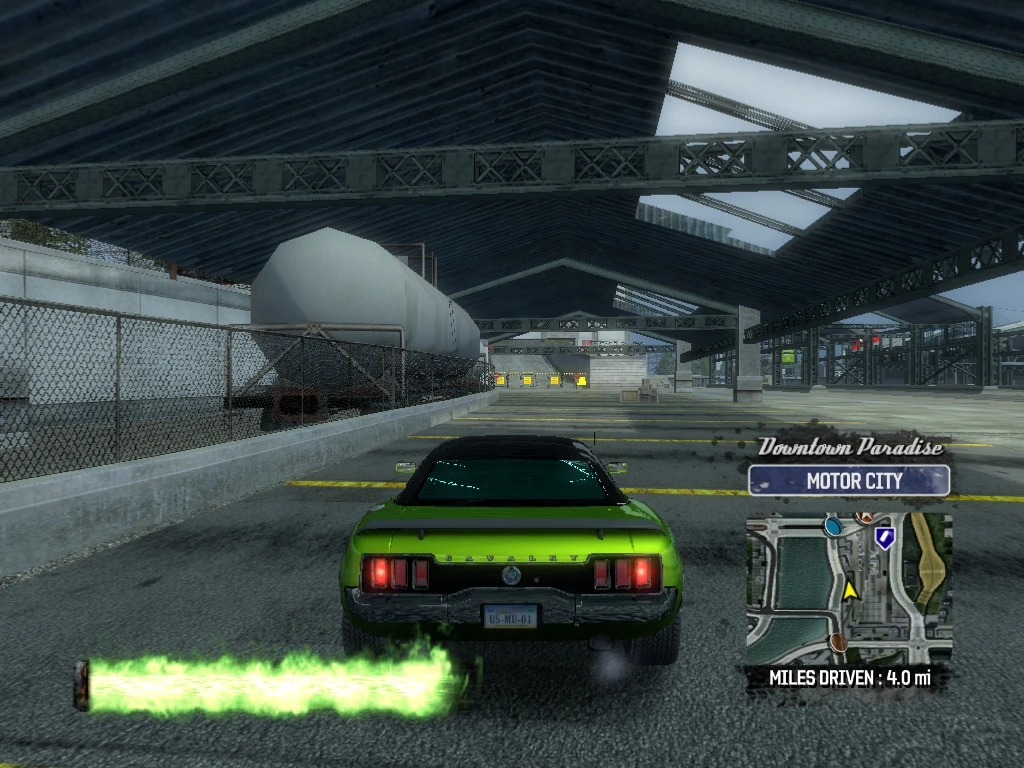
|
| 17 | Downtown Paradise Motor City |
Smash Gate 17 is directly South of Smash Gate 16 in the train yard. Drive through it and up the ramp, landing on Glancey Avenue. | 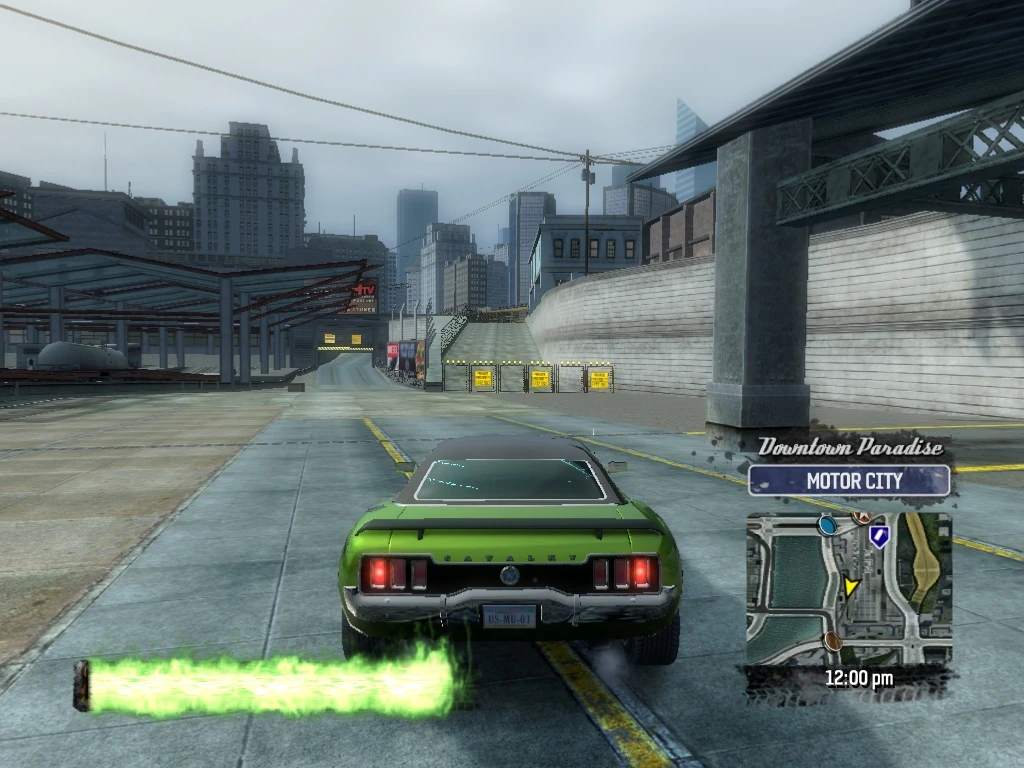
|
| 18 | Downtown Paradise Downtown |
Head South on Glancey and either turn left on 4th Street or go through Smash Gates 13 and 14 again. Smash Gates 18 and 19 are on the sidewalk in front of Paradise City Central Station on the north side of 4th Street. Drive through them heading east. | 
|
| 19 | Downtown Paradise Downtown |
Continue down the sidewalk and drive through Smash Gate 19. | 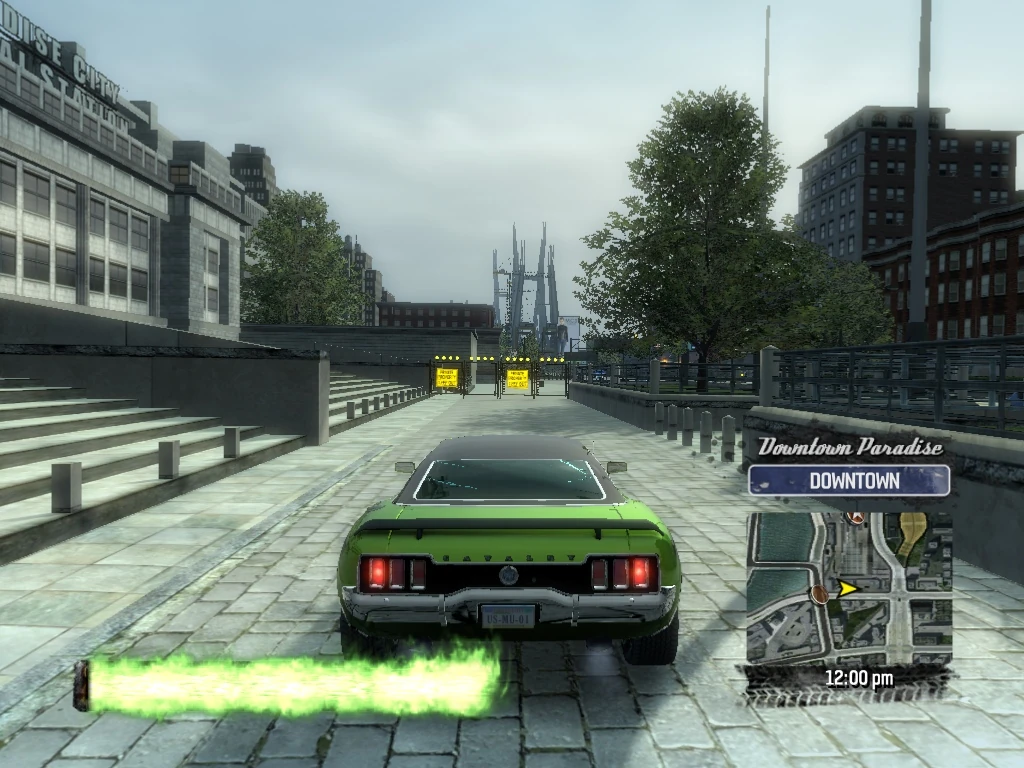
|
| 20 | Downtown Paradise Downtown |
Smash gate 20 is on the left just after Smash Gate 19 and leads into the eastern side of the train yard. Drive through it and down the road inside the train yard. | 
|
| 21 | Downtown Paradise Motor City |
Smash Gate 21 is at the end of the road inside the Train Yard, where it meets Webster Avenue. | 
|
| 22 | Downtown Paradise Motor City |
Turn to the left as you exit Smash Gate 21 and there is a Parking Garage across Webster Avenue. Smash Gate 22 marks the entrance to this garage. The garage can be used for a couple of Billboard Smashes, but for now, just smash the gate and then head south down Webster Avenue. | 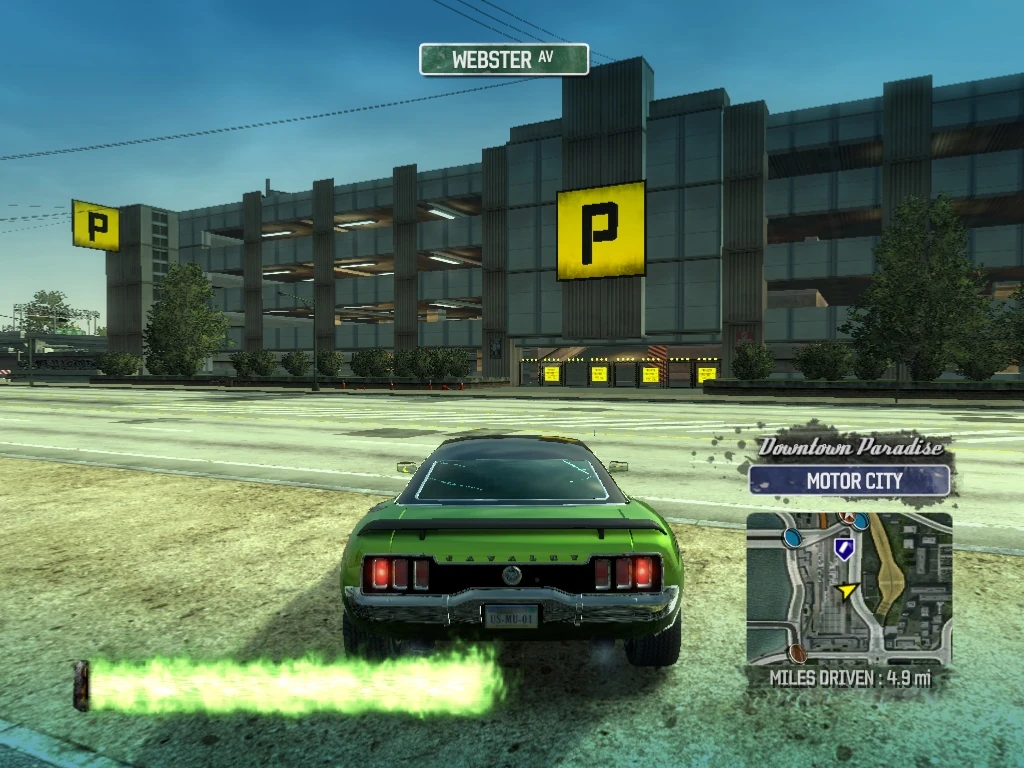
|
| 23 | Downtown Paradise Waterfront |
Just after crossing 4th Street, Smash Gate 23 is on the left in the green parking garage on the SE corner of 4th and Webster. Drive through the pathway in the middle of it. | 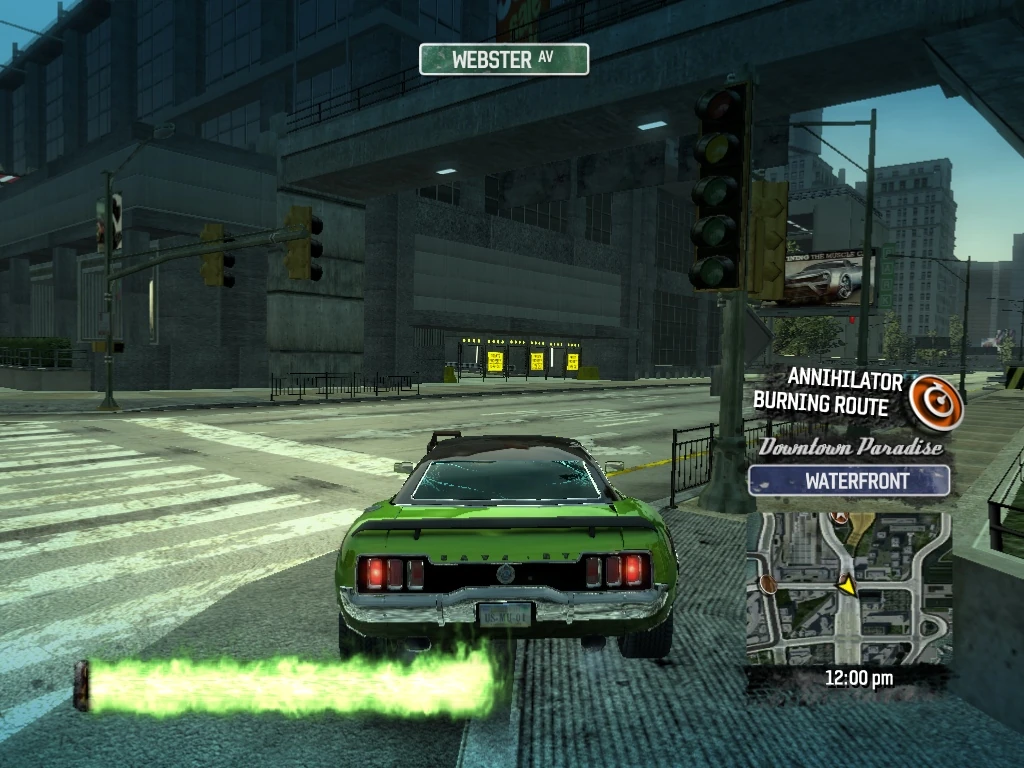
|
| 24 | Downtown Paradise Waterfront |
Smash Gate 24 is at the other end of the path through the building where it exits onto Angus Wharf, right by the statue. | 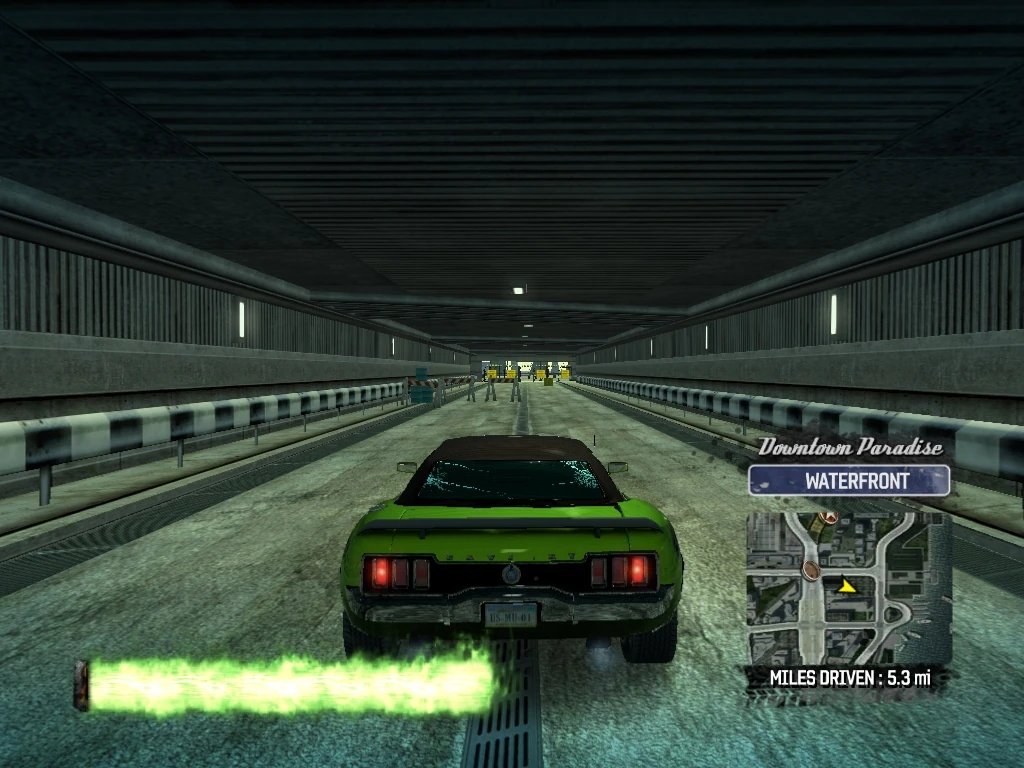
|
| 25 | Downtown Paradise Waterfront |
Turn north on Angus Wharf and there is a Parking Garage on your right. Smash Gate 25 marks an alley to the north of the garage that leads to the garage entrance. Follow the alley. | 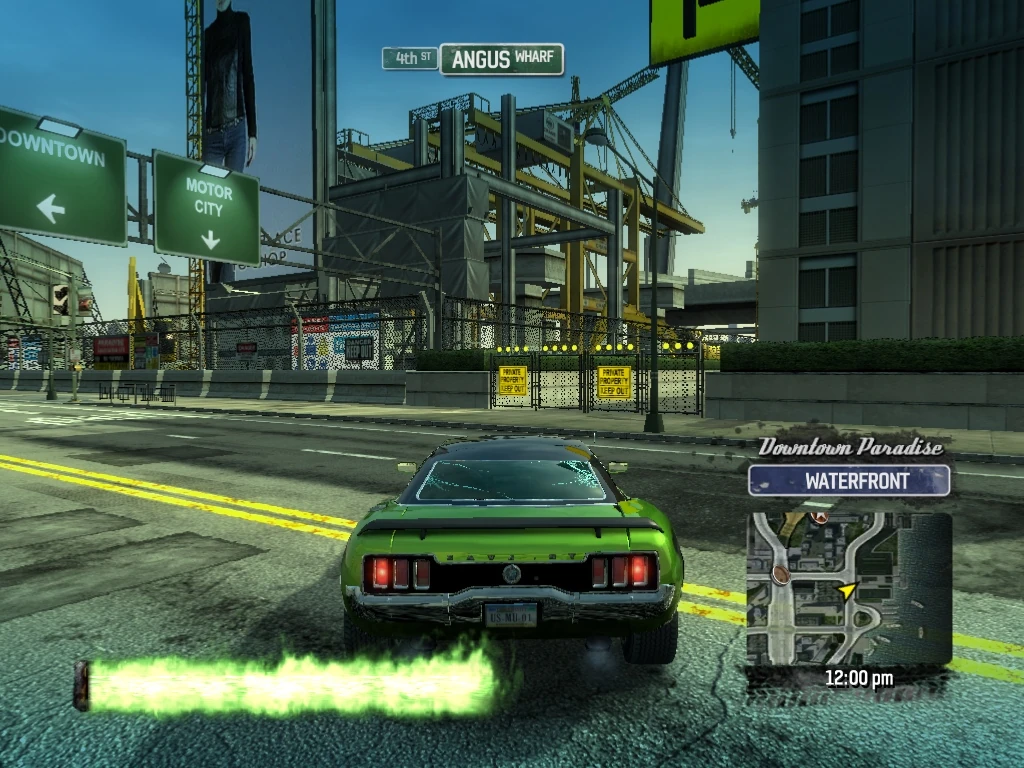
|
| 26 | Downtown Paradise Waterfront |
Smash Gate 26 marks the entrance to the garage. Smash through the gate and climb to the top of the garage. | 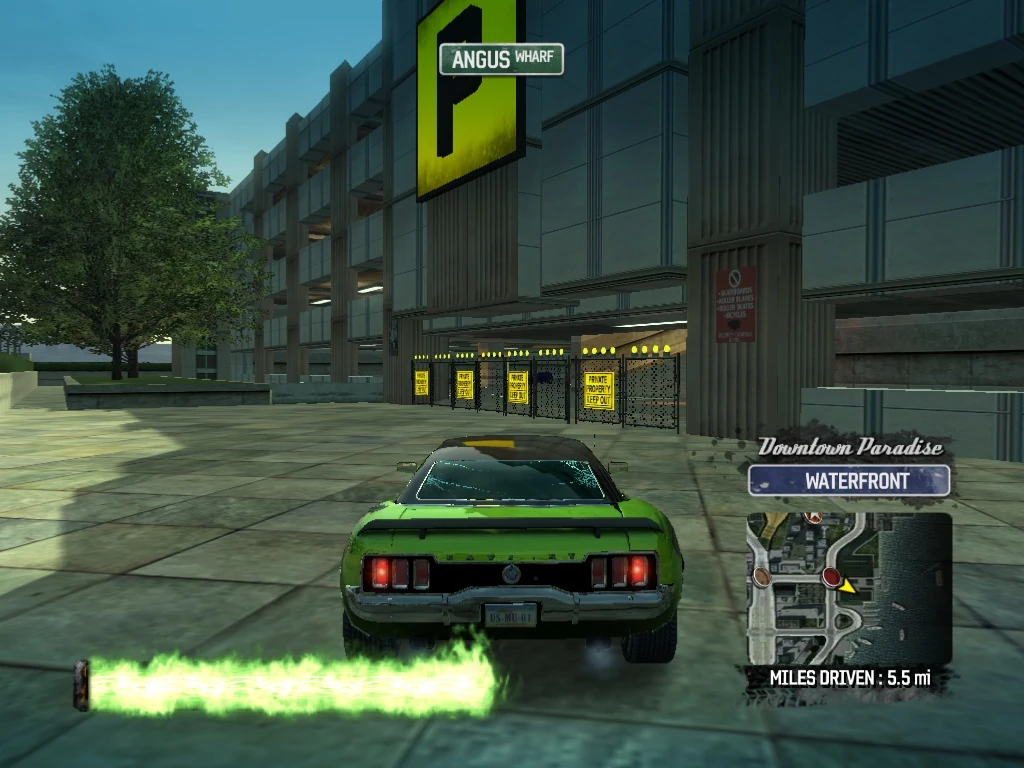
|
| 27 | Downtown Paradise Waterfront |
Smash Gate 27 is at the entrance to Super Jump 11 on the west wall of the garage roof. Use full Boost and a good runup to jump across the ramp to the roof of the next building to the east. | 
|
| 28 | Downtown Paradise Waterfront |
Smash Gate 28 is on the northwest corner of the roof of the building you jumped across to. Drive through the gate to drop down to 4th Street. | 
|
| 29 | Downtown Paradise Downtown |
Smash Gate 29 is at the entrance to an alleyway to the left, just after you cross over Webster Avenue on 4th Street. Drive through it and proceed through the alleyway. | 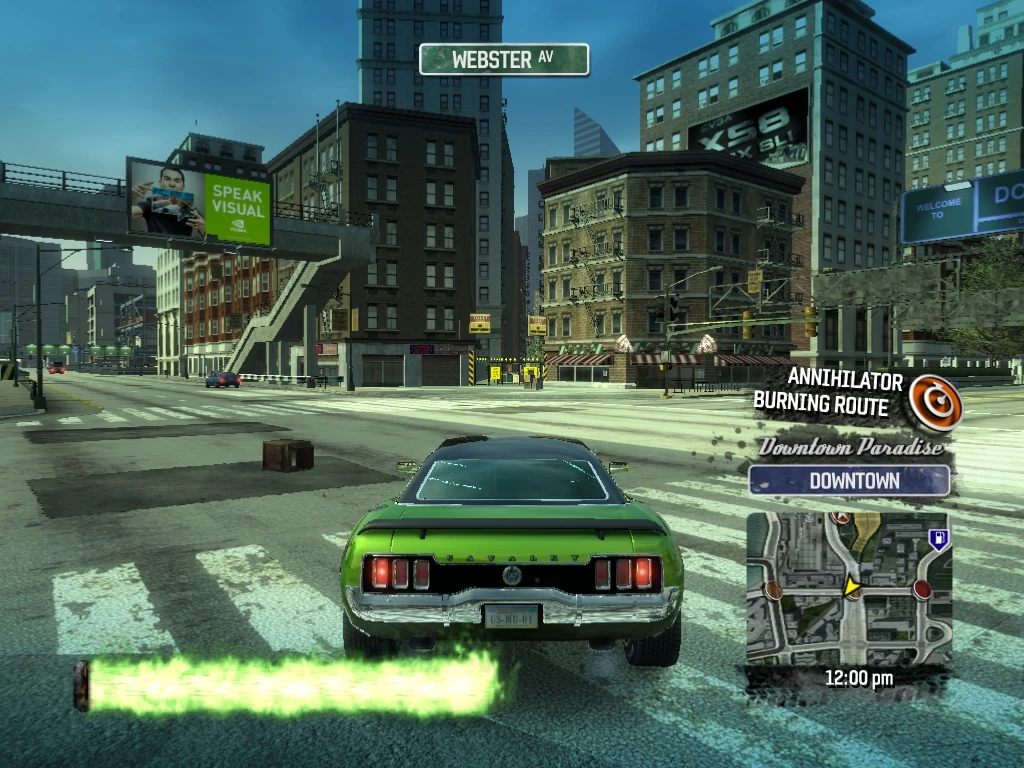
|
| 30 | Downtown Paradise Downtown |
Smash Gate 30 is at the other end of the alley, at the intersection of Glancey Avenue and Andersen Street. Continue straight after driving through the gate, heading west on Andersen Street. | 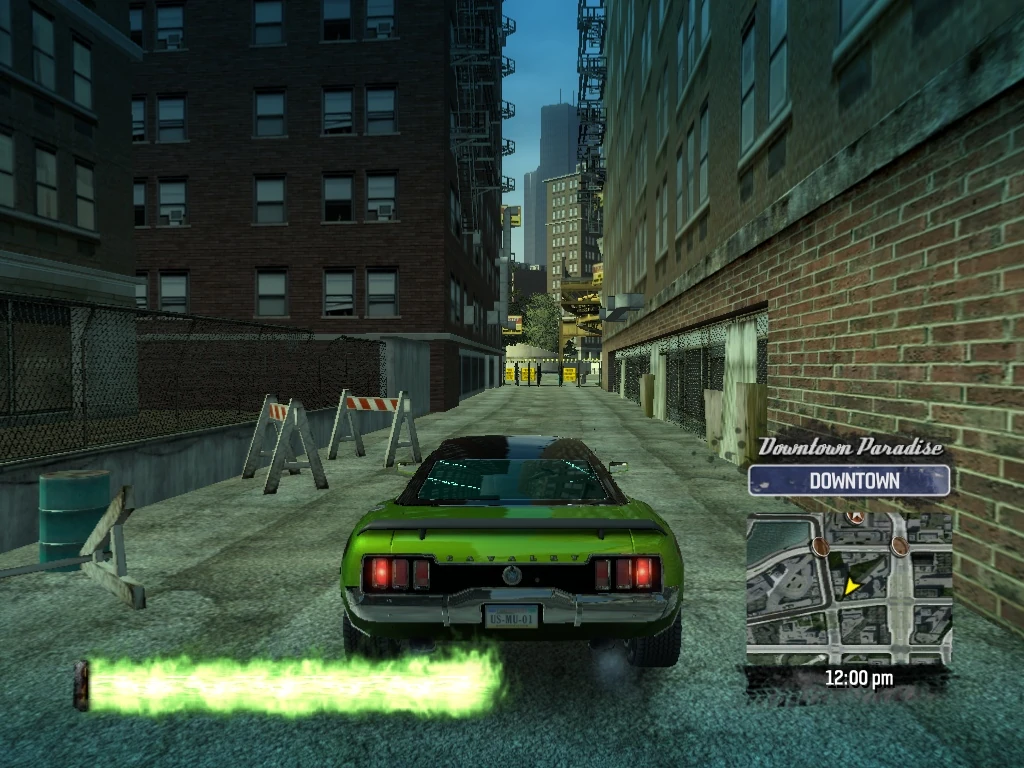
|
| 31 | Downtown Paradise Downtown |
Smash gate 31 is in the middle of the next block on the right, at the entrance to a shopping plaza and across from the Gas Station and the ramps to the Elevated Railroad. Drive through it and follow the walkway down the center of the shopping mall. | 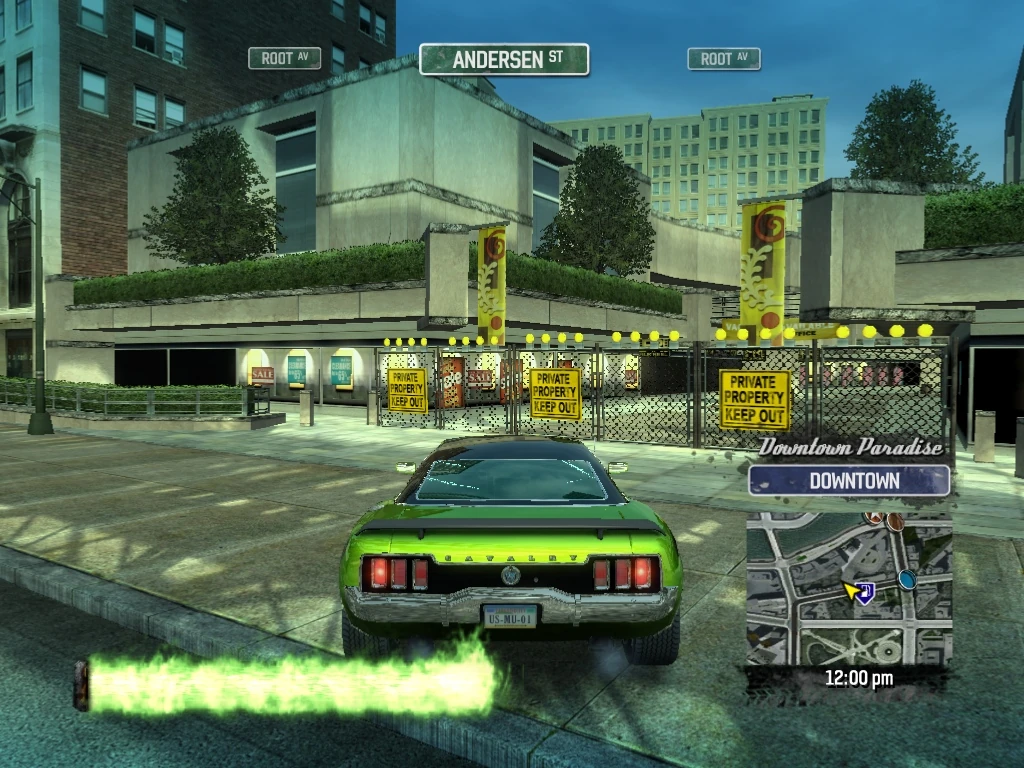
|
| 32 | Downtown Paradise Downtown |
Smash Gate 32 is at the other end of the walkway, and the intersection of Glancey and 4th Street. Drive through it and briefly turn right (south) on Glancey Avenue. | 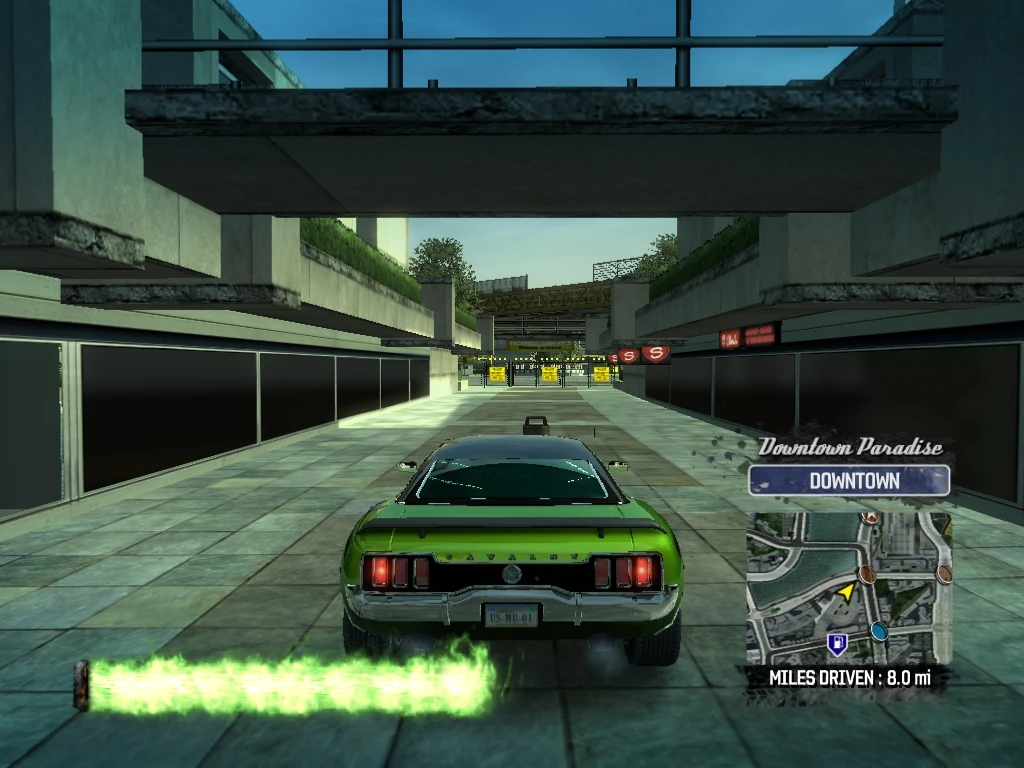
|
| 33 | Downtown Paradise Downtown |
Smash Gate 33 is just across Glancey Avenue, in a construction area surrounded by red and white chevrons. | 
|
| 34 | Downtown Paradise Downtown |
Smash Gate 34 is at the other end of the construction area, exiting back onto 4th Street. Turn left and head west on 4th Street in oncoming. | 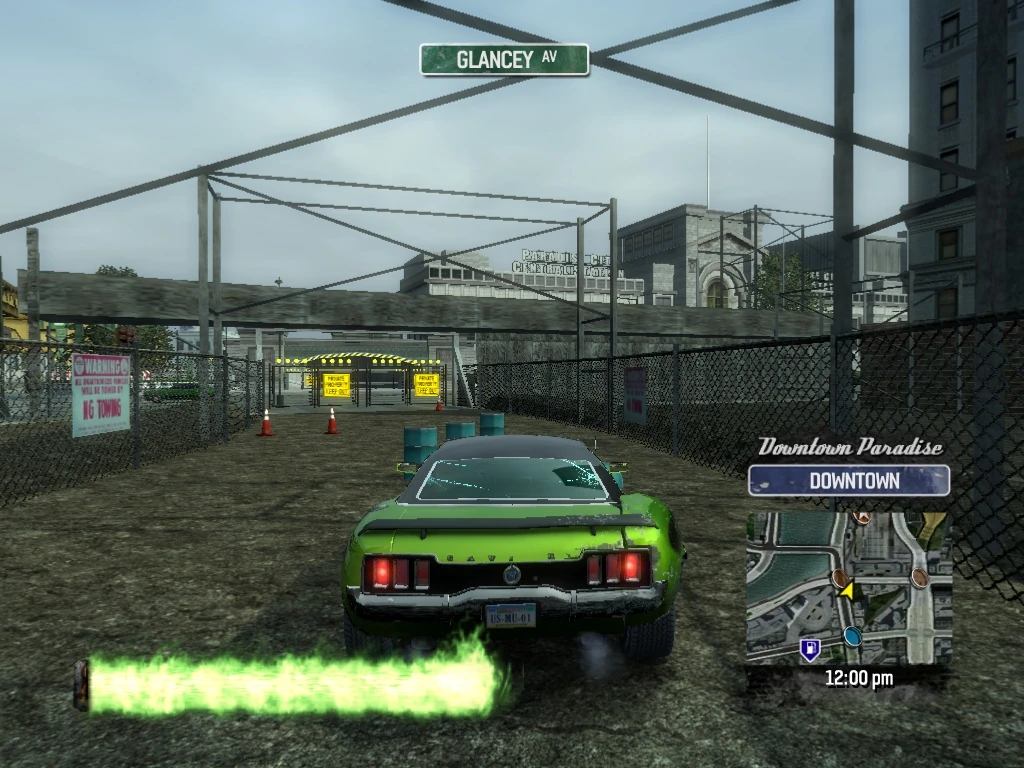
|
| 35 | Downtown Paradise Downtown |
Smash Gates 35-37 are entrances to underground parking for the building at 4th Street and Root Avenue. Black and yellow chevrons surround all three. Take the first left to drive through Smash Gate 35. | 
|
| 36 | Downtown Paradise Downtown |
Smash Gate 36 is just ahead on the right exiting back to 4th street. Drive over to knock it down, but stay inside the building and proceed ahead to Smash Gate 37. | 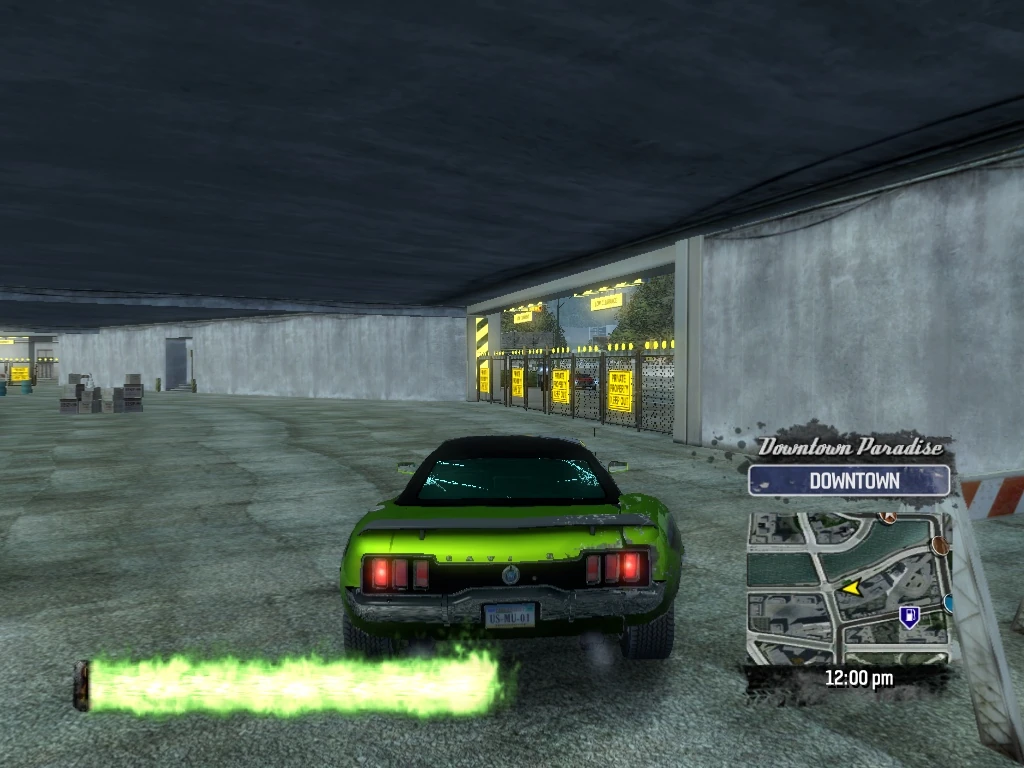
|
| 37 | Downtown Paradise Downtown |
Drive through Smash Gate 37, exiting onto Root Avenue, headed south. | 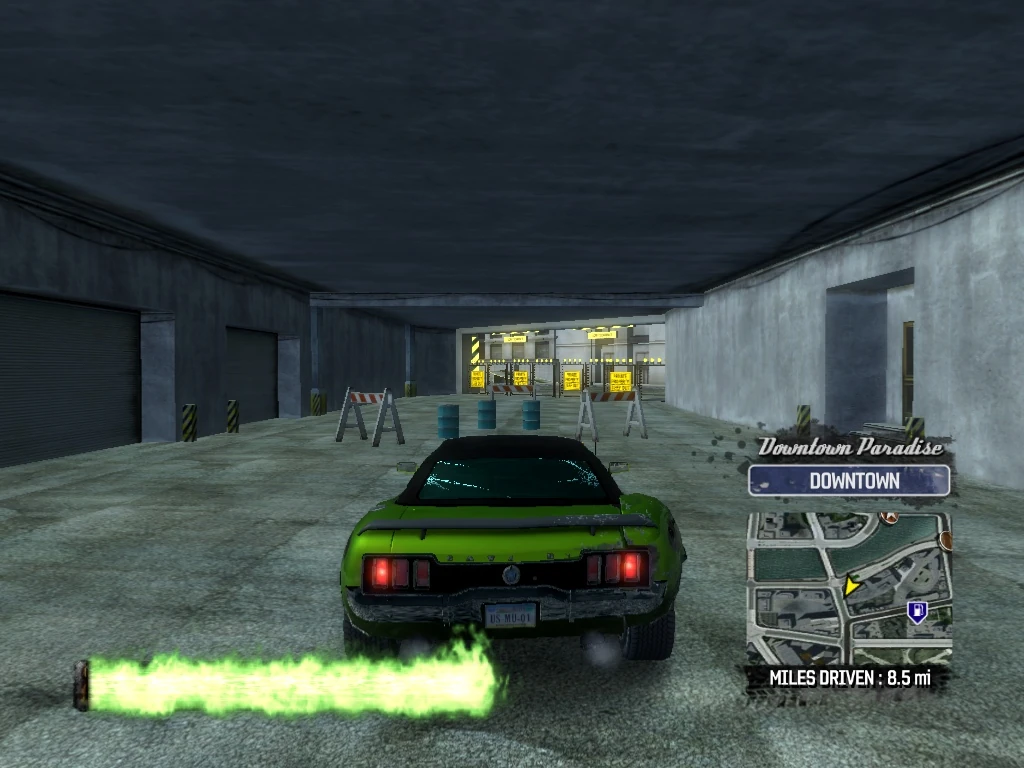
|
| 38 | Downtown Paradise Downtown |
Smash Gate 38 is on the right opposite Andersen Street and marks the entrance to a walkway through another shopping mall. Drive through it and follow the walkway. | 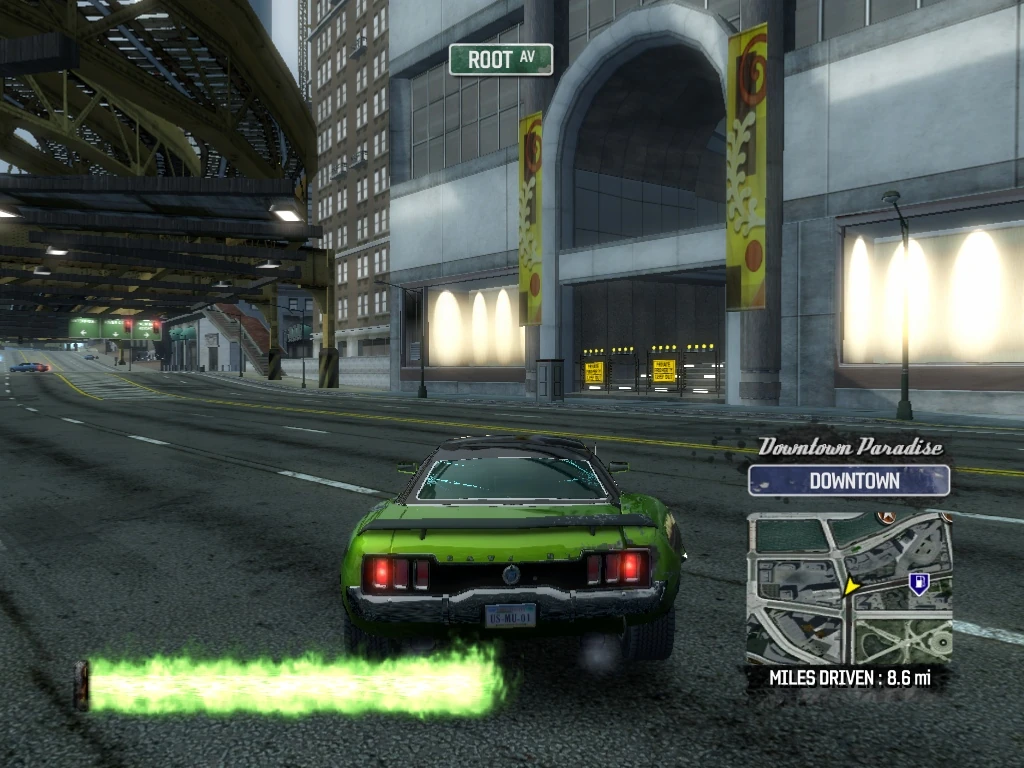
|
| 39 | Downtown Paradise Downtown |
Smash Gate 39 is at the other end of the walkway, exiting onto 3rd Street, headed west. | 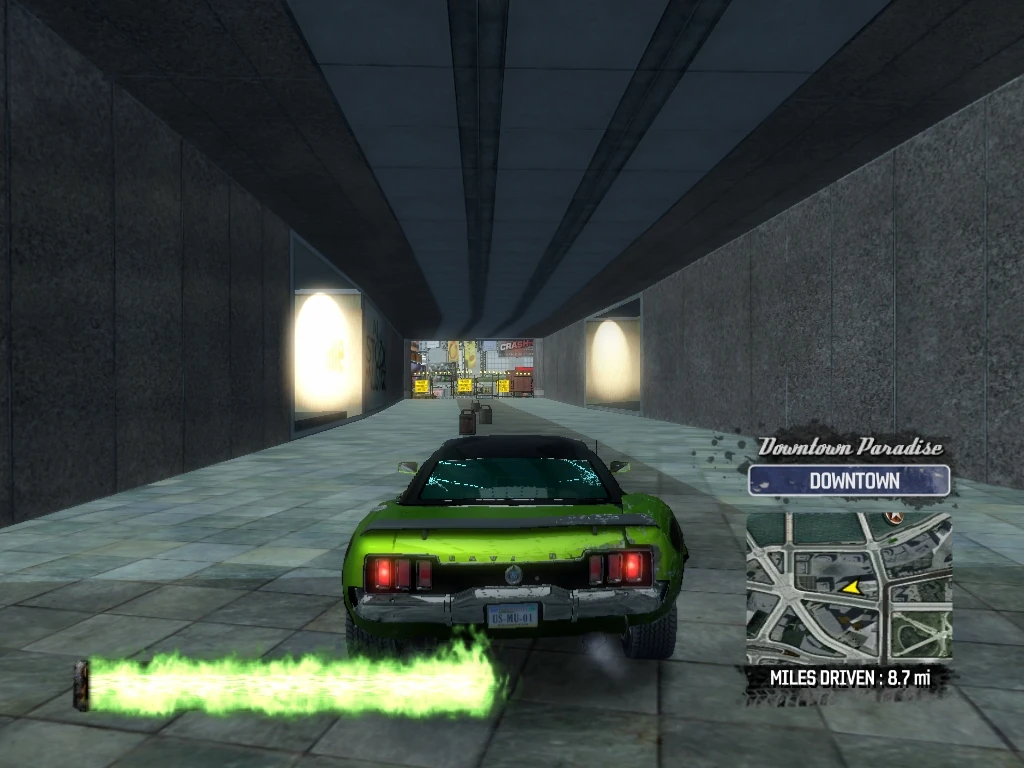
|
| 40 | Downtown Paradise Downtown |
Take the next left headed south on Fry Avenue and Smash Gate 40 is at the entrance to the Parking Garage on the right. Drive through the Smash Gate and climb to the top of the garage. | 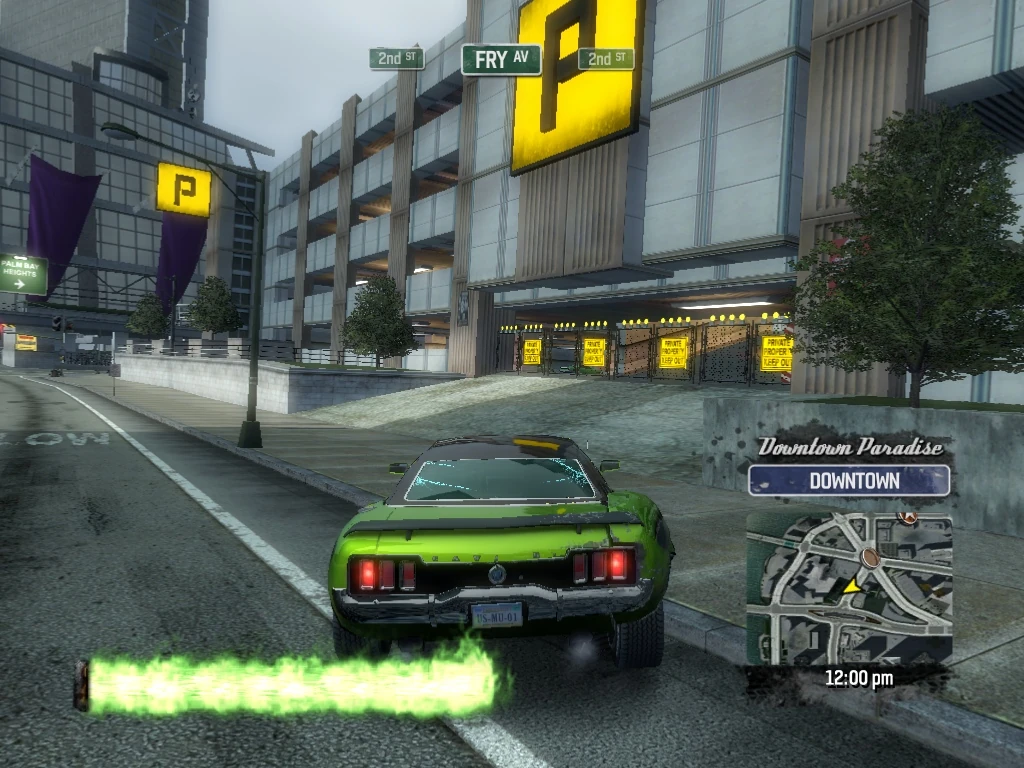
|
| 41 | Downtown Paradise Downtown |
Smash Gates 41 and 42 are on the corners of the roof of the Parking Garage and lead to Billboard Smashes. Smash Gate 41 is on the left. For now, just drive forward enough to get credit for the smash and back up. | 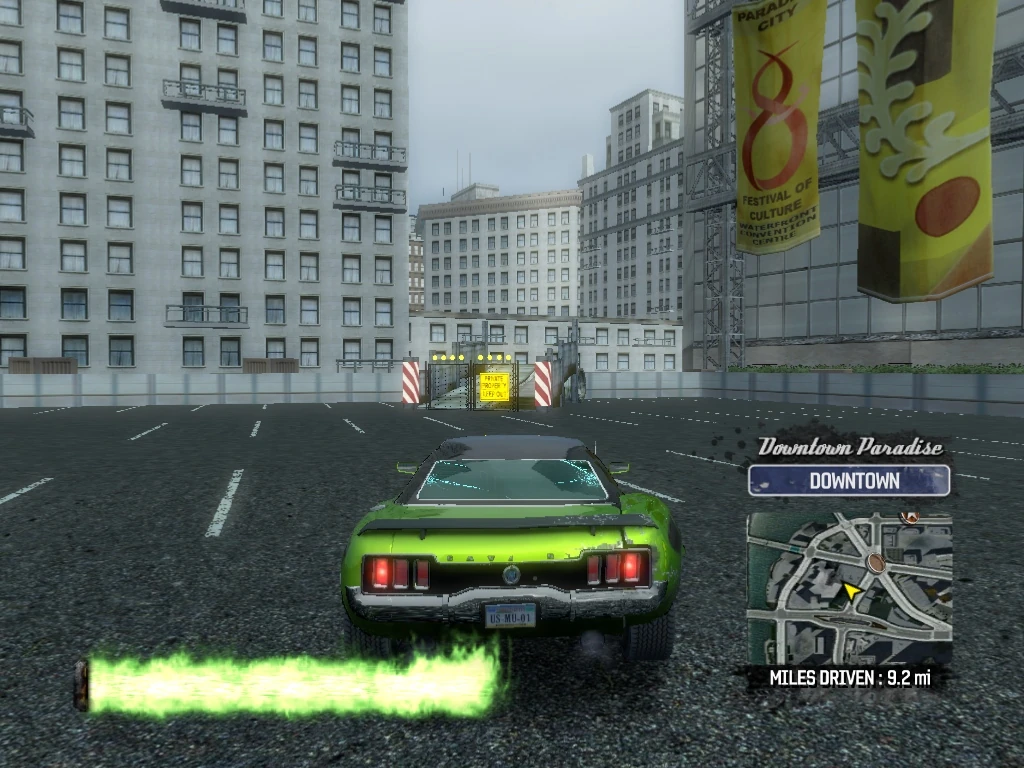
|
| 42 | Downtown Paradise Downtown |
Drive through Smash Gate 42, jumping down to the roof below, where you can jump off another ramp to smash a billboard and land in the center of Paradise Square. | 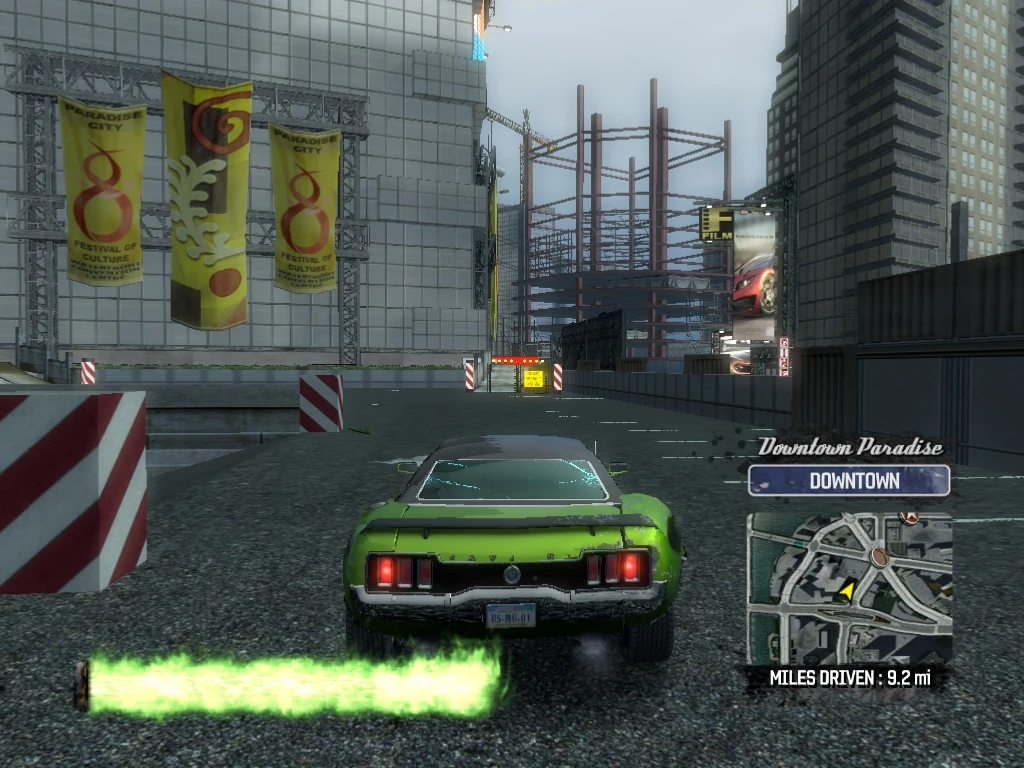
|
| 43 | Downtown Paradise Downtown |
Turn left (south east) on Franke Avenue and Smash Gate 43 is just after Daley's Donuts on the right. Smash Gate 45 is just beyond it, so it looks like one long smash gate, but they are actually separate. Turn into the nearer (furthest west) gate and follow the path through the green parking garage. | 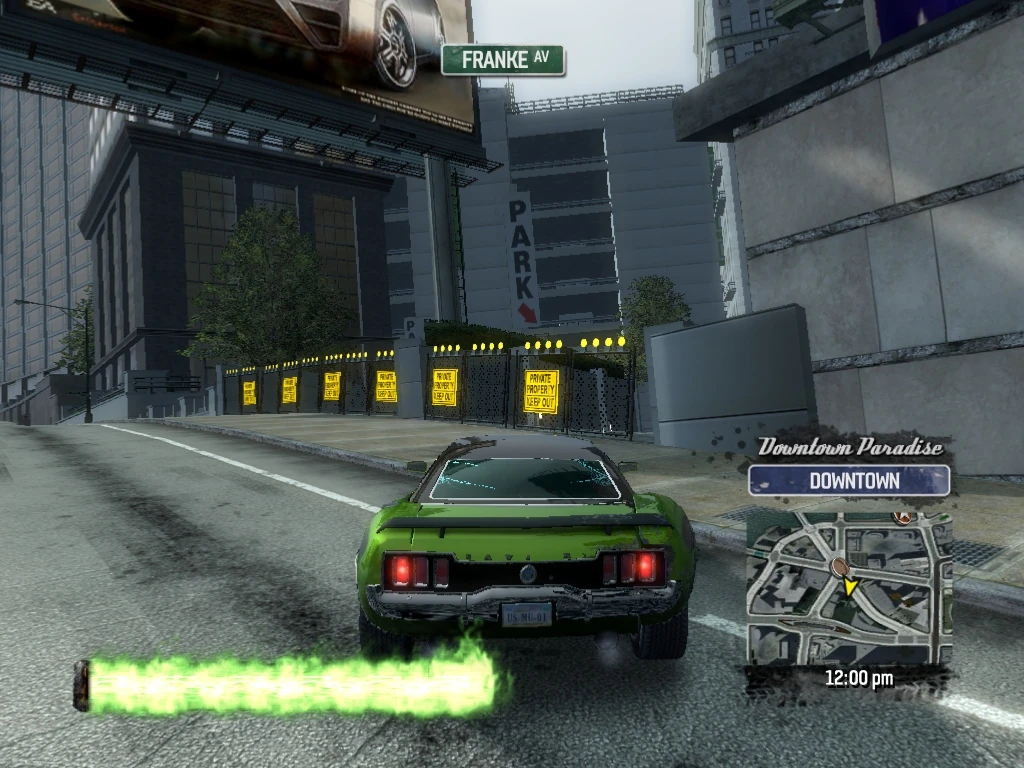
|
| 44 | Downtown Paradise River City |
Smash Gate 44 is at the end on the path through the parking garage, exiting onto 2nd Street. Drive through it, and then turn around and go back through it, cutting back through the parking garage to Franke Avenue. | 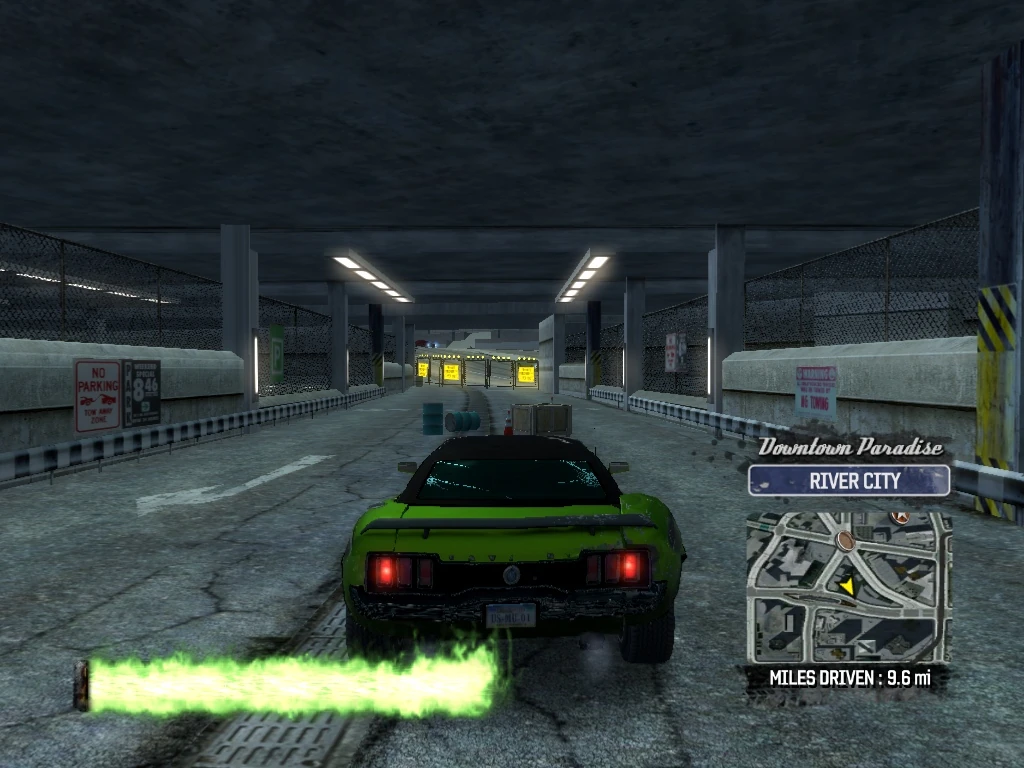
|
| 45 | Downtown Paradise Downtown |
Make a U-Turn to the right and drive through Smash Gate 45. Follow the path through the parking garage and smash Billboard 25, landing on 2nd Street. | 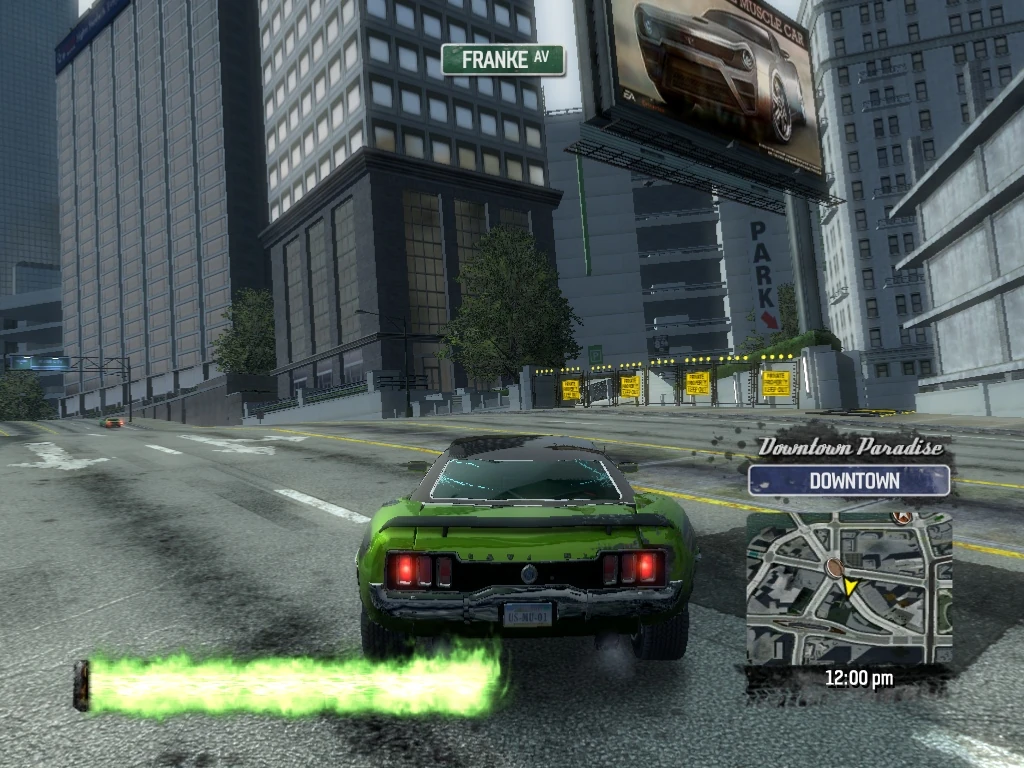
|
| 46 | Downtown Paradise River City |
Circle east of the Urban Ocean Liner and head west in oncoming on 2nd Street and Smash Gate 46 is just ahead on the left at the entrance to the Paradise City Police Department. Drive through it and follow the path through the police parking area. | 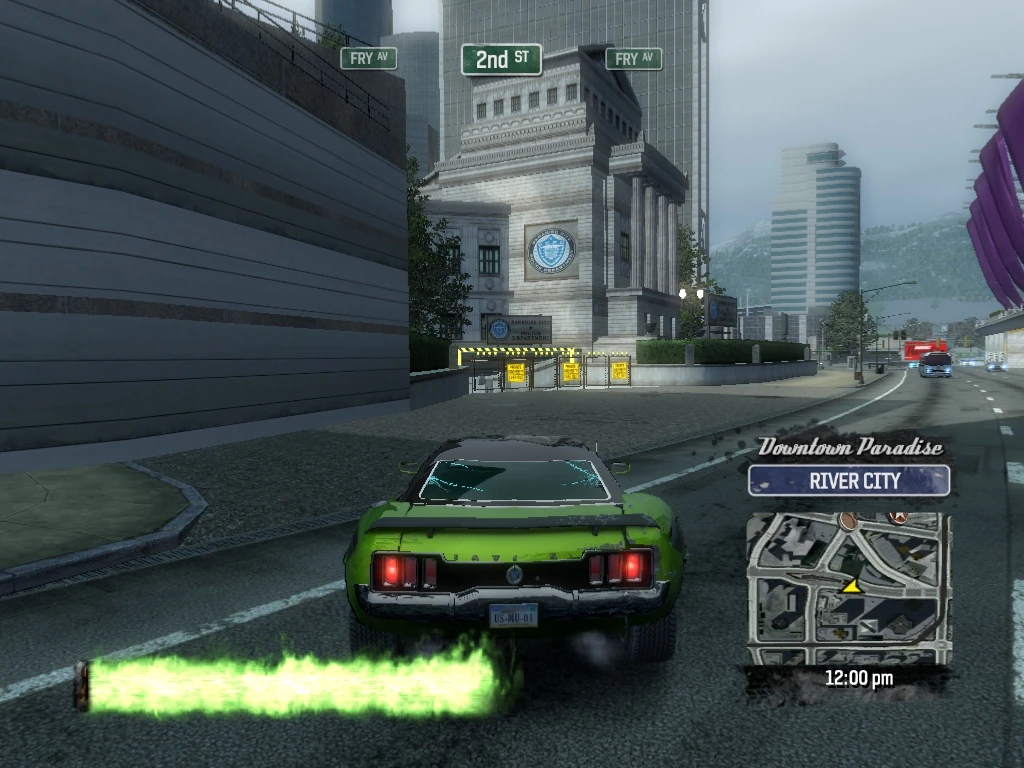
|
| 47 | Downtown Paradise River City |
Drive through Smash Gate 47 to exit the police parking garage onto Fry Avenue. Turn right (north) on Fry Avenue and then right (east) on 2nd Street. | 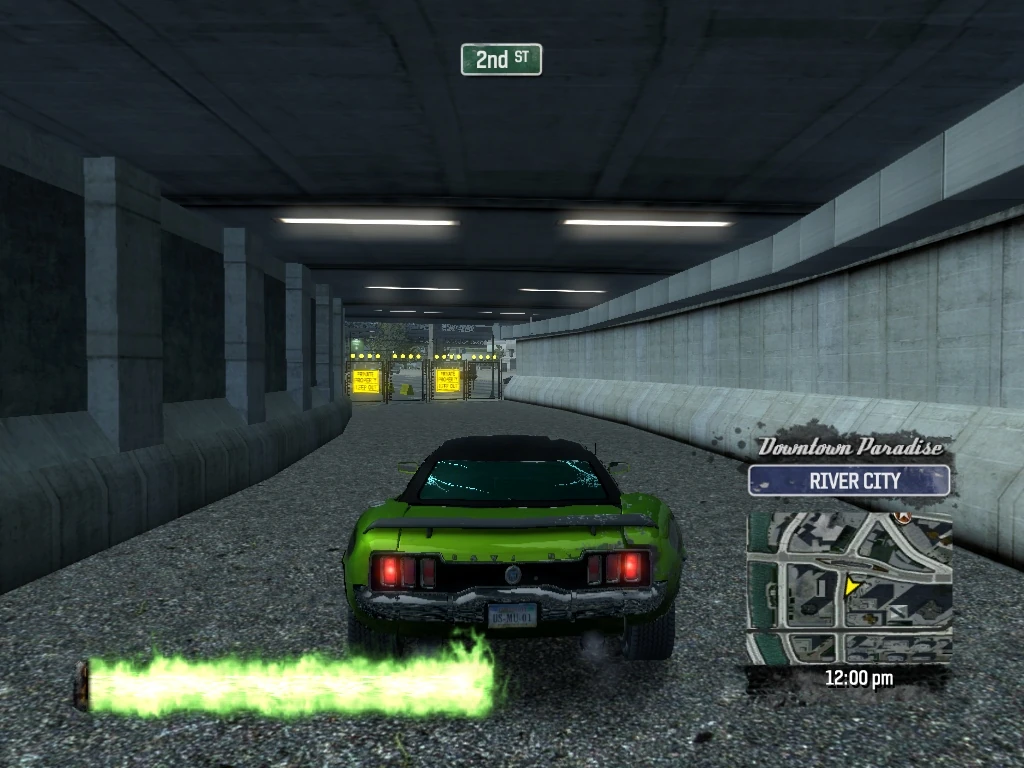
|
| 48 | Downtown Paradise River City |
Continue east on 2nd Street, and just before you reach Root Avenue, you will see Smash Gate 48 in the building on the right. Turn right and drive through it. | 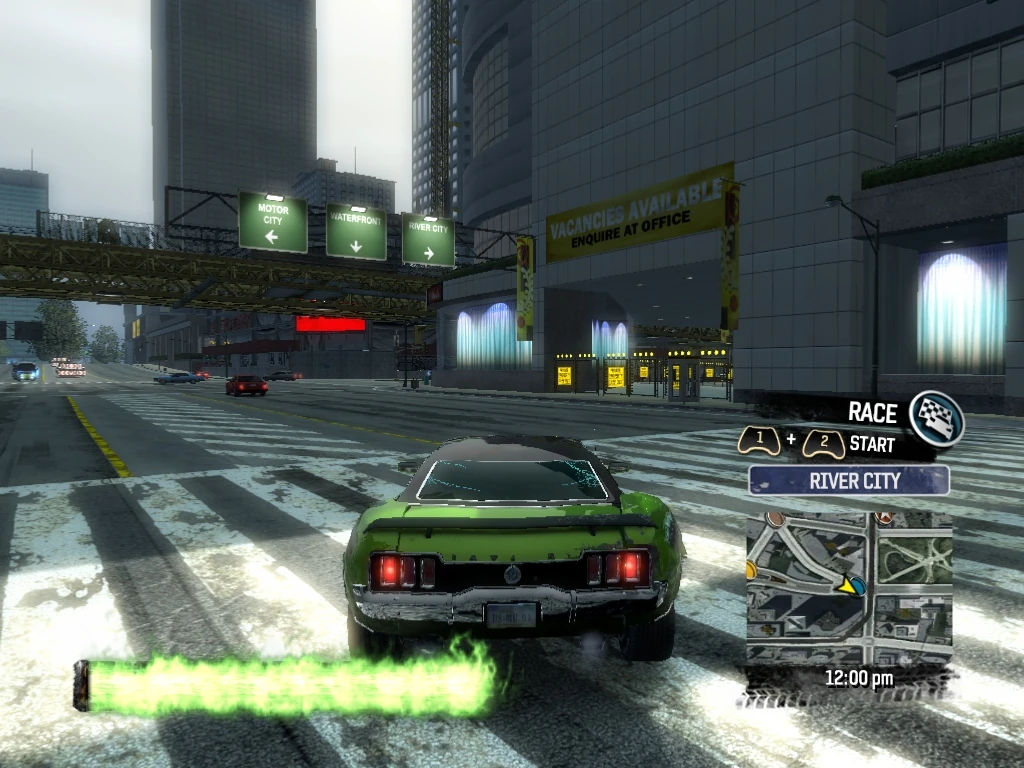
|
| 49 | Downtown Paradise River City |
Smash Gate 49 is inside the building, just south of Smash Gate 48. Drive through it and follow the stairs up behind it, circling around to the right and smashing a billboard to end up on the Elevated Railroad. | 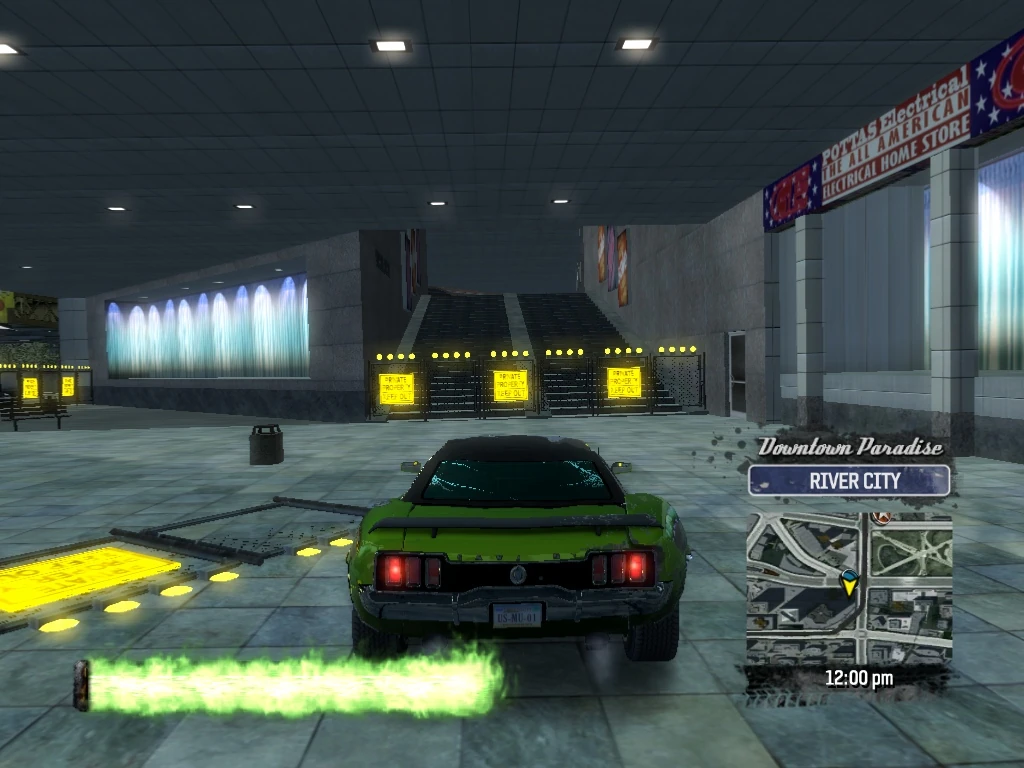
|
| 50 | Downtown Paradise River City |
Smash Gate 50 is one of the more complicated ones in the game - it is on the 2nd floor of the building under construction on the southeast corner of Root Avenue and 2nd Street. Follow the Elevated Railroad left and after it turns northeast you will see two black and yellow chevrons with three oil cans between them. Drive between the chevrons with boost to jump across Root Avenue into the 2nd floor of the building, and then just drive across and through the Smash Gate, landing on 2nd Street. | 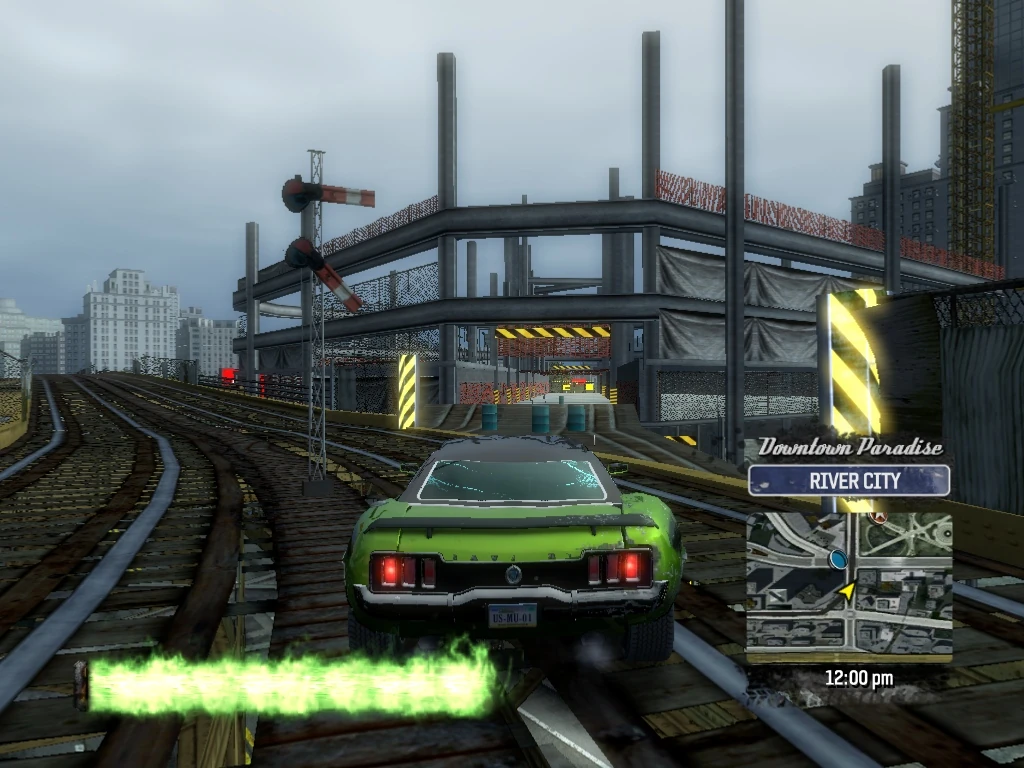
|
| 51 | Downtown Paradise River City |
Smash Gate 51 is directly below Smash Gate 50 on the first floor of the building (hit the brakes and you will see it behind you). Turn around and drive through it, following the path through the building. | 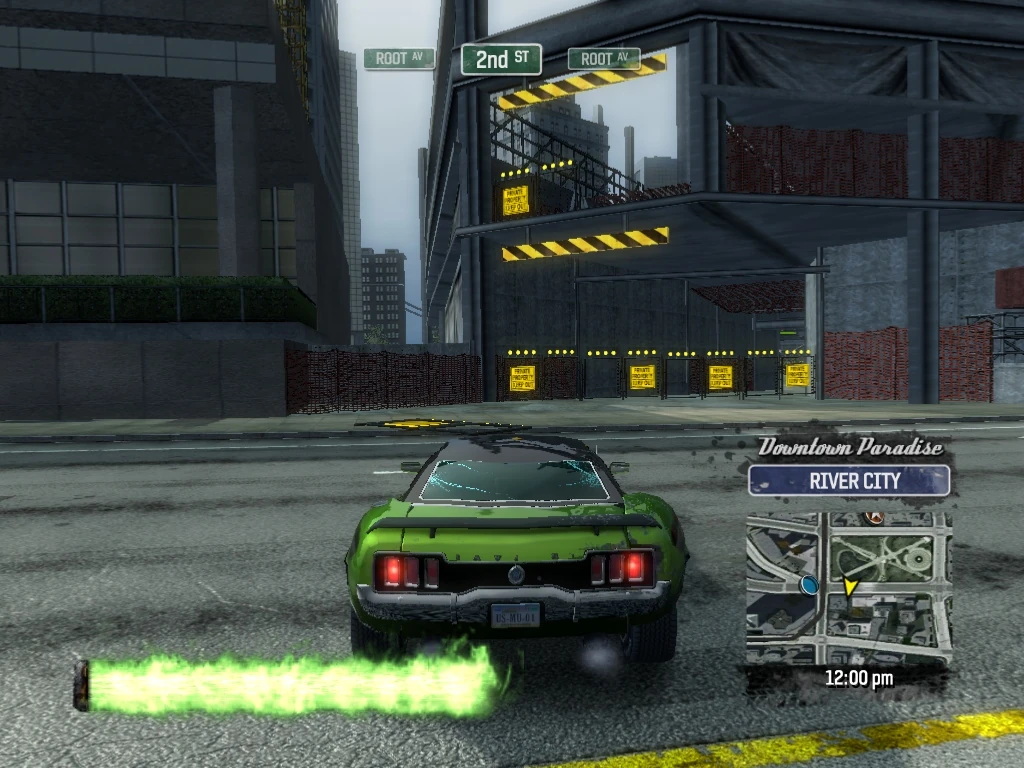
|
| 52 | Downtown Paradise River City |
As you drive through the building, you will see Smash Gate 53 dead ahead, but we don't want to miss Smash Gate 52. Just before you reach Smash Gate 53, swing to the right and you will see Smash Gate 52 at the base of a ramp leading to another billboard smash. For now, just smash the gate and back up and proceed to Smash Gate 53. | 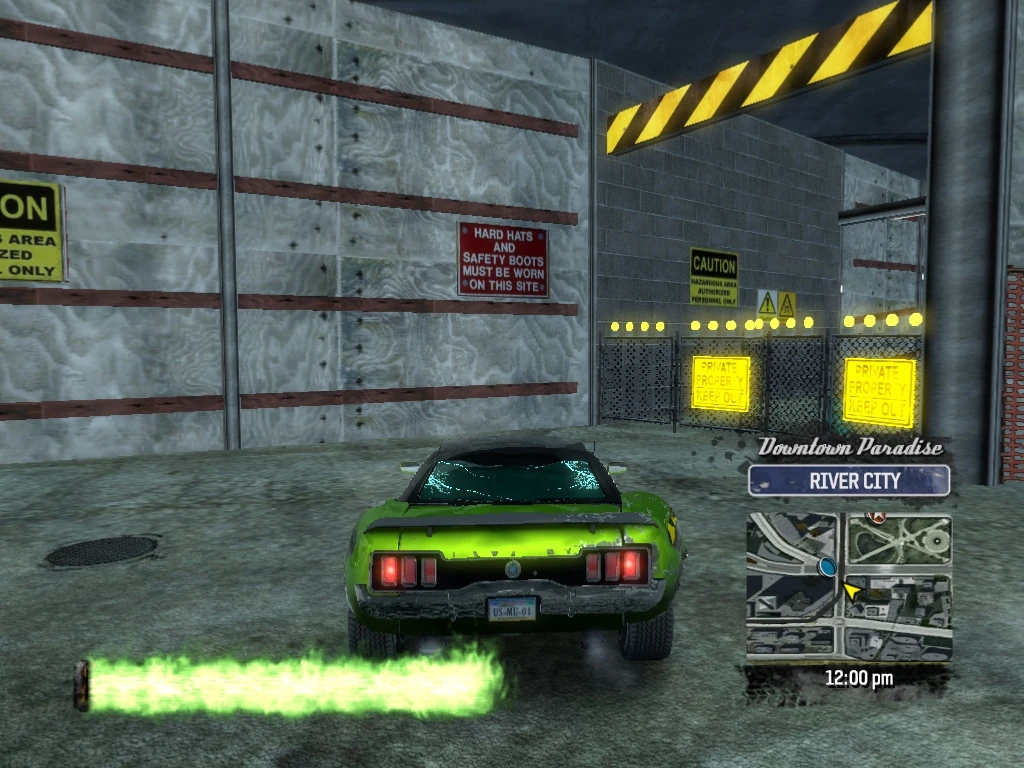
|
| 53 | Downtown Paradise River City |
Drive through Smash Gate 53, exiting the building onto Root Avenue and turn right (north). | 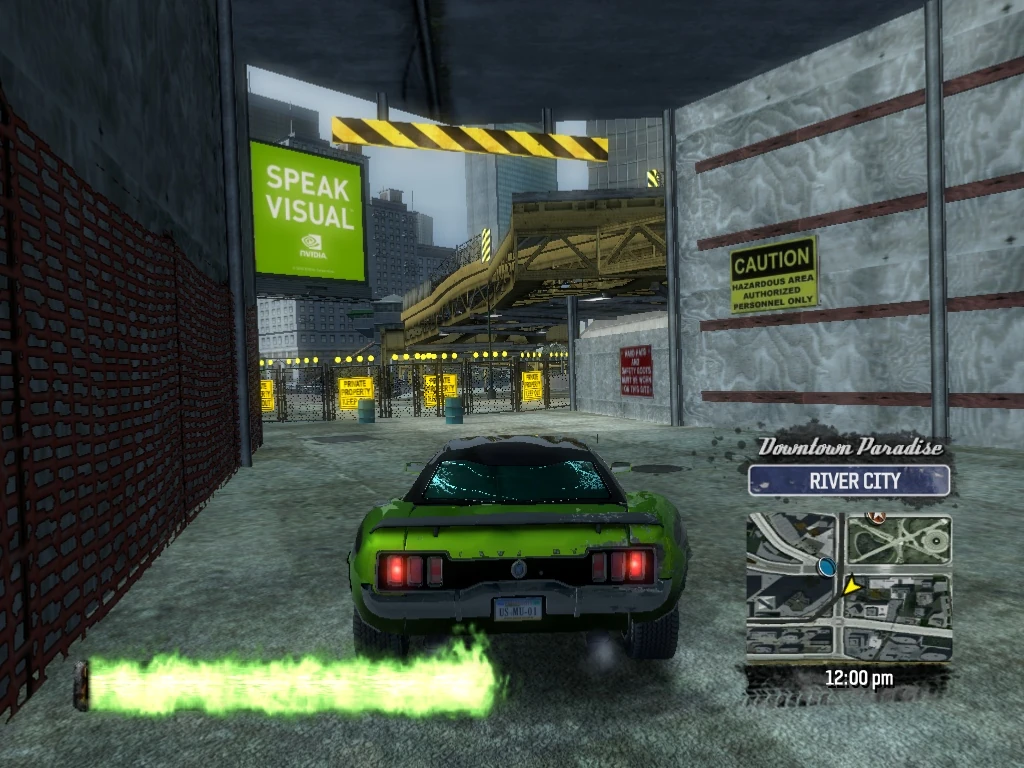
|
| 54 | Downtown Paradise River City |
There is one Smash Gate that we missed from the shopping mall on the left earlier. Smash Gate 54 is on the east wall of the mall, facing Root Avenue. Turn left to drive through it, and cut through the building, turning right (east) on 2nd street, facing the central park. | 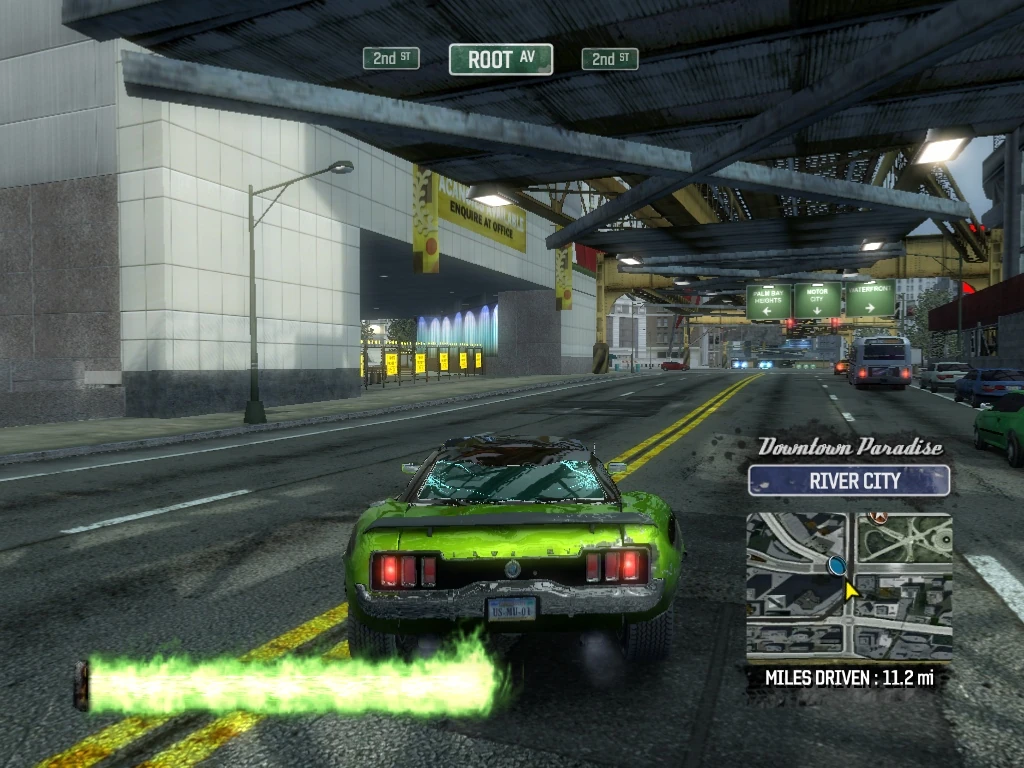
|
| 55 | Downtown Paradise River City |
Smash Gates 55-58 are on the four corners of the park. Turn northeast to drive through Smash Gate 55 and continue on the diagonal through the park. | 
|
| 56 | Downtown Paradise Downtown |
Drive through Smash Gate 56 on the northeast corner of the Park, and turn right (south) on Glancey Avenue. | 
|
| 57 | Downtown Paradise River City |
As you reach 2nd Street, swing right and drive through Smash Gate 57 on the southeast corner of the park. | 
|
| 58 | Downtown Paradise Downtown |
Follow the diagonal through the park and drive through Smash Gate 58, turning right (north) on Root Avenue. | 
|
| 59 | Downtown Paradise Downtown |
From Root Avenue, take the next right onto Andersen Street. Just before the Gas Station on the right, you will see Smash Gate 59. Drive through it and between the green parking garages, dropping down onto 3rd Street and turn left (east). | 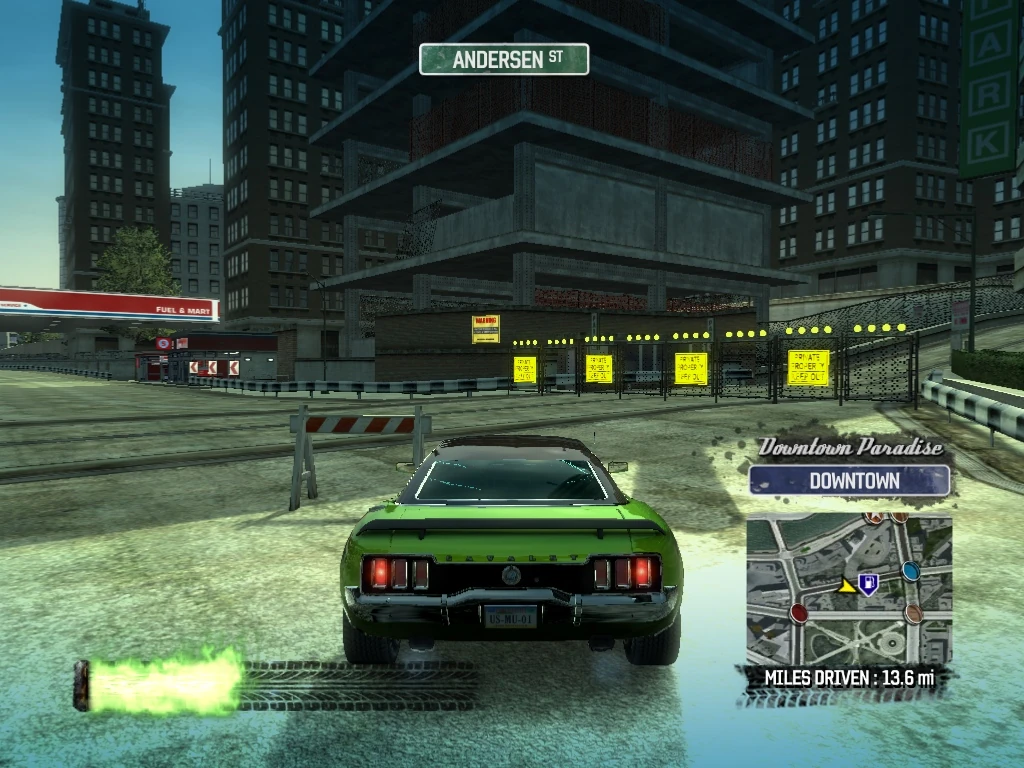
|
| 60 | Downtown Paradise Downtown |
Smash Gate 60 is in the building under construction on the northeast corner of 3rd Street and Glancey Avenue. After you drive through it, the wide ramp on the left leads to a Super Jump, but take the narrow ramp on the right down to Smash Gate 61. | 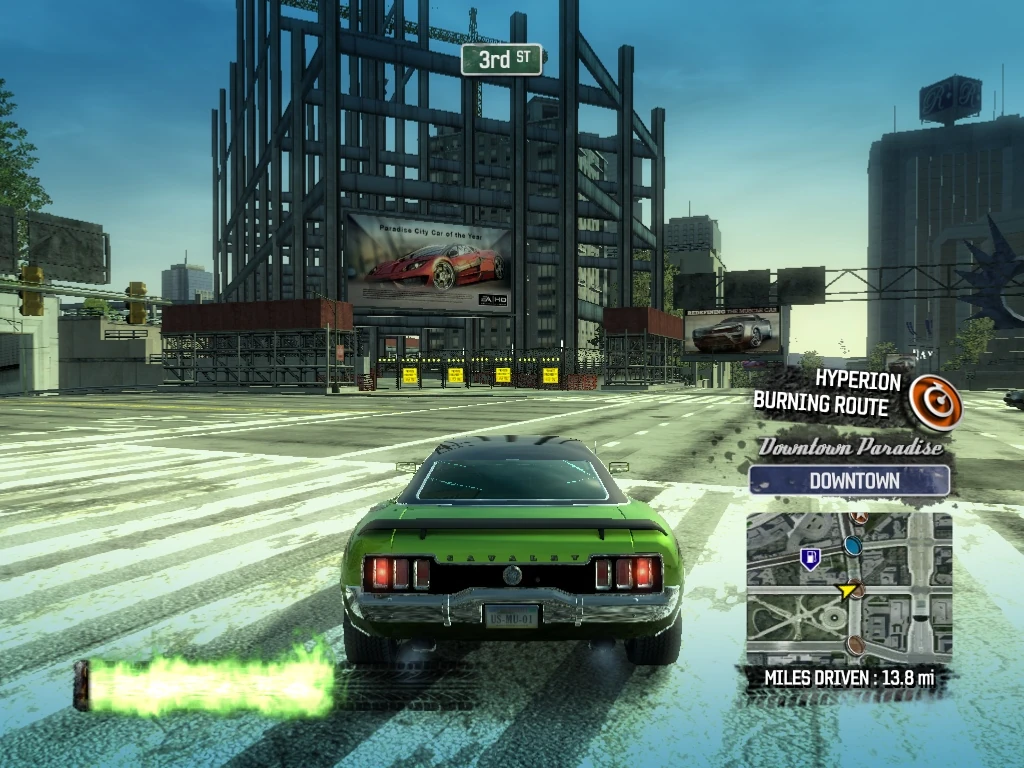
|
| 61 | Downtown Paradise Downtown |
Smash Gate 61 is on the opposite corner of the building, at the intersection of Andersen Street and Webster Avenue. Drive through it and then turn right (east) on Andersen Street. | 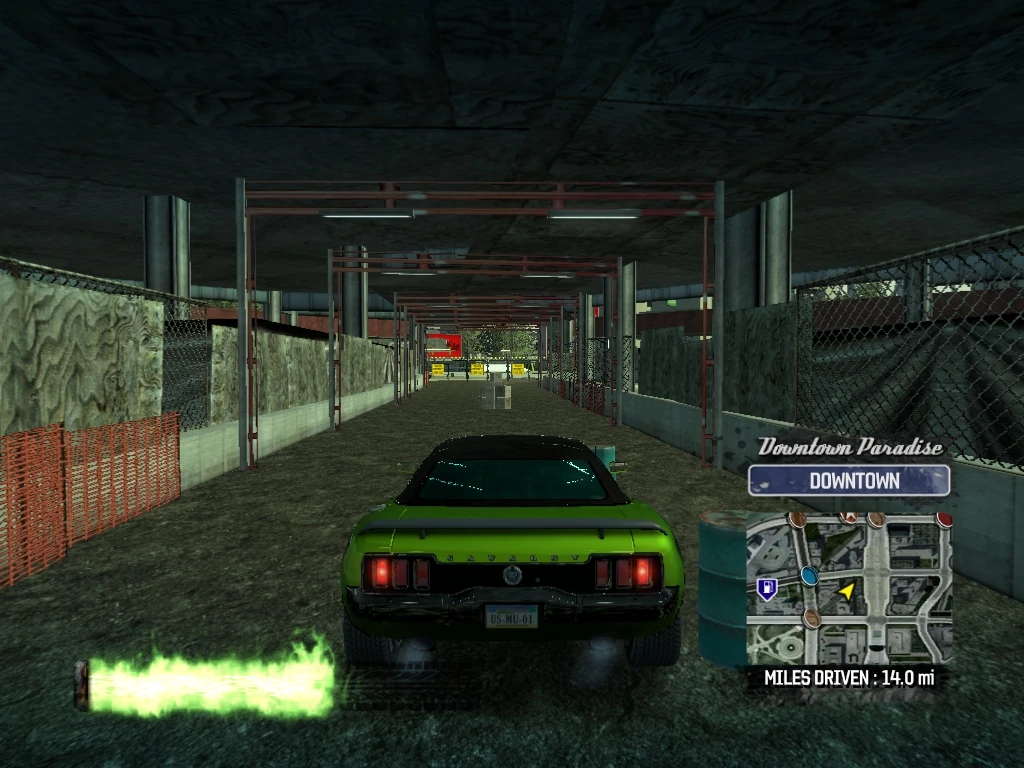
|
| 62 | Downtown Paradise Waterfront |
Take the right (south) on Angus Wharf and the next four smash gates are in a straight line on the left hand sidewalk and avoid the curve in Angus Wharf. Drive through Smash Gate 62, which is at the entrance to the walkway of the building with the JL Audio sign. | 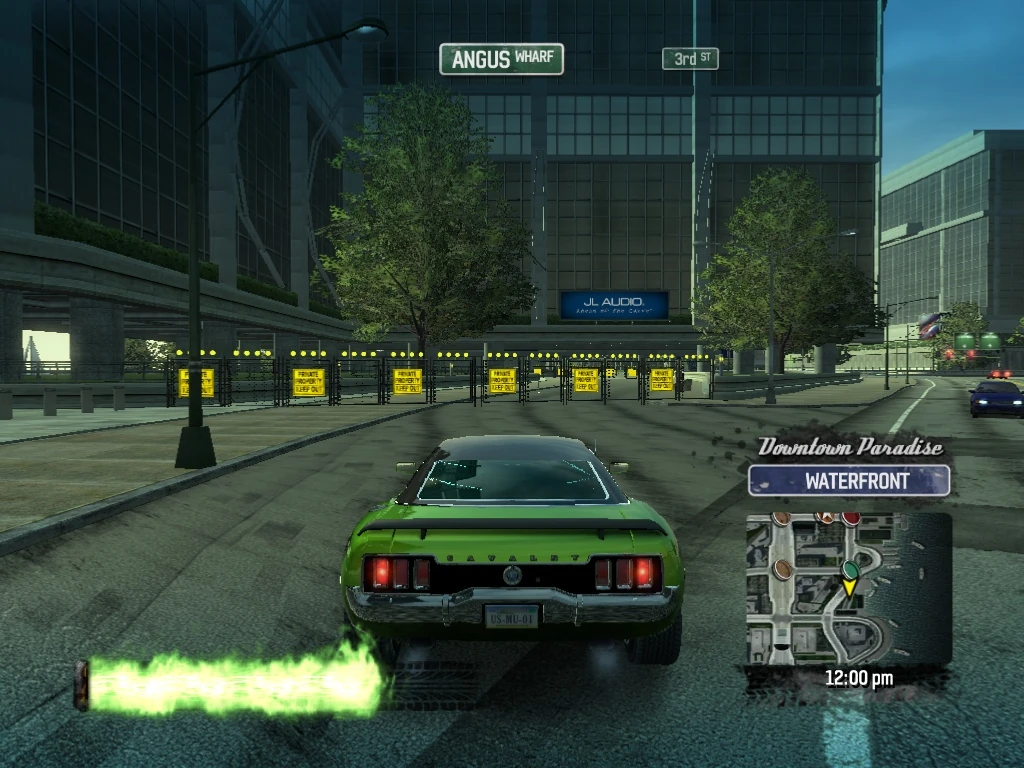
|
| 63 | Downtown Paradise Waterfront |
Drive through Smash Gate 63 at the other end of the walkway. | 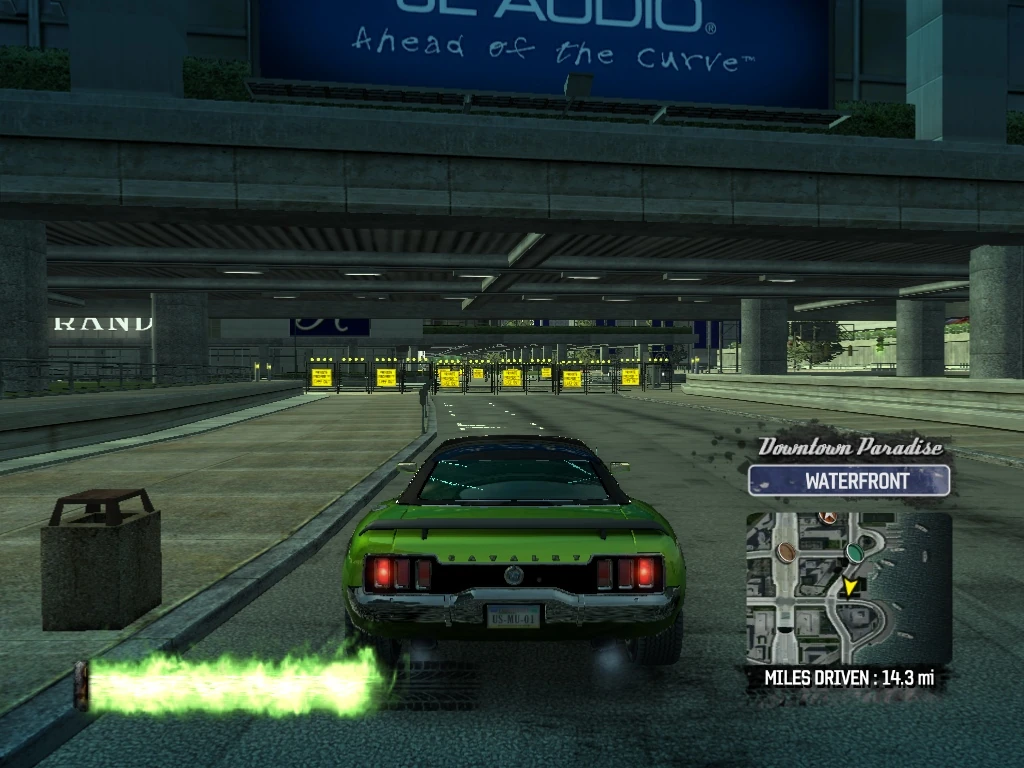
|
| 64 | Downtown Paradise Waterfront |
Drive through Smash Gate 64 at the North end of the lobby of the Rayford Grand. | 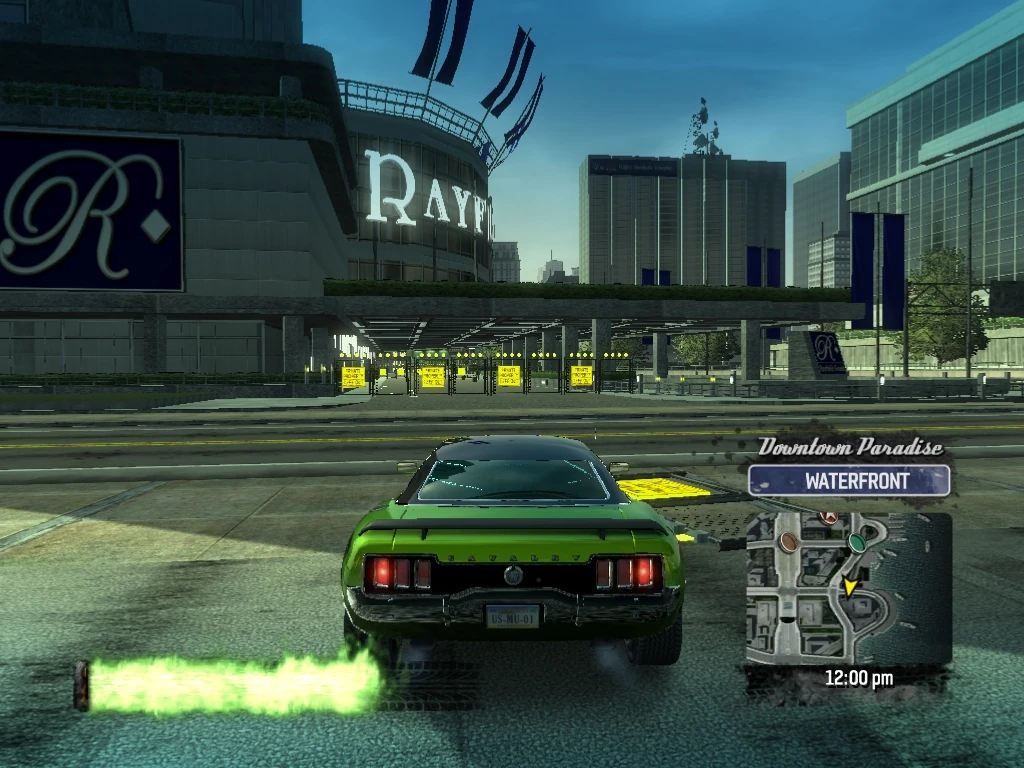
|
| 65 | Downtown Paradise Waterfront |
Drive through Smash Gate 65 at the other end of the lobby. | 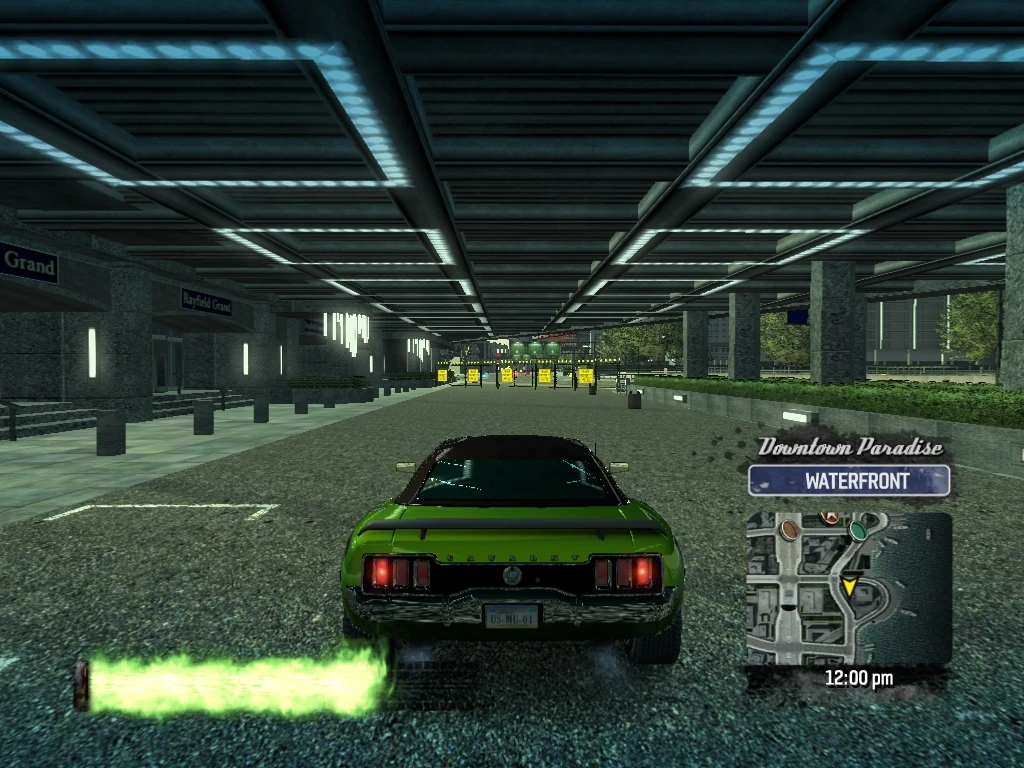
|
| 66 | Downtown Paradise Waterfront |
Continue down the west sidewalk, and Smash Gate 66 is at the entrance to a ramp at the parking garage under construction. Drive through it and up the ramp. | 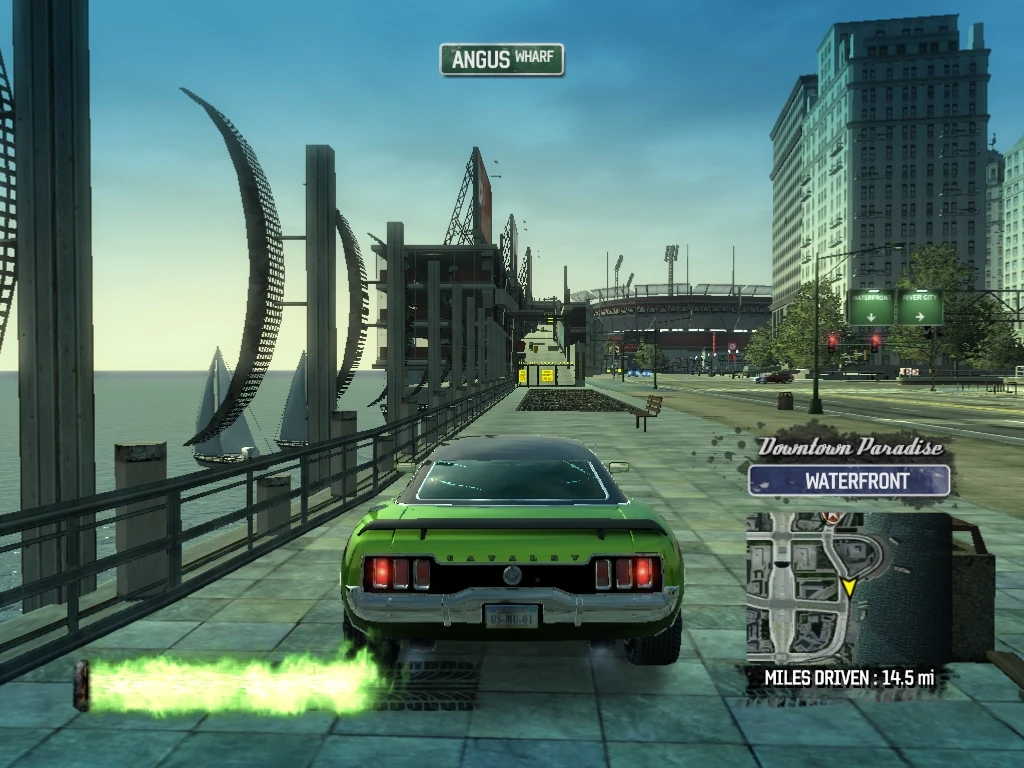
|
| 67 | Downtown Paradise Waterfront |
Smash Gate 67 is at the top of the ramp where it levels out. Drive through it and to the end of the building - dropping down to the street below. | 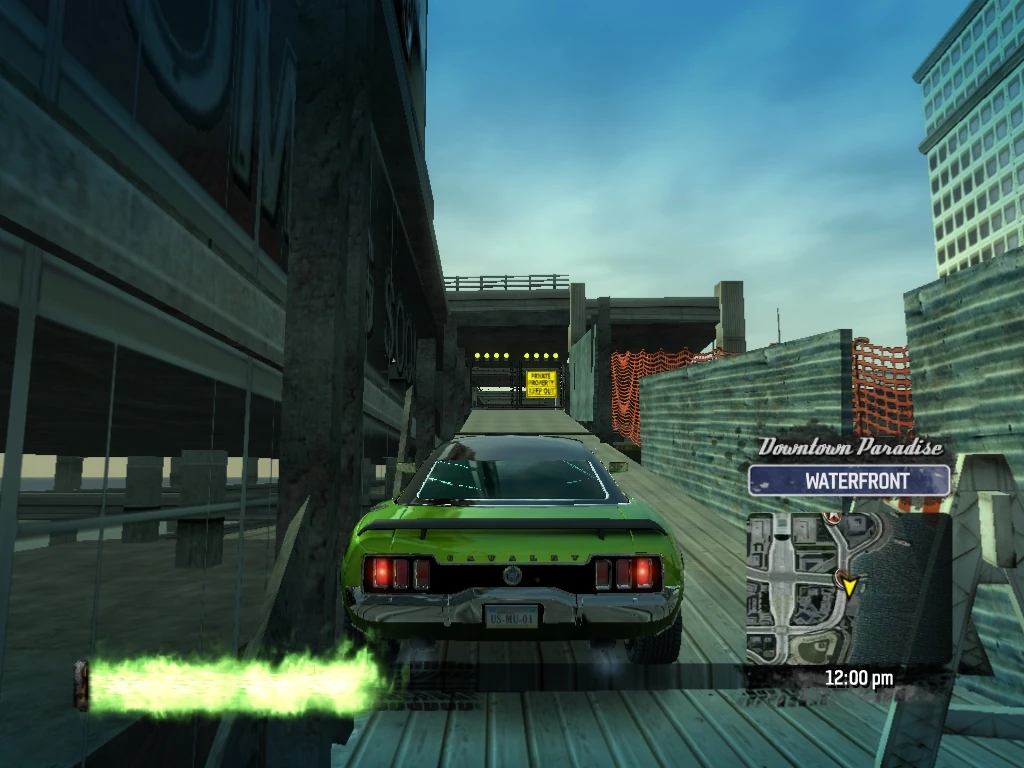
|
| 68 | Downtown Paradise Waterfront |
Smash Gate 68 is just behind you on the first floor of the building that you just jumped down from and directly below the ramp you were just on. Turn around, knock it down, and then turn back around for the next smash. | 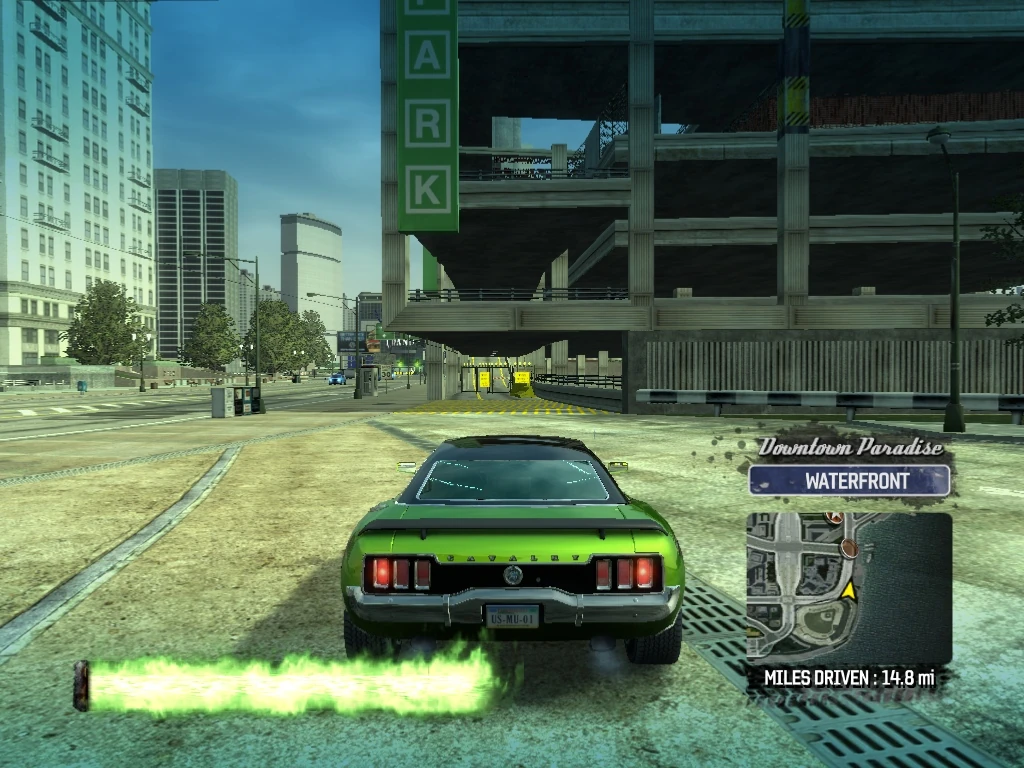
|
| 69 | Downtown Paradise Waterfront |
Smash Gate 69 is at the entrance to the Wildcats Stadium. Drive through it and onto the baseball diamond. | 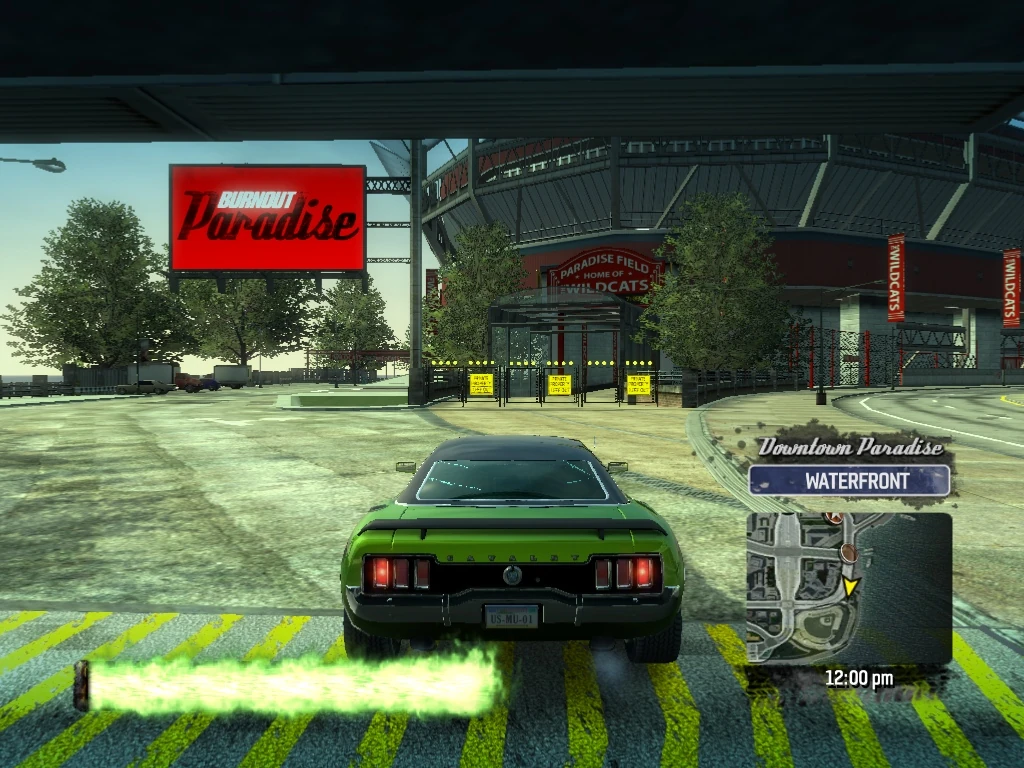
|
| 70 | Downtown Paradise Waterfront |
Drive across the diamond and through Smash Gate 70, which is under the scoreboard. | 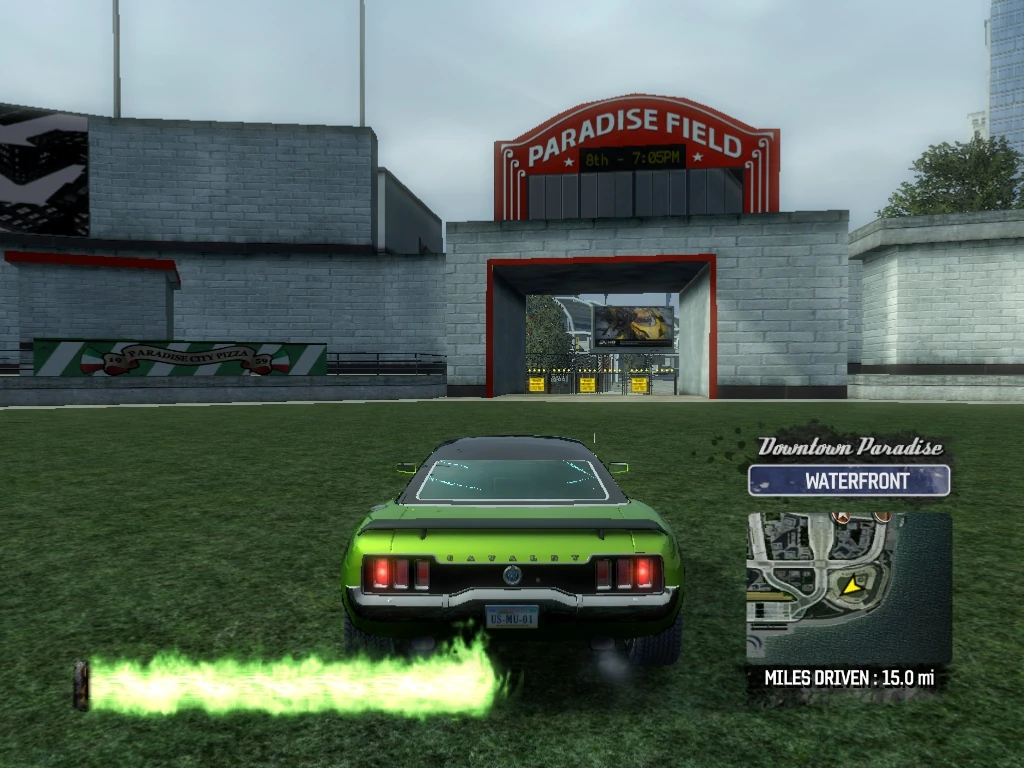
|
| 71 | Downtown Paradise River City |
Veer right onto Glancey Avenue and take the next left onto 1st Street. Smash Gate 71 is at the entrance to the Parking Garage on the left. Drive through it and climb to the top of the garage. | 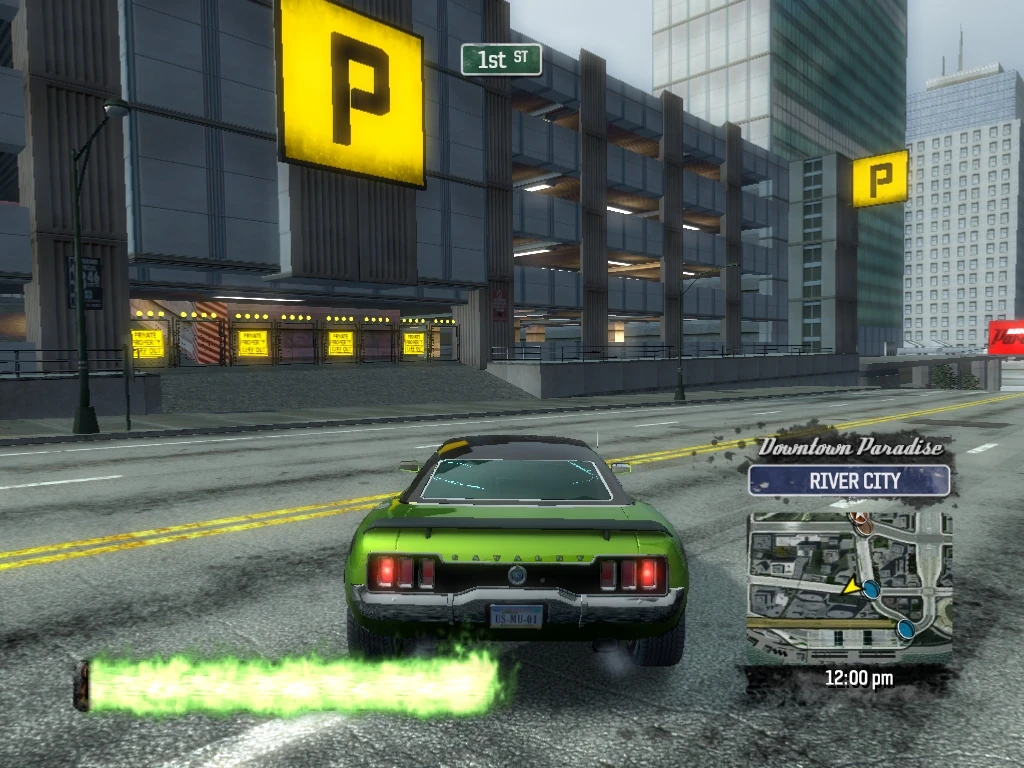
|
| 72 | Downtown Paradise River City |
Smash Gate 72 is at the entrance to the jump ramp on the SW corner of the parking garage. It's an interesting jump, but it aims in the wrong direction for the next smash gates, so for now, simply knock it over and back up and jump back down to 1st Street/Glancey Avenue via either the northeast or northwest ramps. | 
|
| 73 | Downtown Paradise River City |
Head east on 1st Street and turn left (north) on Glancey Avenue. Take the next left (west) on 2nd Street in oncoming and drive through Smash Gate 73 midway through the office building on the left. | 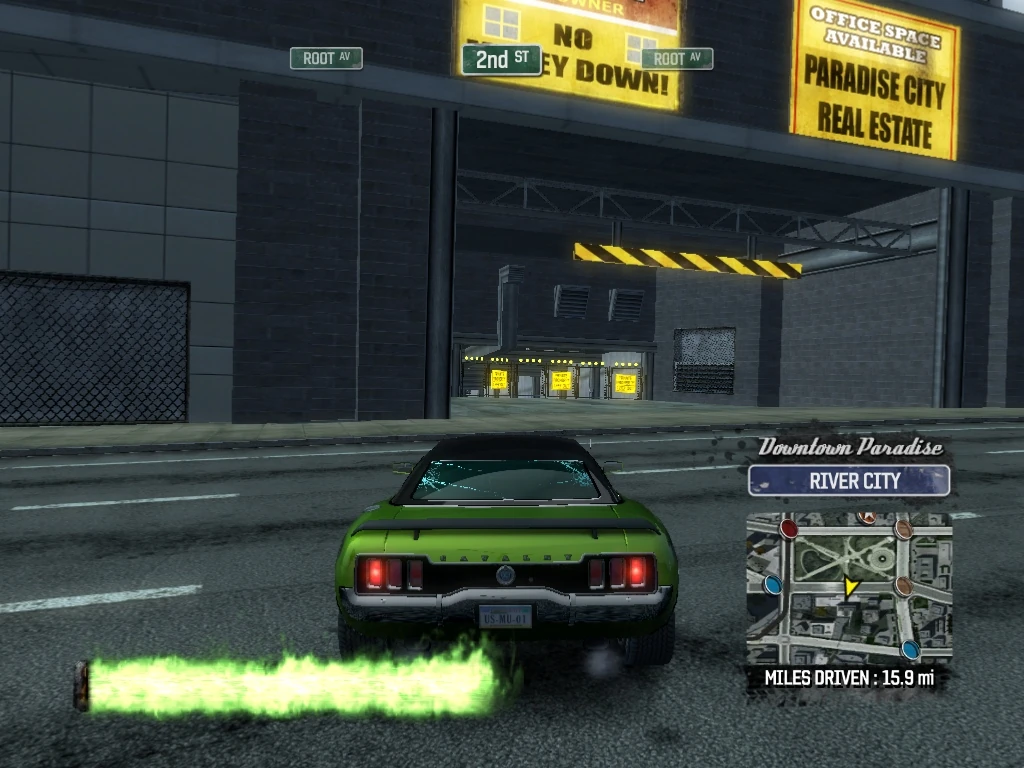
|
| 74 | Downtown Paradise River City |
Drive through the building and through Smash Gate 74 at the exit of the building onto 1st Street. | 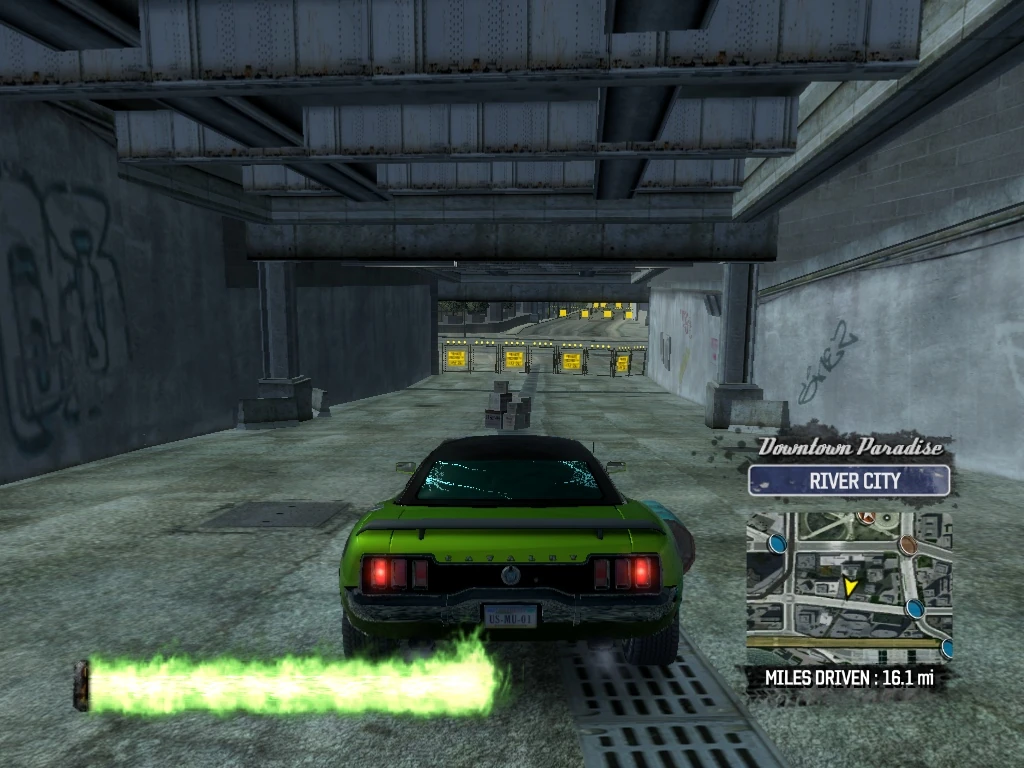
|
| 75 | Downtown Paradise River City |
Cross over 1st Street and Smash Gate 75 is just ahead in the alleyway across the street. Drive through it and the alleyway. | 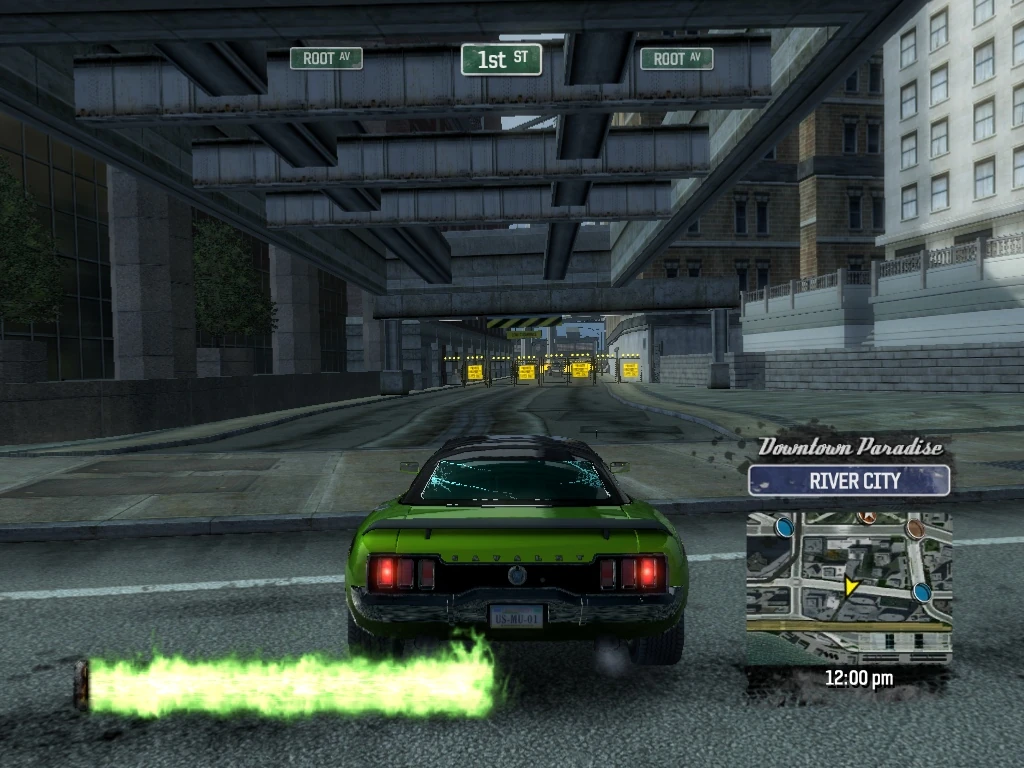
|
| 76 | Downtown Paradise Waterfront |
Drive through Smash Gate 76 at the exit of the alleyway, turning right (west) on Harber Street. | 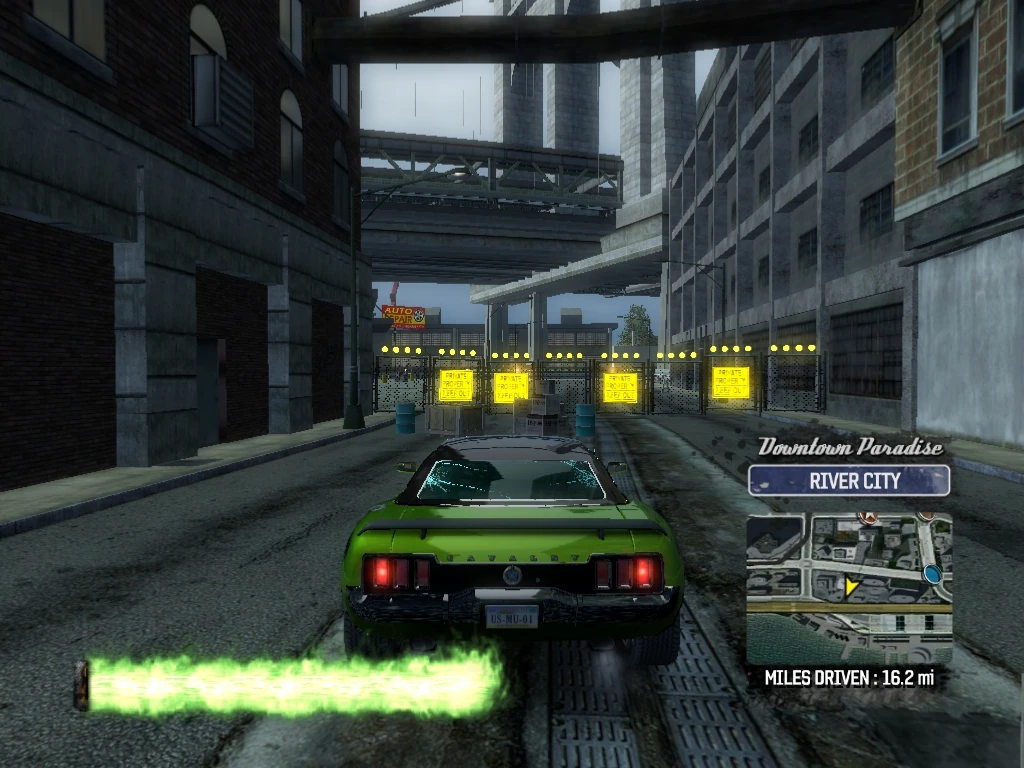
|
| 77 | Downtown Paradise Waterfront |
Smash Gates 77-79 are on the corner of the building at the corner of Harber Street and Fry Avenue. Drive through Smash Gate 77 on the south side of the building on the right, entering the building. | 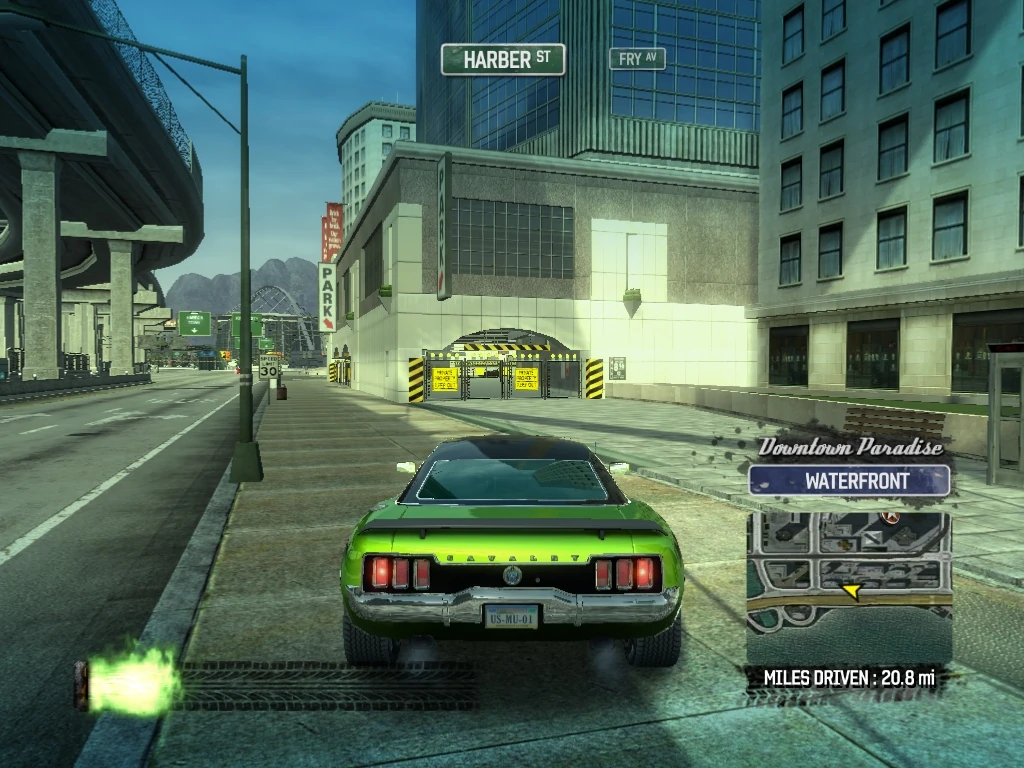
|
| 78 | Downtown Paradise Waterfront |
Knock down or drive through Smash Gate 78 on the corner of the building. | 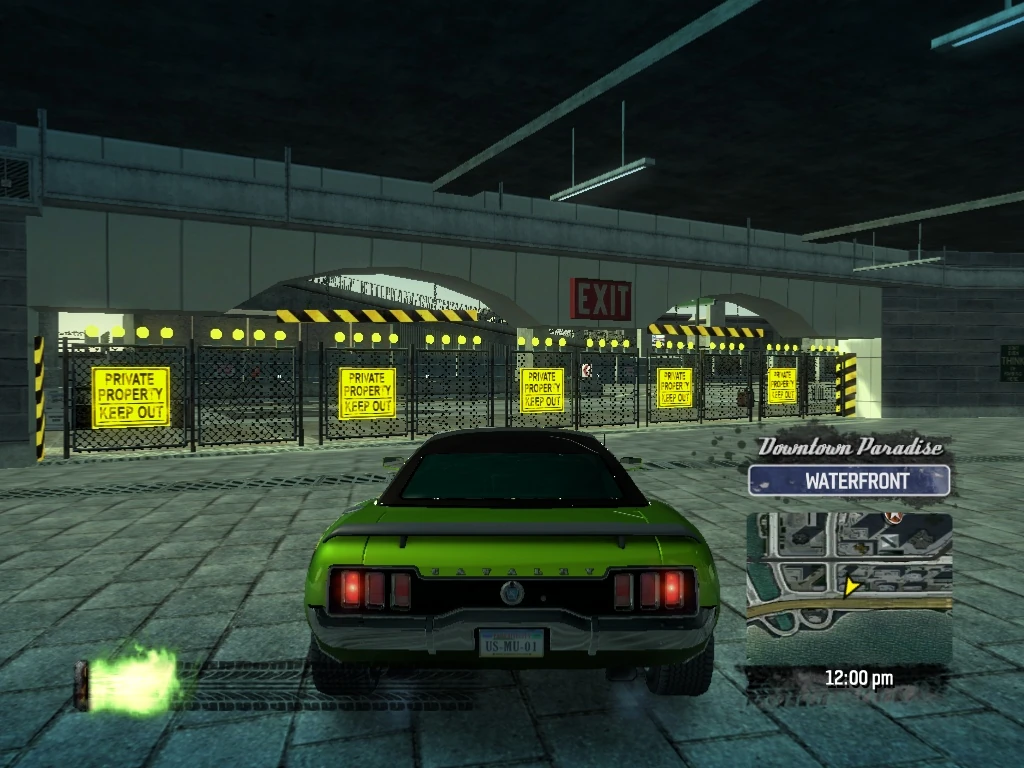
|
| 79 | Downtown Paradise Waterfront |
Drive through or knock down Smash Gate 79 on the west side of the building, exiting north on Fry Avenue. | 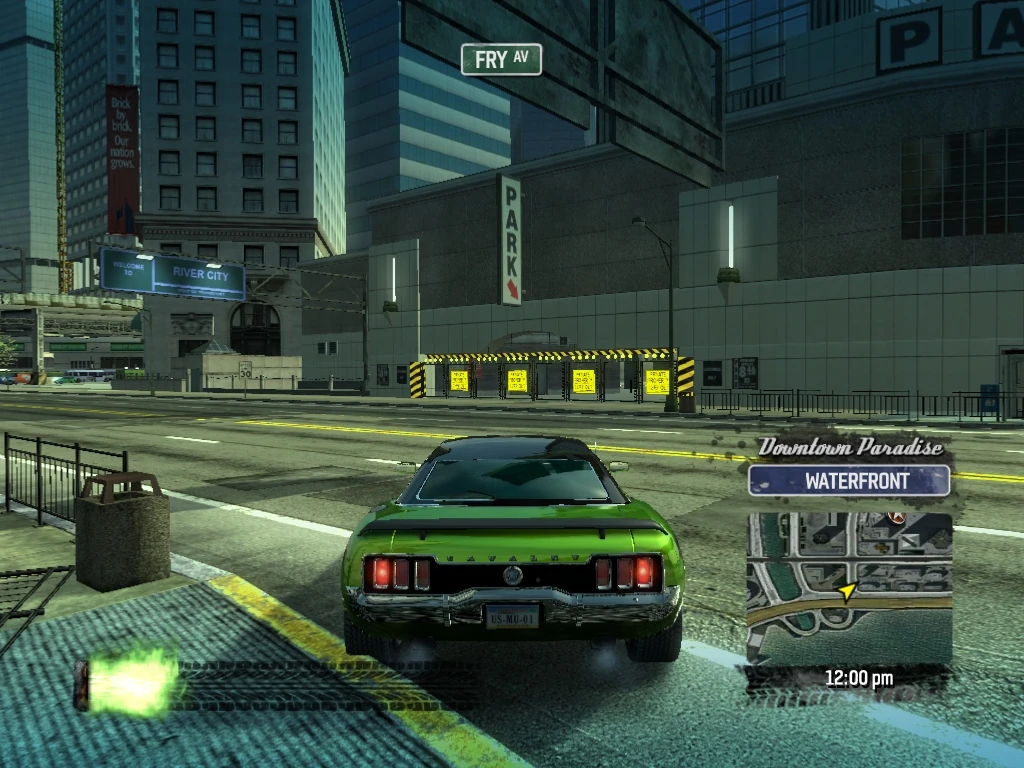
|
| 80 | Downtown Paradise River City |
Smash Gate 80 is in the park on the left. Just before you get to 1st Street, swing around to the left and head southwest and drive through Smash Gate 80, clearing all the Downtown Paradise Smash Gates. | 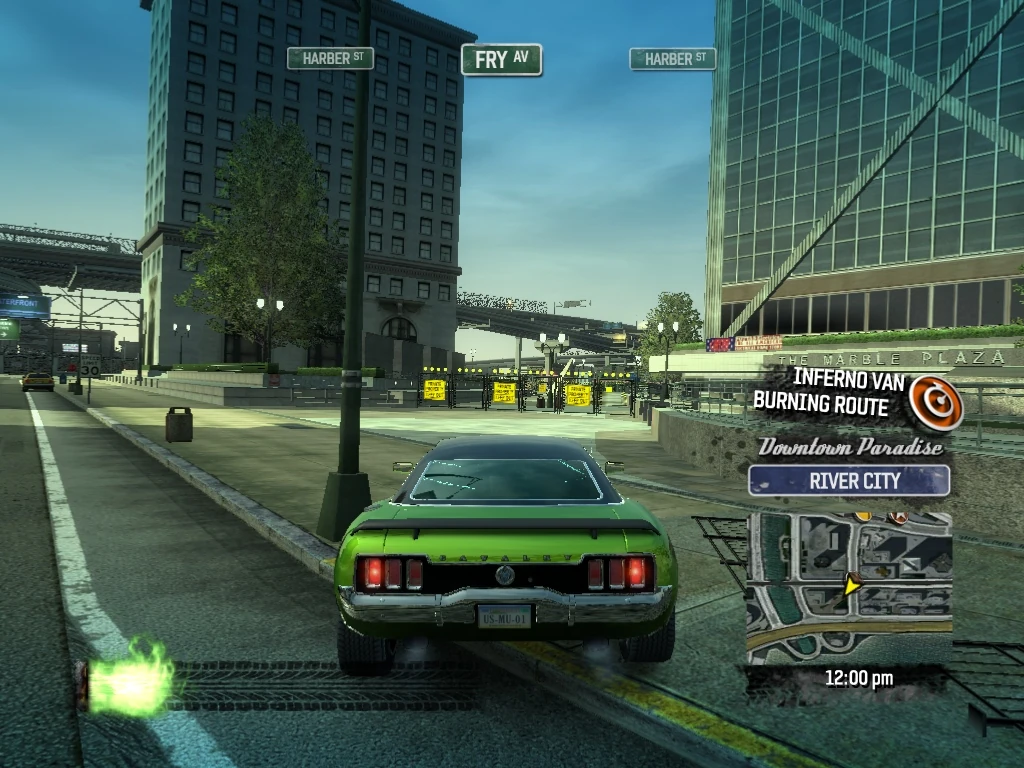
|
| 81 | Harbor Town Paradise Wharf |
Continue southwest and drive through Smash Gate 81, exiting onto Harber Street, westbound. | 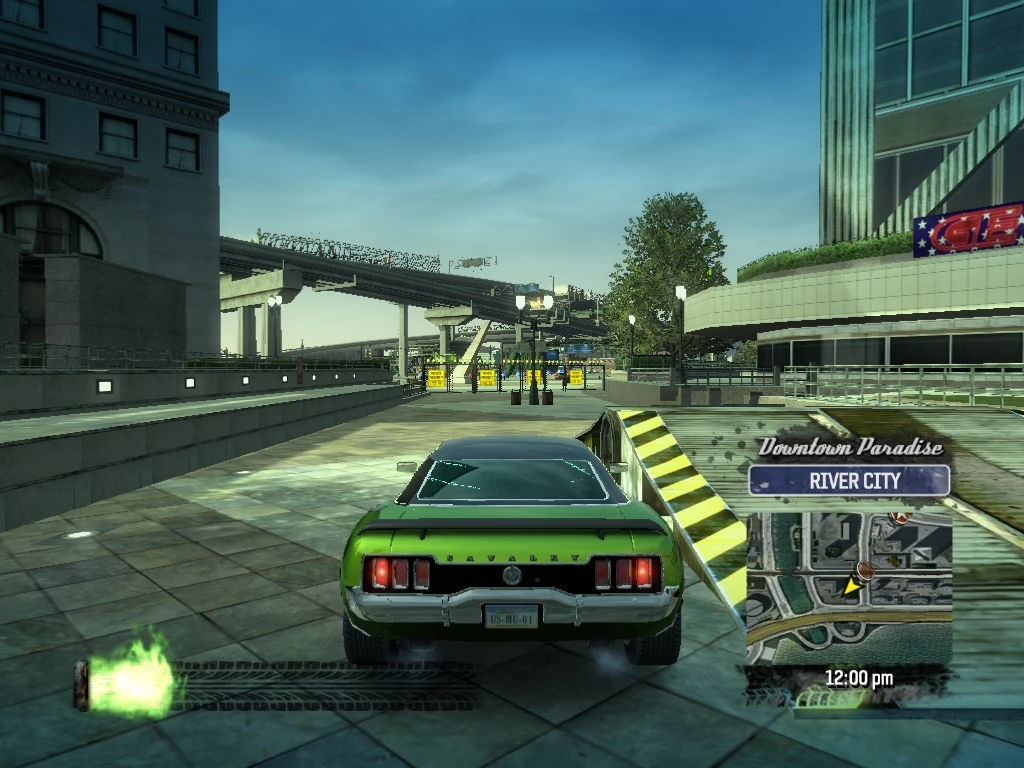
|
| 82 | Harbor Town Paradise Wharf |
Drive under the bridge across the Paradise River, and you will see a GT Concept billboard ahead on the left. Veer left before the billboard and drive through Smash Gate 82, heading for the wharf area. | 
|
| 83 | Harbor Town Paradise Wharf |
Smash Gates 83 and 84 are at the entrance and exit of the warehouse building ahead. Drive through Smash Gate 83 and through the warehouse. | 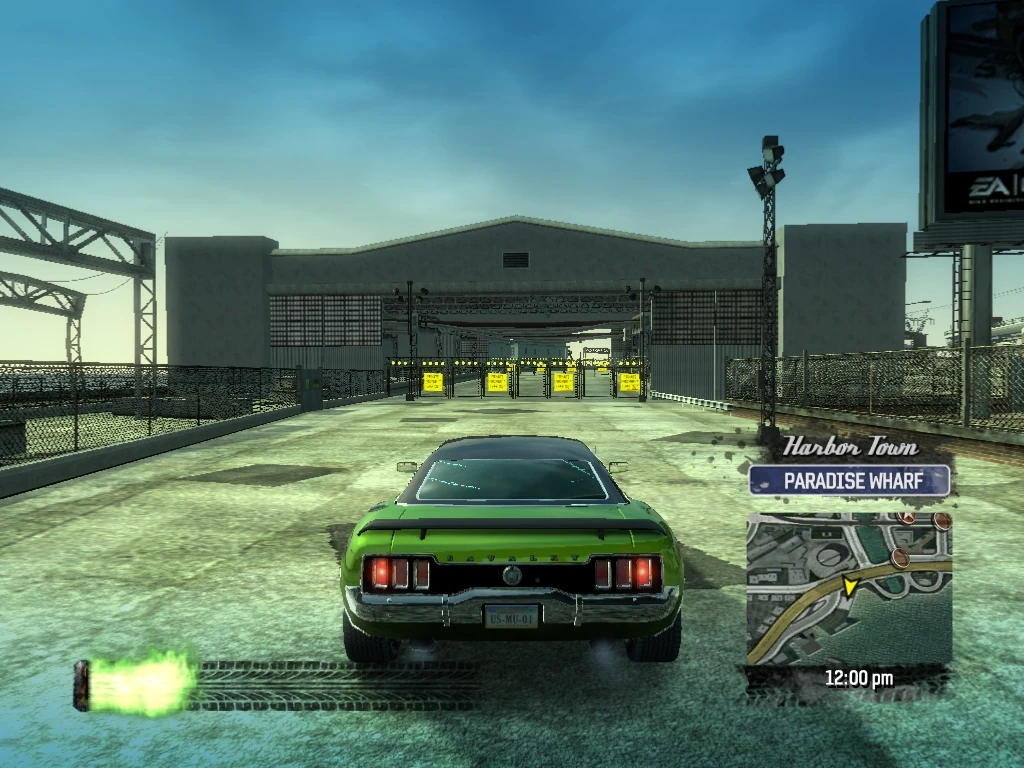
|
| 84 | Harbor Town Paradise Wharf |
Drive through Smash Gate 84 at the exit to the warehouse, and there is a Paradise Billboard just ahead. Turn to the right just before the billboard and approach Manners Avenue just east of the concrete abutment in front of the billboard. | 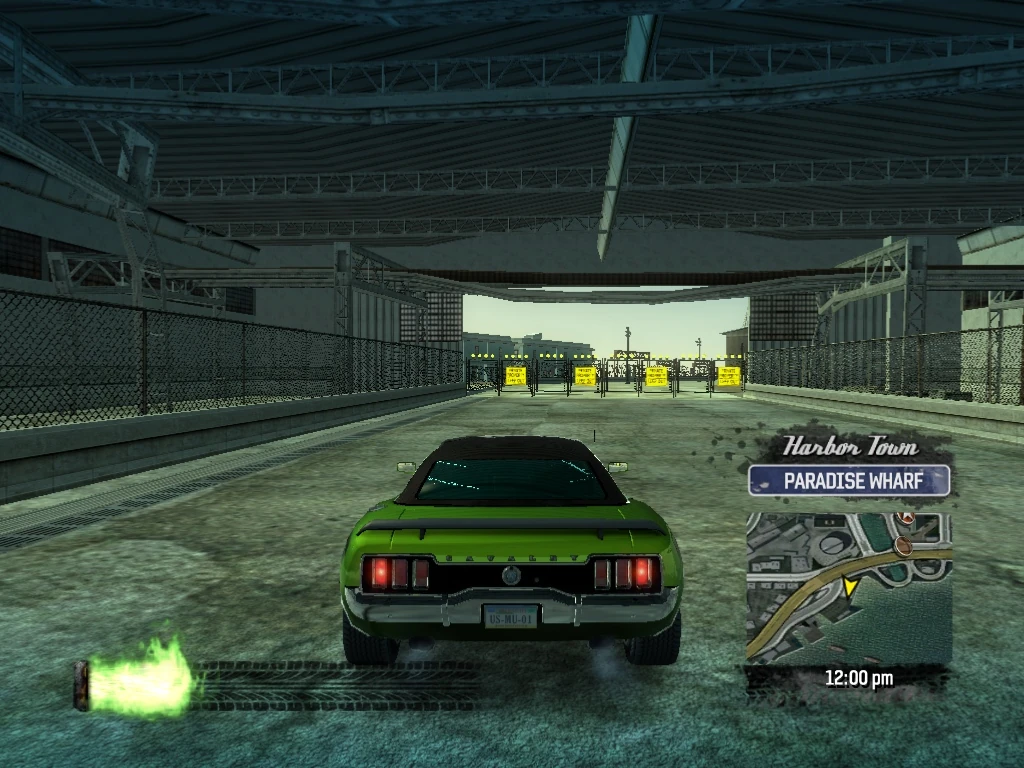
|
| 85 | Harbor Town Paradise Wharf |
As you look across Manners Avenue, you will see signs on the brick wall for the Paradise City Seafood Company and a raised sign right in front of you. Smash Gate 85 is just west of the raised sign. Drive across Manners Avenue and through it, heading northeast through the Seafood Company. | 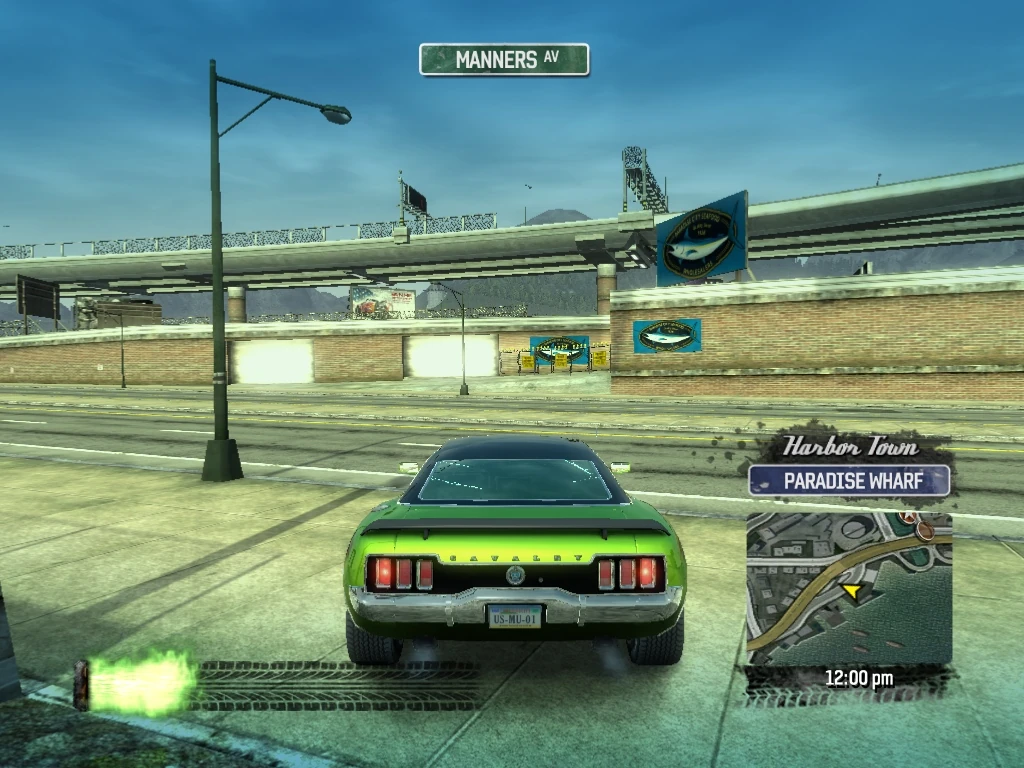
|
| 86 | Harbor Town Paradise Wharf |
Smash Gate 86 is at the exit of the Seafood Company, exiting at the intersection of Manners Avenue and Harber Street. Make a buttonhook through it, turning around and coming back through the Seafood Company. | 
|
| 87 | Harbor Town Paradise Wharf |
This time, stay to the right as you go through the Fish Company and you will drive though Smash Gate 87 further west of Smash Gate 85, again exiting toward Manners Avenue. | 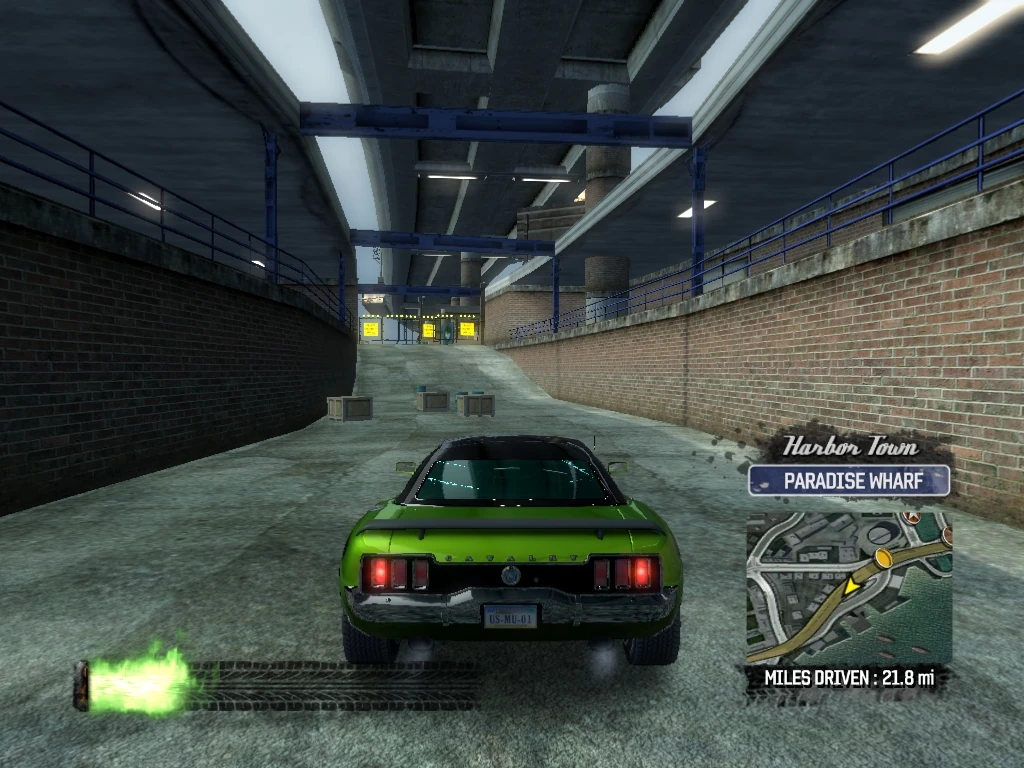
|
| 88 | Harbor Town Paradise Wharf |
Smash Gate 88 is pretty well hidden from this angle. Look across Manners Avenue and there is a gray building with a sailfish atop it on the right and the building with the billboard inside on the left. Head between the two buildings and turn left and knock down Smash Gate 88, then turn around and head southwest down the sidewalk area. | 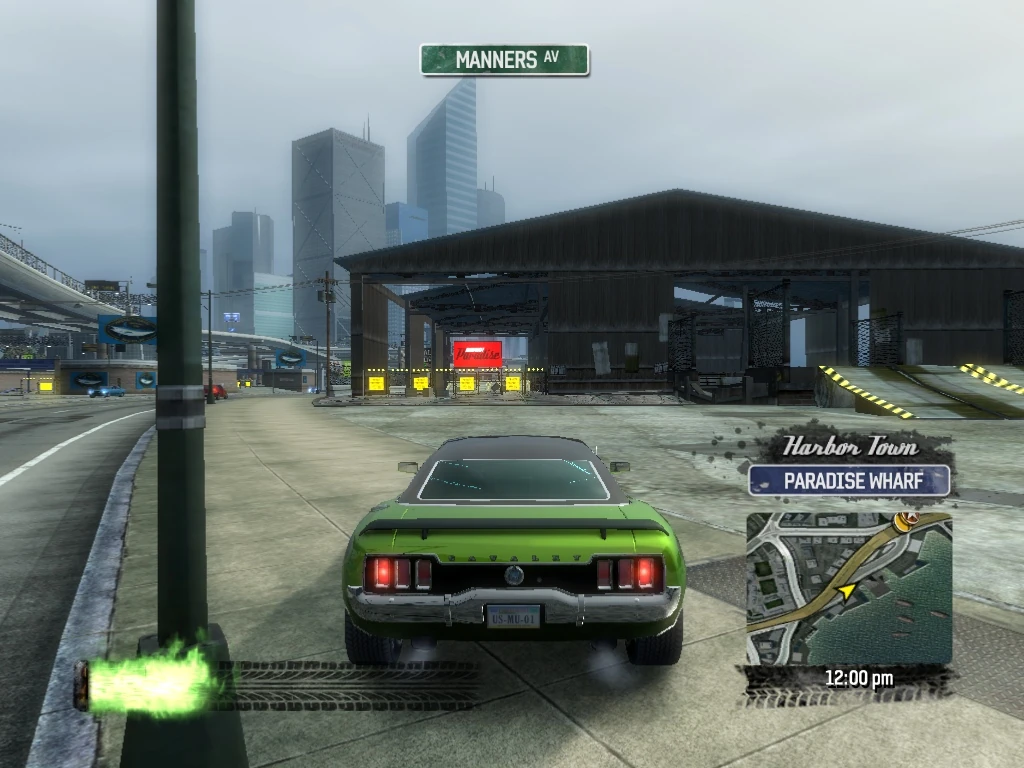
|
| 89 | Harbor Town Paradise Wharf |
On your left, you will see a billboard with Smash Gates 92 and 93 underneath. Smash Gate 89 is just east (nearer) of them, also on the left. Veer left to drive through it. | 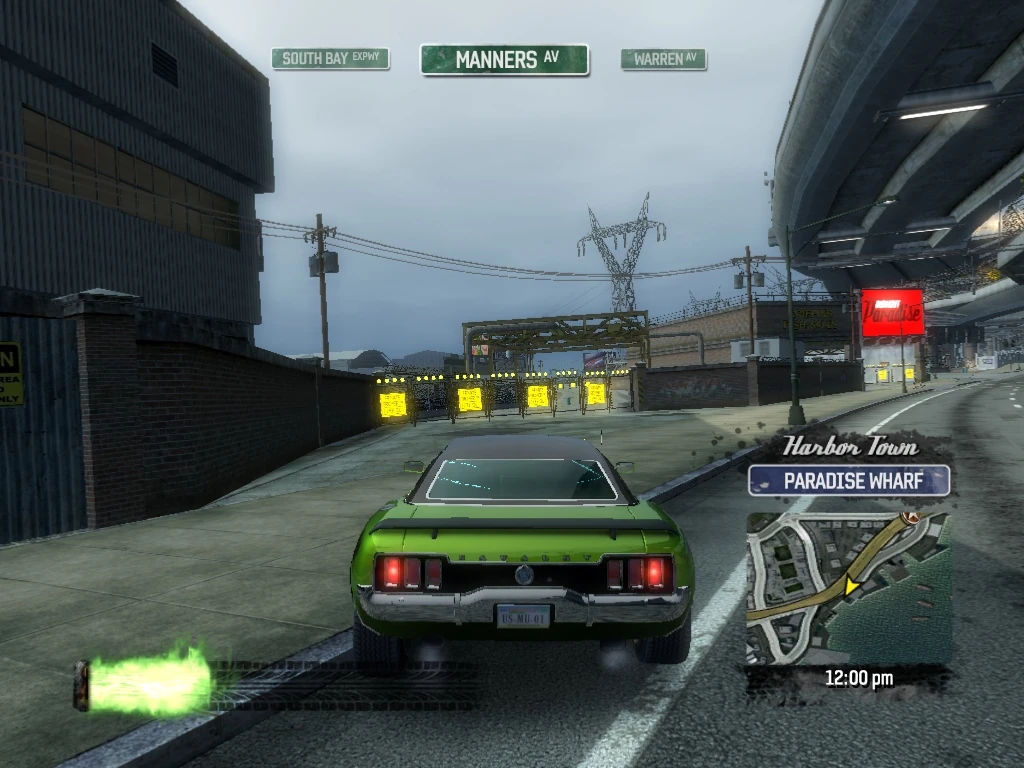
|
| 90 | Harbor Town Paradise Wharf |
After you go through Smash Gate 89, Smash Gate 90 is directly in front of you. Again, make a buttonhook, driving through the gate and then coming back through it, headed northeast. | 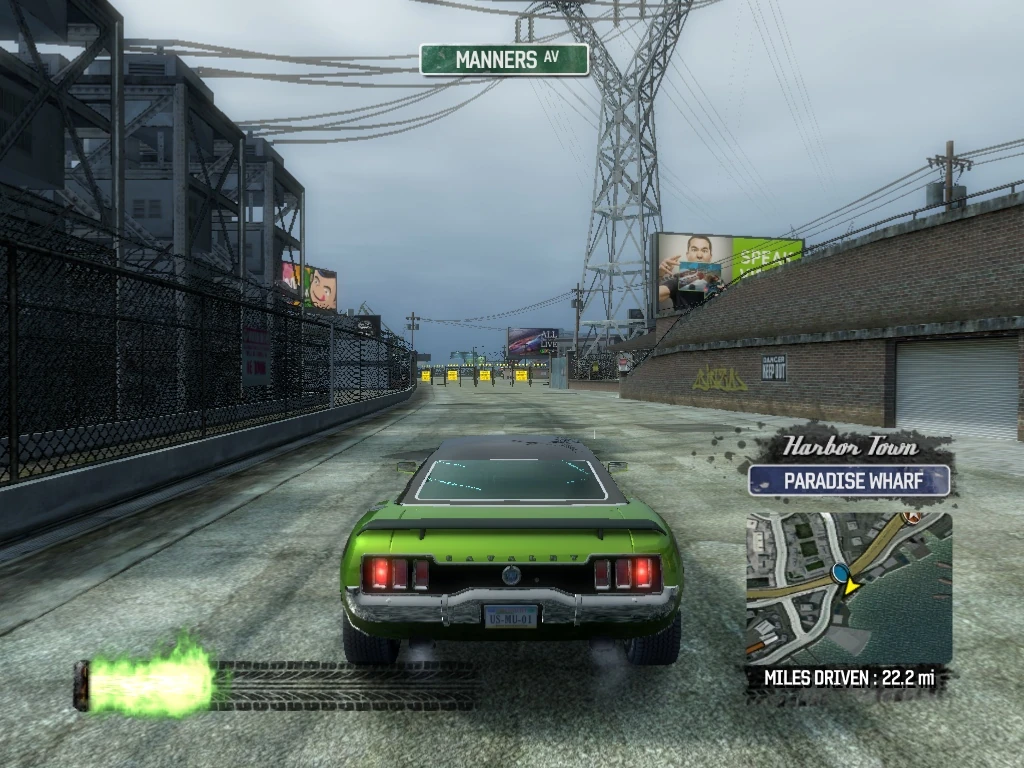
|
| 91 | Harbor Town Paradise Wharf |
As you head through Smash Gate 90 the second time, you will see a ramp to a billboard smash on the left and Smash Gate 91 on the right. Drive through Smash Gate 91. | 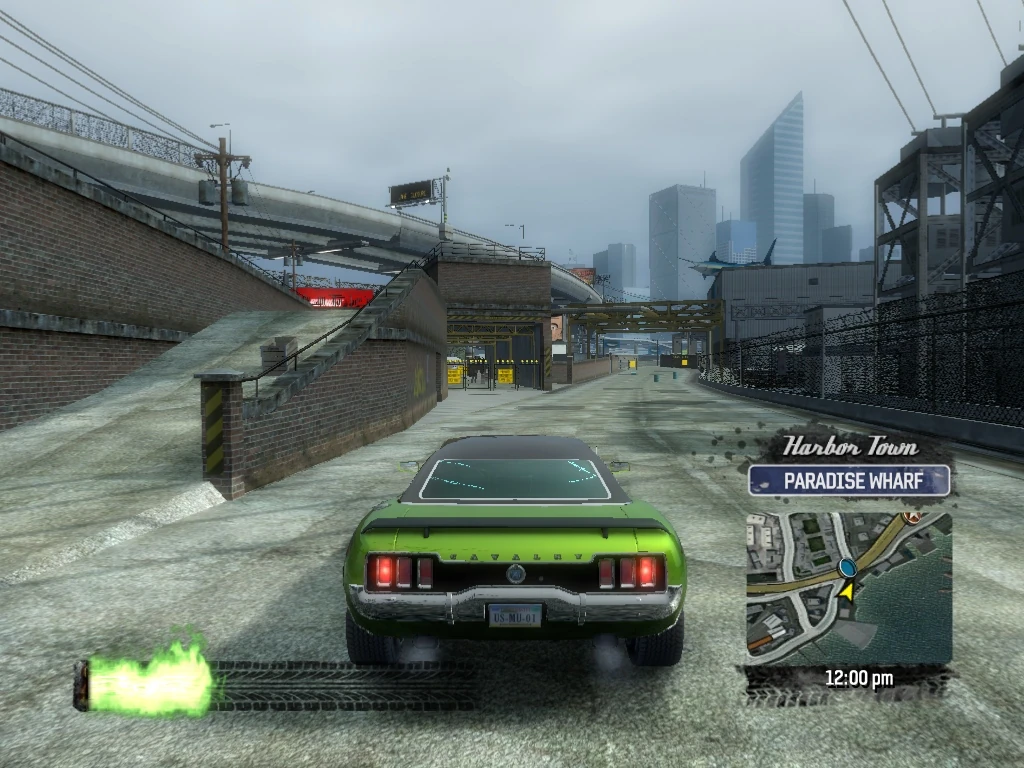
|
| 92 | Harbor Town Paradise Wharf |
Smash Gates 92 and 93 are just ahead before you get to Manners Avenue. Drive through Smash Gate 92 on the right. | 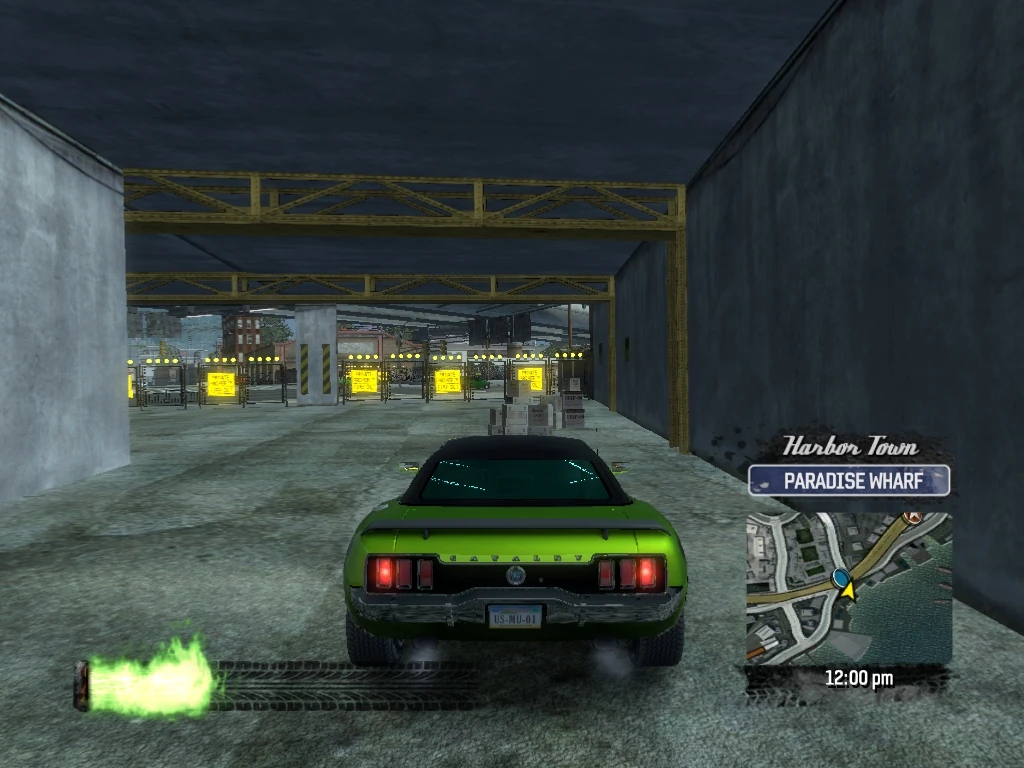
|
| 93 | Harbor Town Paradise Wharf |
And circle around through Smash Gate 93, coming back out through Smash Gate 92 and crossing Manners Avenue. | 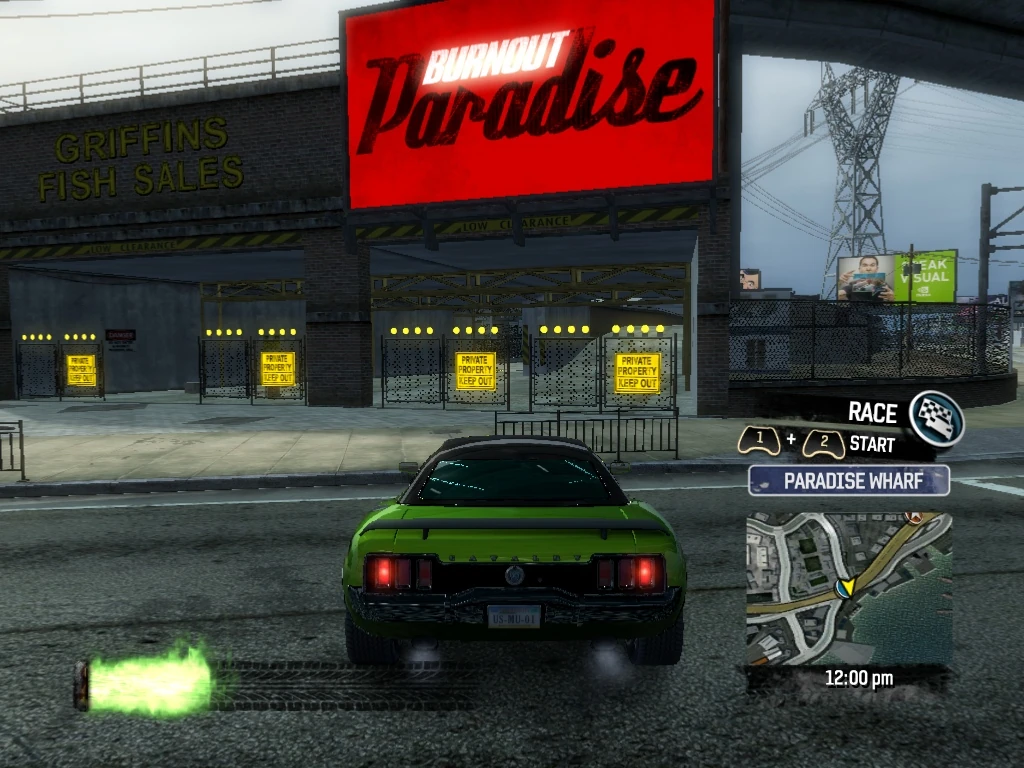
|
| 94 | Harbor Town Paradise Wharf |
Smash Gate 94 is at the entrance to the Ideal Hosiery warehouse at the corner of Manners and Warren Avenues. Drive through the smash Gate and into the building. | 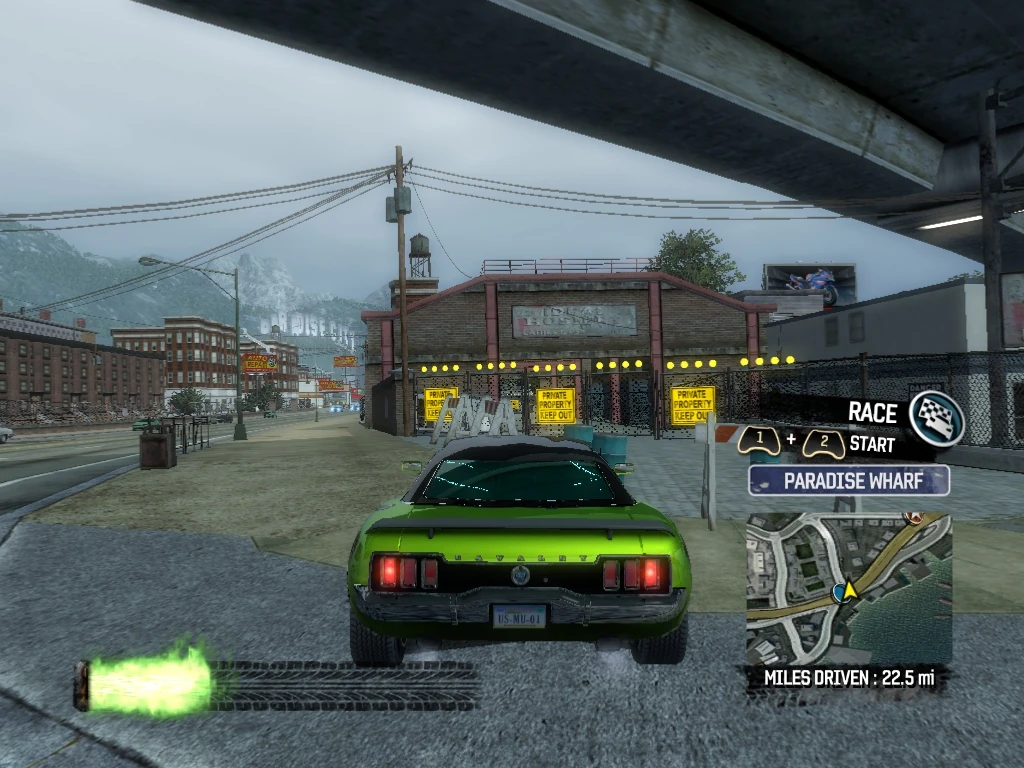
|
| 95 | Harbor Town Paradise Wharf |
Drive through Smash Gate 95 at the exit of the Ideal Hosiery warehouse and follow the paved alleyway north. | 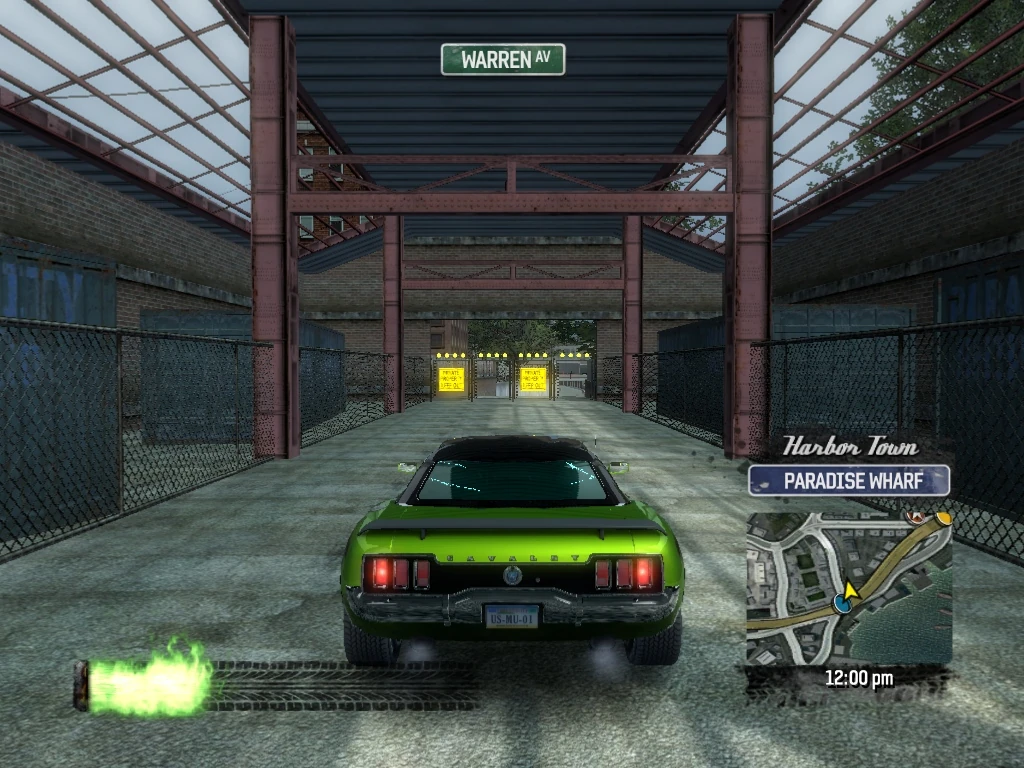
|
| 96 | Harbor Town Paradise Wharf |
Smash Gate 96 is at the end of the alleyway, before the intersection of Warren Avenue, Harber Street, and Hamilton Avenue. Drive through it, and veer northeast on Hamilton Avenue. |
|
| 97 | Harbor Town Paradise Wharf |
Drive through Smash Gate 97 on the right, just after the Paint Shop and continue down the paved alleyway. | 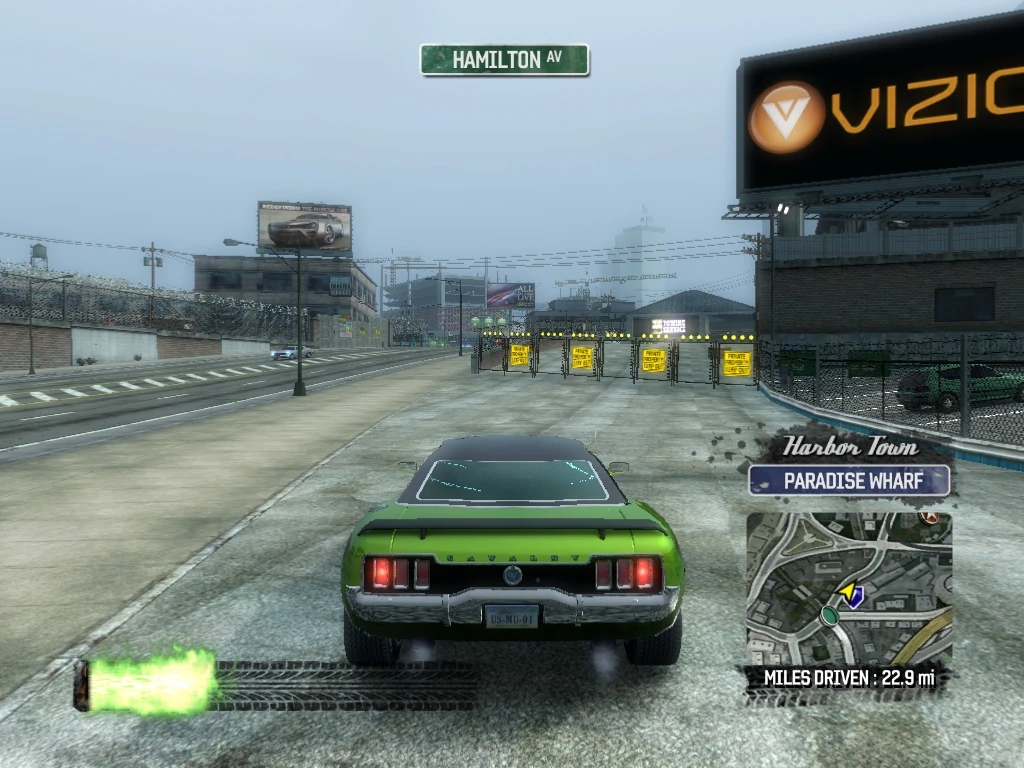
|
| 98 | Harbor Town Paradise Wharf |
Drive through Smash Gate 98, just ahead under the 24-Hour Towing sign. | 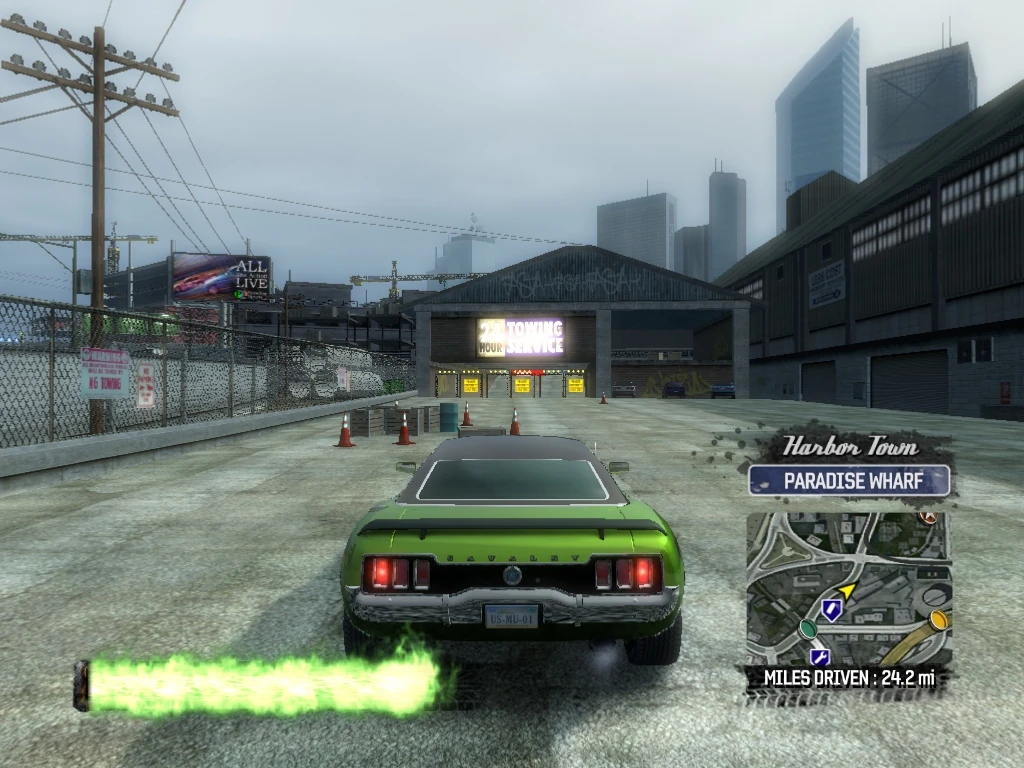
|
| 99 | Harbor Town Paradise Wharf |
Drop down to street level just before the billboard and in front of 1st Street. Turn around to the right and Smash Gate 99 is just ahead to the South. Knock it down and then head east on 1st Street. | 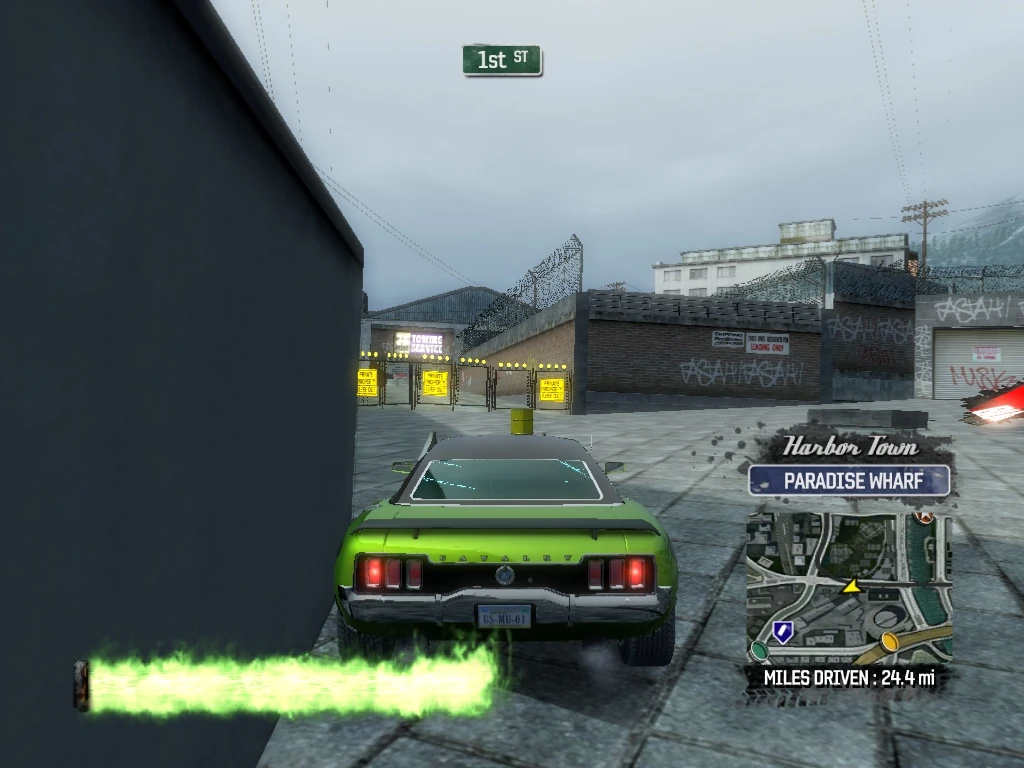
|
| 100 | Harbor Town Paradise Wharf |
Smash Gate 101 is directly across 1st Street in the West Acres Construction Area and Smash Gate 100 is just a bit further east before the Evans Boulevard intersection. Both are convenient cut-throughs to Evans Boulevard, but for now, just knock down Smash Gate 100 and come back west down 1st Street. | 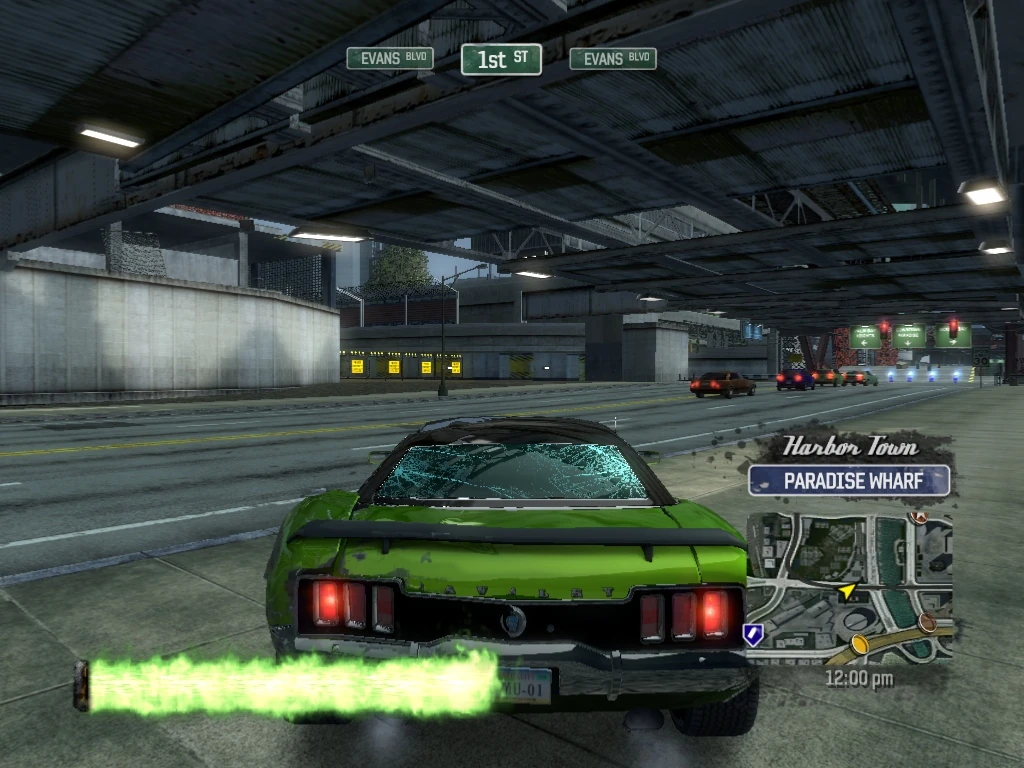
|
| 101 | Harbor Town Paradise Wharf |
Knock down Smash Gate 101 on the right and continue west down 1st Street. | 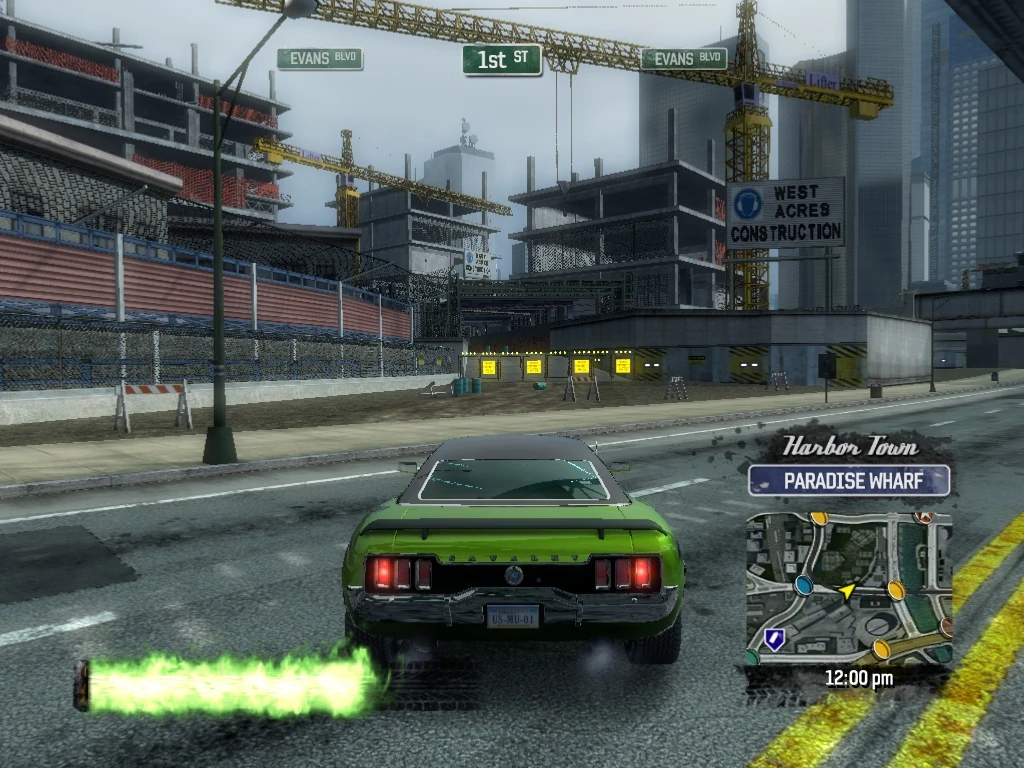
|
| 102 | Harbor Town Paradise Wharf |
As you cross Hamilton Avenue, you will see Smash Gate 104 on the right. Smash Gate 102 is just opposite it in the building on the left. Turn left and smash through it, continuing through the building. | 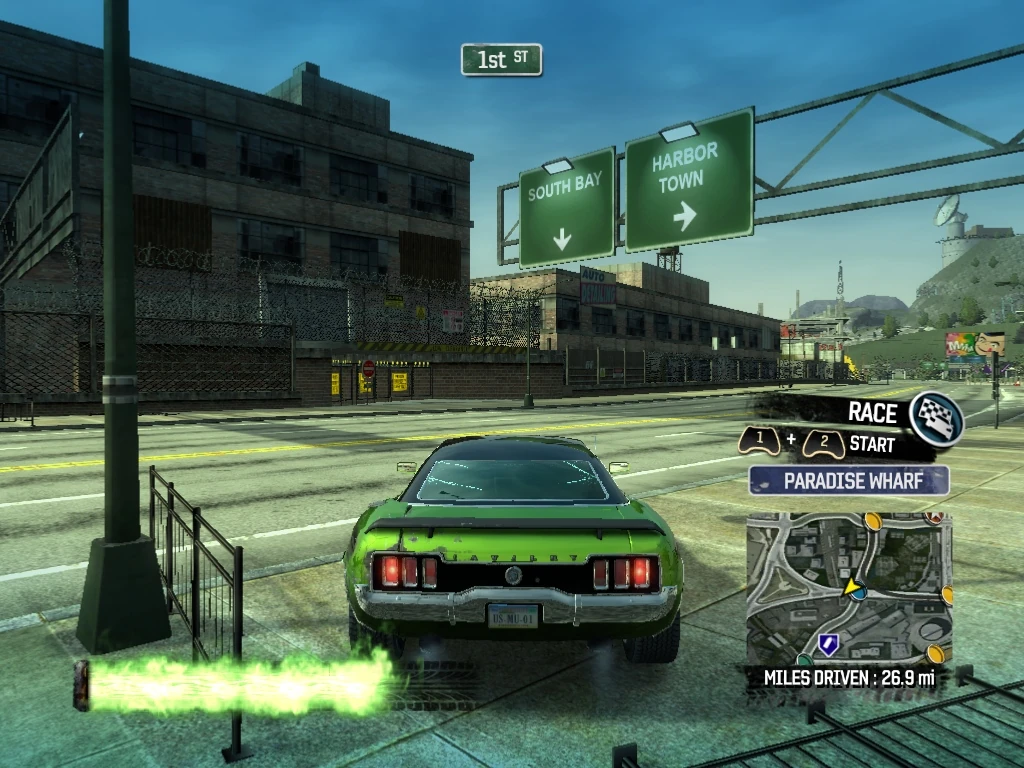
|
| 103 | Harbor Town Paradise Wharf |
Drive through Smash Gate 103, on the opposite wall of the building, and make a buttonhook, coming back though Smash Gates 103 and 102. | 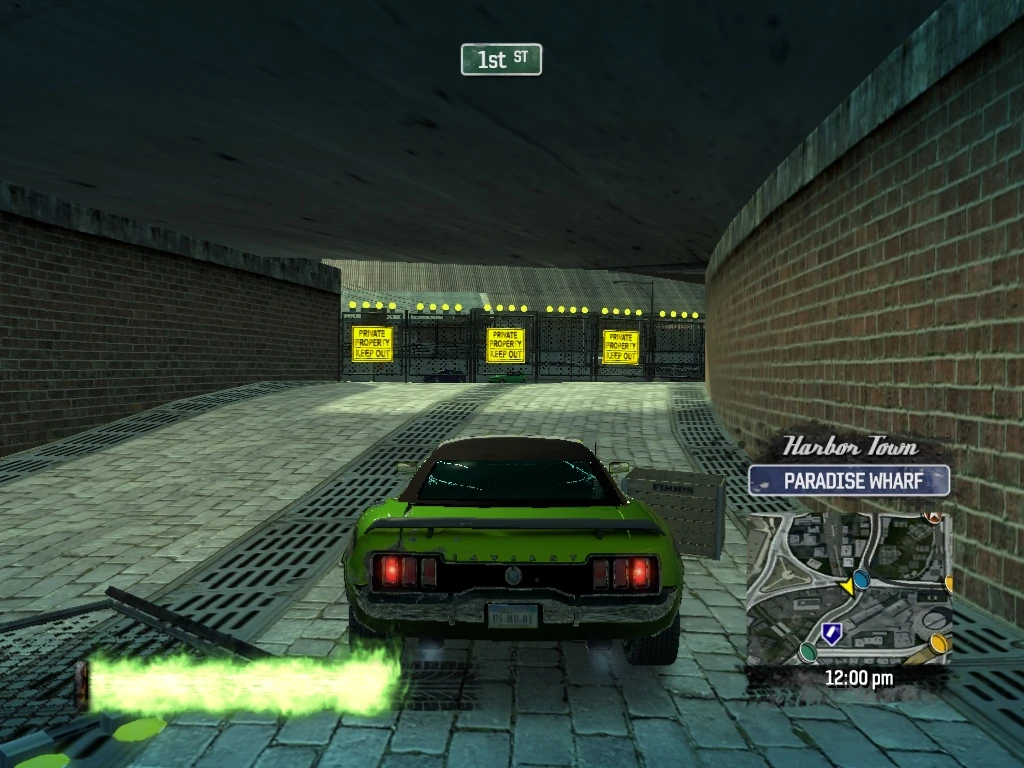
|
| 104 | Harbor Town Paradise Wharf |
Knock down Smash Gate 104, then continue west on 1st Street, merging right toward Lambert Parkway. | 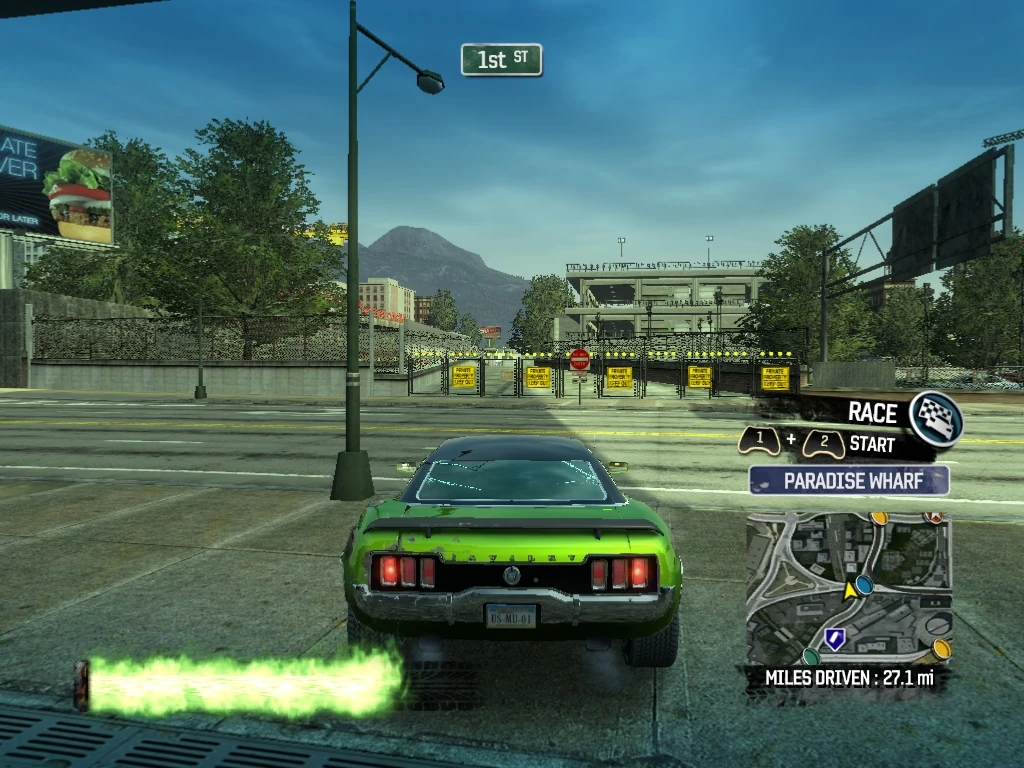
|
| 105 | Harbor Town Park Vale |
Do not actually turn onto Lambert Parkway. Just after the triangular median, you will see Smash Gate 105 across Lambert Parkway on the left. Cut across Lambert and drive through the Smash Gate and follow the walkway. | 
|
| 106 | Harbor Town Park Vale |
Drive through Smash Gate 106 at the other end of the walkway, just before 2nd Street. | 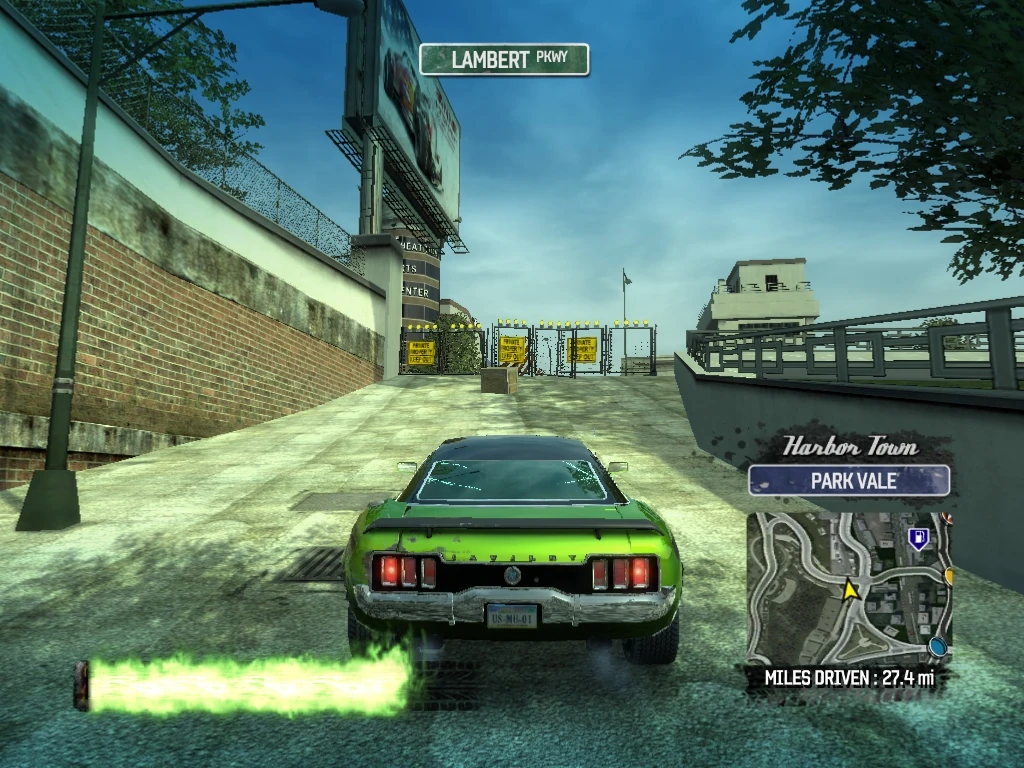
|
| 107 | Harbor Town Park Vale |
Cross over 2nd Street, and drive through Smash Gate 107, just east of the Theatrical Arts Center. | 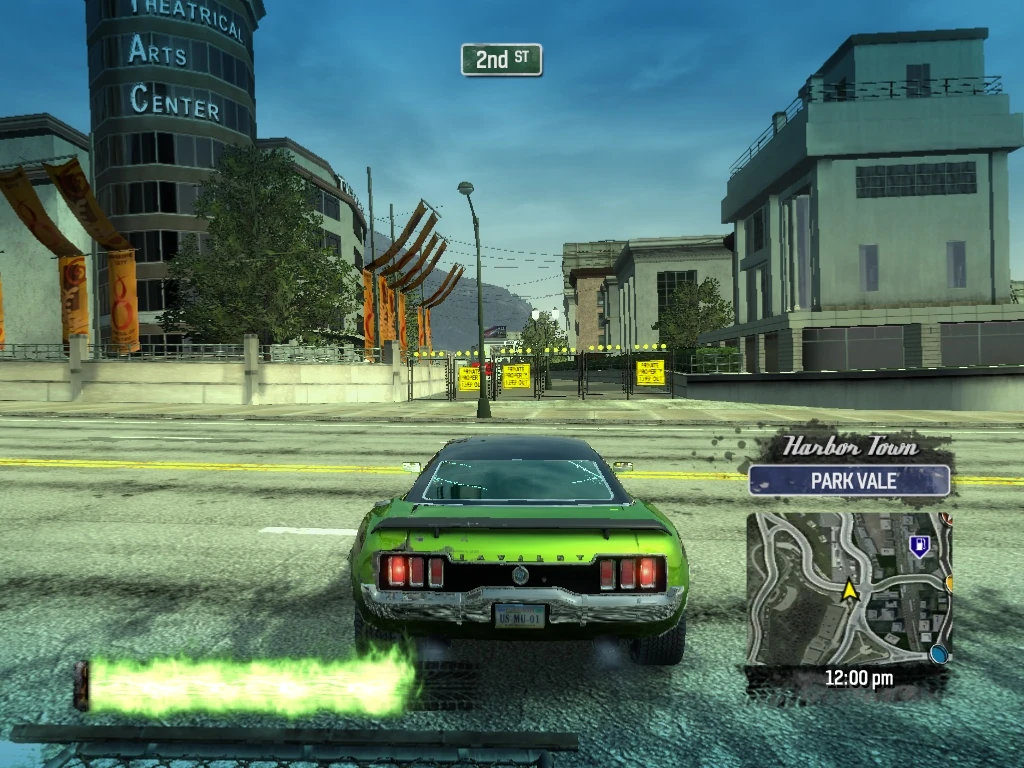
|
| 108 | Harbor Town Park Vale |
Follow the walkway (leads on the left to a billboard smash), but stay to the right and you will drive through Smash Gate 108 before exiting onto Lambert Parkway. Turn right (south) on Lambert Parkway, and then right (west) on 2nd Street. | 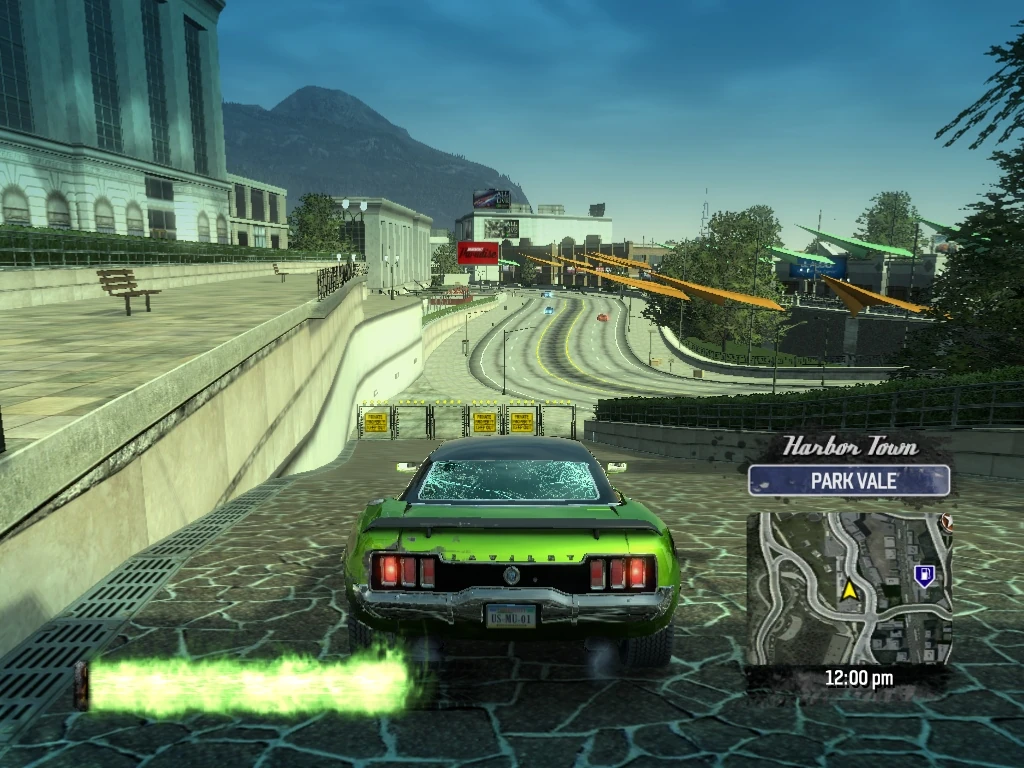
|
| 109 | Harbor Town Park Vale |
Smash Gate 109 is just west of Smash Gate 106, on the left across the street from the Theatrical Arts Center. Knock down Smash Gate 109, then head west on 2nd Street again. (Smash Gate 109 is a bit deceptive in that it does not span the entire opening, so it will look like you have already knocked one segment down when in reality, you have not.) | 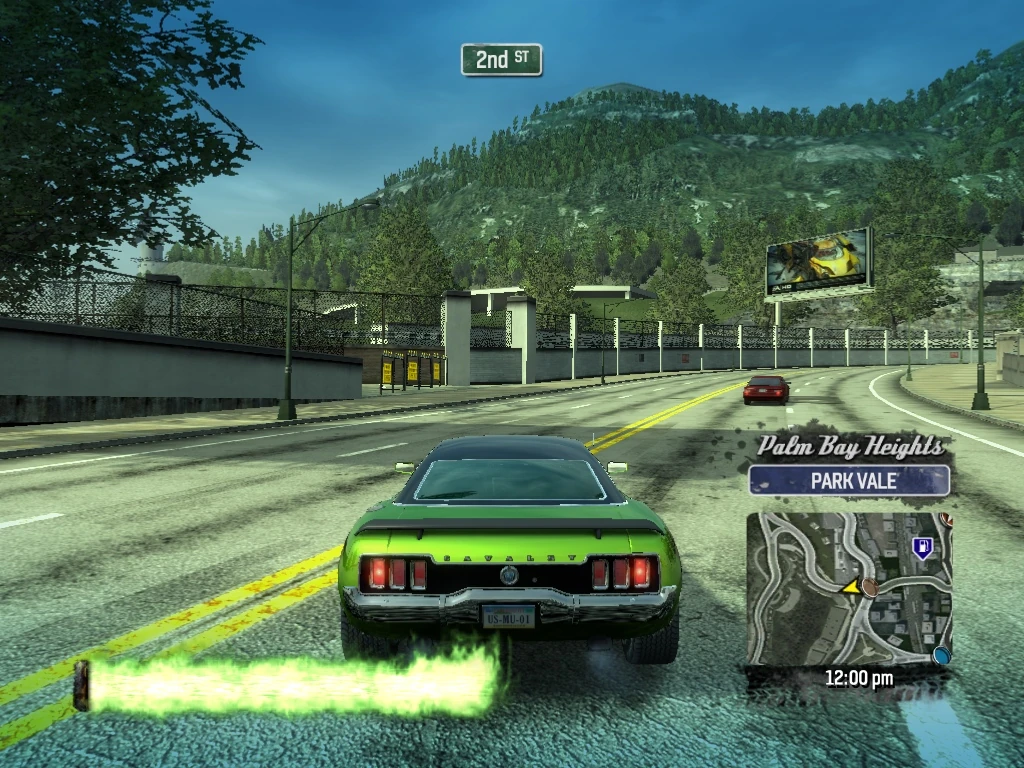
|
| 110 | Harbor Town Park Vale |
As 2nd Street turns toward the north, you will see and drive through Smash Gate 110 on the right. | 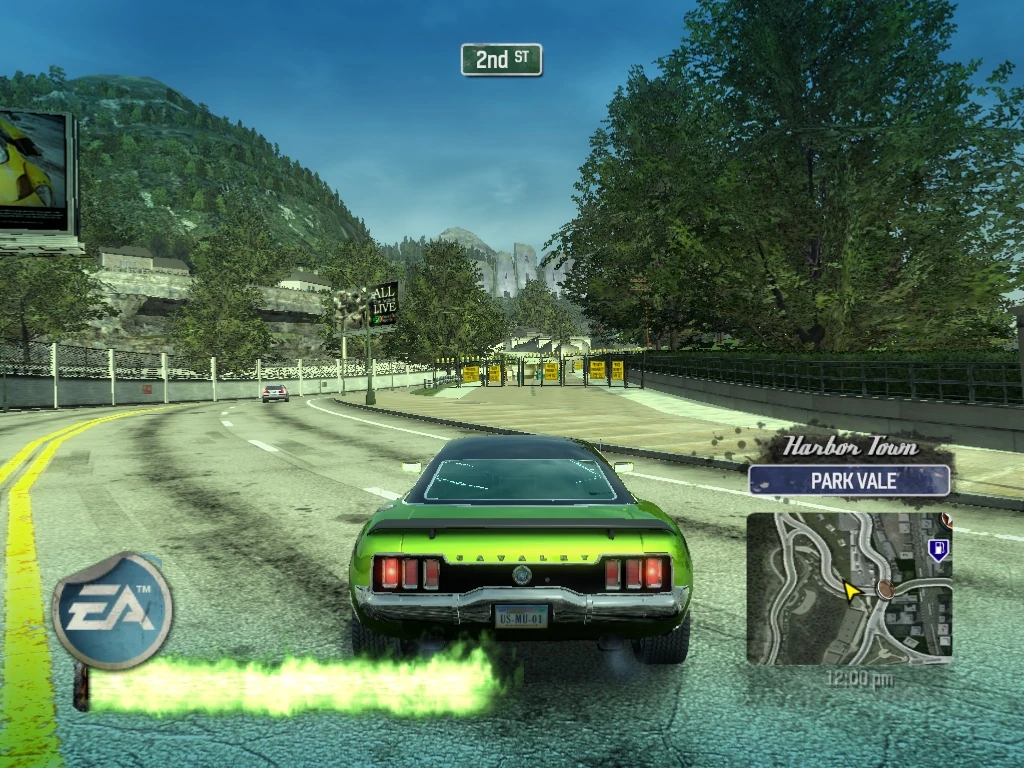
|
| 111 | Harbor Town Park Vale |
Drive through Smash Gate 111 where the sidewalk re-joins the road. | 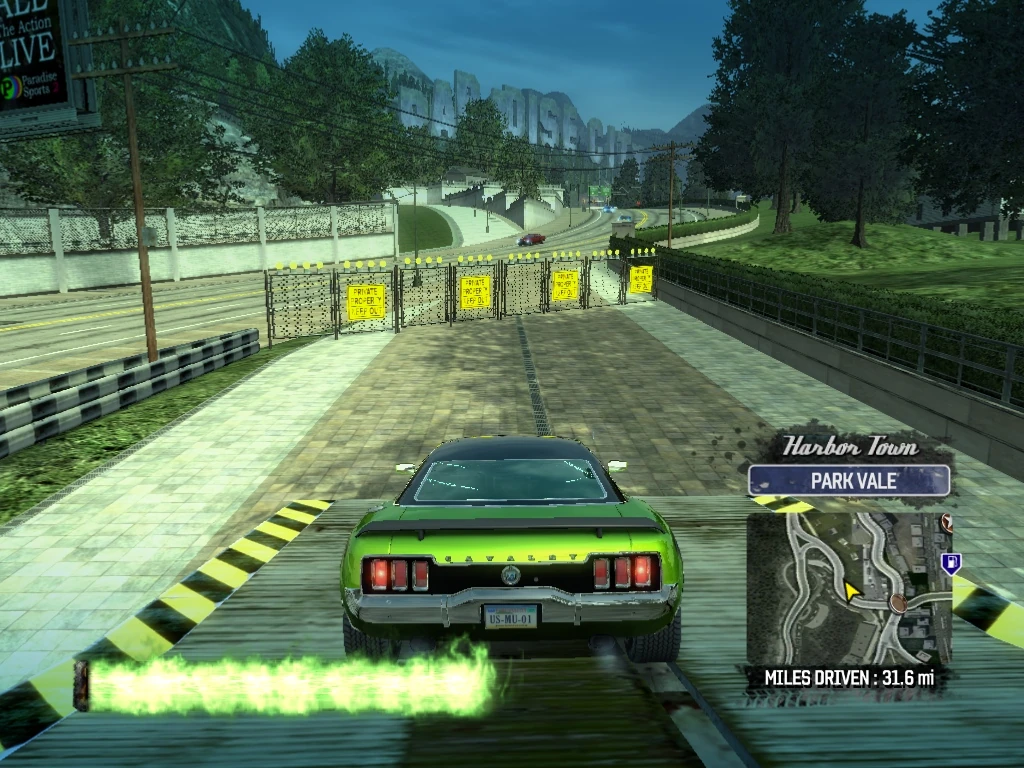
|
| 112 | Harbor Town Park Vale |
Continue north on 2nd street and Smash Gate 112 is on the right just before the intersection of Hubbard Avenue, at the entrance to a covered terrace. Drive through it and under the terrace. | 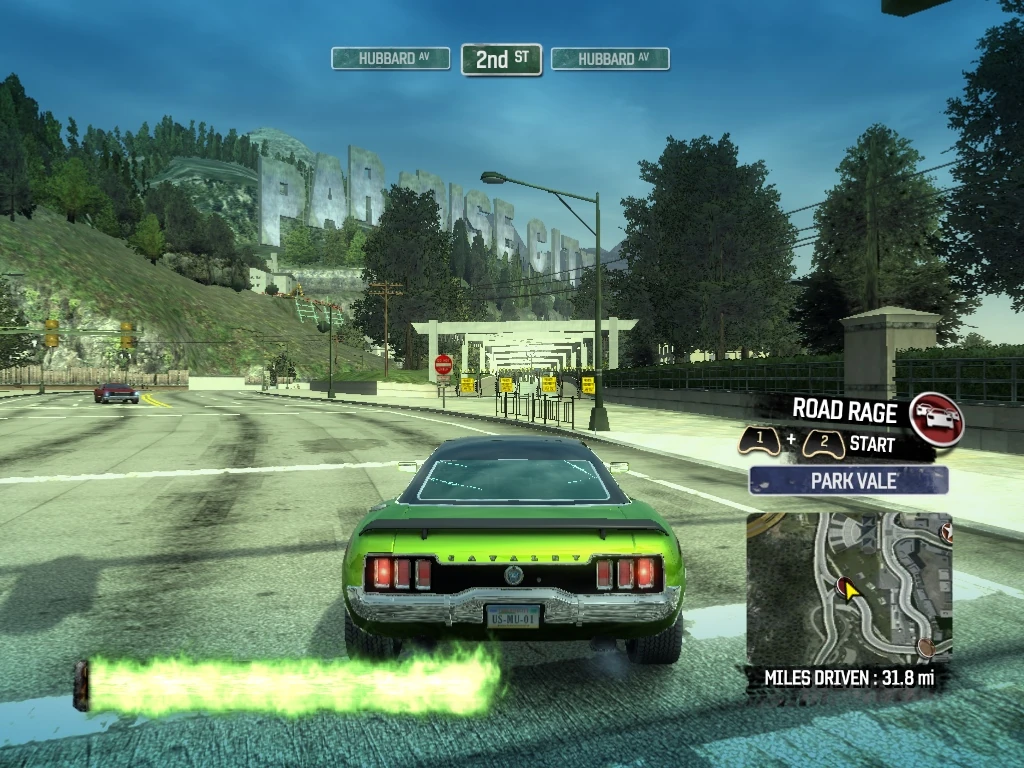
|
| 113 | Harbor Town Park Vale |
Drive through Smash Gate 113 at the north end of the terrace, then turn left, heading south down Hubbard Avenue. | 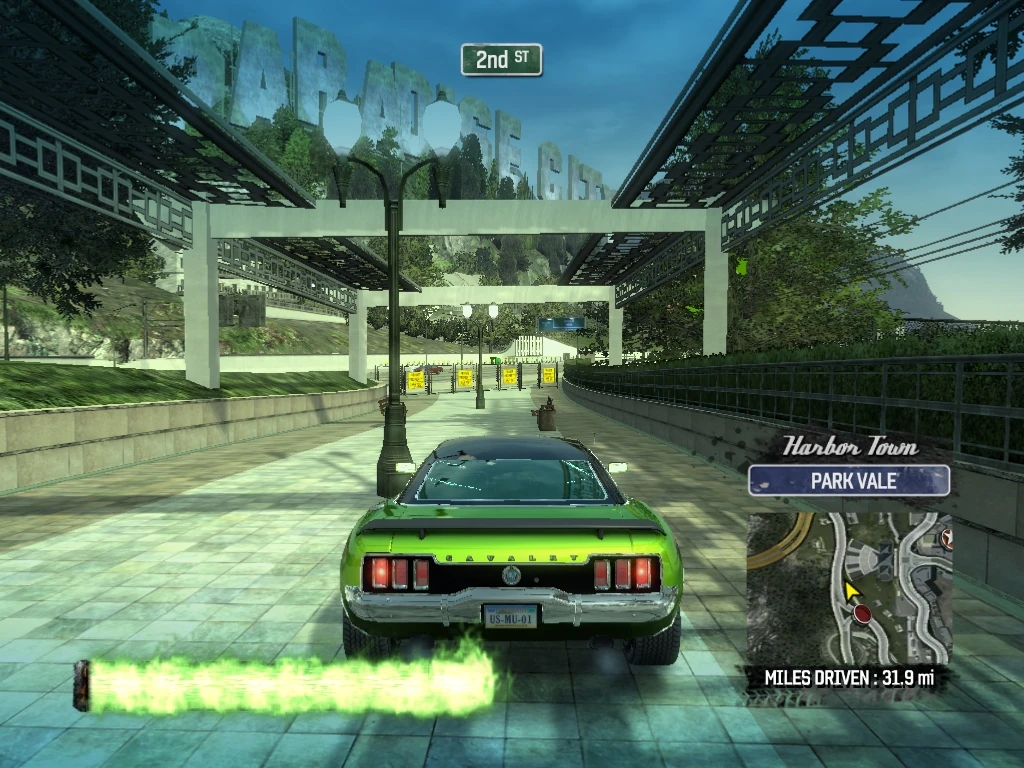
|
| 114 | Harbor Town Park Vale |
Follow Hubbard and just after you cross 2nd Street, you will see Smash Gate 114 ahead and across the street on the left. Drive forward, knock it down and back up. (You will see Smash Gate 115 on the right just before you knock down 114). | 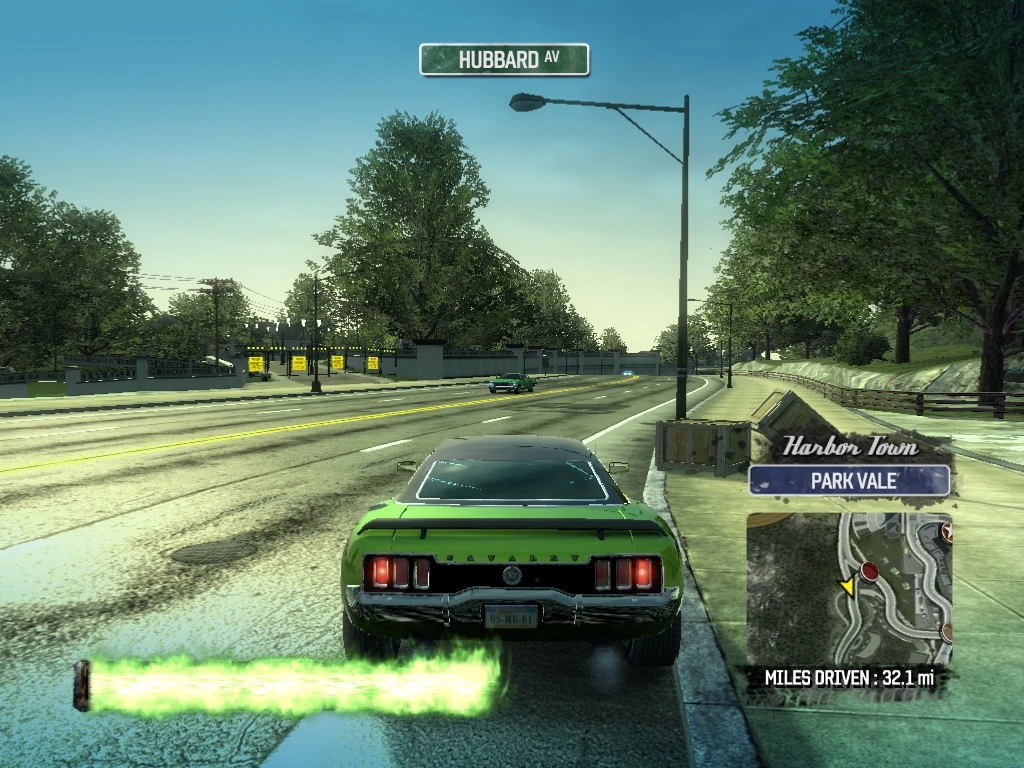
|
| 115 | Harbor Town Park Vale |
As you are backing up, Smash Gate 115 is almost directly behind you. Spin around and drive through it, following the paved pathway. | 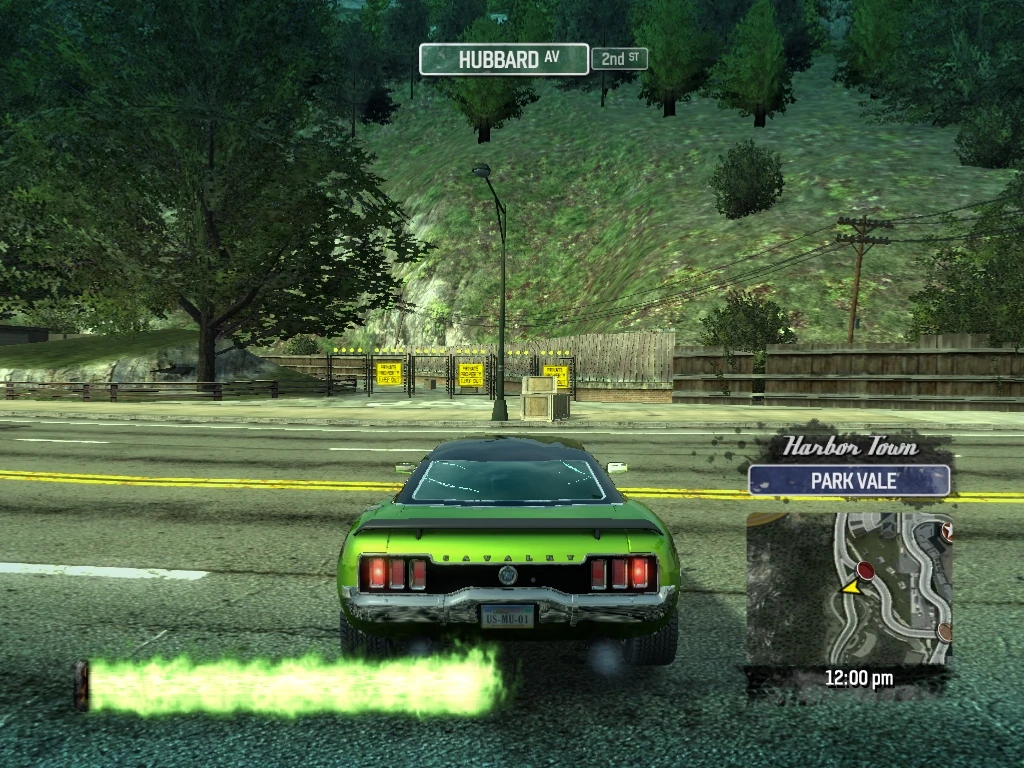
|
| 116 | Harbor Town Park Vale |
Drive through Smash Gate 116 at the other end of the paved parkway, exiting back onto Hubbard Avenue, headed south. | 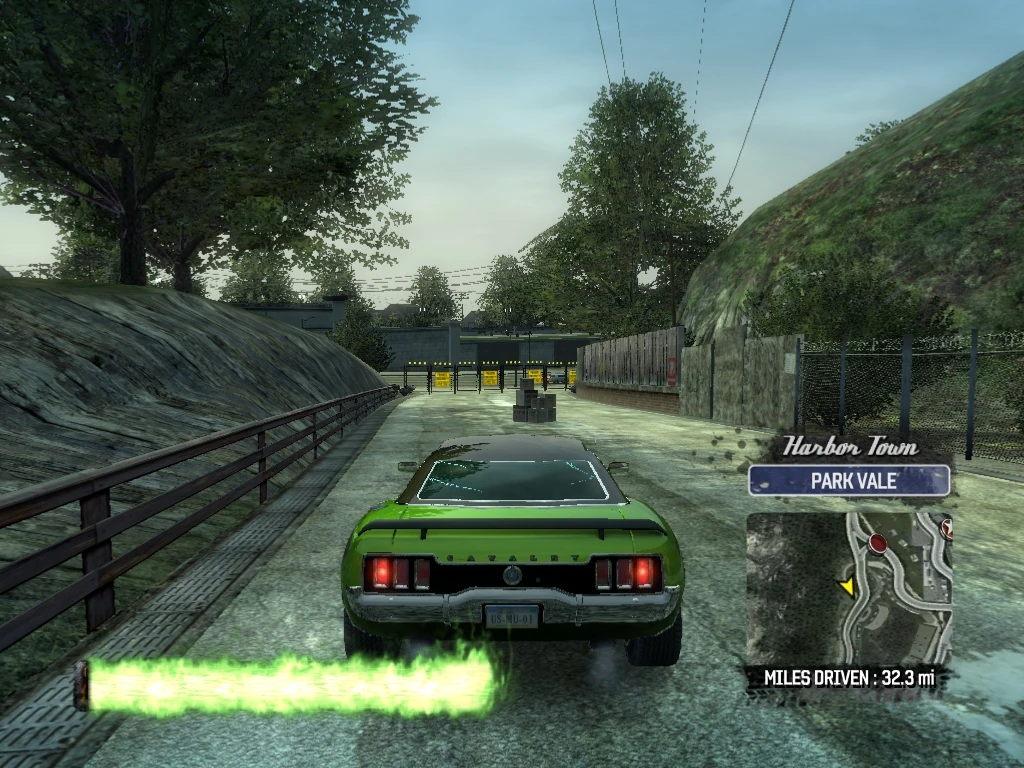
|
| 117 | Harbor Town Park Vale |
Smash Gate 117 is just ahead on the right on Hubbard and leads to another paved parkway and a billboard smash. Drive through the smash gate and follow the paved parkway. | 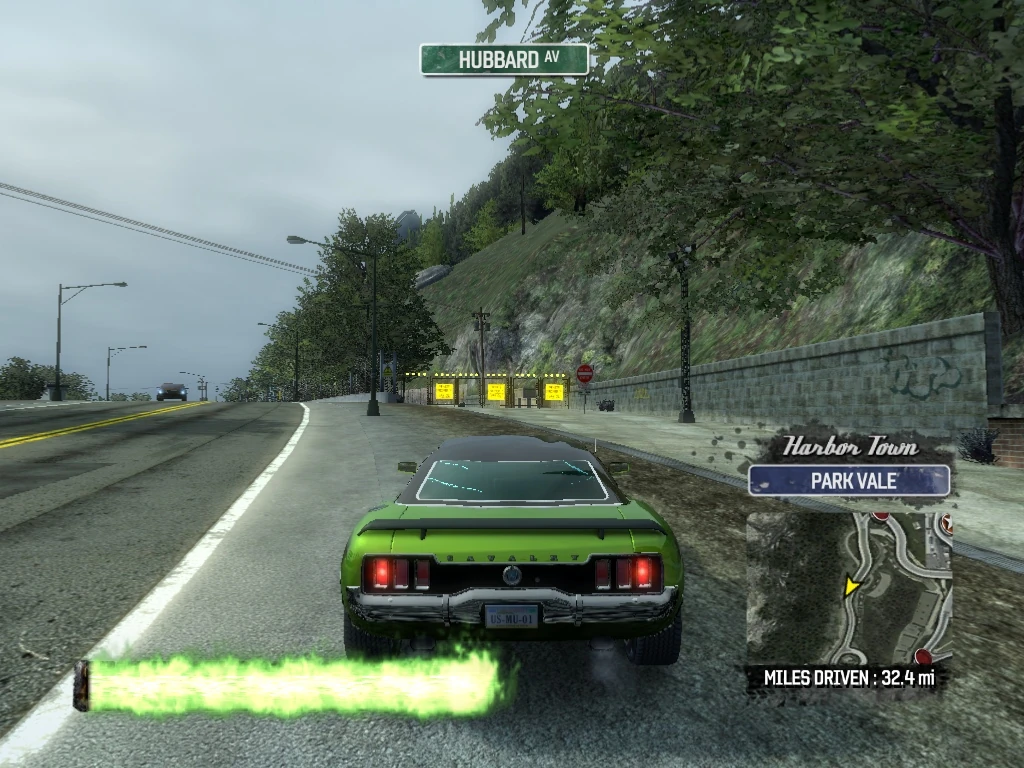
|
| 118 | Harbor Town Park Vale |
Drive through Smash Gate 118 after the billboard smash, exiting back onto Hubbard Avenue westbound. | 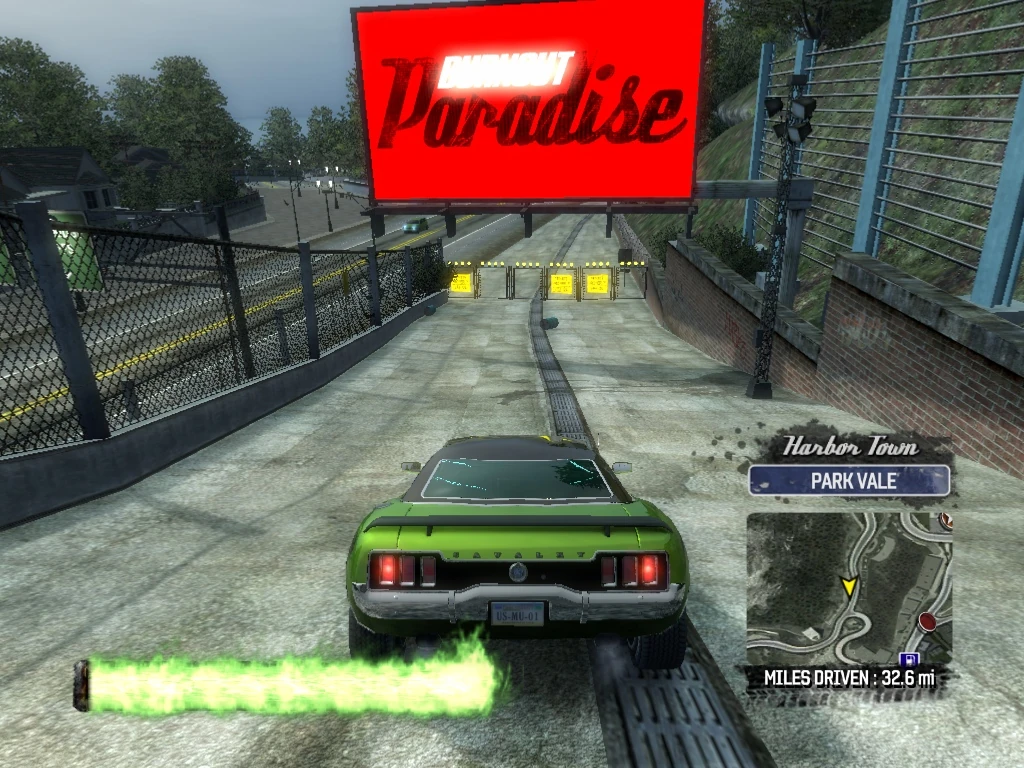
|
| 119 | Harbor Town Park Vale |
Drive through Smash Gate 119 which is just ahead on the right at the entrance to a tunnel. | 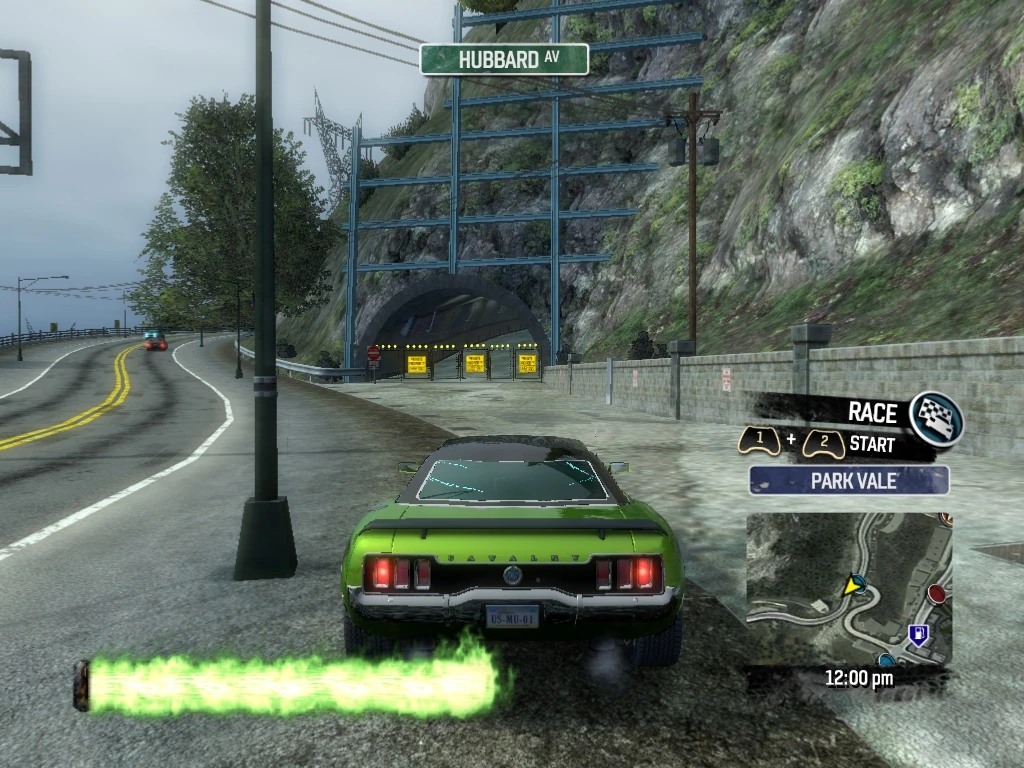
|
| 120 | Harbor Town Park Vale |
Once you enter the tunnel, the path divides, but you can take either the right or left path and they will re-join just before you drive through Smash Gate 120, again exiting onto Hubbard Avenue, westbound. | 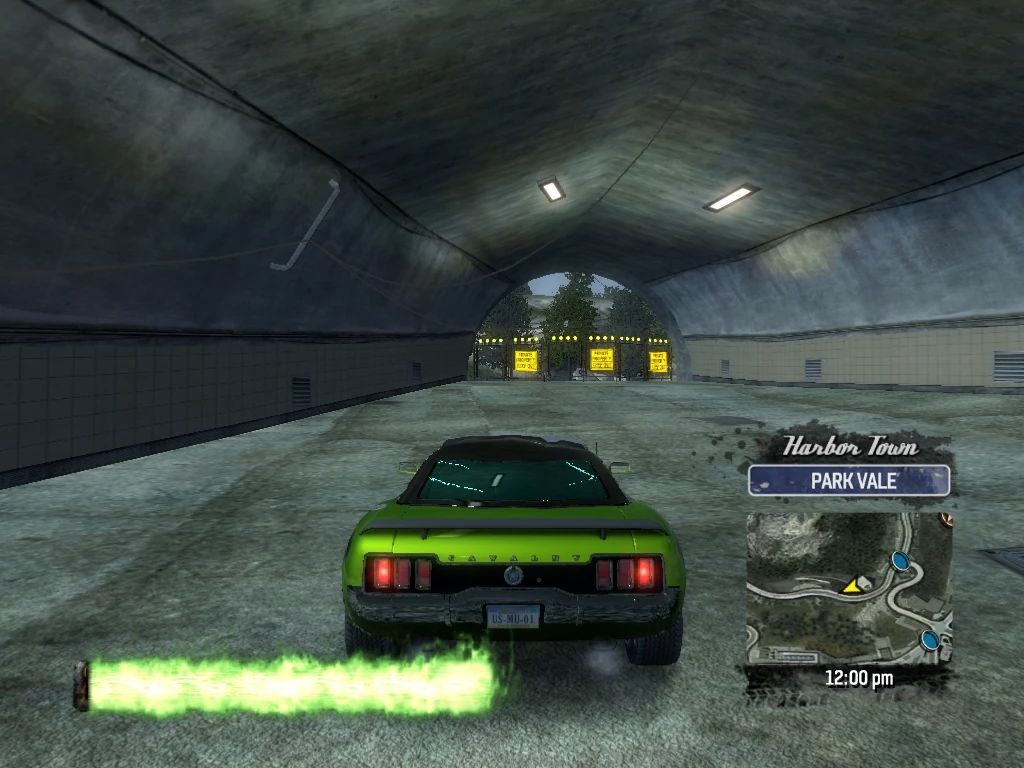
|
| 121 | Harbor Town Park Vale |
Drive through Smash Gate 121, which is just ahead on the right at the entrance to a dirt path. | 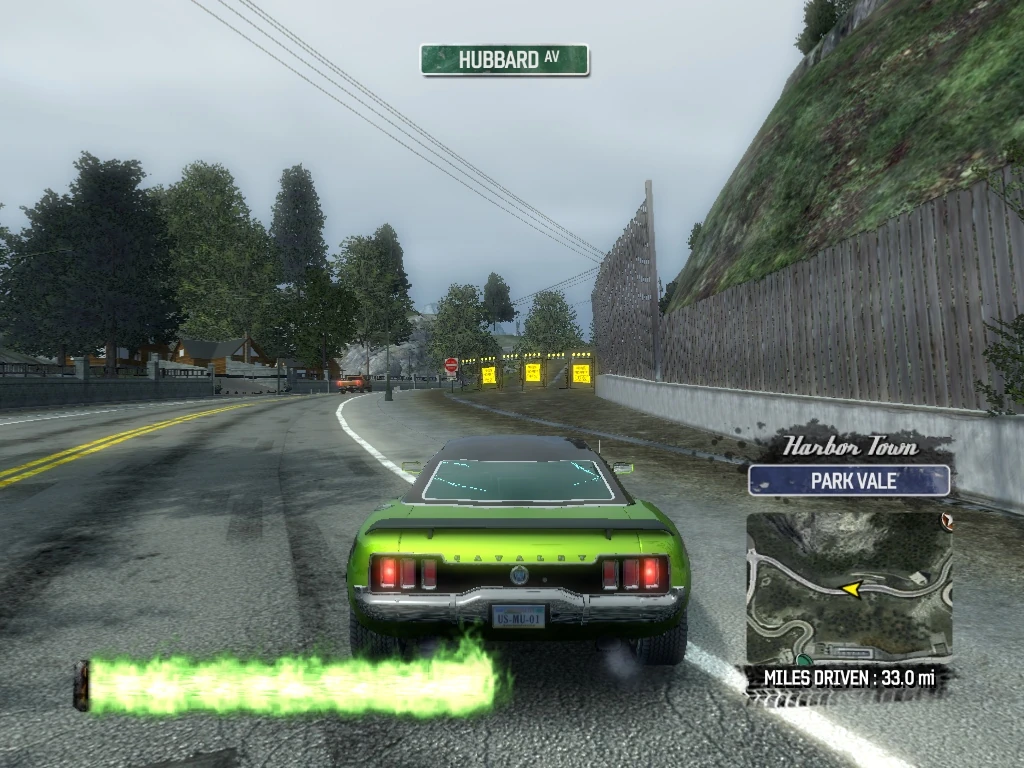
|
| 122 | Harbor Town Park Vale |
Follow the dirt path and drive through Smash Gate 122, at the other end, again re-joining Hubbard Avenue westbound. | 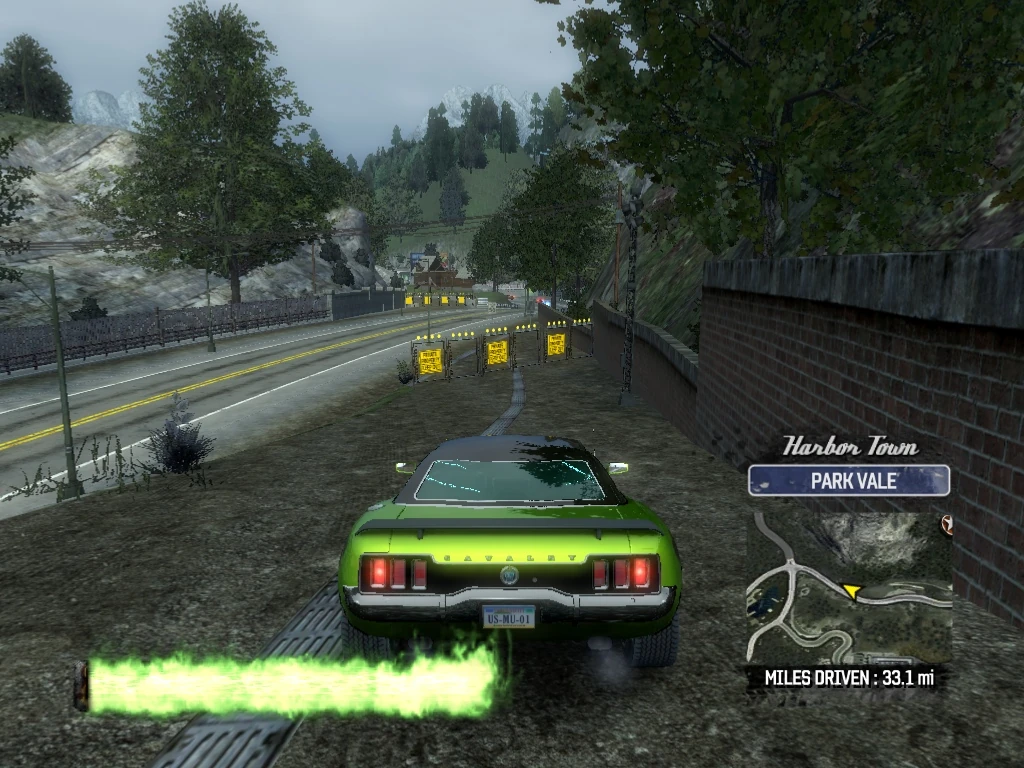
|
| 123 | Harbor Town Park Vale |
Smash Gate 123 is just across Hubbard avenue on the left and marks a dirt path that cuts the corner between Hubbard Avenue and S. Rouse Drive. Drive through the Smash Gate and follow the dirt path. | 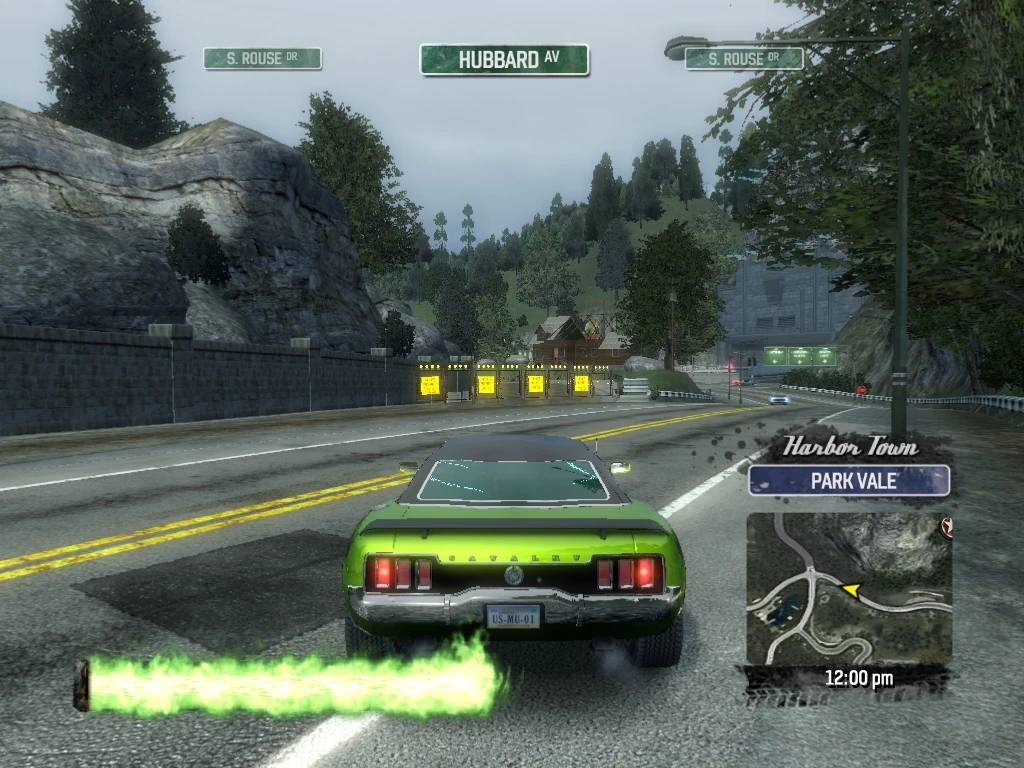
|
| 124 | Harbor Town Park Vale |
Drive through Smash Gate 124 at the other end of the dirt path, exiting onto S. Rouse Drive, southbound. | 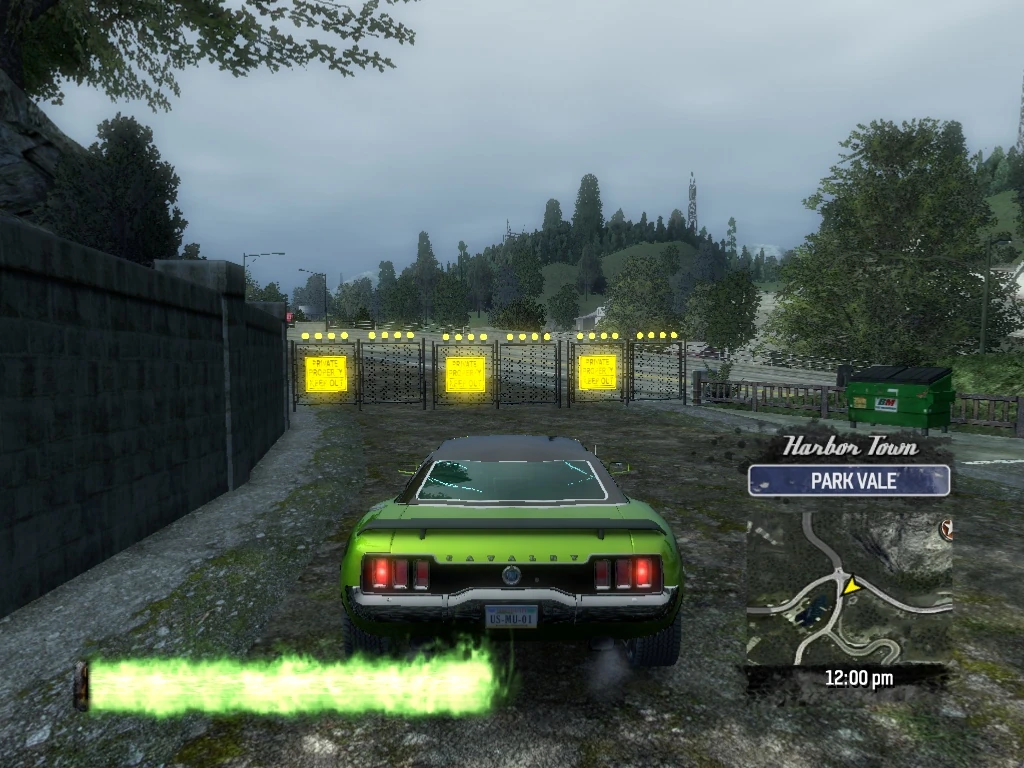
|
| 125 | Harbor Town Park Vale |
Smash Gate 125 is ahead on the left just before the Hall Avenue intersection. Drive through it and follow the paved path. | 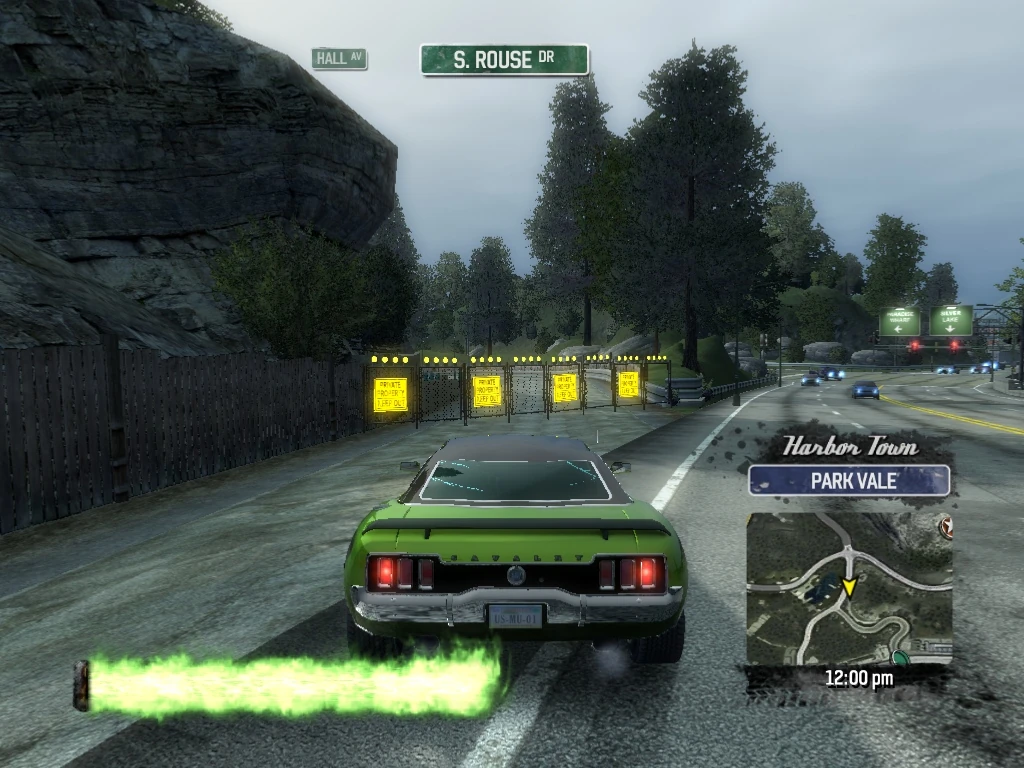
|
| 126 | Harbor Town Park Vale |
Drive through Smash Gate 126 at the other end of the paved path, exiting left (east) on Hall Avenue. | 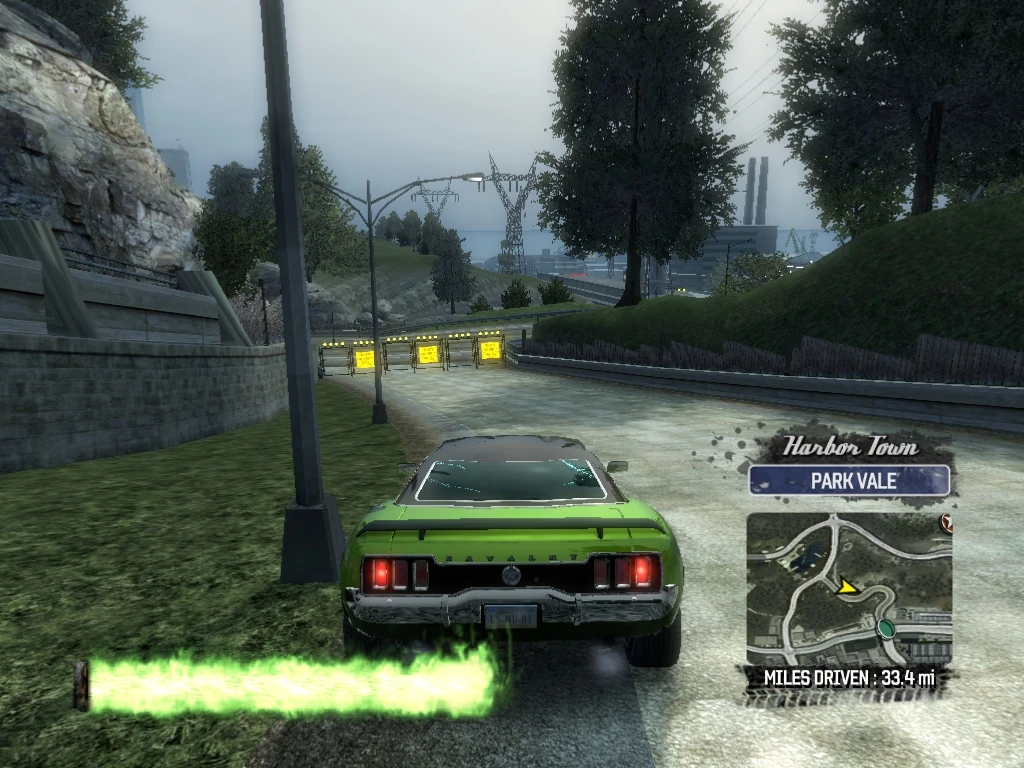
|
| 127 | Harbor Town Park Vale |
Just after the curve on Hall Avenue, drive through Smash Gate 127. (You will see the Nakumura Automotive Plant lights in the distance. After driving though the Smash Gate, you will drop down a couple of step ledges before landing on Lambert Parkway. | 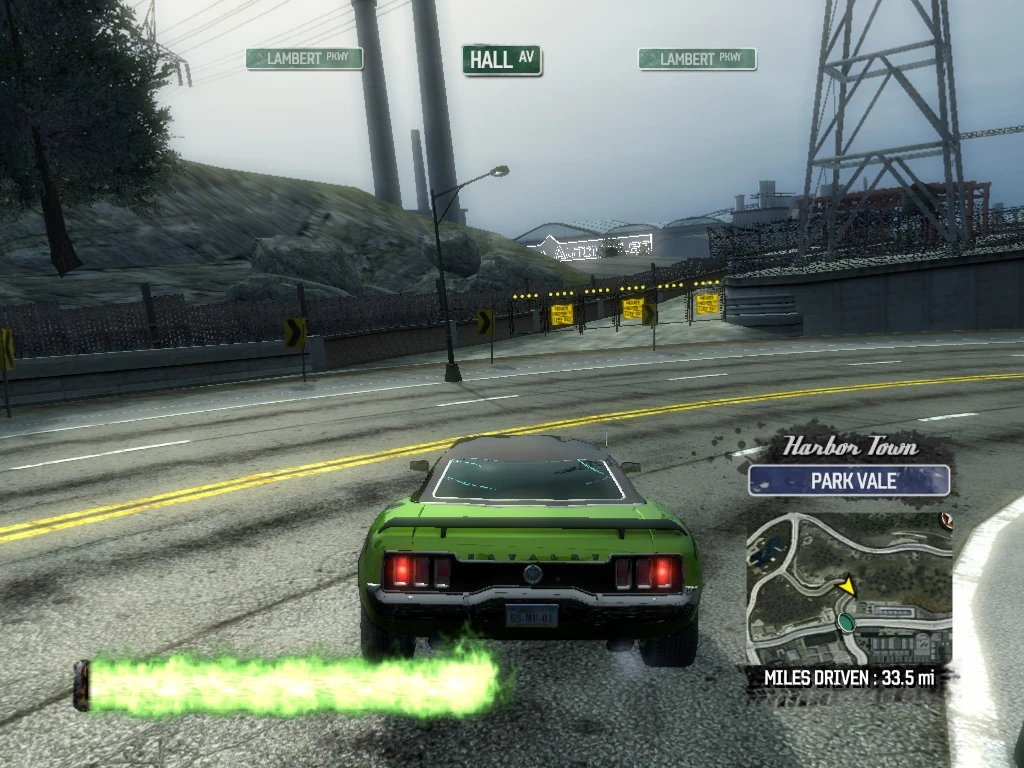
|
| 128 | Harbor Town Park Vale |
Drive a short ways left (east) on Lambert Parkway and turn right into the Nakumuara Automotive entrance. Smash Gate 128 is on your right and Smash Gate 129 is on your left. Drive through Smash Gate 128 and the easiest path is to back up, but if you feel adventurous, there is also a jump ramp back to the entranceway. (If you are having trouble finding it, the Smash Gate is north of the western spinning NA sign). | 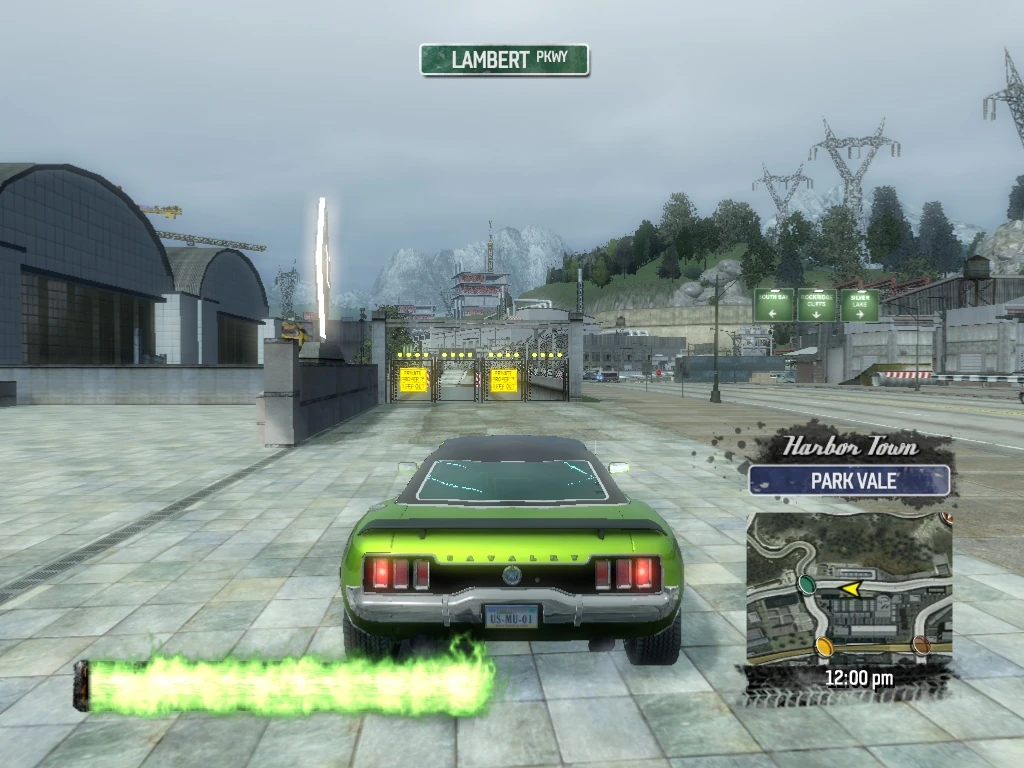
|
| 129 | Harbor Town Park Vale |
Drive through Smash Gate 129, which on the other side of the entranceway, south of the eastern spinning NA sign. | 
|
| 130 | Harbor Town Park Vale |
Follow the path and drop down several steps, driving through Smash Gate 130 at the entrance to a roofed structure. | 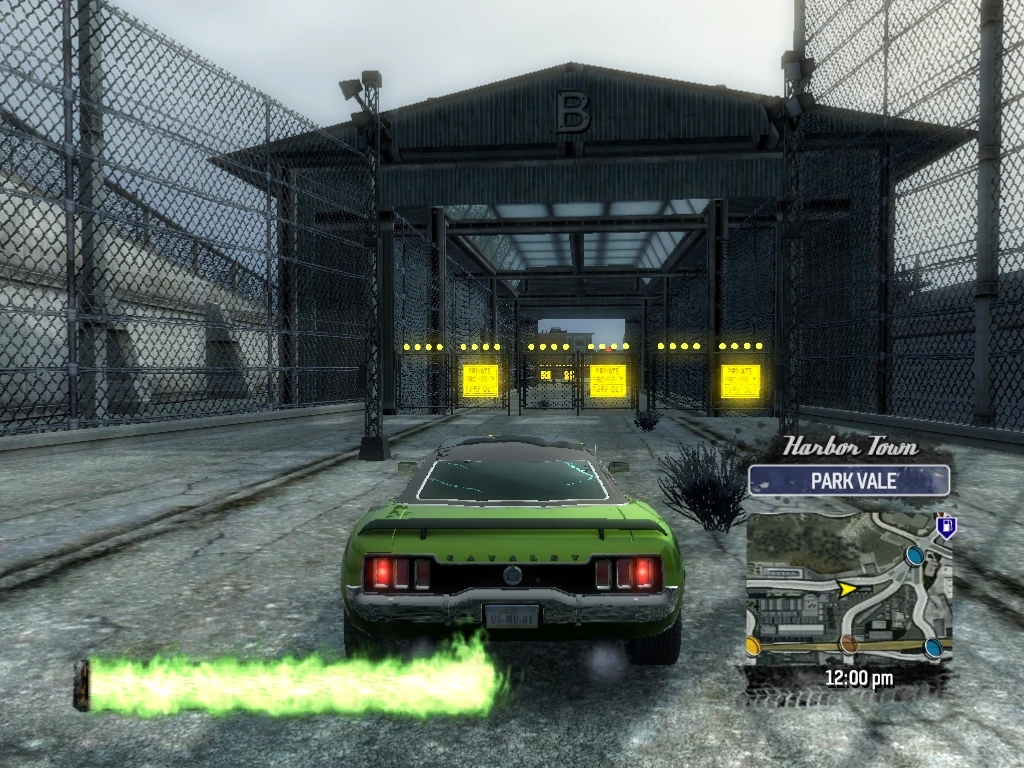
|
| 131 | Harbor Town Park Vale |
Drive though Smash Gate 131 at the exit of the roofed structure. | 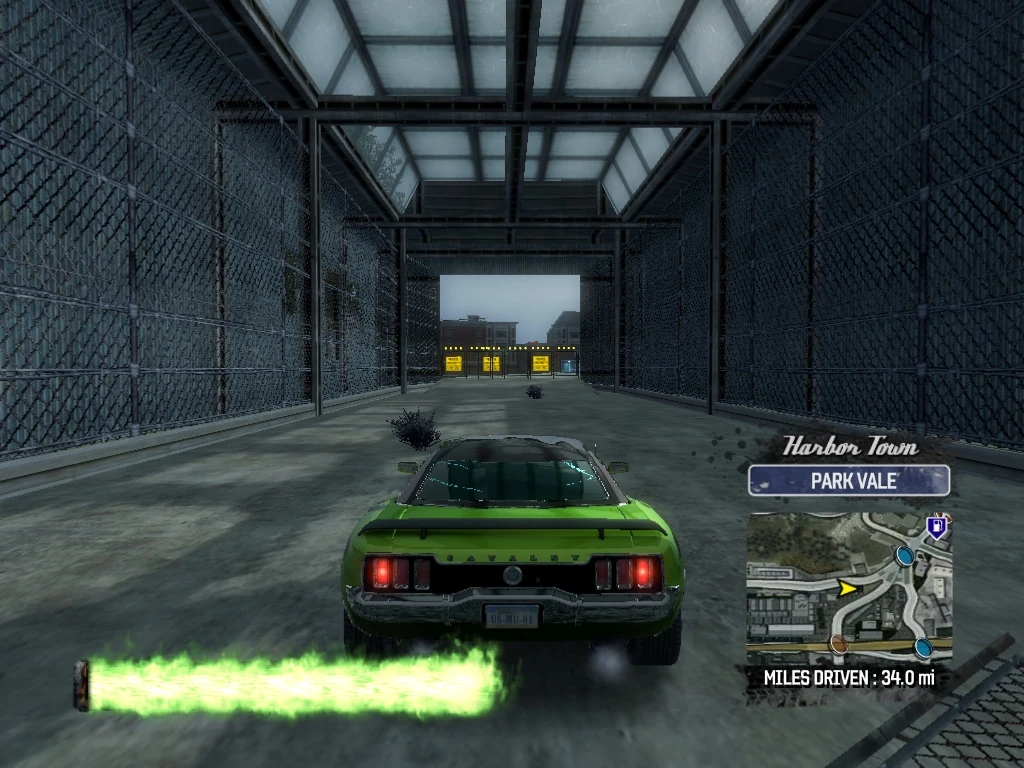
|
| 132 | Harbor Town Park Vale |
Smash Gates 132-134 are right after each other. Drive across the grassy knoll and across Parr Avenue and drive though Smash Gate 132. | 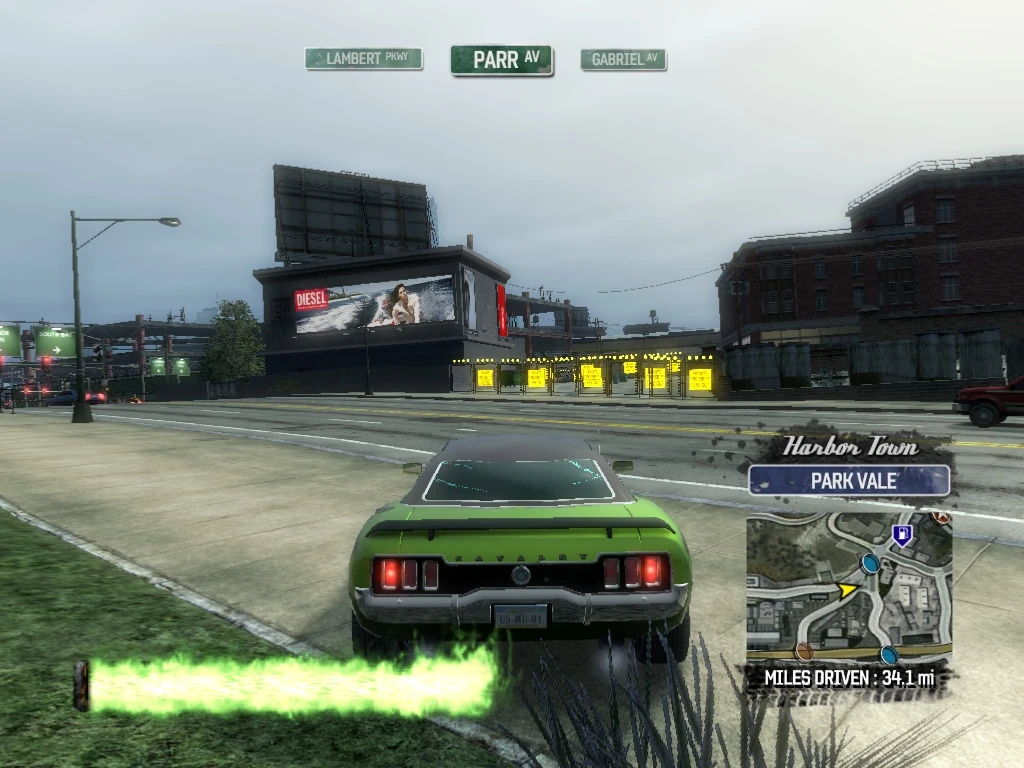
|
| 133 | Harbor Town Park Vale |
Continue between the buildings and drive through Smash Gate 133, exiting before Gabriel Avenue. | 
|
| 134 | Harbor Town Park Vale |
Cross over Gabriel Avenue and drive through Smash Gate 134. | 
|
| 135 | Harbor Town Park Vale |
Stay to the left on the path through the construction site and drive through Smash Gate 135, exiting onto Lambert Parkway, northbound. | 
|
| 136 | Harbor Town Park Vale |
Drive through Smash Gate 136 on the left just after the Gas Station, at the entrance to the wide sidewalk. | 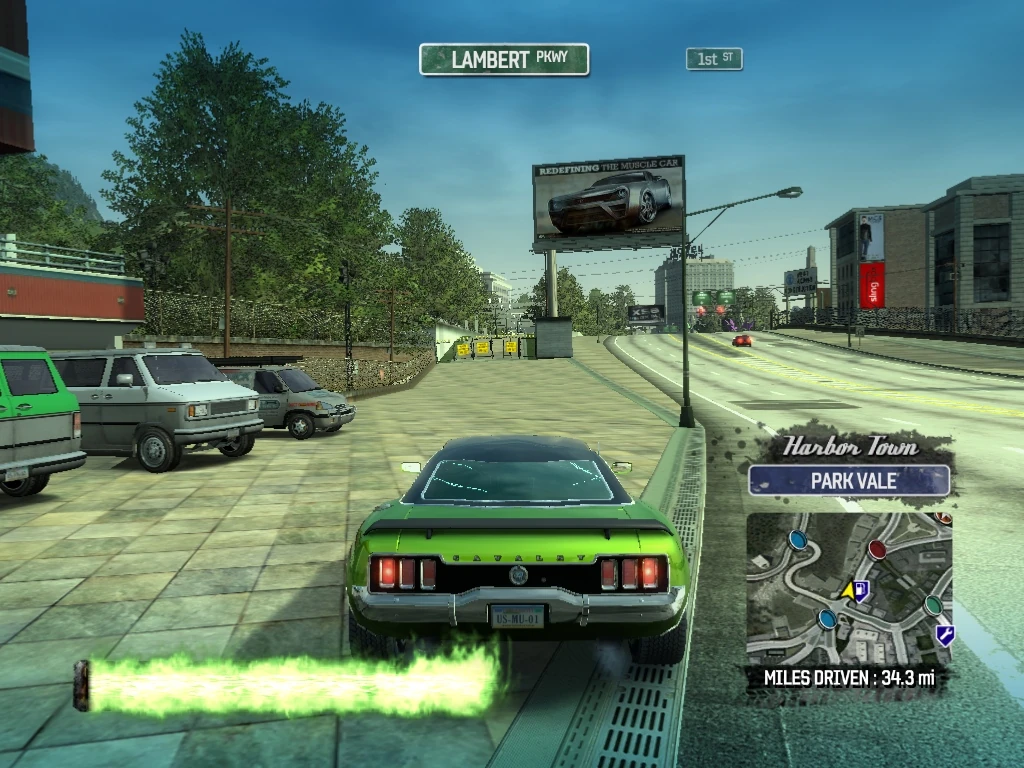
|
| 137 | Harbor Town Park Vale |
Follow the wide sidewalk, and just before the billboard, you can turn to the right and drive through Smash Gate 137, exiting back onto Lambert Parkway. | 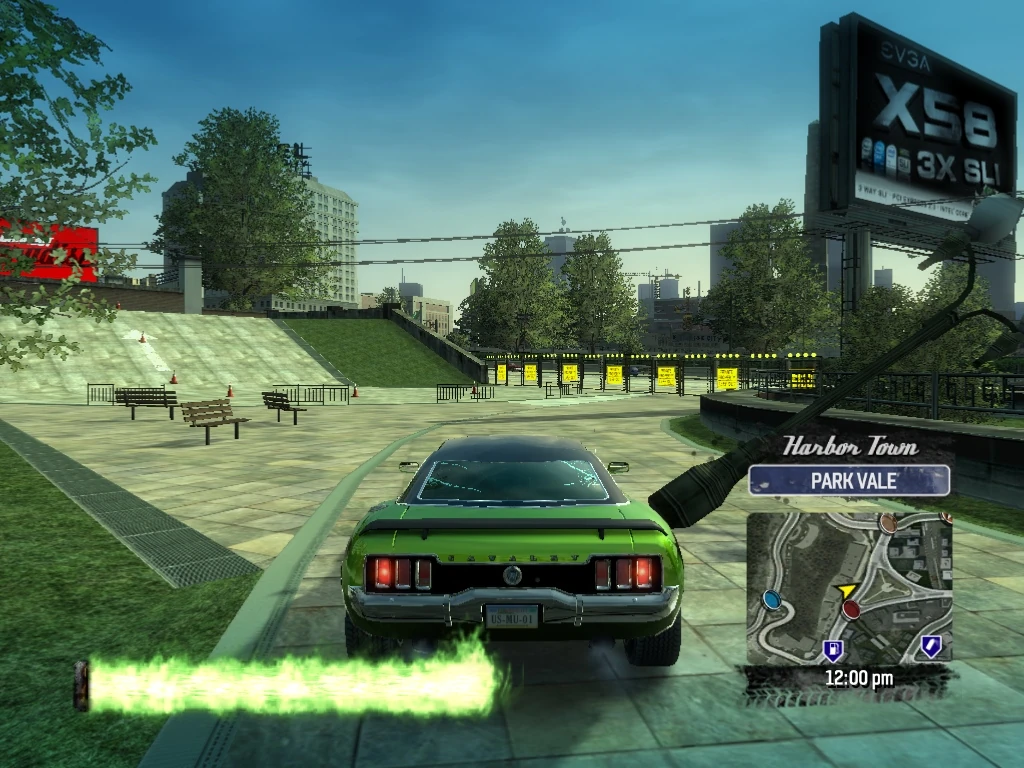
|
| 138 | Harbor Town Park Vale |
Turn right (south) on Lambert Parkway, and drive through Smash Gate 138, across the intersection with 1st Street, in the construction area. | 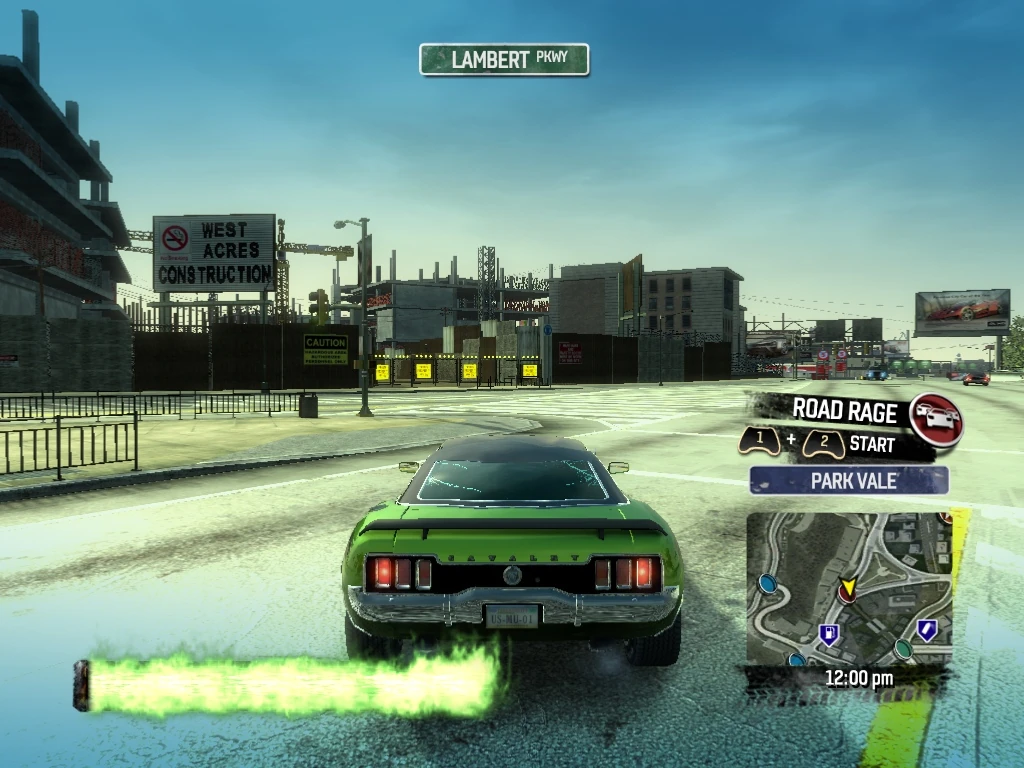
|
| 139 | Harbor Town Paradise Wharf |
Follow the path through the construction area and the path will turn from dirt to paved, then drive through Smash Gate 139, before completing a billboard smash and landing at the Harber Street/Hamilton Avenue intersection. | 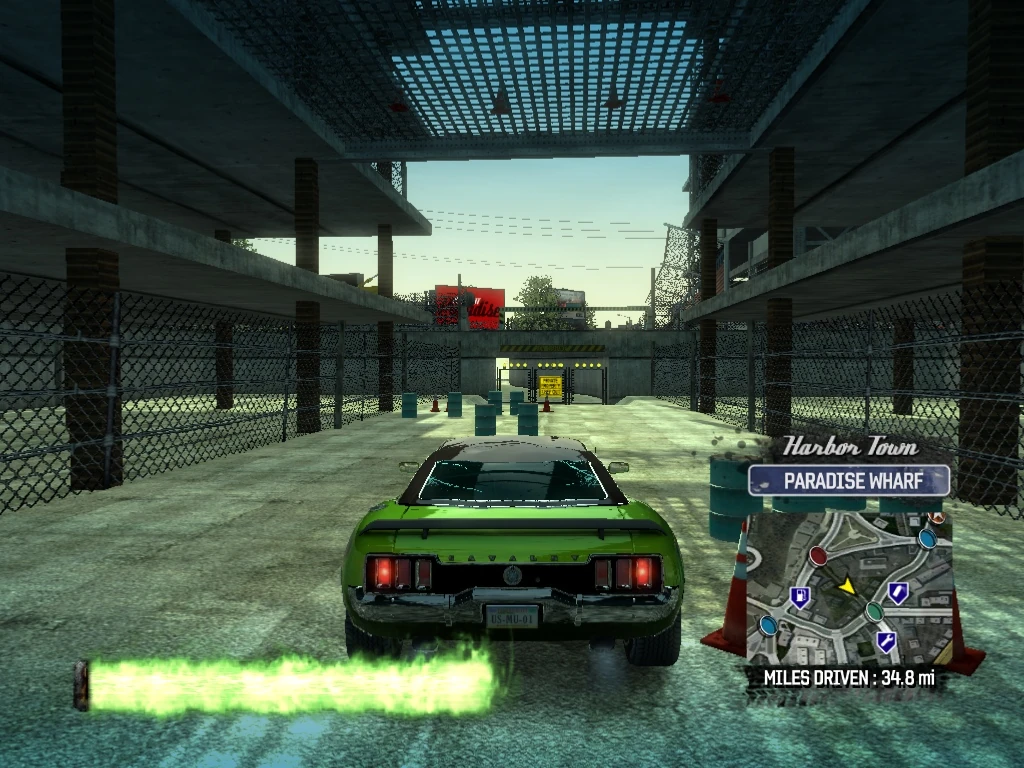
|
| 140 | Harbor Town Paradise Wharf |
Smash Gate 140 is just behind you to the right, turn around and knock it over, then continue west on Harber Street. | 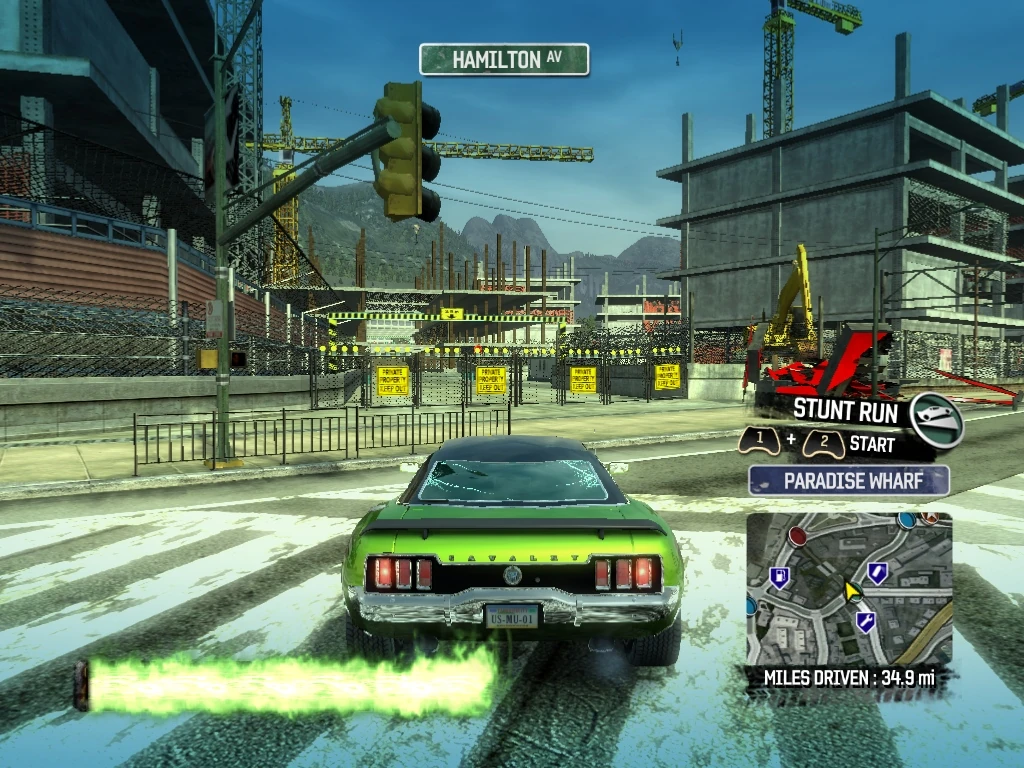
|
| 141 | Harbor Town Paradise Wharf |
Follow Harber Street past Warren Avenue and turn left (south) on Shepherd Avenue and then take the next right (west) on Manners avenue and turn right and drive through Smash Gate 141, at the entrance to the parking garage on Manners Avenue. Climb to the top of the garage. | 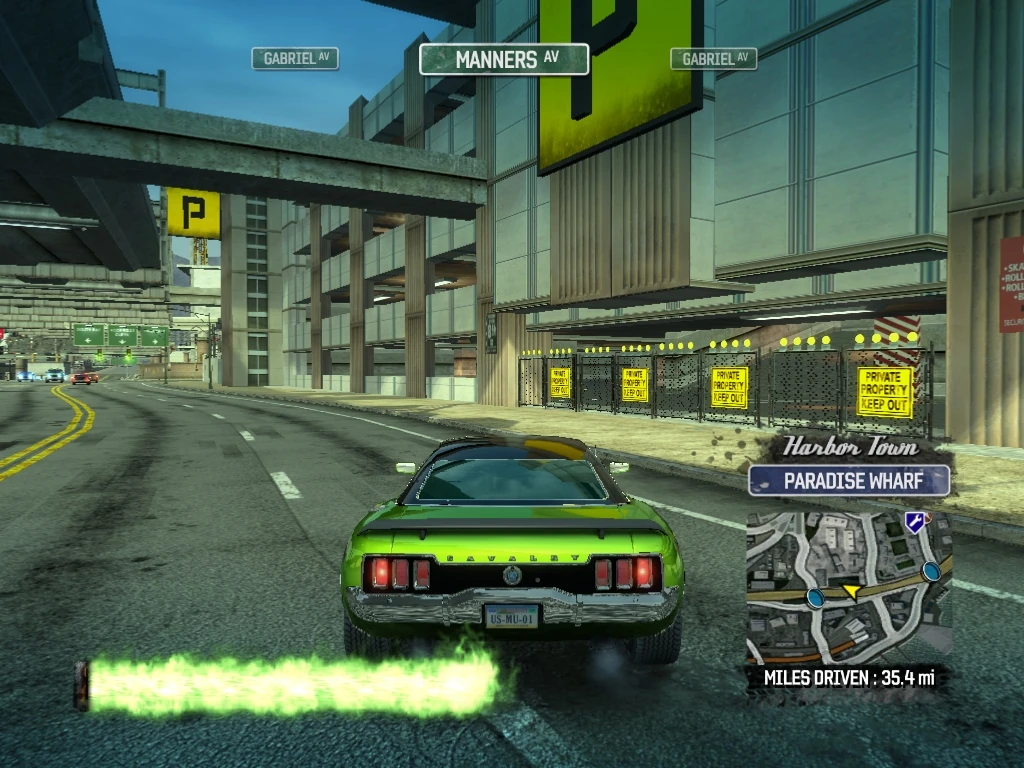
|
| 142 | Harbor Town Paradise Wharf |
Smash Gate 142 is at a ramp on the northwest corner of the Parking Garage roof. Drive through the gate with moderate boost and take some drops down, ending in a billboard smash if you want to. | 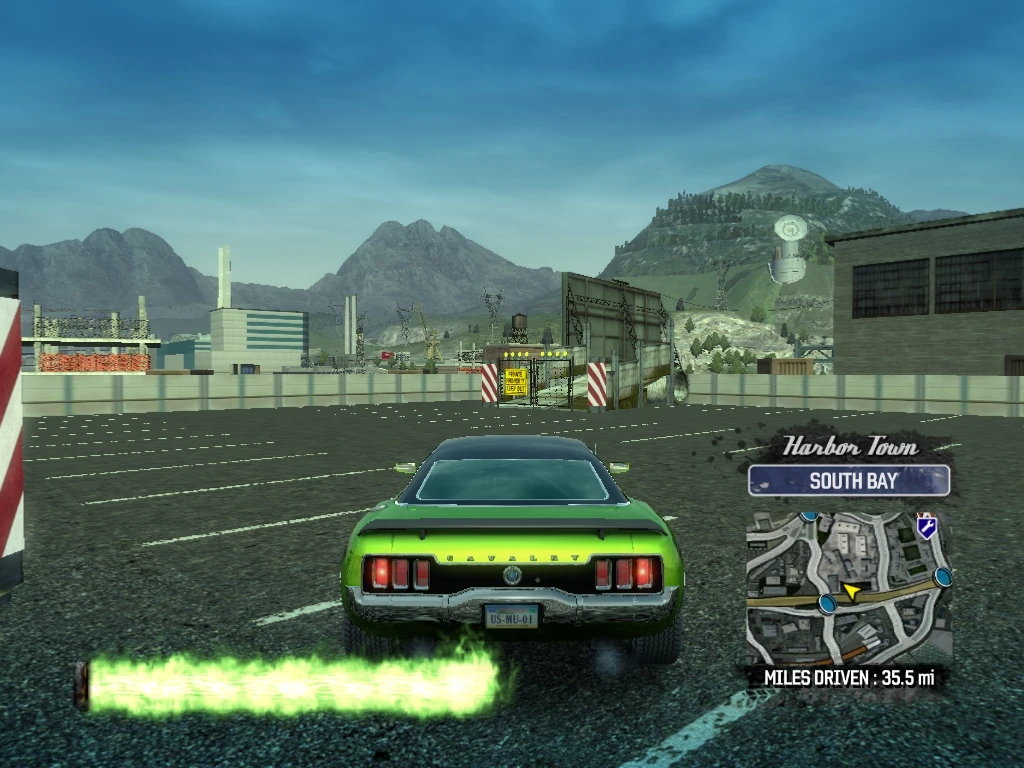
|
| 143 | Harbor Town South Bay |
Smash Gate 143 is directly ahead after the billboard smash in the dirt portion of the construction area. Knock it down and then back up. | 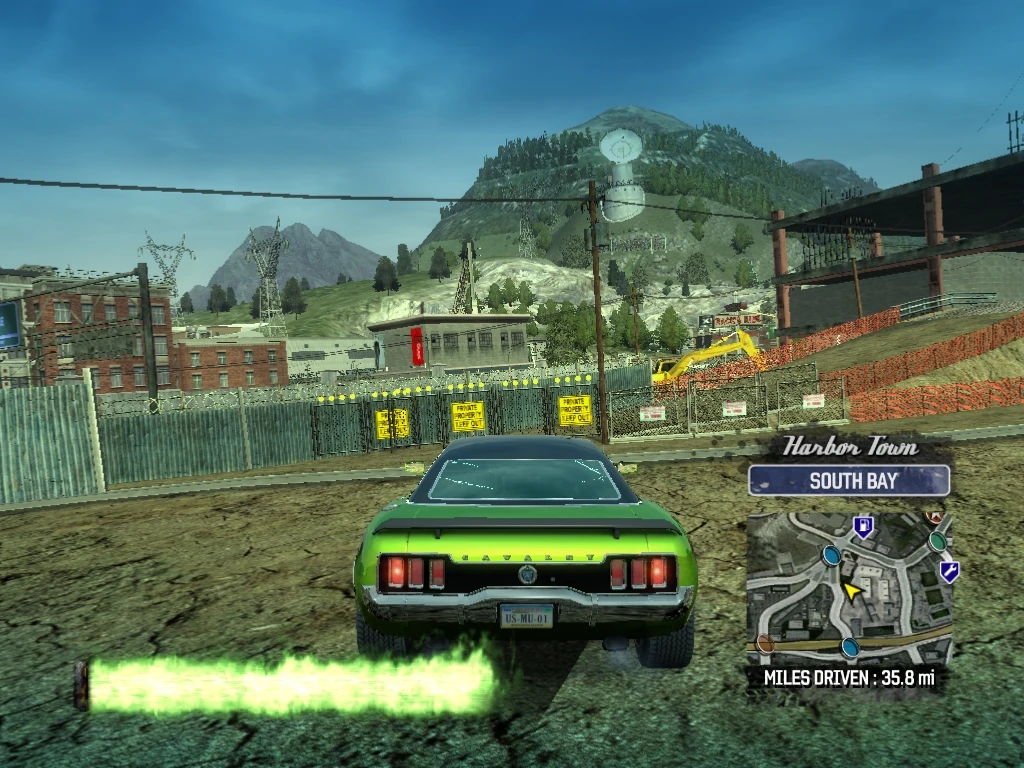
|
| 144 | Harbor Town South Bay |
Smash Gate 144 is just to the left exiting onto Gabriel Avenue. Knock it down also, and then proceed east along the dirt path through the construction area. | 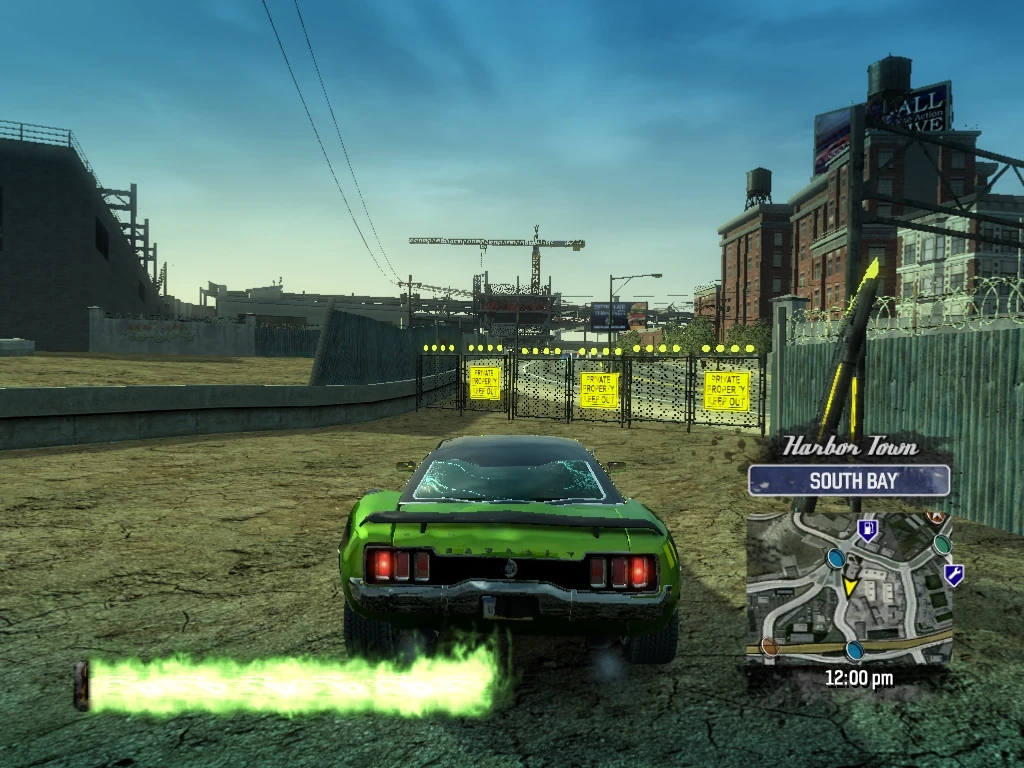
|
| 145 | Harbor Town Paradise Wharf |
Follow the dirt path to the right, and drive through Smash Gate 145, exiting onto Harber Street. Turn right on Harber Street and head east. | 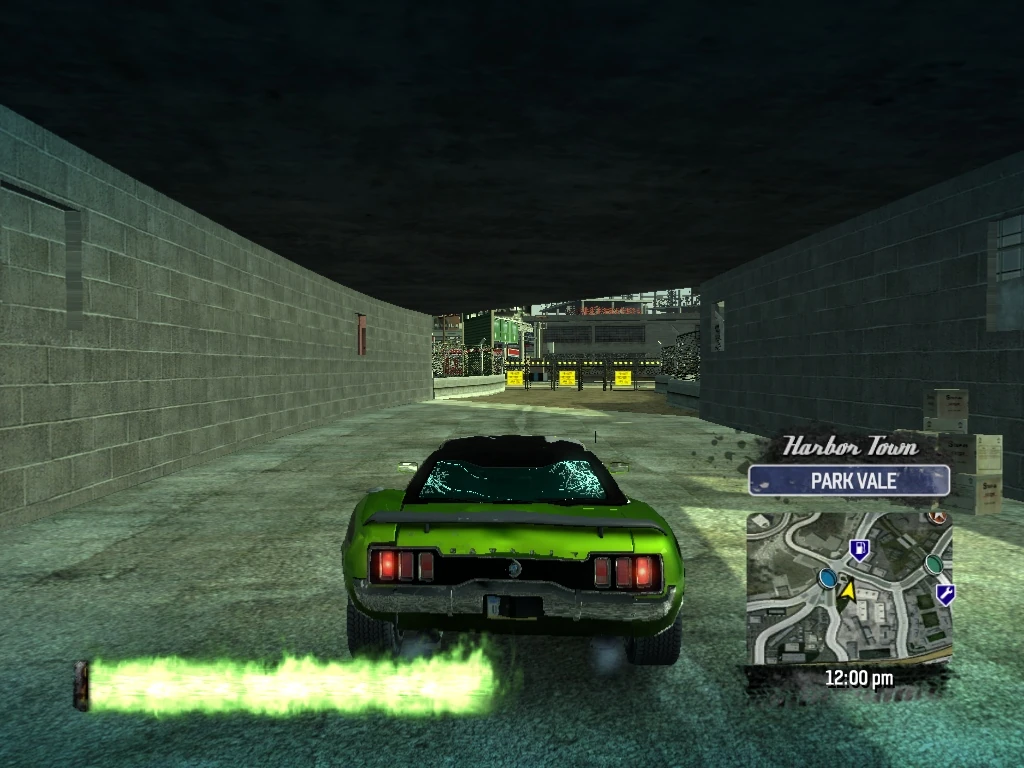
|
| 146 | Harbor Town Paradise Wharf |
Follow Harber Street past Shepherd Avenue and turn right (south) on Warren Avenue. Cross over Manners Avenue and onto the South Bay Expressway and drive through Smash Gate 146 on the left under an X58 billboard. | 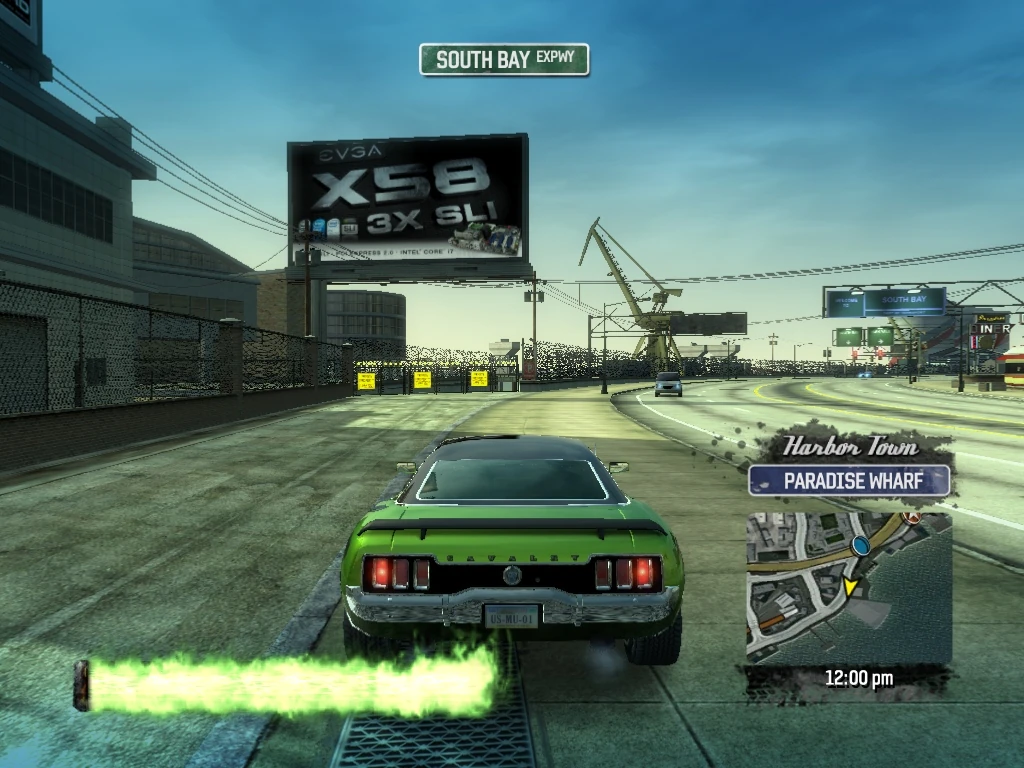
|
| 147 | Harbor Town South Bay |
Follow the dock area roads to the right past the Super Jump, and drive through Smash Gate 147. | 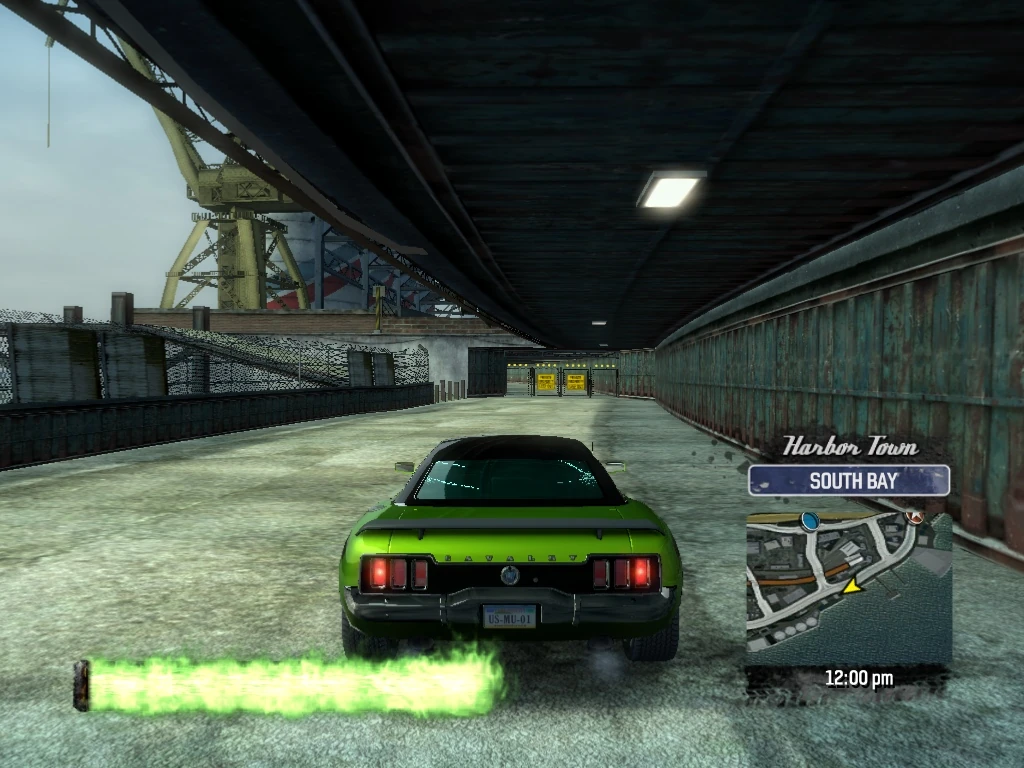
|
| 148 | Harbor Town South Bay |
Drive through Smash Gate 148, which is just west of Smash Gate 147. | 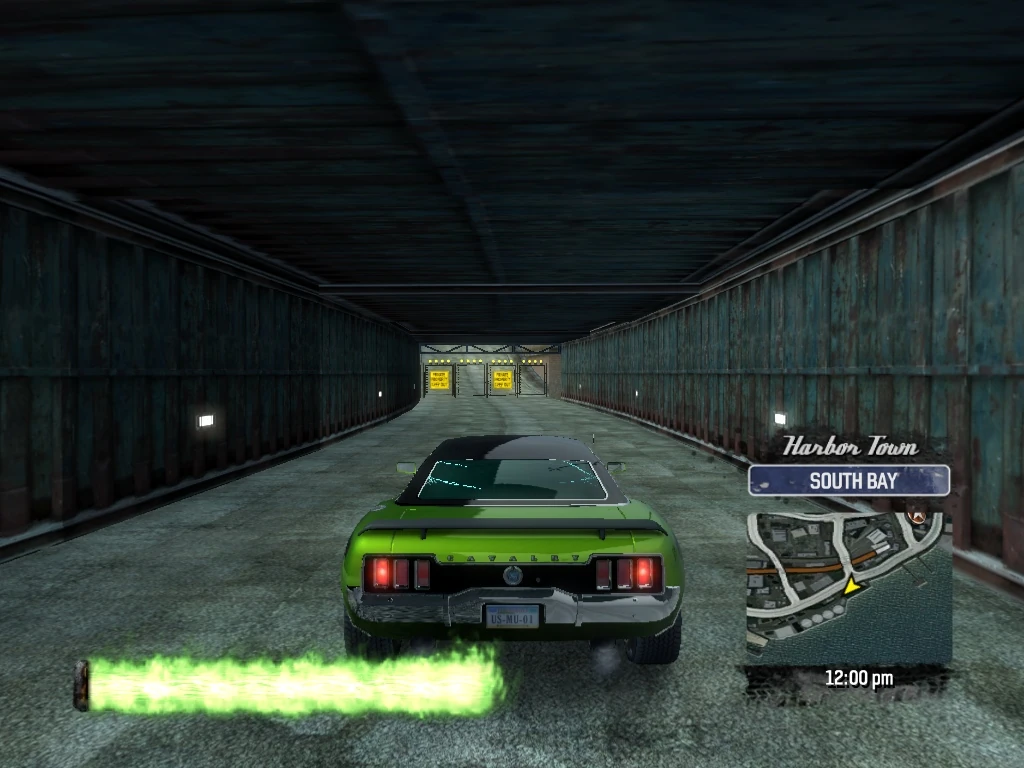
|
| 149 | Harbor Town South Bay |
Bear to the right and drive through Smash Gate 149, exiting onto South Bay Drive. | 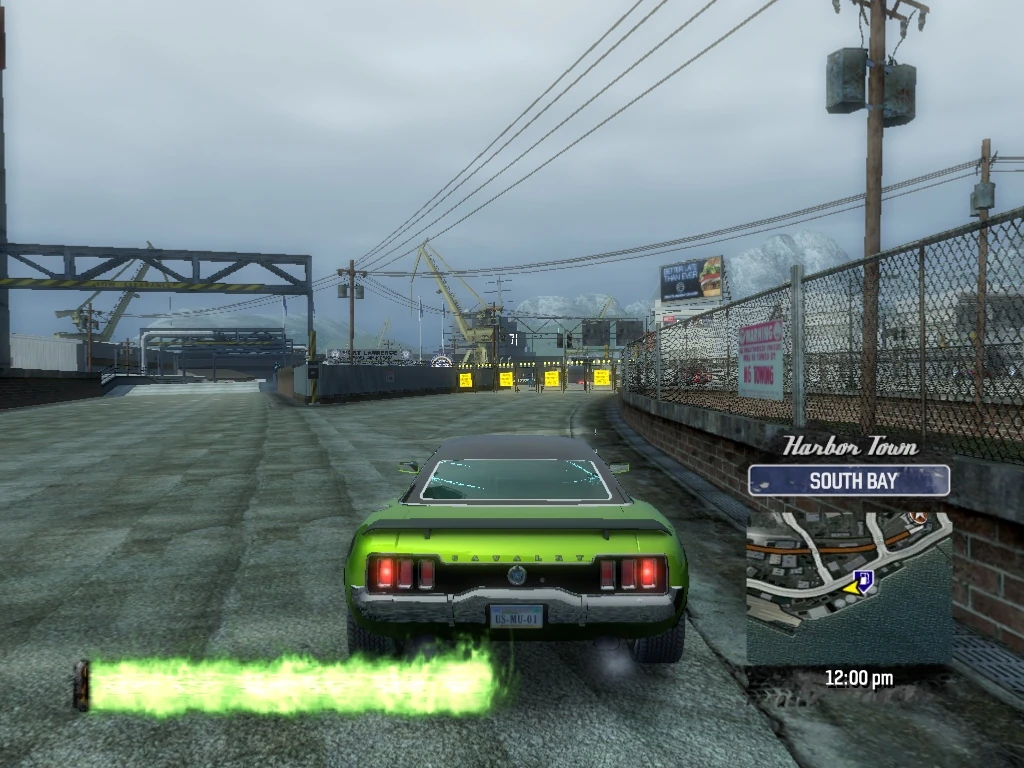
|
| 150 | Harbor Town South Bay |
Turn left (west) before you enter South Bay Drive and Smash Gate 150 is at the vehicle entrance to the Naval Yard. There are some good shortcuts after the Smash Gate, but for now just knock it down and continue west on the South Bay Expressway. | 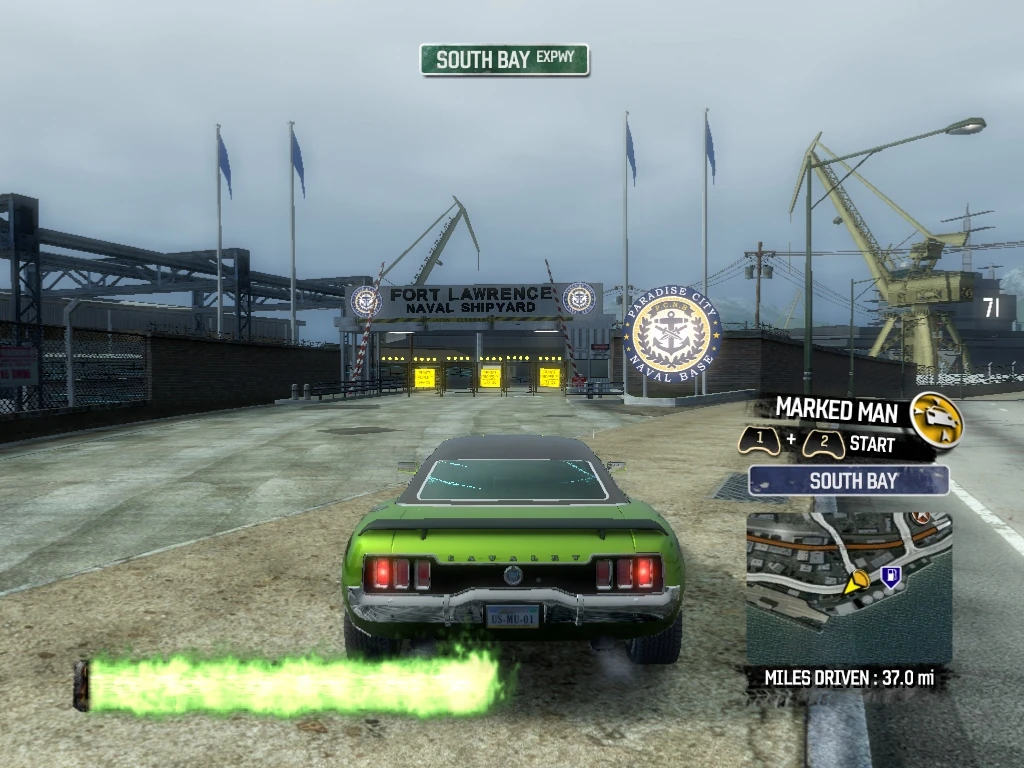
|
| 151 | Harbor Town South Bay |
Look left and follow the mini-map, and Smash Gate 151 is just after the large Naval Yard sign, opposite the control island of the first aircraft carrier. Drive through it and up the gangway. | 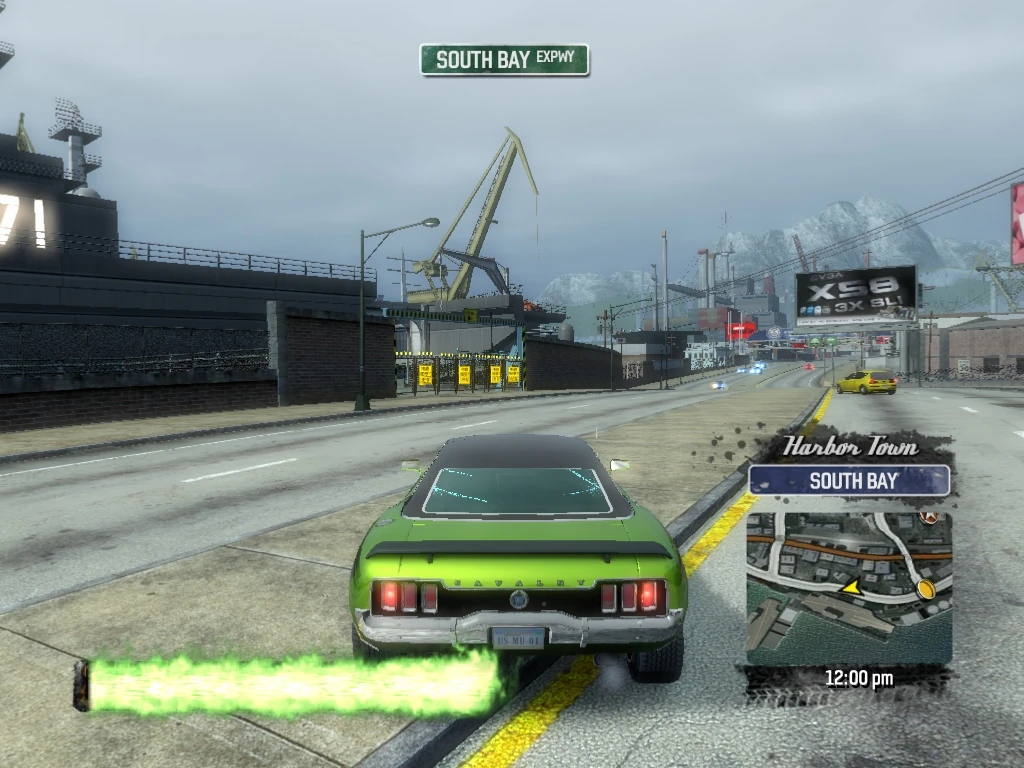
|
| 152 | Harbor Town South Bay |
Turn right to go up the gangway, left to enter the ship, right to exit the rear of the ship, and drive through smash gate 152 at the finish line for the Naval Yard events, opposite Hall Avenue. | 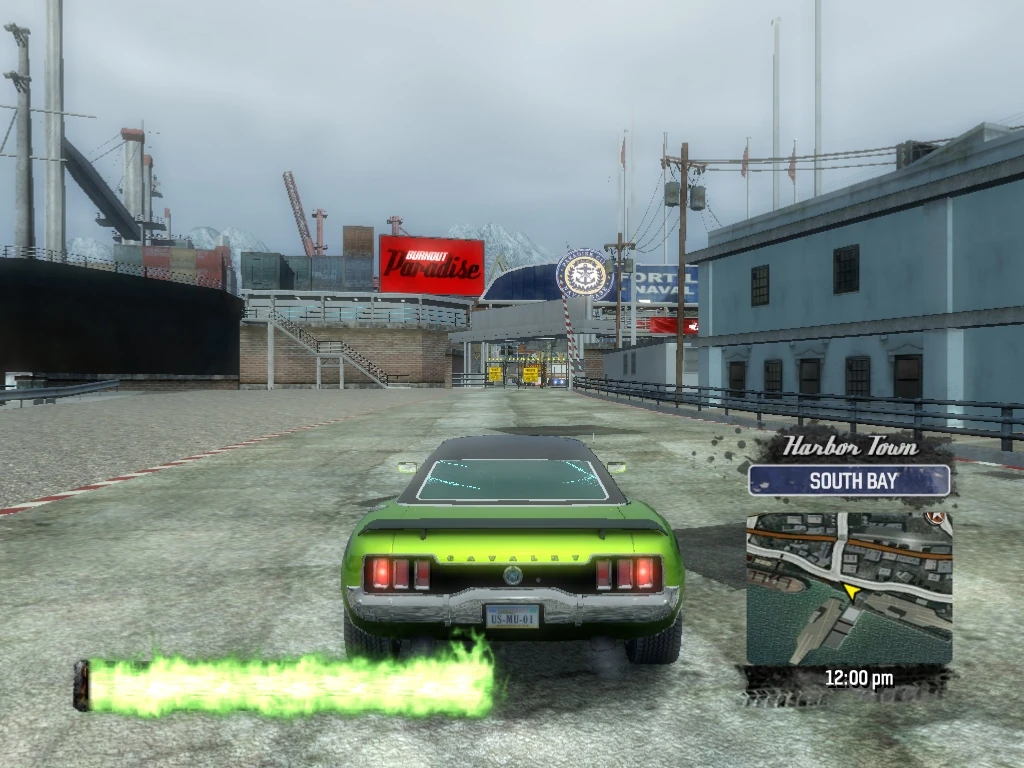
|
| 153 | Harbor Town South Bay |
Turn left (west) on South Bay Expressway, and follow it until just before the bridge. There is a sliproad on the left with Smash Gate 153 in front of it. Swing around to the left and drive through it. | 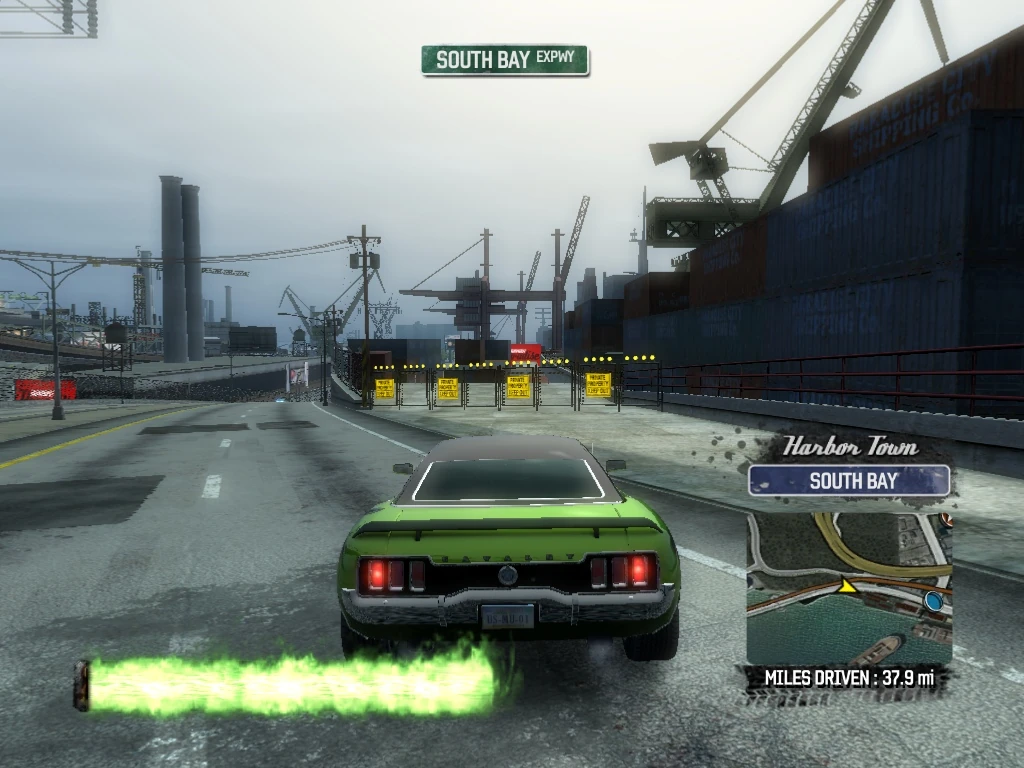
|
| 154 | Harbor Town South Bay |
After you drive through Smash Gate 153, there are white barricades on the right and the left. Drive through the left set and past the first Billboard on the right and you will see a Billboard in front of you. Take the ramp in front of it, and if you don't try to smash it, at least boost enough to clear the guardrail. When you land opposite the Auto Repair, look to the right and just after the steel girders, you will see Smash Gate 154 at the base of a ramp for another Billboard Smash. (This is another deceptive gate where only part of the entrance is covered, so it looks like it was previously knocked over). Either knock it down or drive through it and up the ramp to smash the billboard. | 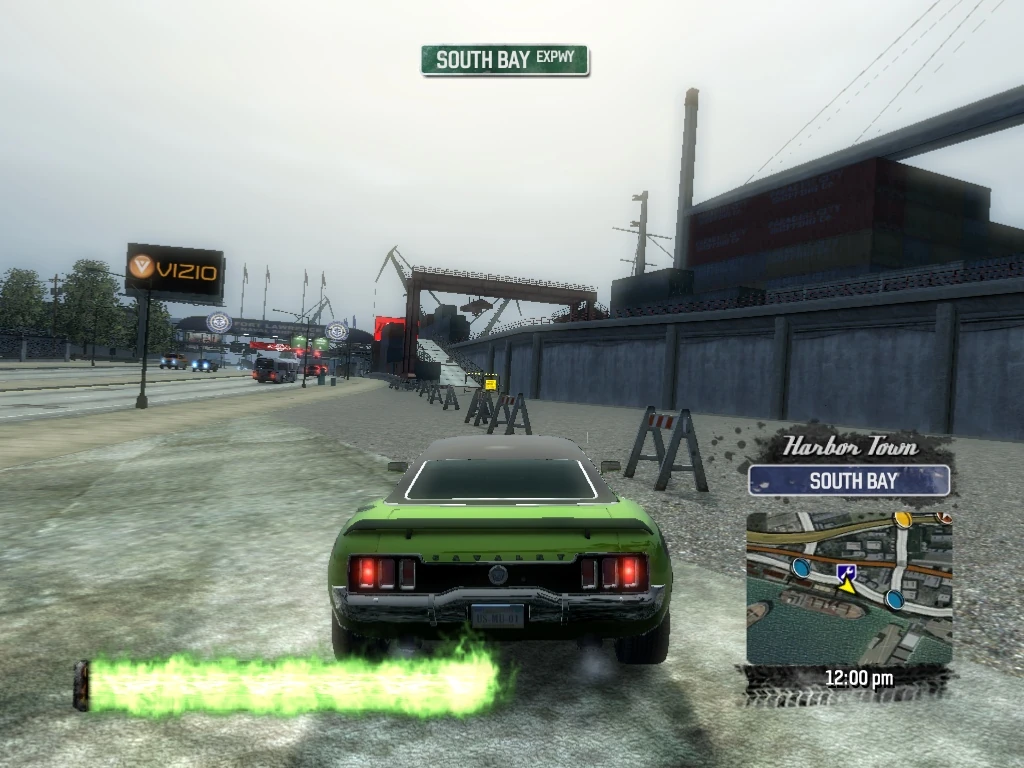
|
| 155 | Harbor Town South Bay |
Get onto Hall Avenue headed north and Smash Gate 155 is at the entrance to the Parking Garage on the right. Drive through it and climb to the top of the garage. | 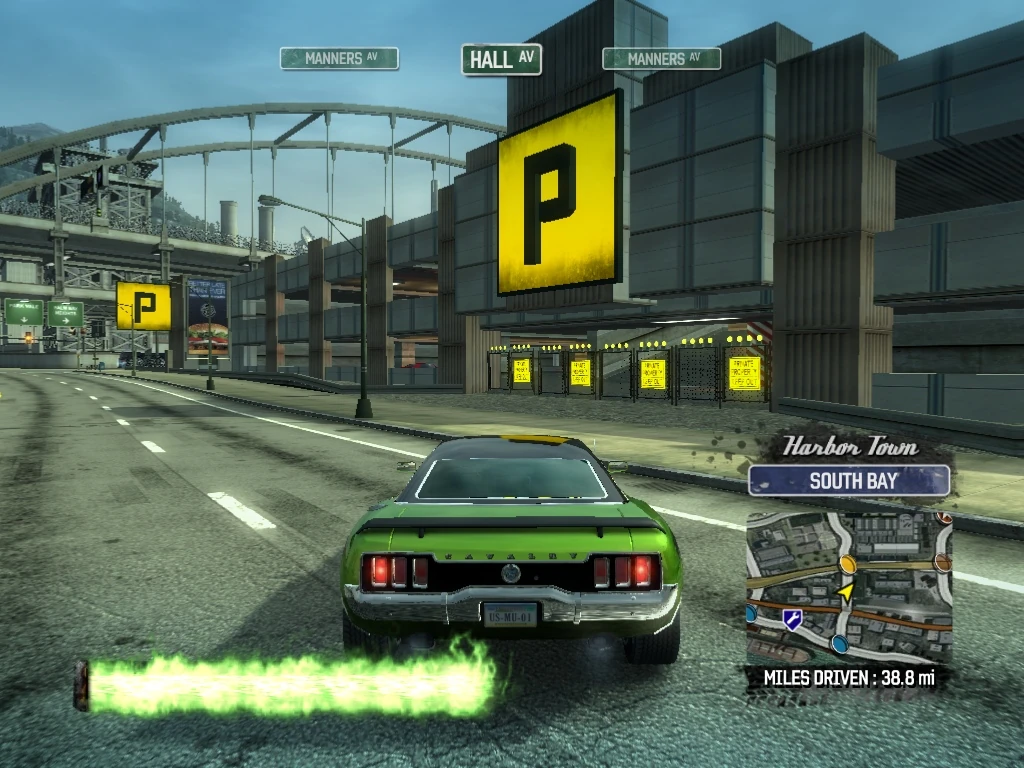
|
| 156 | Harbor Town South Bay |
Smash Gate 156 is in front of the ramp on the southeast corner of the Parking Garage roof. Drive through it (no boost) and drive along the rooftops before dropping down to the railroad tracks below. | 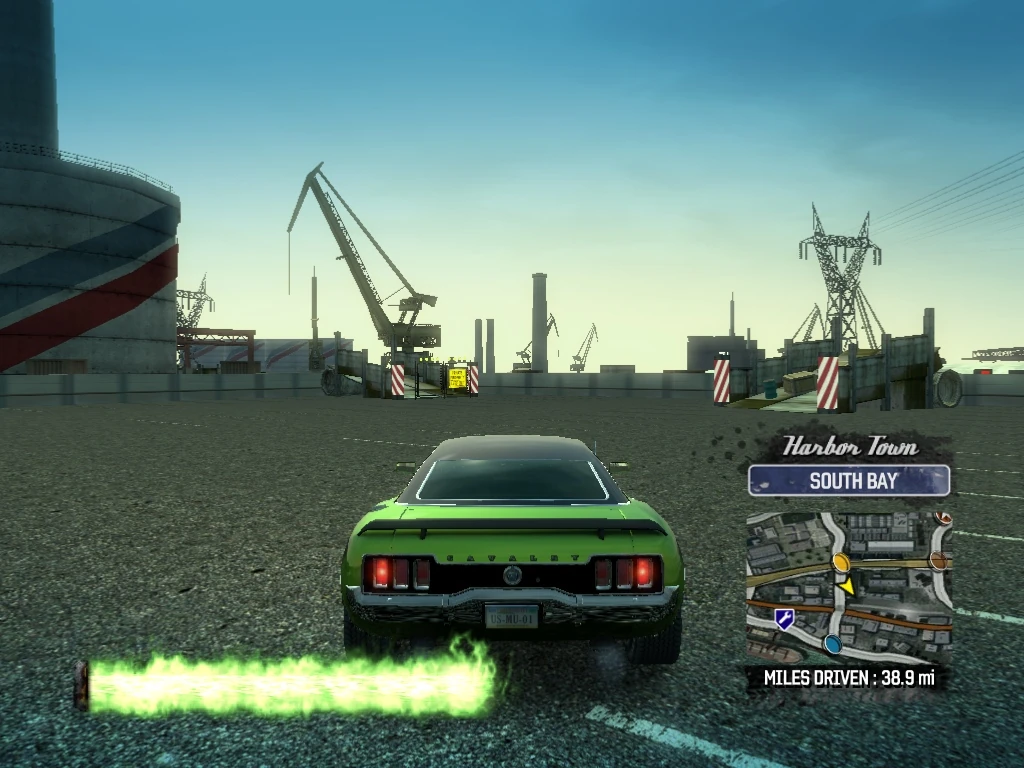
|
| 157 | Harbor Town South Bay |
Follow the train tracks west across Hall Avenue and you will see Smash Gate 157 at the entrance to a loading dock on the right. Drive through the Smash Gate and follow the path past the loading dock. | 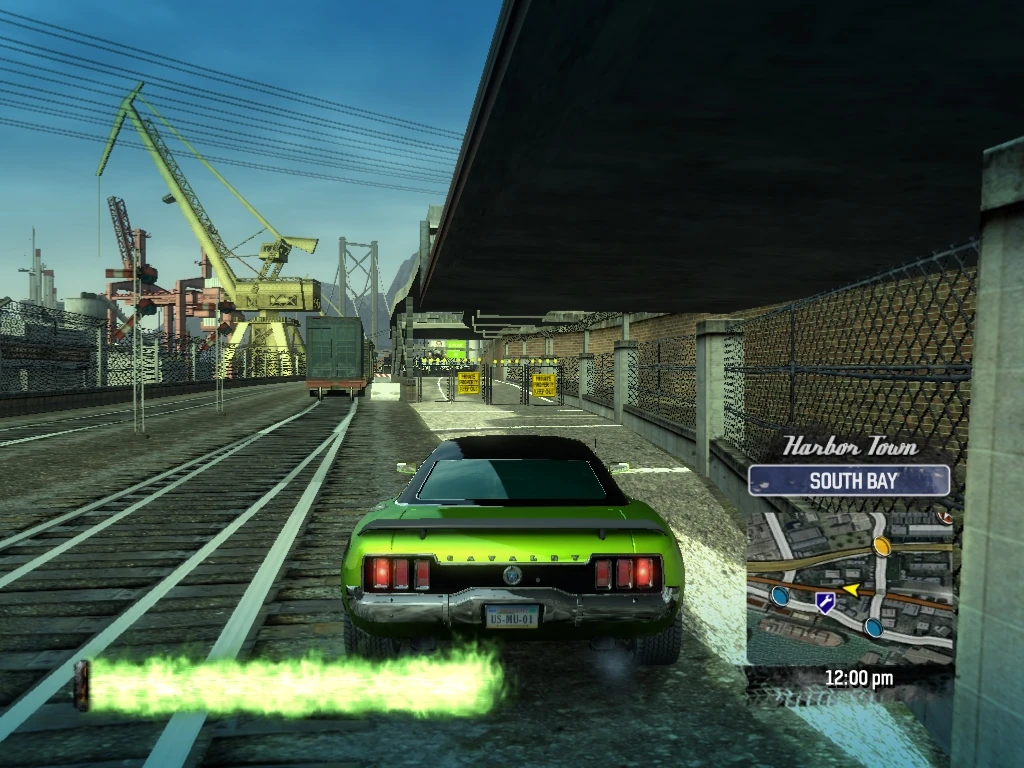
|
| 158 | Harbor Town South Bay |
Drive through Smash Gate 158 at the end of the path, exiting left onto S. Rouse Drive, headed south. | 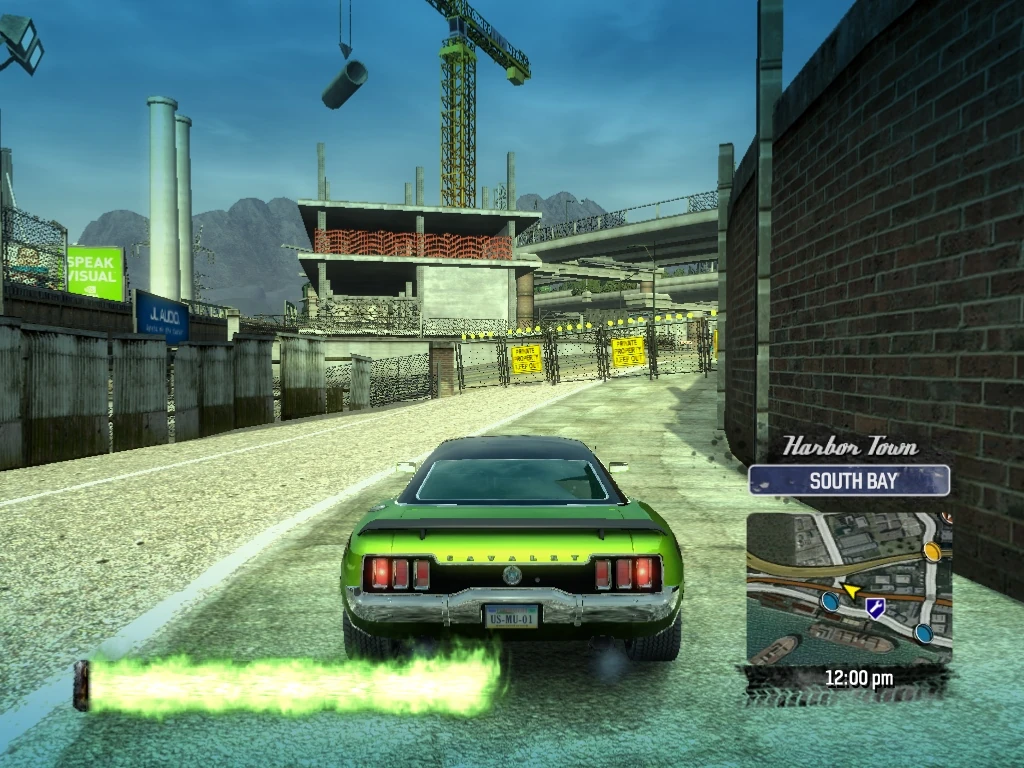
|
| 159 | Harbor Town South Bay |
Smash Gates 159-161 are also right after one another. Follow S. Rouse, and just before you get to the South Bay Expressway, turn to the right and Smash Gate 159 is just ahead up a ramp at the entrance to a warehouse. Drive through it and into the Warehouse. | 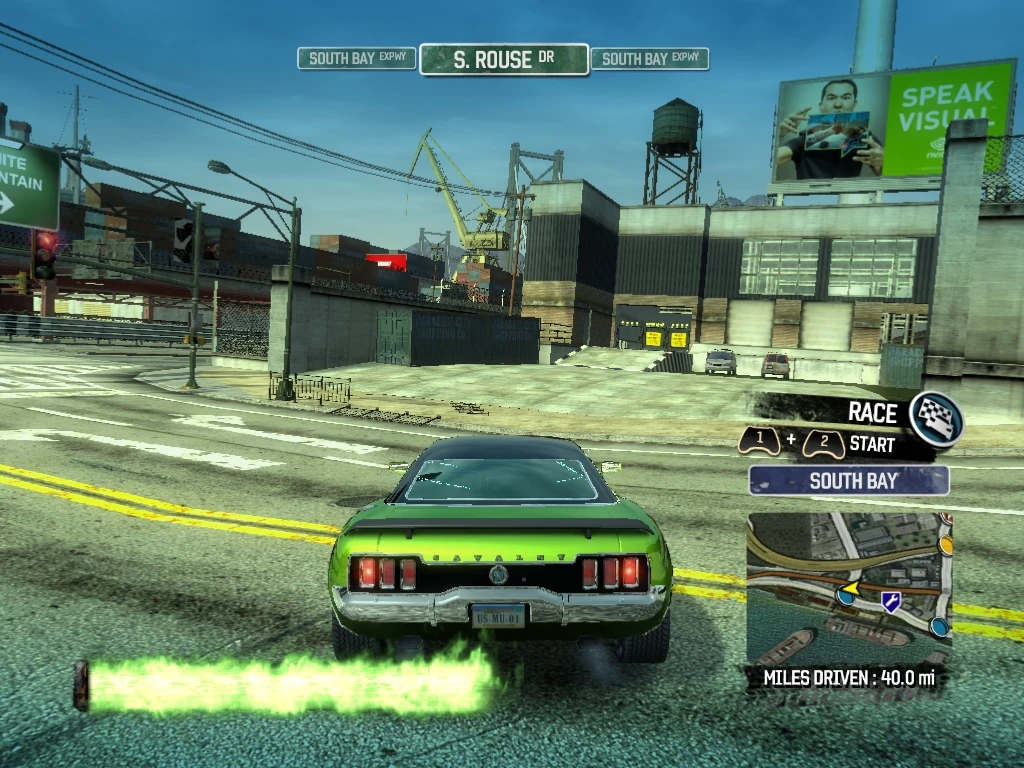
|
| 160 | Harbor Town South Bay |
Drive up another ramp and through Smash Gate 160. | 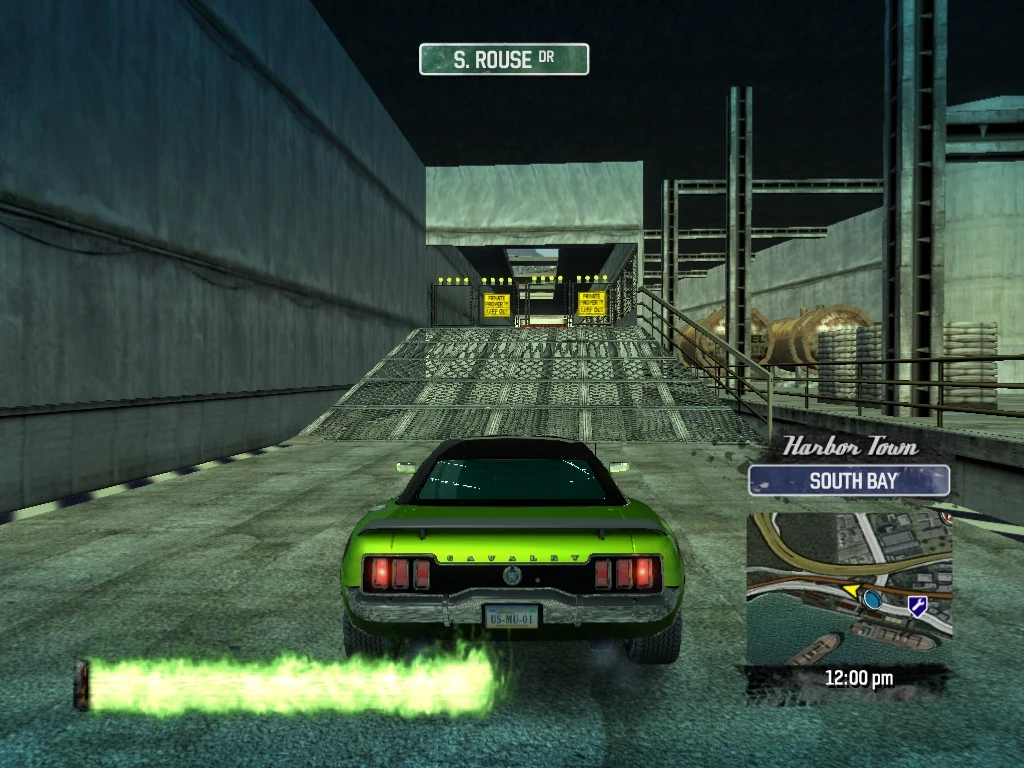
|
| 161 | Harbor Town South Bay |
Drive up yet another ramp and through Smash Gate 161, and continue on - there is a billboard smash ahead, dropping down just before Manners Avenue. | 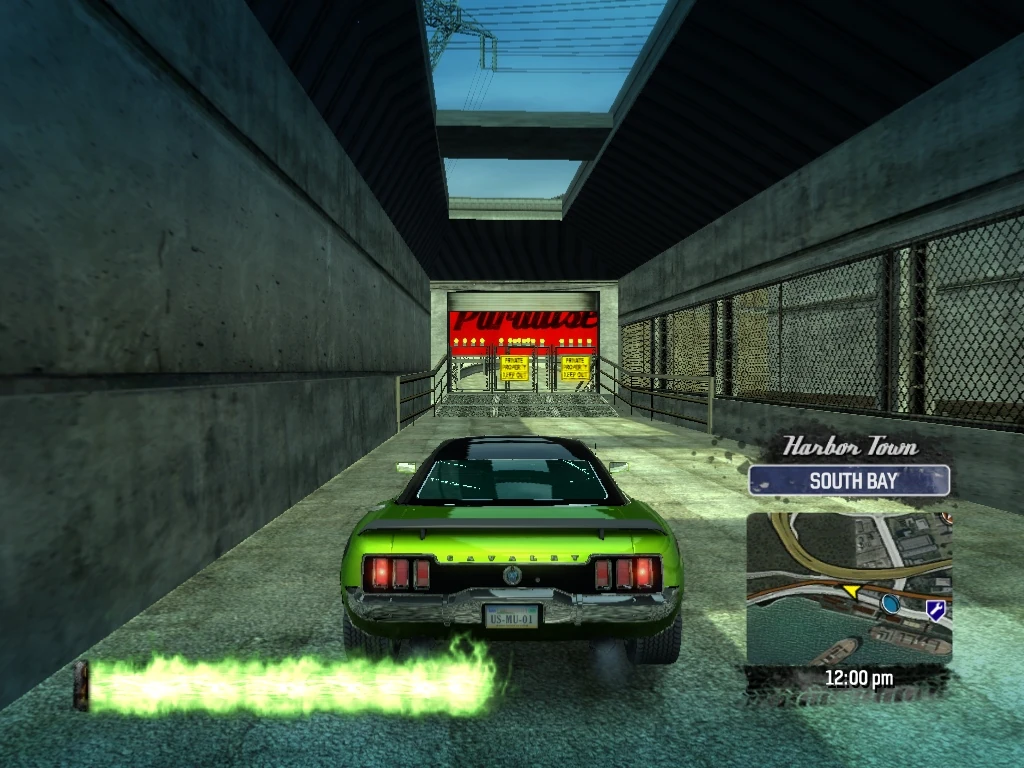
|
| 162 | Harbor Town Park Vale |
Turn right (east) on Manners Avenue, cross over S. Rouse Drive, and take the next left (north) on Hall Avenue and then the next left (west) on Lambert Parkway. Smash Gate 162 is at the entrance to the Parking Garage on the left. Drive through it and climb to the top of the garage. | 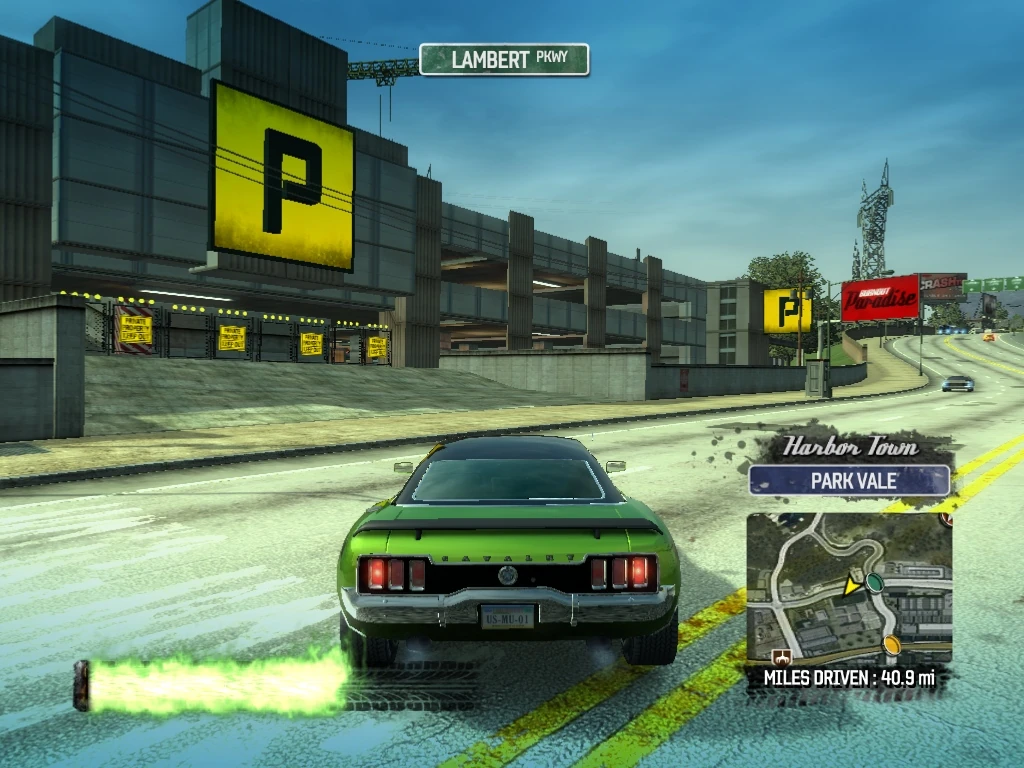
|
| 163 | Harbor Town Park Vale |
Smash Gate 163 is in front of the ramp on the southeast corner of the garage. We don't want to go that direction, so just knock it over and jump off the northeast ramp, landing on Lambert Parkway. Spin around and head west. | 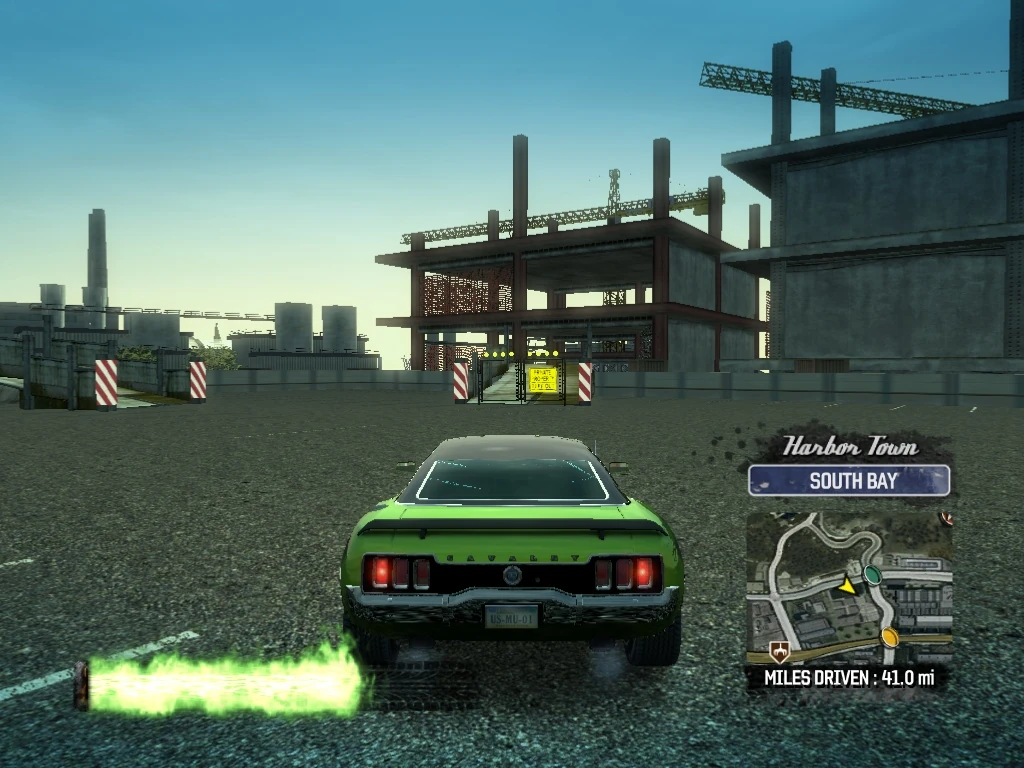
|
| 164 | Harbor Town South Bay |
Follow Lambert Parkway and just after you cross S. Rouse Drive, you will see Smash Gate 164 on the left. It leads to a Billboard Smash, but for now, just knock it down and continue westbound. | 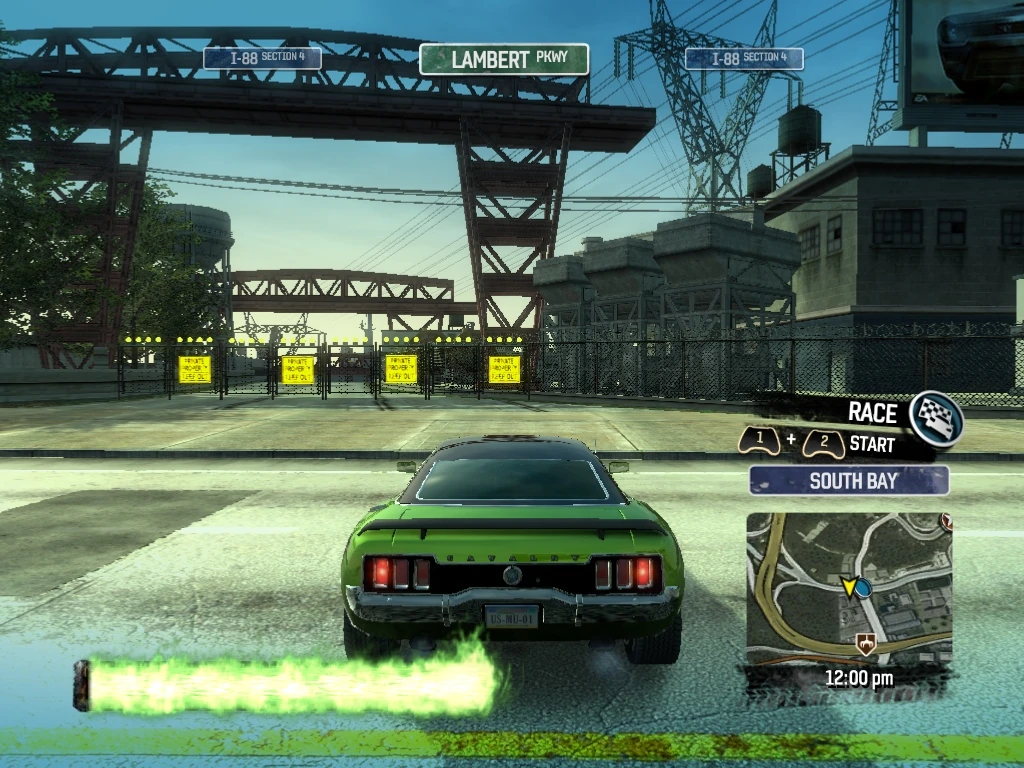
|
| 165 | Harbor Town South Bay |
Smash Gate 165 is just around the next curve in the road on the right and leads through some pipes to a Billboard Smash. For now, just knock it over and continue on westbound. | 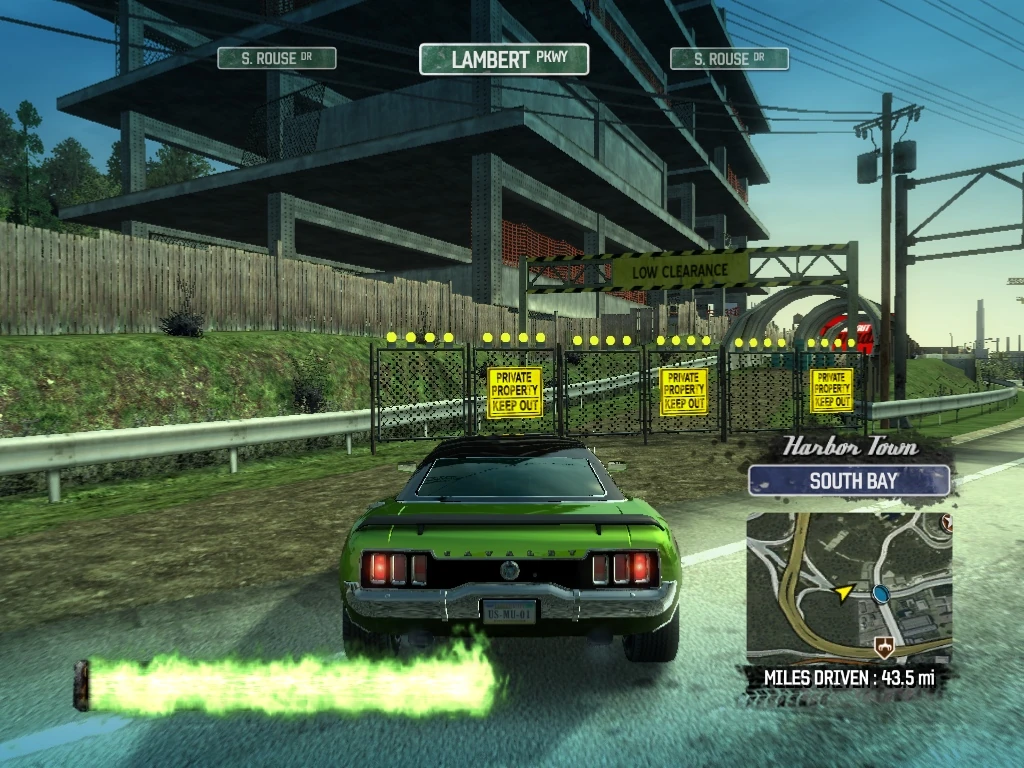
|
| 166 | Harbor Town Rockridge Cliffs |
Follow Lambert Parkway under I-88 Section 4 and then turn left on Manners Avenue and drive through the tunnel, as you exit the tunnel on Manners Avenue, you will see Smash Gate 166 on the right at the entrance to a service tunnel. Drive through it and into the tunnel. | 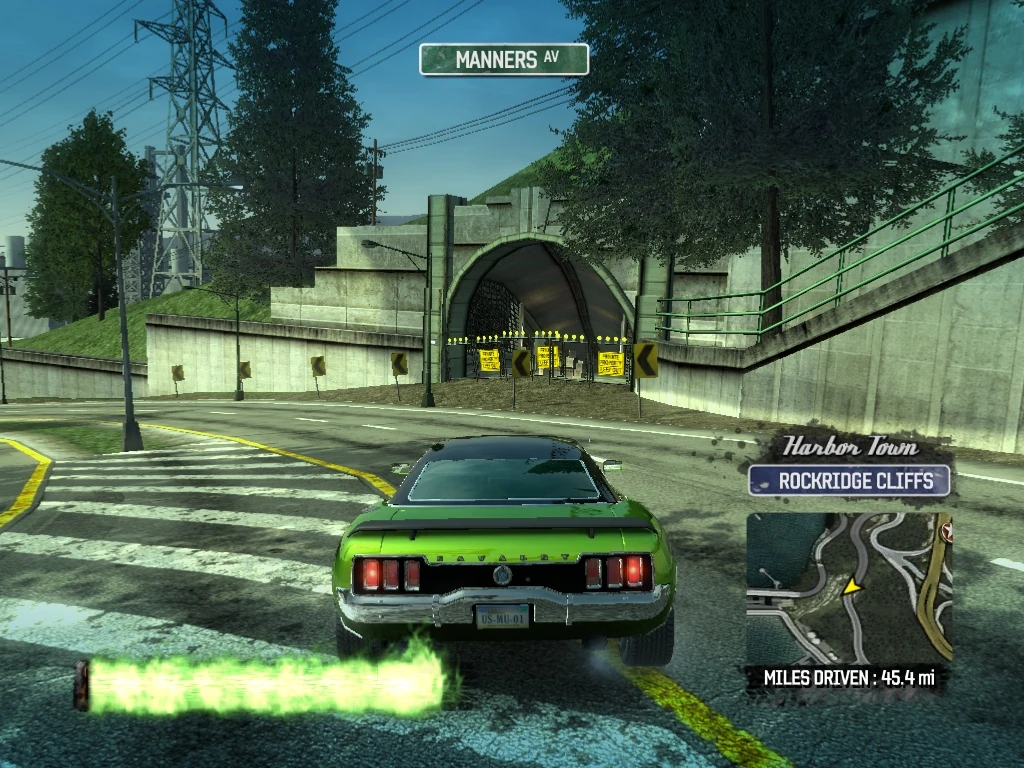
|
| 167 | Harbor Town Rockridge Cliffs |
Drive through Smash Gate 167 at the other end of the tunnel, exiting onto Casey Pass. | 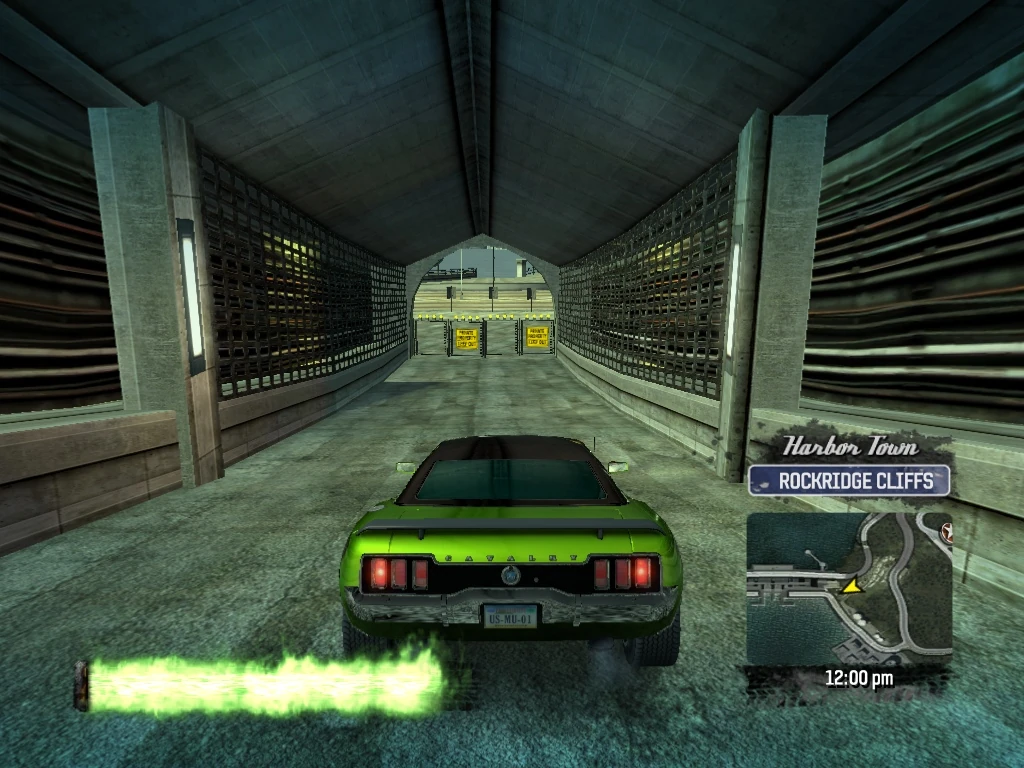
|
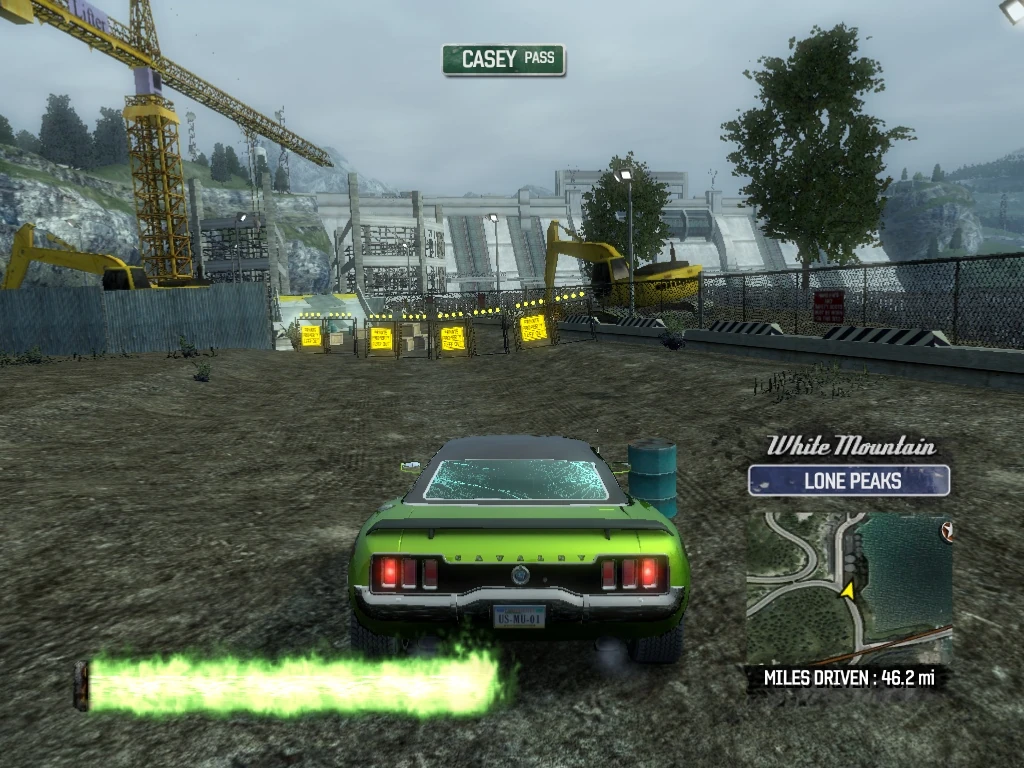
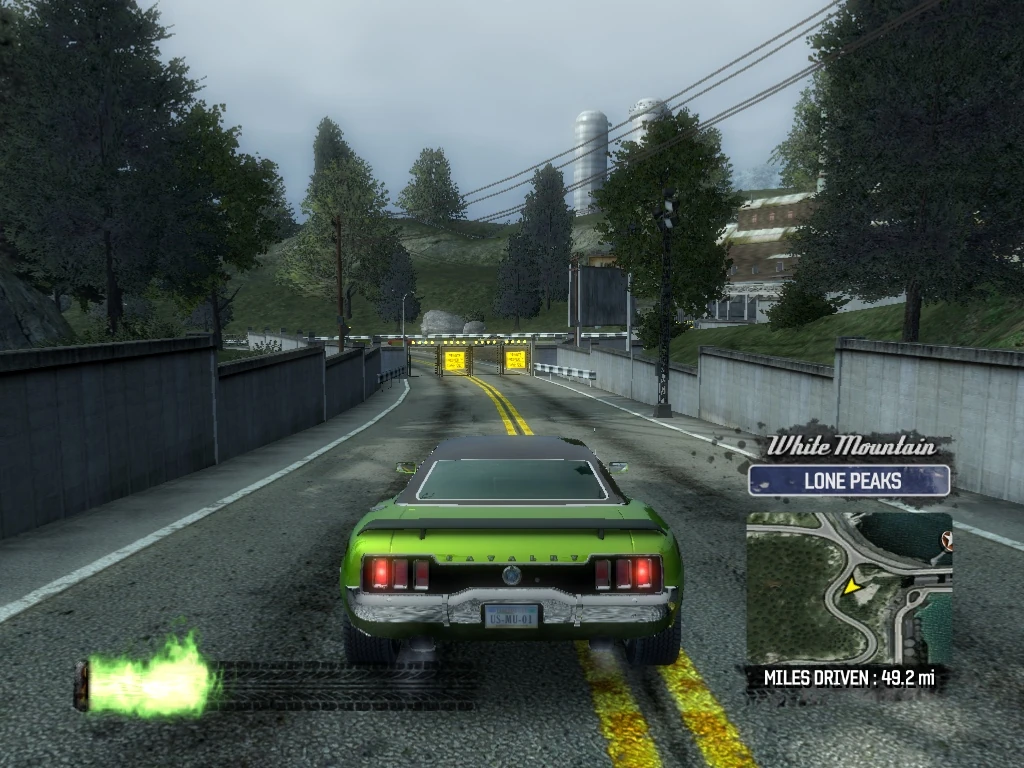
| 168 | White Mountain Lone Peaks |
NOTE: There are still three more smash gates in Harbor Town, but we have to go through White Mountain to smash one of them, and we are going to go through three more first to avoid later backtracking.
Follow Casey Pass west in front of the dam (taking the Super Jump), and then turning south. When Casey Pass merges with S. Mountain Drive, spin around to the left and knock down Smash Gate 168 on the dirt path (leads to a Billboard Smash), and then continue northwest (toward the dam) on S. Mountain Drive. |
|
| 169 | White Mountain Lone Peaks |
Follow S. Mountain Drive and look to the right and just before the hairpin turn, there will be a break in the split rail fence with Smash Gate 169 across it. Drive through it and through the tunnel under the road. | 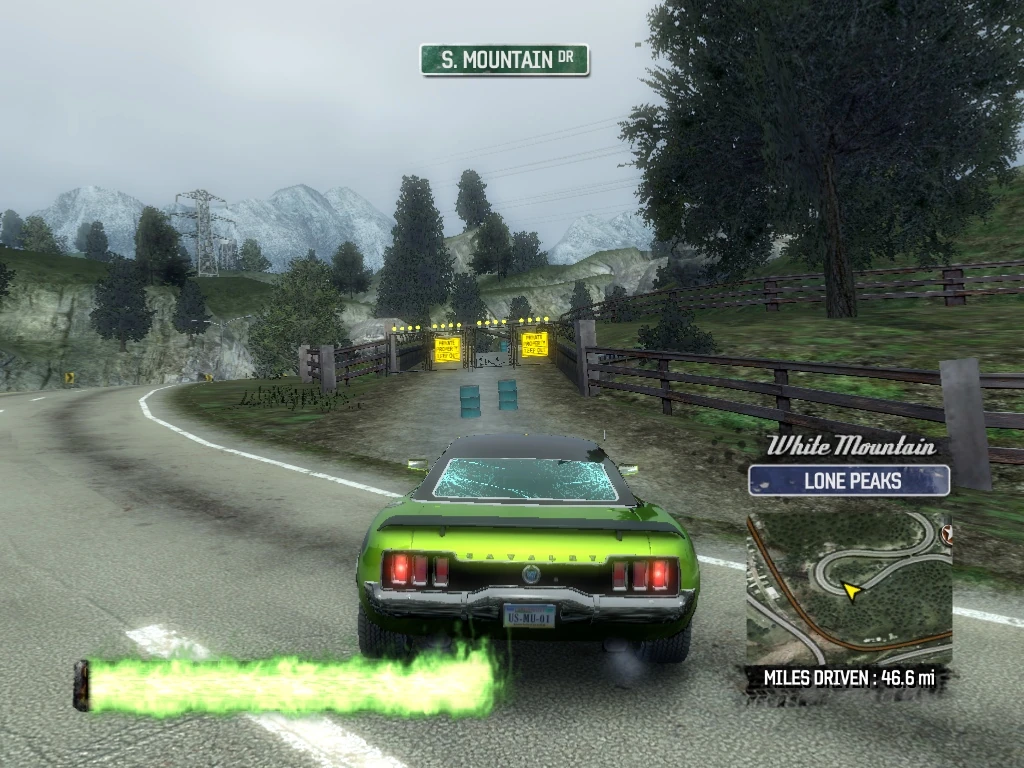
|
| 170 | White Mountain Lone Peaks |
Drive through Smash Gate 170 at the exit to the tunnel and drive down the steel girder bridge into the hidden south entrance to Lone Peaks Quarry. | 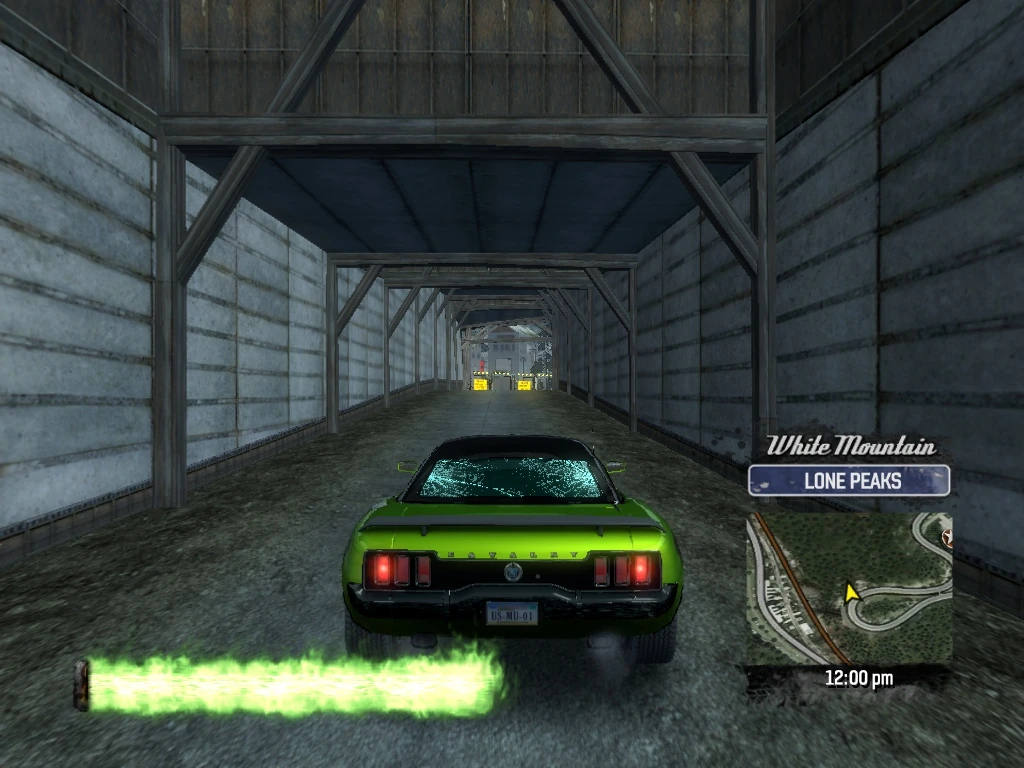
|
| 171 | White Mountain Lone Peaks |
Smash Gate 171 can be difficult to find even if you know the general area. Drive straight off the girder bridge and boost to take the jump across the quarry pond. When you reach the base of the conveyor on the left, take a sharp right and you will see a circular silo and Smash Gate 171 is just to the left of the silo. Drive through it and through the tunnel beyond it. | 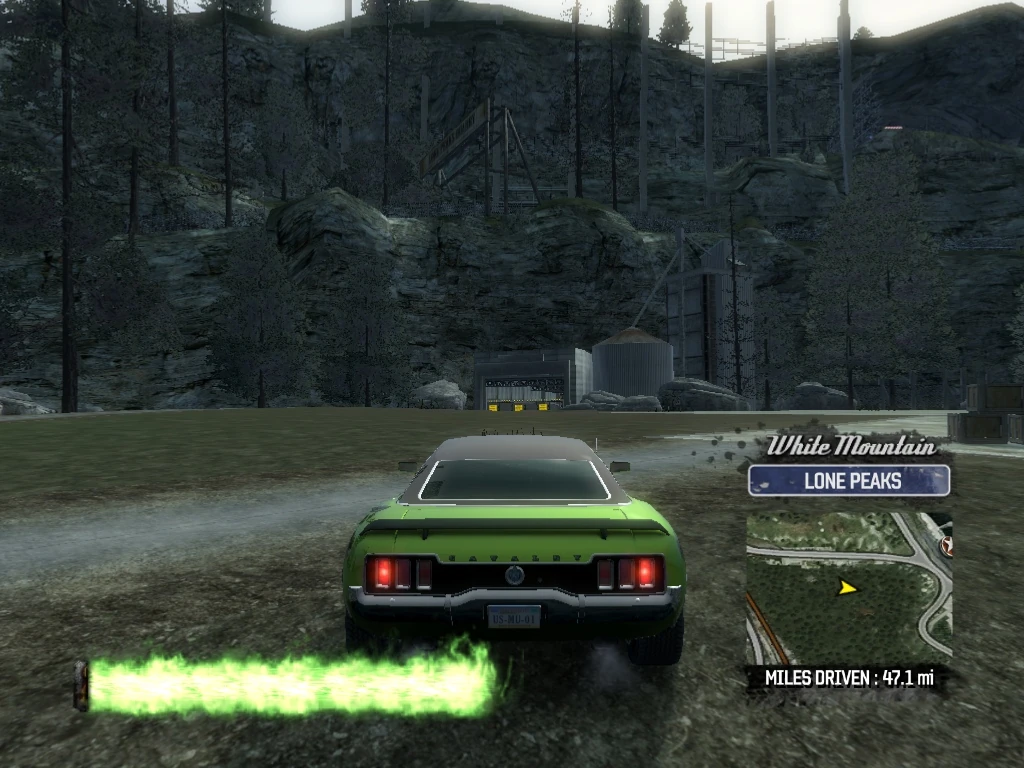
|
| 172 | Harbor Town Rockridge Cliffs |
Drive through Smash Gate 172 at the other end of the tunnel, dropping down onto Casey Pass. | 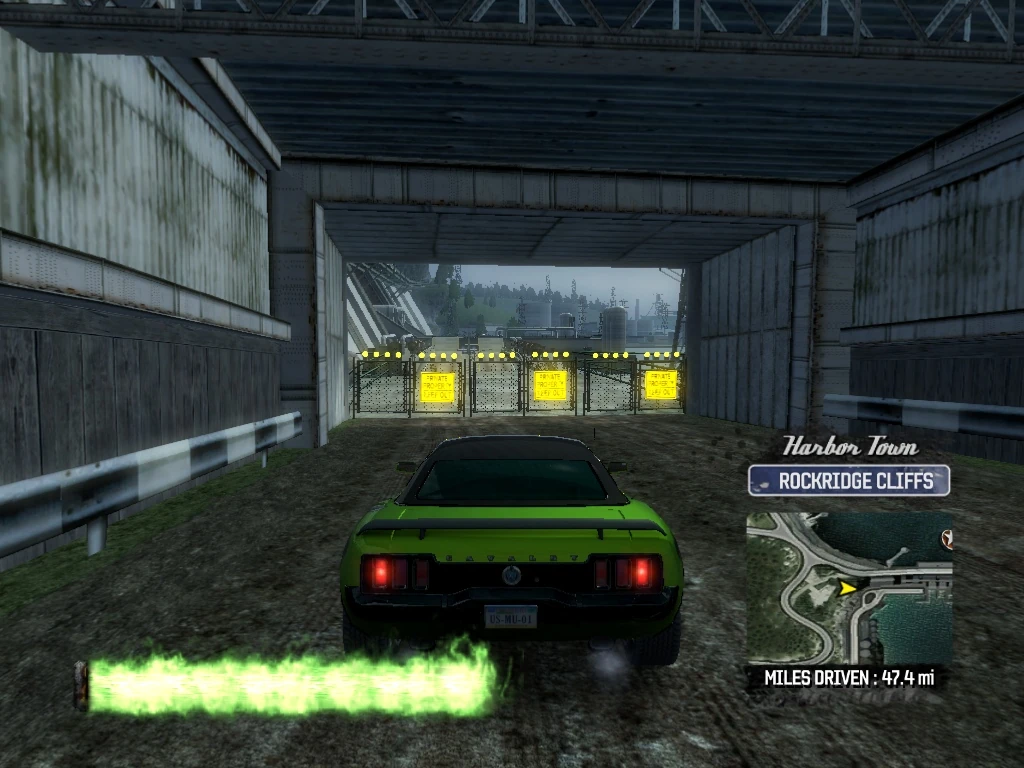
|
| 173 | Harbor Town Rockridge Cliffs |
Physically, the remaining two smash gates in Harbor Town are close by, but there is no direct route to reach them. Take the left (south) on Casey Pass and then the right (northwest) on S. Mountain Drive and follow S. Mountain all the way to the right turn (east) on Geldard Drive. As you start to drive over the dam, you will see Smash Gate 173 on the left (leads to a billboard smash). Knock it down and back up and turn back west on Geldard. | 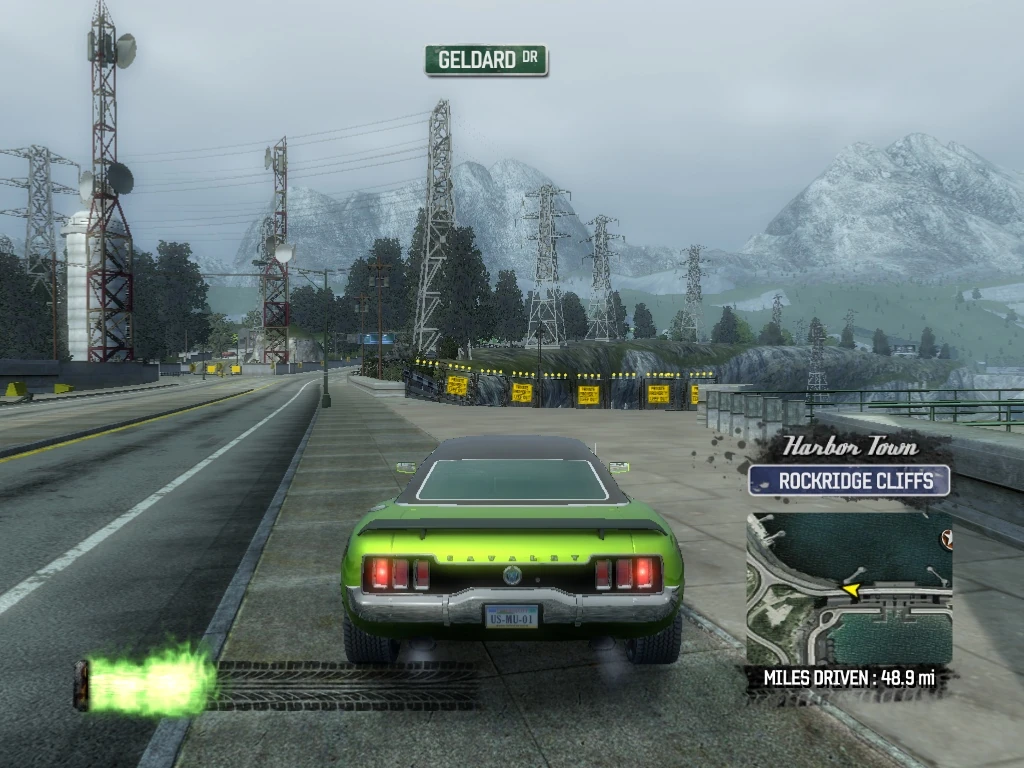
|
| 174 | Harbor Town Rockridge Cliffs |
Smash Gate 174 is on the left between two radio antenna towers. Drive through it and down the path behind it. You have now completed all smashes in Harbor Town. | 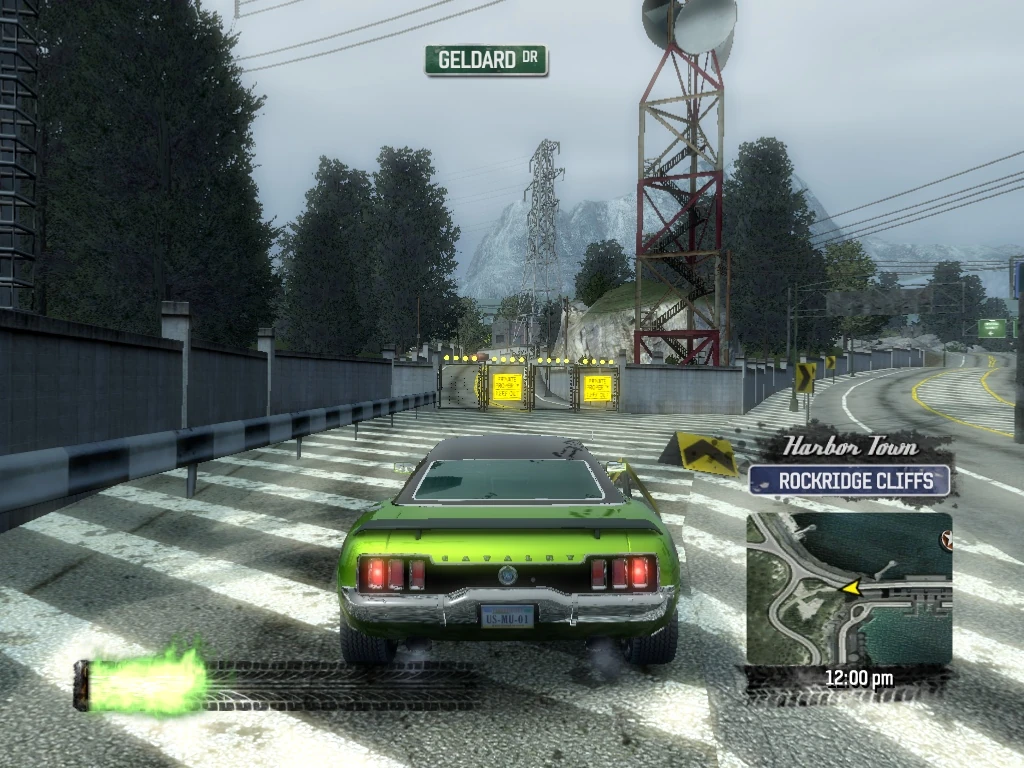
|
| 175 | White Mountain Lone Peaks |
NOTE: If you are using this walkthrough to find one missing Smash Gate in White Mountain, remember that Smash Gates 168-171 above where in White Mountain and were done out-of-sequence, so review them first.
Continue down the path from Smash Gate 174, driving through Smash Gate 175 at the opposite end and exiting onto S. Mountain Drive. |
|
| 176 | White Mountain Lone Peaks |
Veer right onto S. Mountain Drive, and you will see the entrance to Lone Peaks Quarry just in front of you. Smash Gate 176 is the northern entrance to the quarry and Smash Gate 177 is the southern set of gates. We already smashed all the interior gates, so drive in through Smash Gate 176 ... | 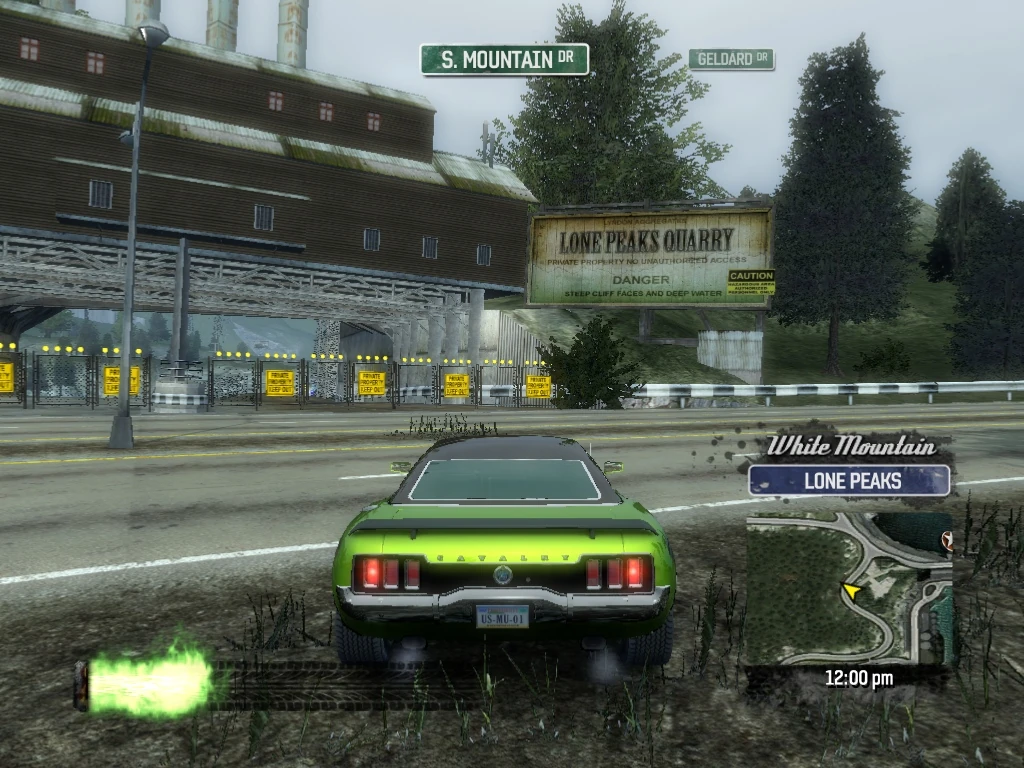
|
| 177 | White Mountain Lone Peaks |
And turn around and drive out through Smash Gate 177, exiting to the right (south) on S. Mountain Drive. | 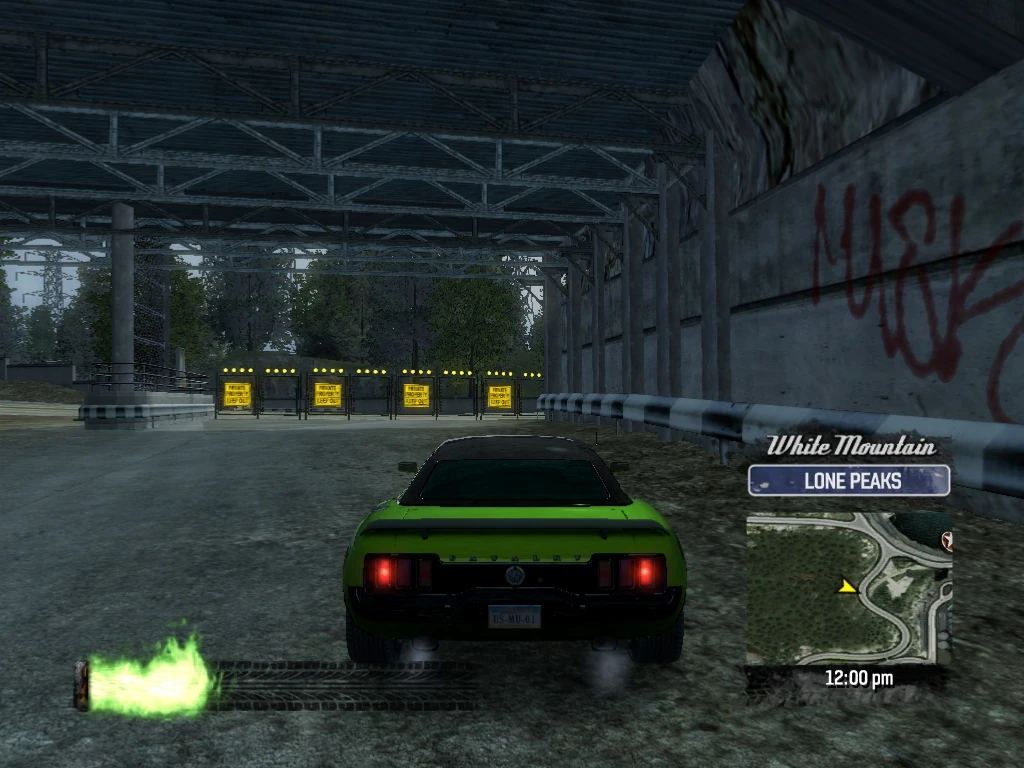
|
| 178 | White Mountain Lone Peaks |
Take the Super Jump to avoid the curved portion of S. Mountain Drive, and then take the right turn to head toward Lone Stallion Ranch. Just after you pass Lone Stallion Ranch, you will see Smash Gates 178-181 on the right, marking entrances to the South Bay Railroad from either direction on S. Mountain Drive. Drive through Smash Gate 178, which is the first one on the right. | 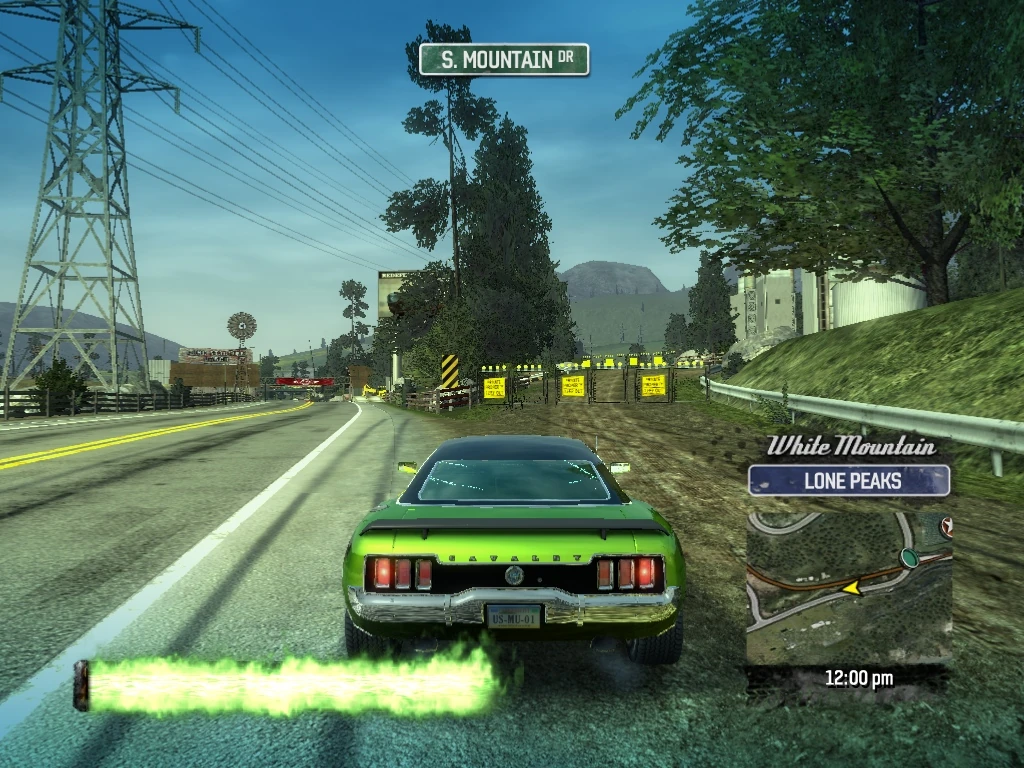
|
| 179 | White Mountain Lone Peaks |
Take an immediate hard right and knock down Smash Gate 179, which leads east down the train tracks, then back up and spin around 180 degrees. | 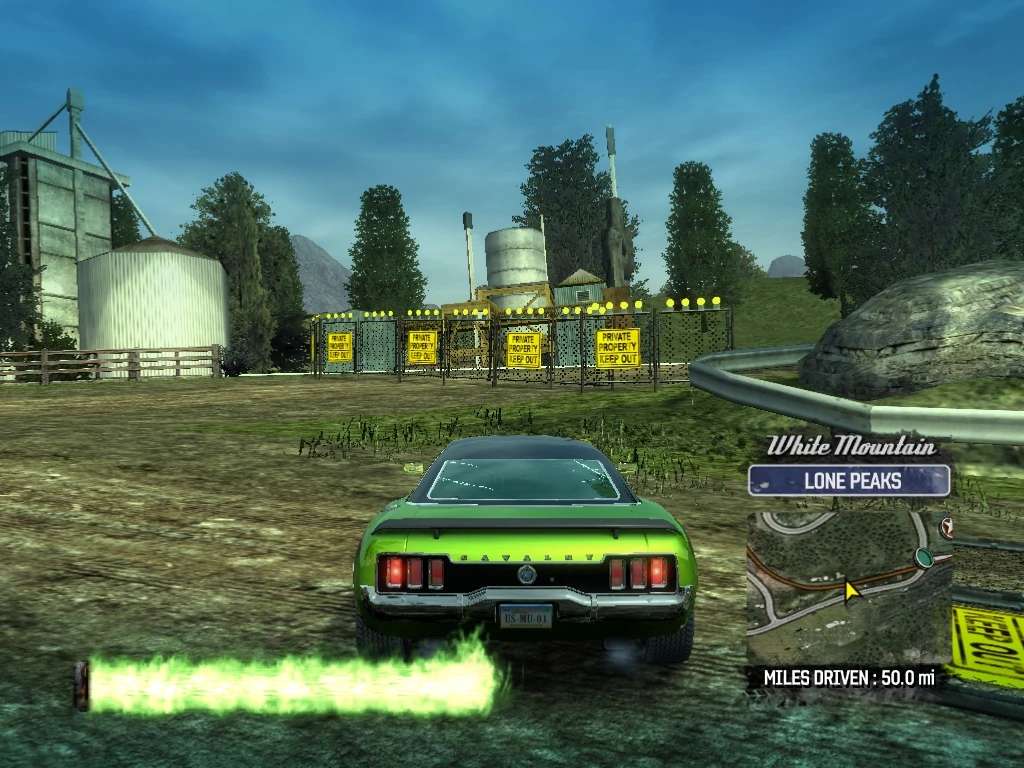
|
| 180 | White Mountain Lone Peaks |
Drive forward and knock over Smash Gate 180, which would exit westbound on S. Mountain Drive and then back up again. | 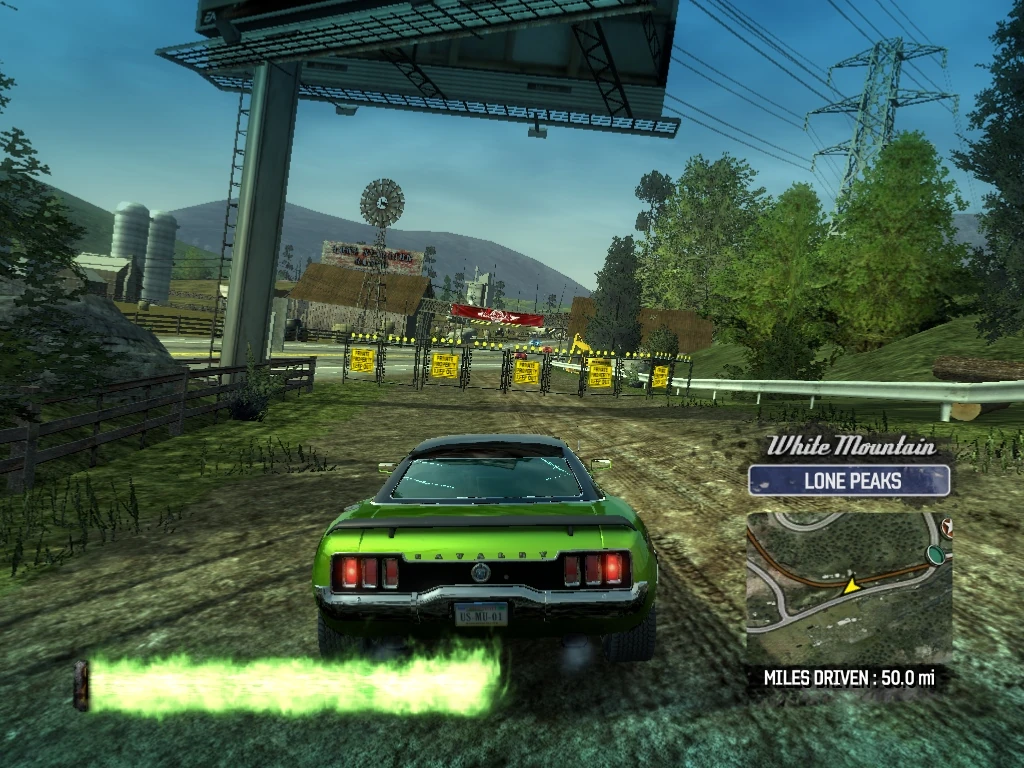
|
| 181 | White Mountain Lone Peaks |
Finally, turn a bit to the right and drive through Smash Gate 181, heading west down the train tracks. | 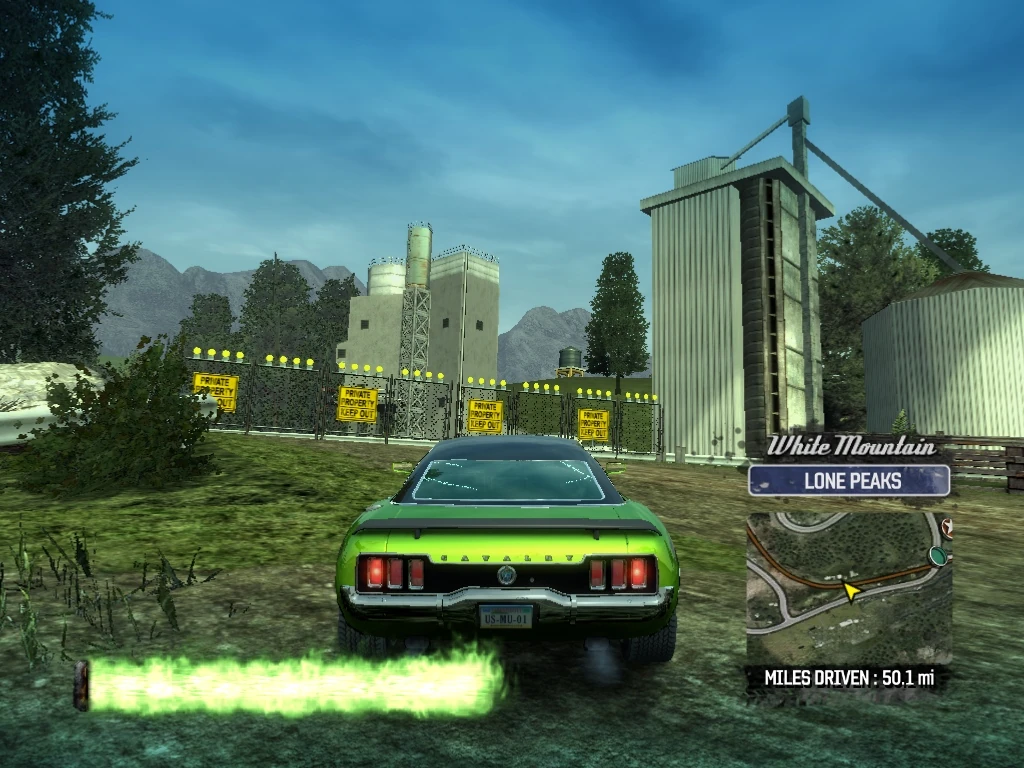
|
| 182 | White Mountain Lone Peaks |
Smash Gate 182 is a short ways down the tracks to the left of an abandoned Car-body style locomotive. Drive through it and down the dirt path forming a shortcut from the train tracks to Lucas Way and vice versa. | 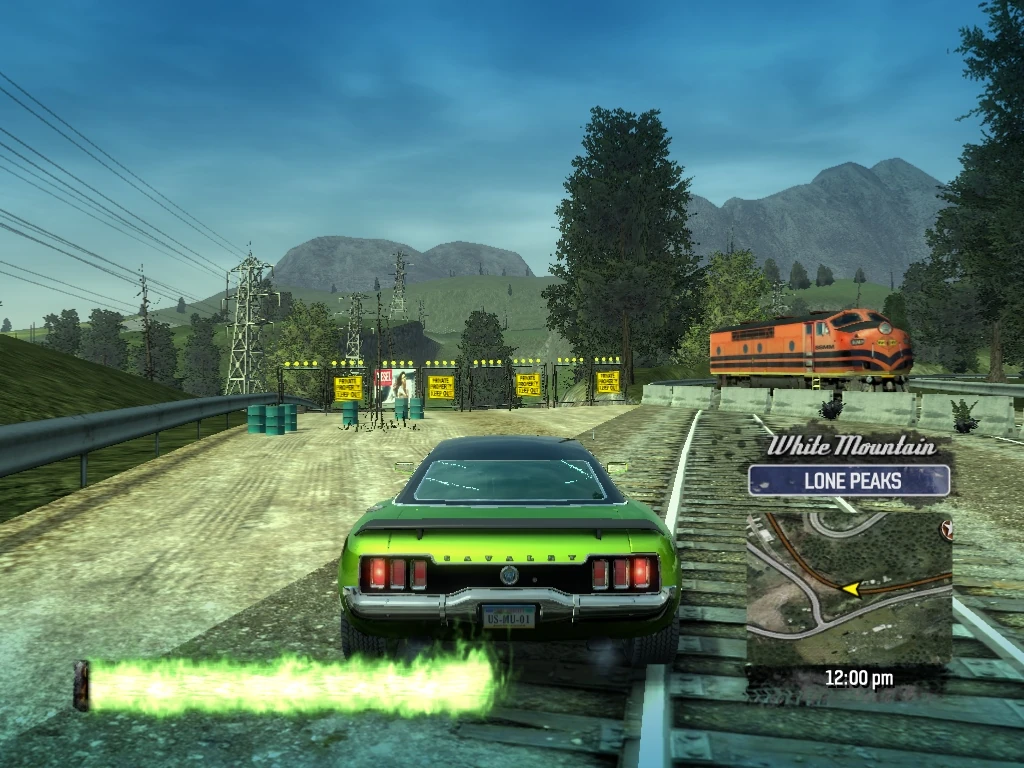
|
| 183 | White Mountain Lone Peaks |
Drive through Smash Gate 183 at the other end of the dirt path, and turn left (south) on Lucas Way. | 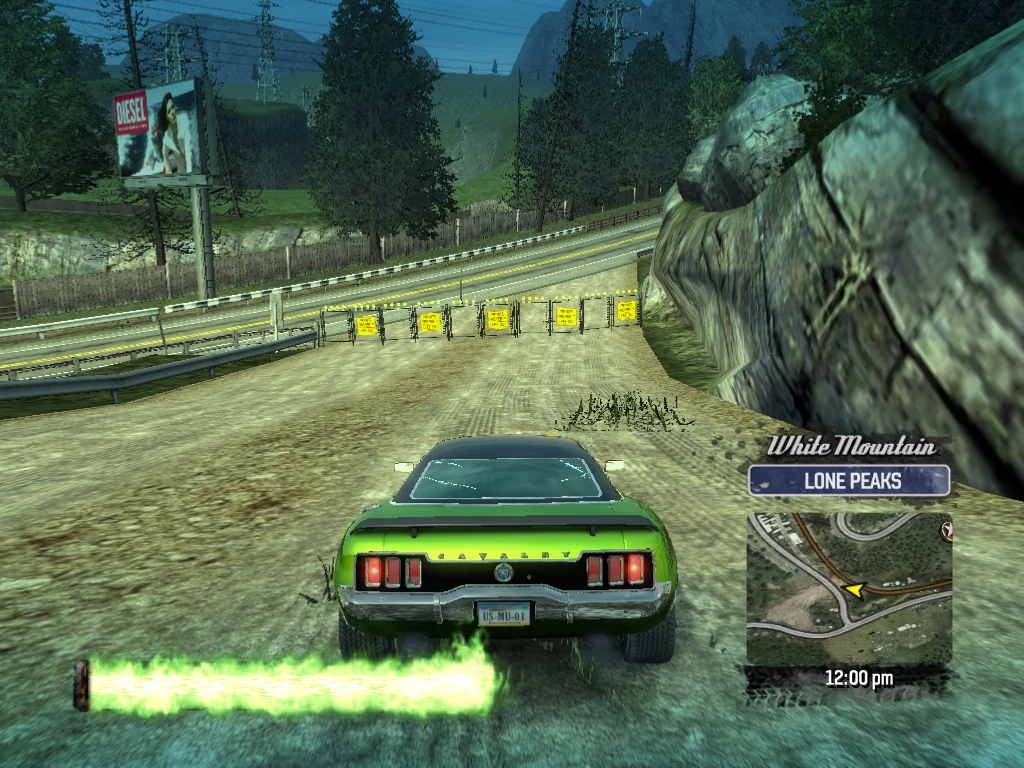
|
| 184 | White Mountain Lone Peaks |
Follow Lucas Way and then turn right (west) on S. Mountain Drive. Smash Gate 184 is just ahead on the left at the entrance to the Paradise City Stock Car Track. There are a lot of good stunt run activities inside, but no more smash gate, so for now, just knock Smash Gate 184 down and proceed west on S. Mountain Drive. | 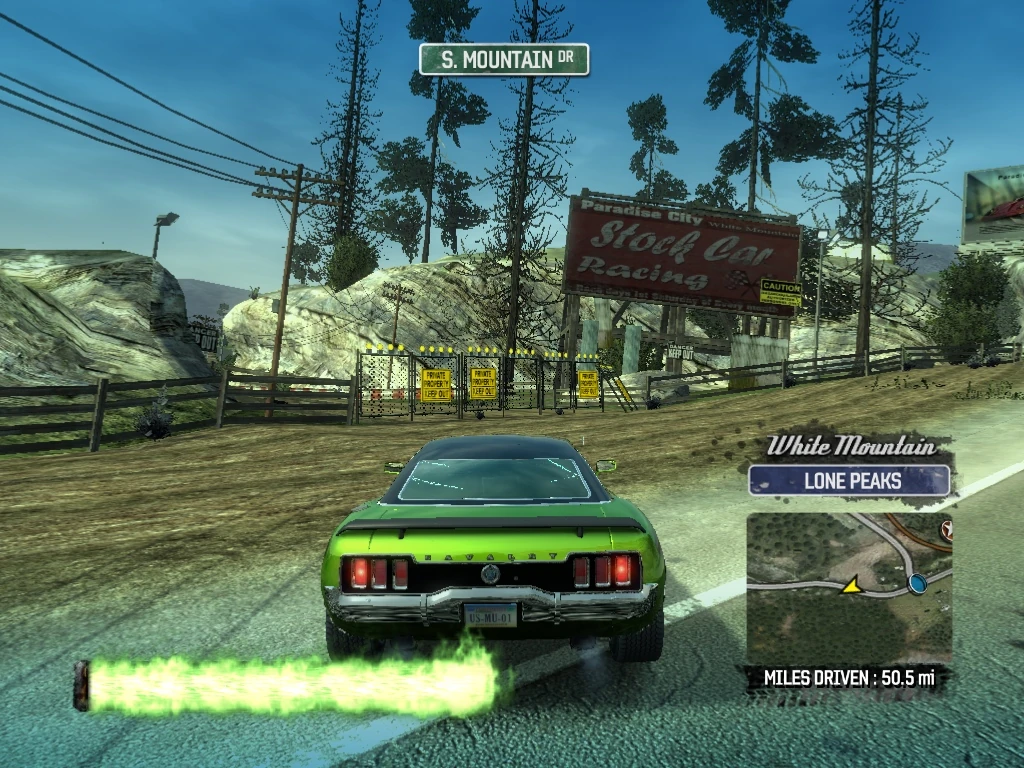
|
| 185 | White Mountain Lone Peaks |
Drive through Smash Gate 185 at the entrance to a dirt path on the right just before the Gas Station and a "Speak Visual" billboard. The dirt path leads to a billboard smash. You want a good deal of boost for the central jump so you clear the road and land on the path on the other side - stay to the left to remain on the path. | 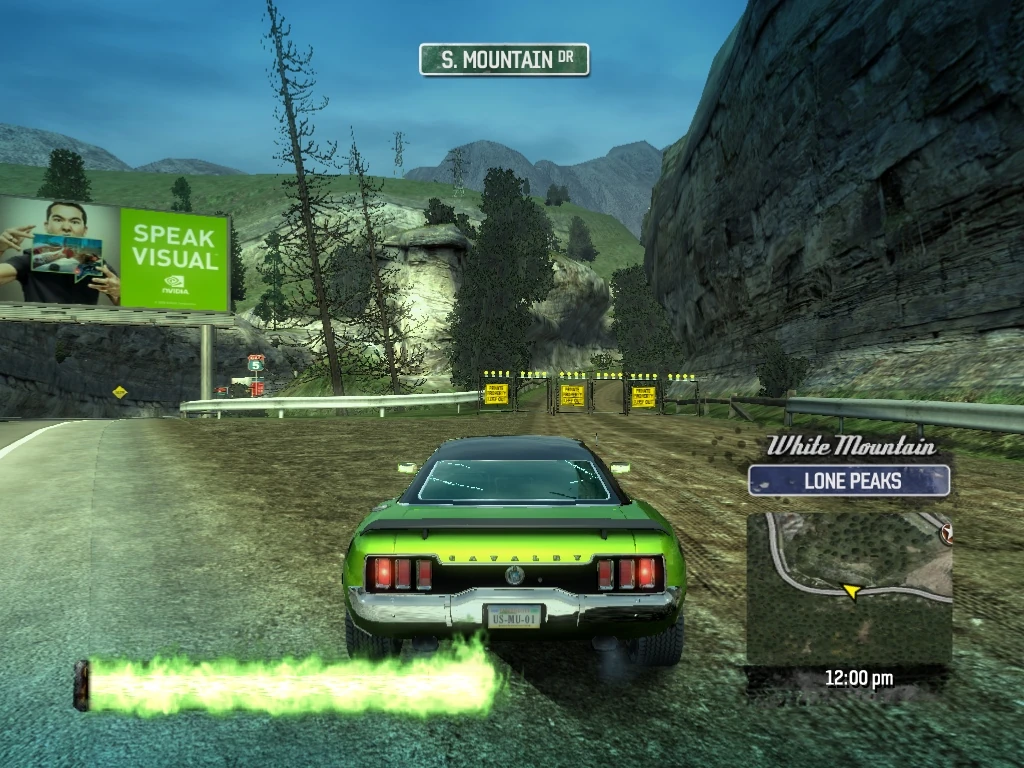
|
| 186 | White Mountain Lone Peaks |
Drive through Smash Gate 186 where the dirt path rejoins S. Mountain Drive, now heading north. (If you did not make the jump, just look for a hill descending from the left and turn around and knock over the smash gates at the base of it.) | 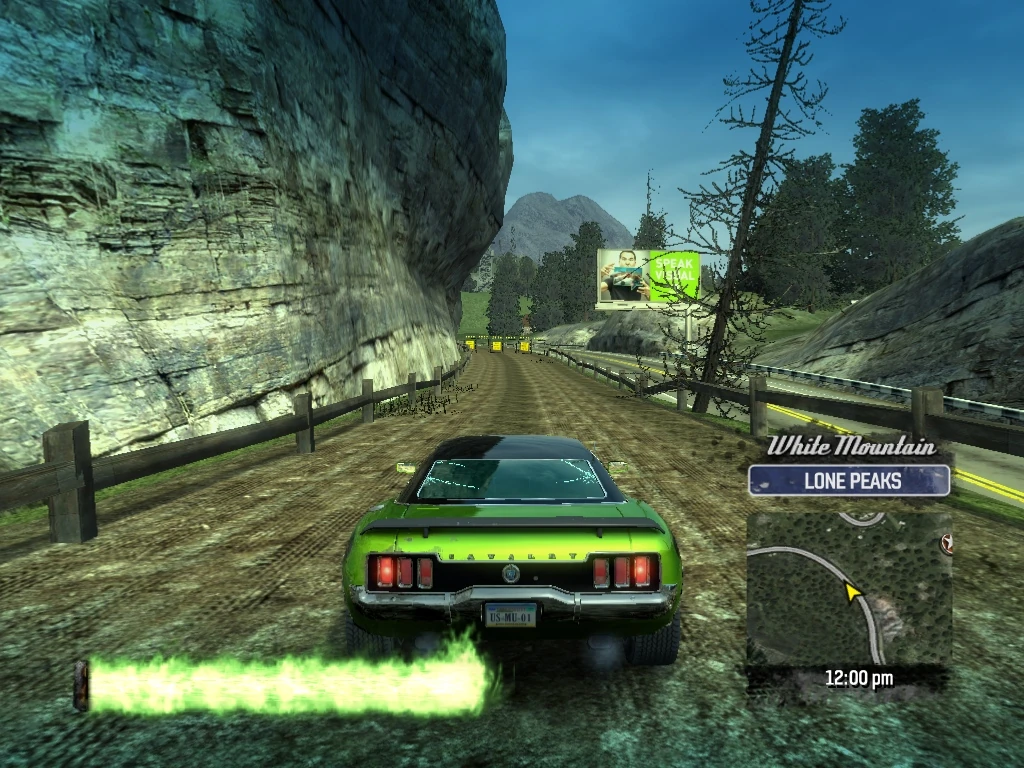
|
| 187 | White Mountain Lone Peaks |
Drive through Smash Gate 187 just ahead on the right at the entrance to a dirt path that eliminates the apex of the hairpin turn on S. Mountain Drive. | 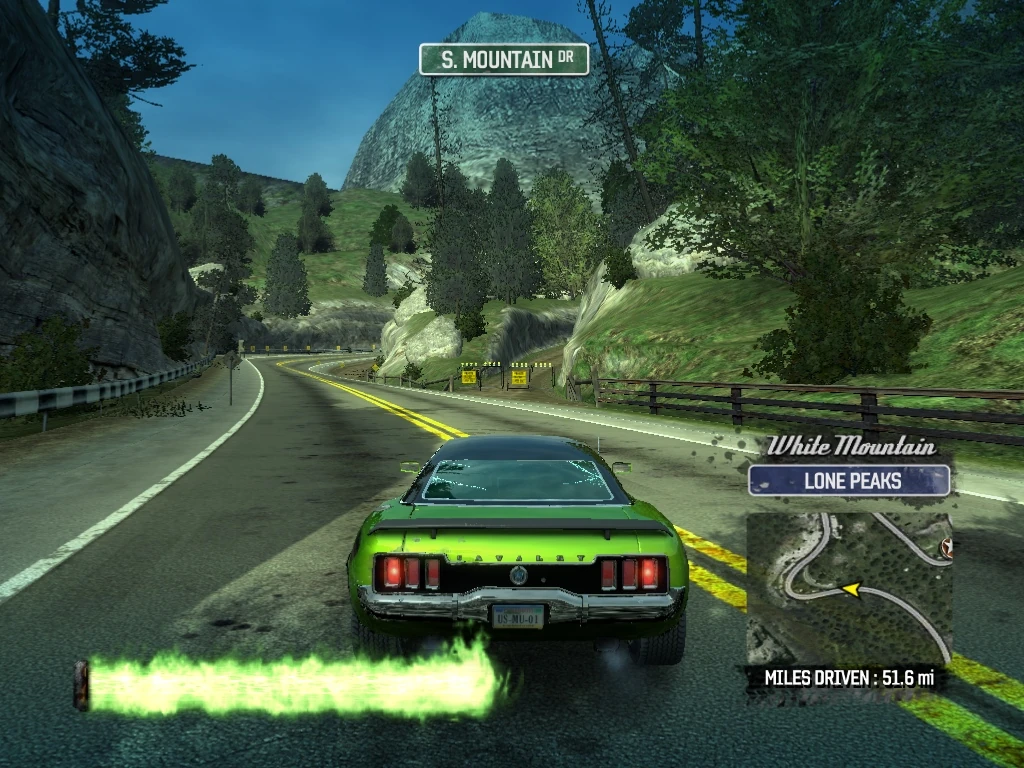
|
| 188 | White Mountain Lone Peaks |
Drive through Smash Gate 188 where the path rejoins S. Mountain Drive, still headed north. | 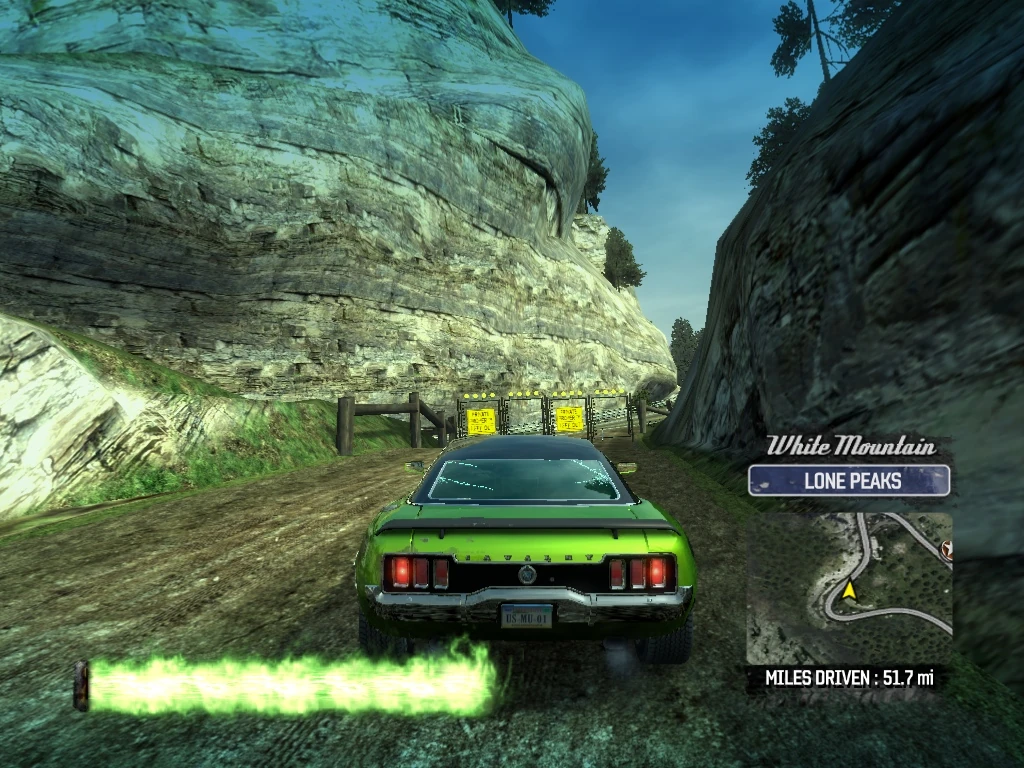
|
| 189 | White Mountain Lone Peaks |
As you approach the covered bridge at the intersection of Hans Way, you will drive past Smash Gate 191 on the right. Smash Gate 189 is down a dirt path to the left of the bridge and leads to a billboard smash. Drive through it with mild boost. | 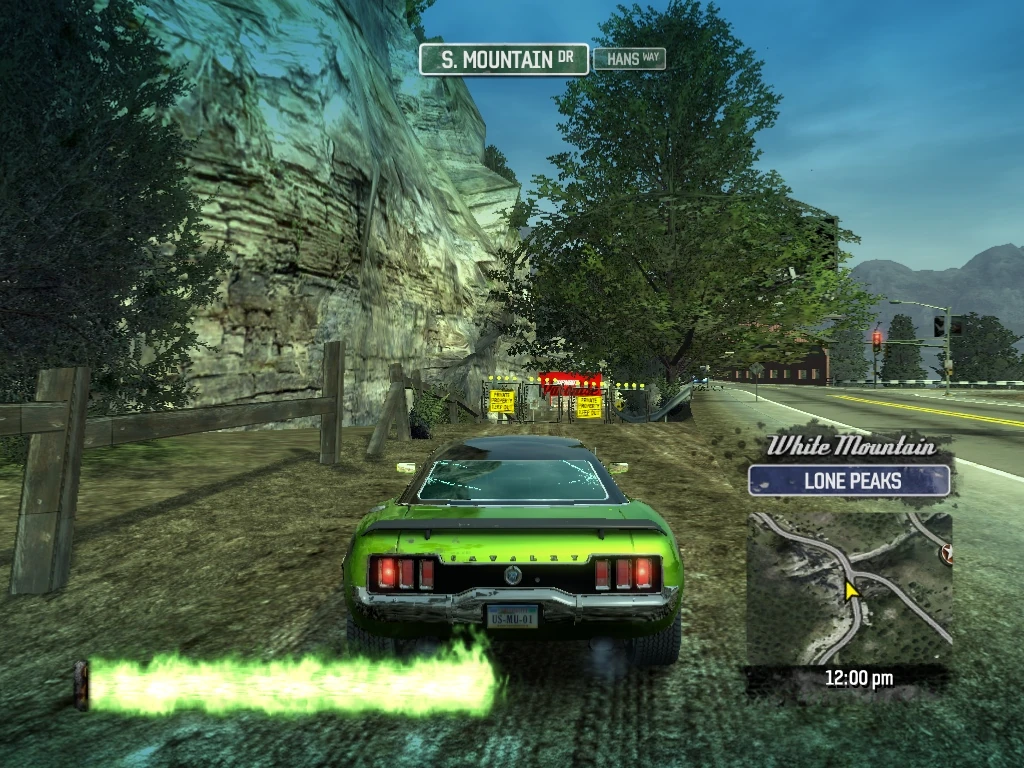
|
| 190 | White Mountain Lone Peaks |
Smash the billboard and drive through Smash Gate 190 at the opposite end of the path where it re-joins S. Mountain Drive. Turn right (south) on (now) N. Mountain Drive and go through the Hans Way intersection. | 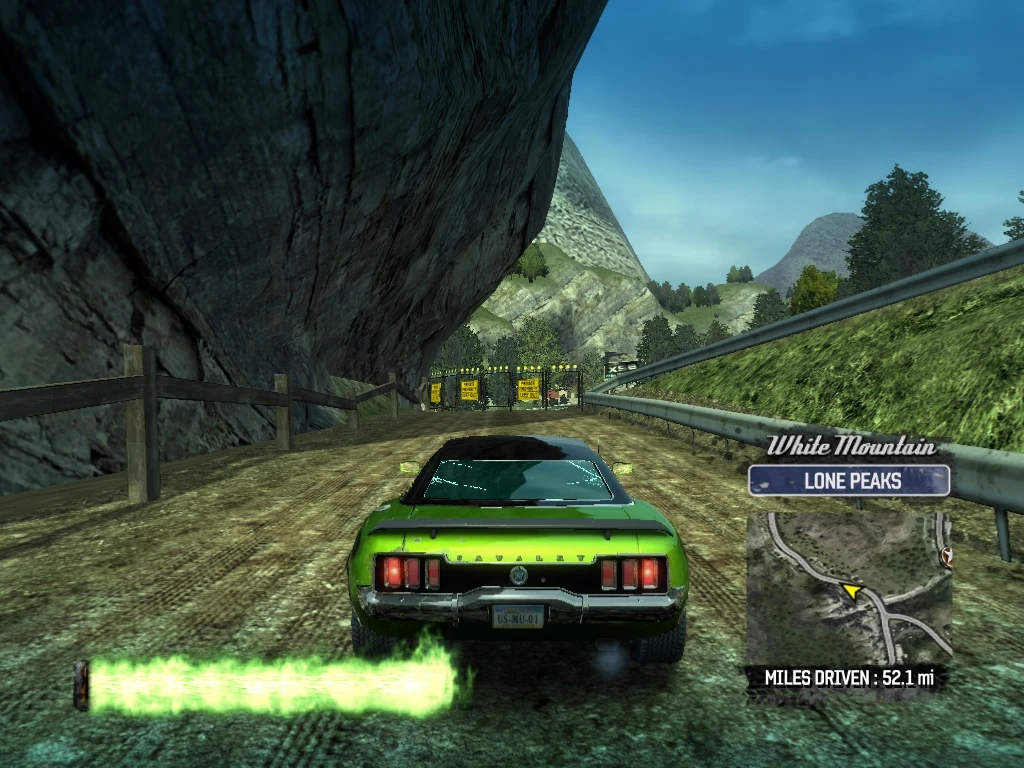
|
| 191 | White Mountain Lone Peaks |
Drive through Smash Gate 191 on the left just before the White Mountain Lookout sign, following a dirt path that cuts the corner onto Hans Way. | 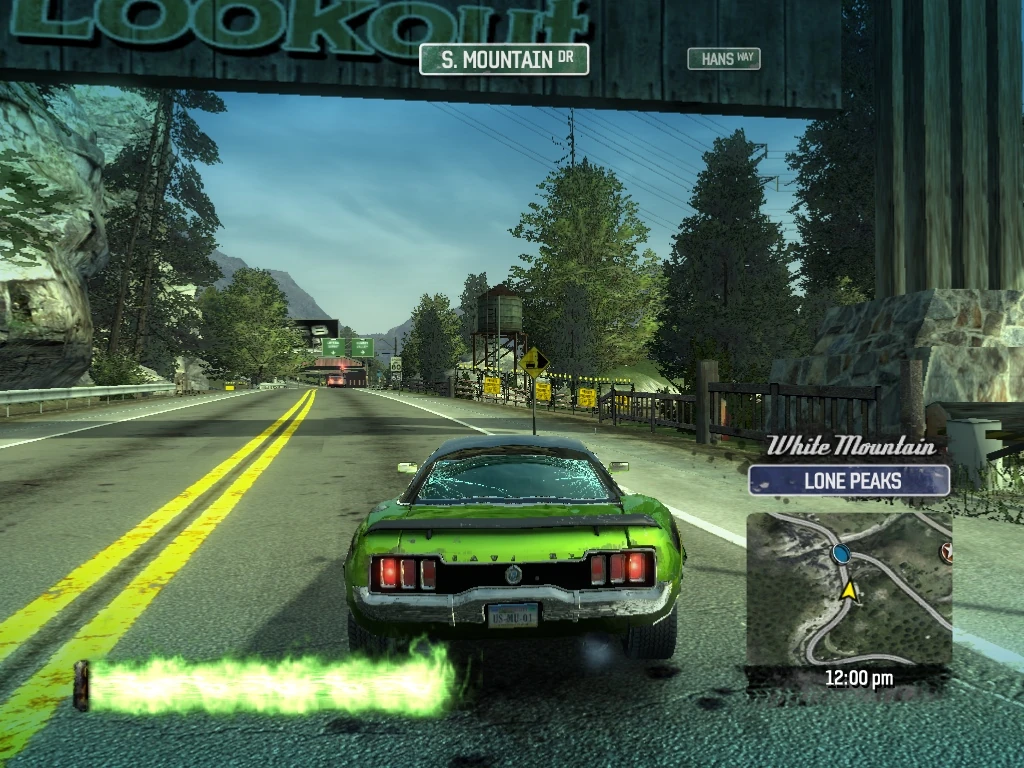
|
| 192 | White Mountain Lone Peaks |
Drive through Smash Gate 192 at the other end of the path, exiting onto Hans Way - turn right, headed south. | 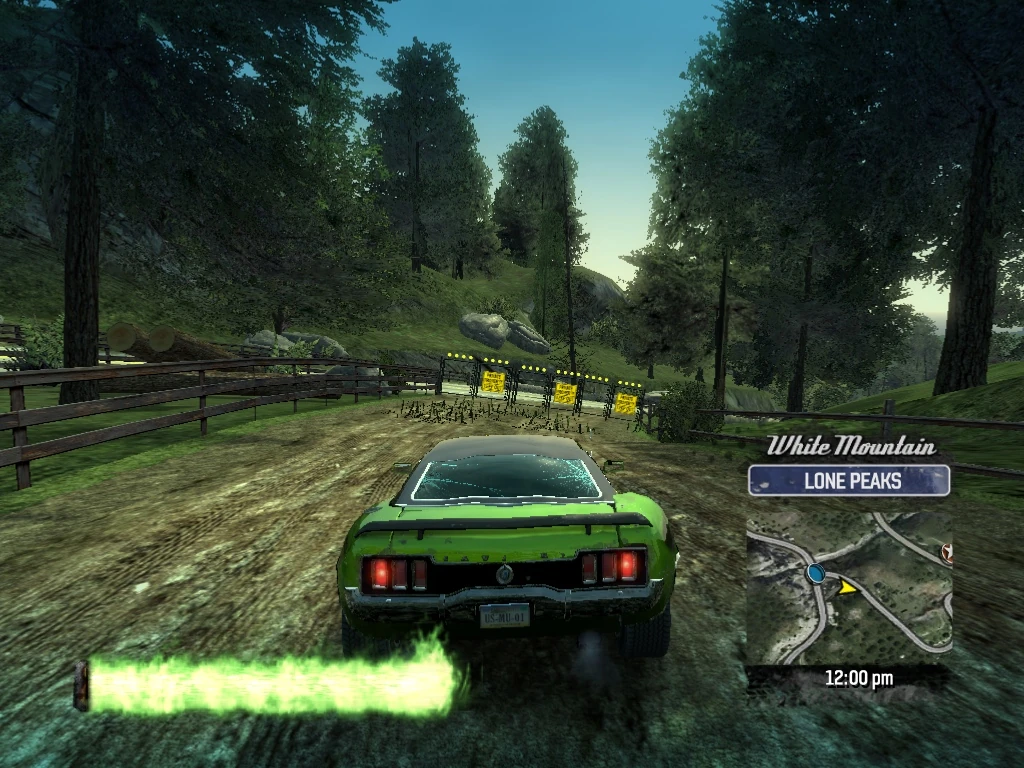
|
| 193 | White Mountain Lone Peaks |
Drive through Smash Gate 193 on the right after the curve where Hans Way turns back north, and follow the dirt path that eliminates a curve in the road. | 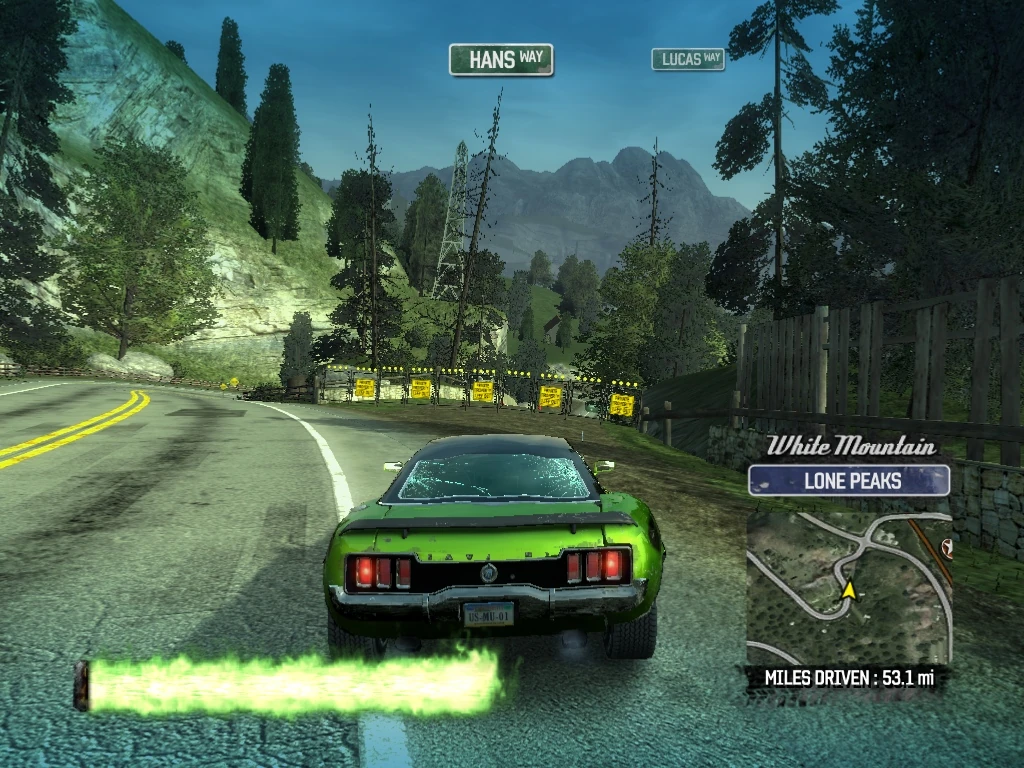
|
| 194 | White Mountain Lone Peaks |
Drive through Smash Gate 194 at the other end of the dirt path, re-joining Hans Way just before the Lucas Way intersection. | 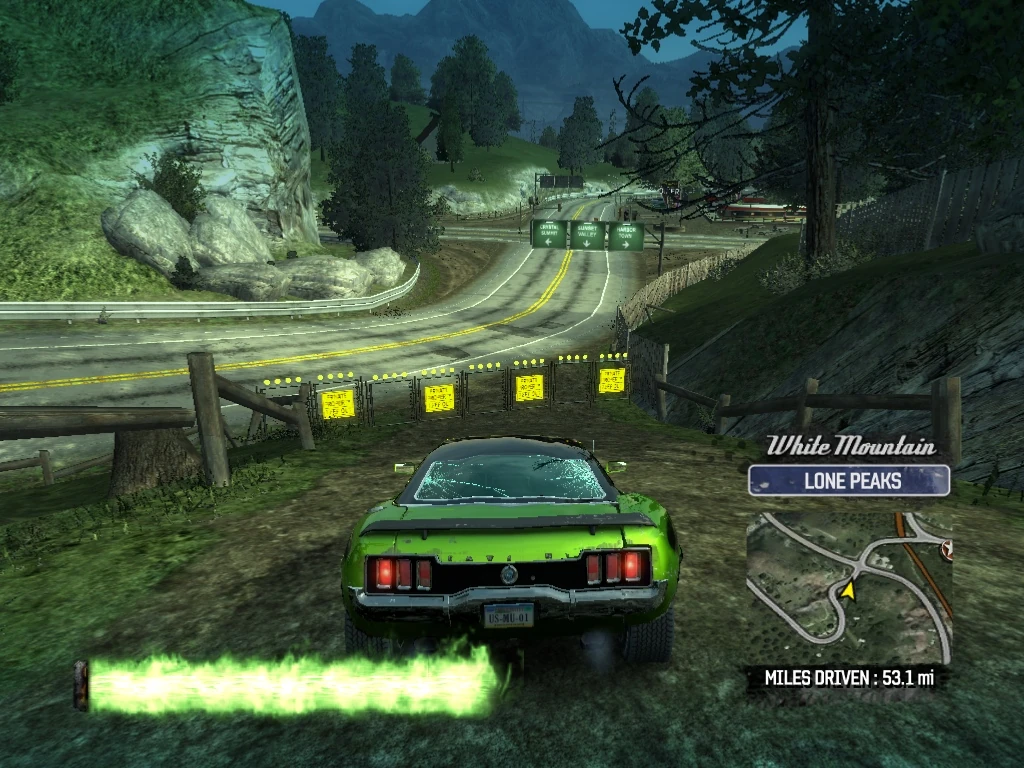
|
| 195 | White Mountain Lone Peaks |
Turn left (northwest) on Lucas Way and go under the tunnel and drive through Smash Gate 195 on the right following a dirt path up and through a barn. | 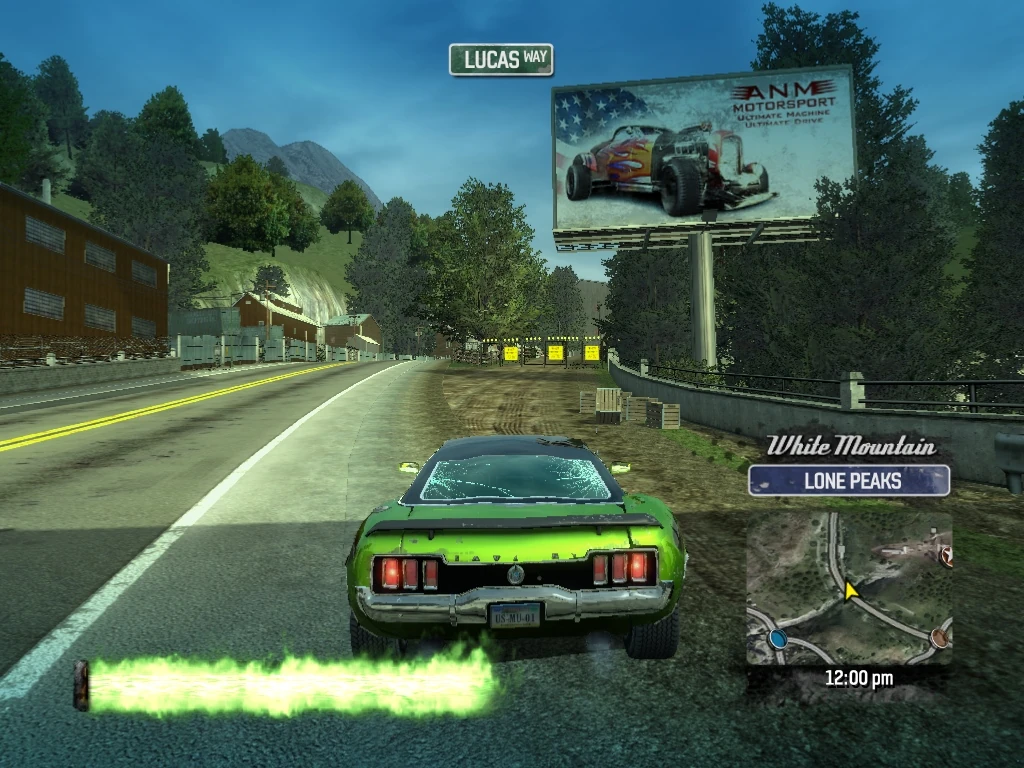
|
| 196 | White Mountain Lone Peaks |
Drive through Smash Gate 196 at the other end of the path through the barn, exiting back onto Lucas Way. | 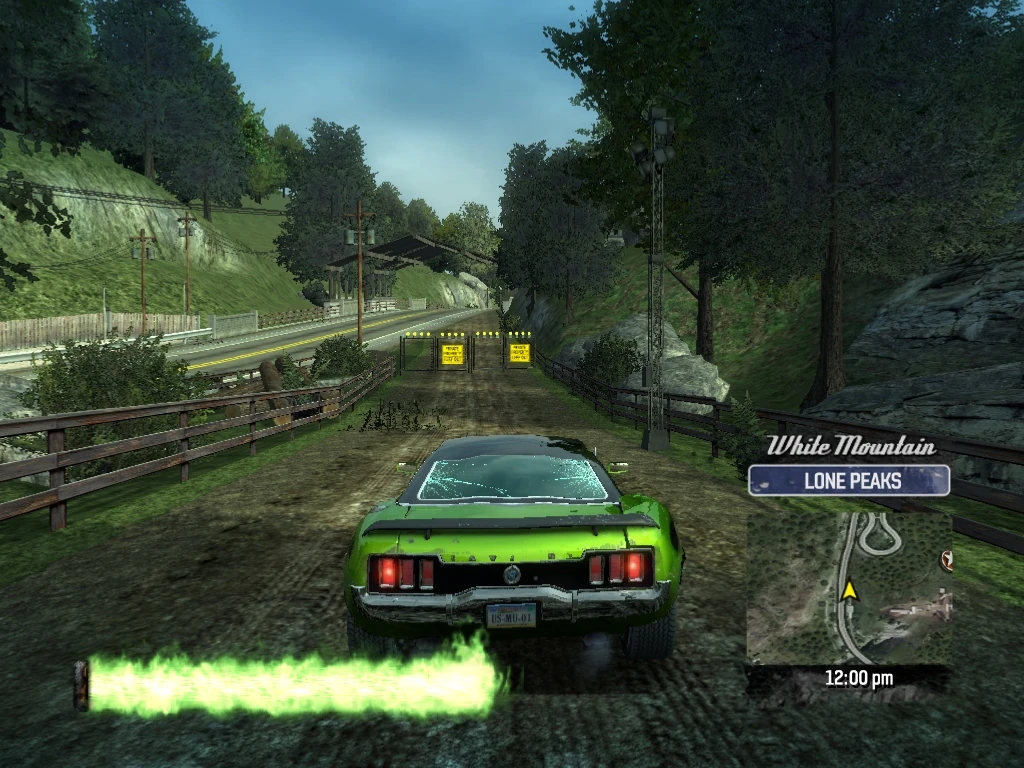
|
| 197 | White Mountain Lone Peaks |
Turn right (southeast) on Schembri Pass and follow the left guardrail. When the guardrail stops, there is Smash Gate 197, marking a path to a billboard smash. (It is easier to see from the opposite direction). Spin around to knock it over, then continue southeast down Schembri Pass. | 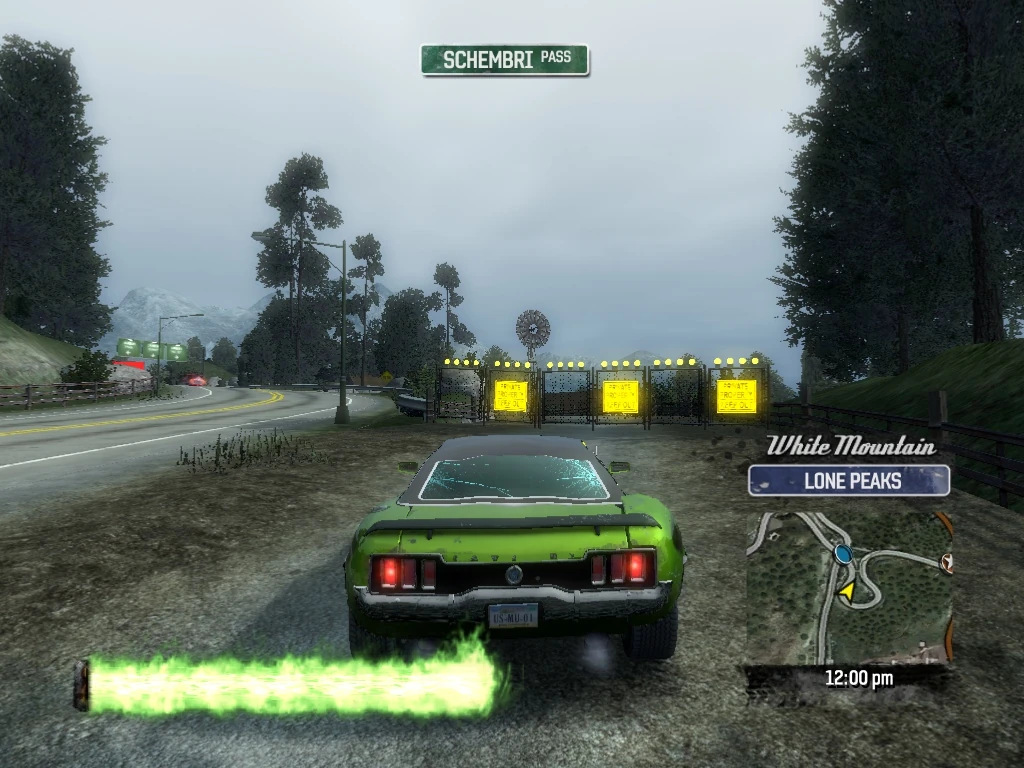
|
| 198 | White Mountain Sunset Valley |
Follow Schembri Pass to the Chubb Lane intersection. Smash Gate 198 is on the southwest corner of the intersection at the entrance to Tindle's Mine. Drive through the Smash Gate and into the mine. | 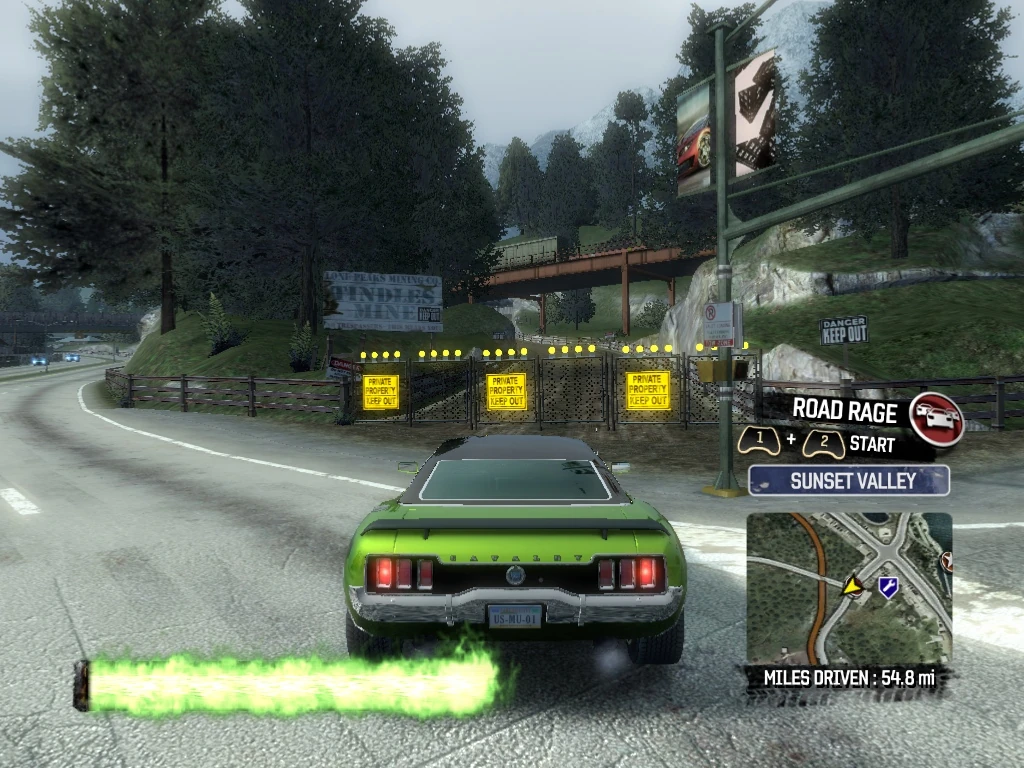
|
| 199 | White Mountain Sunset Valley |
Follow the main path through the mine, and drive through Smash Gate 199 where the mine again exits to Chubb Lane. | 
|
| 200 | White Mountain Sunset Valley |
Smash Gate 200 is directly in front of you and marks a path which cuts the corner between Chubb Lane and Hans Way. Drive across Chubb Lane and through Smash Gate 200. | 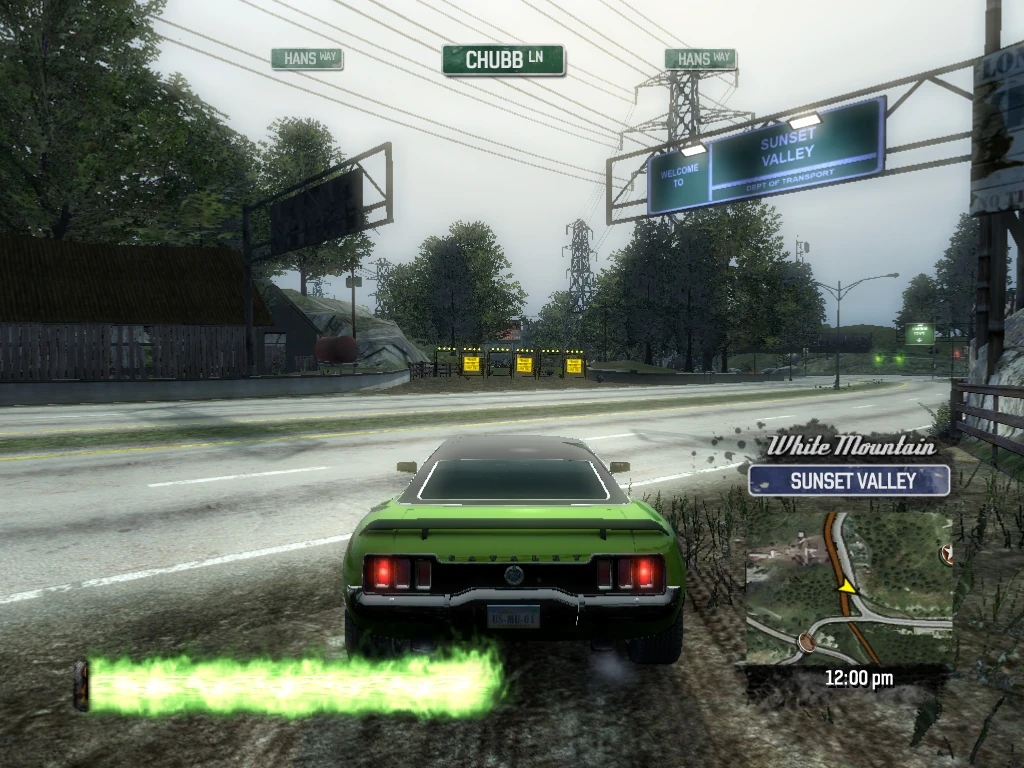
|
| 201 | White Mountain Lone Peaks |
Follow the dirt path and drive through Smash Gate 201 at the opposite end, exiting onto Hans Way eastbound, oncoming. | 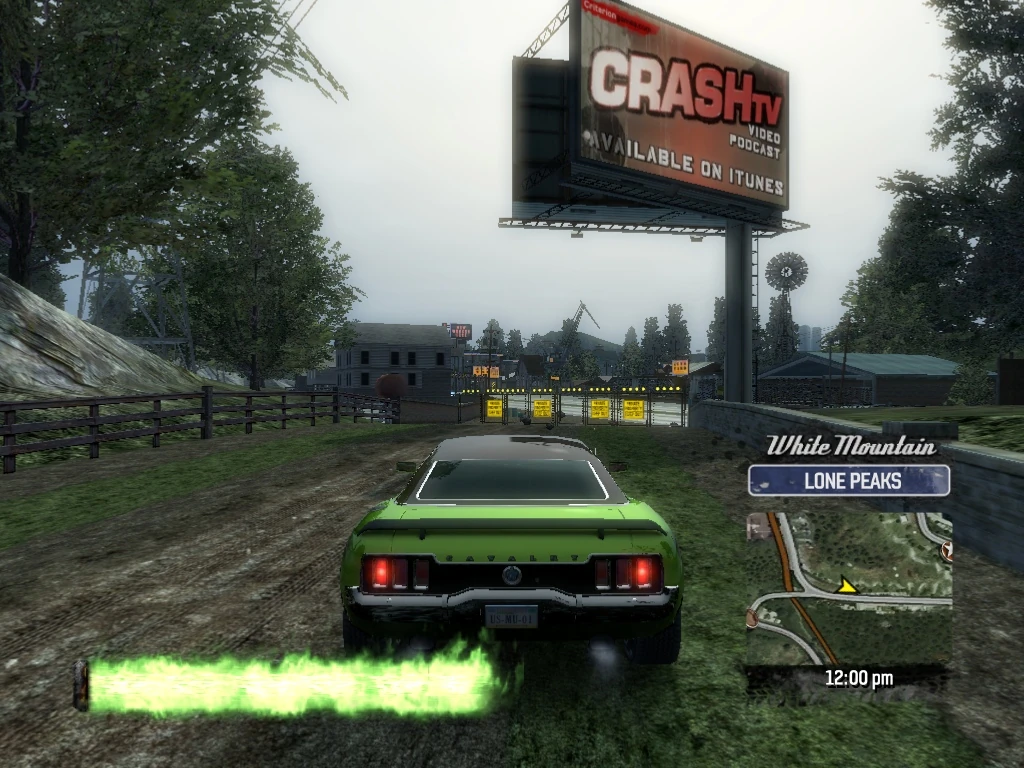
|
| 202 | White Mountain Lone Peaks |
Drive through Smash Gate 202 on the northwest corner of Hans Way and W. Lake Drive and follow the lined pathway. | 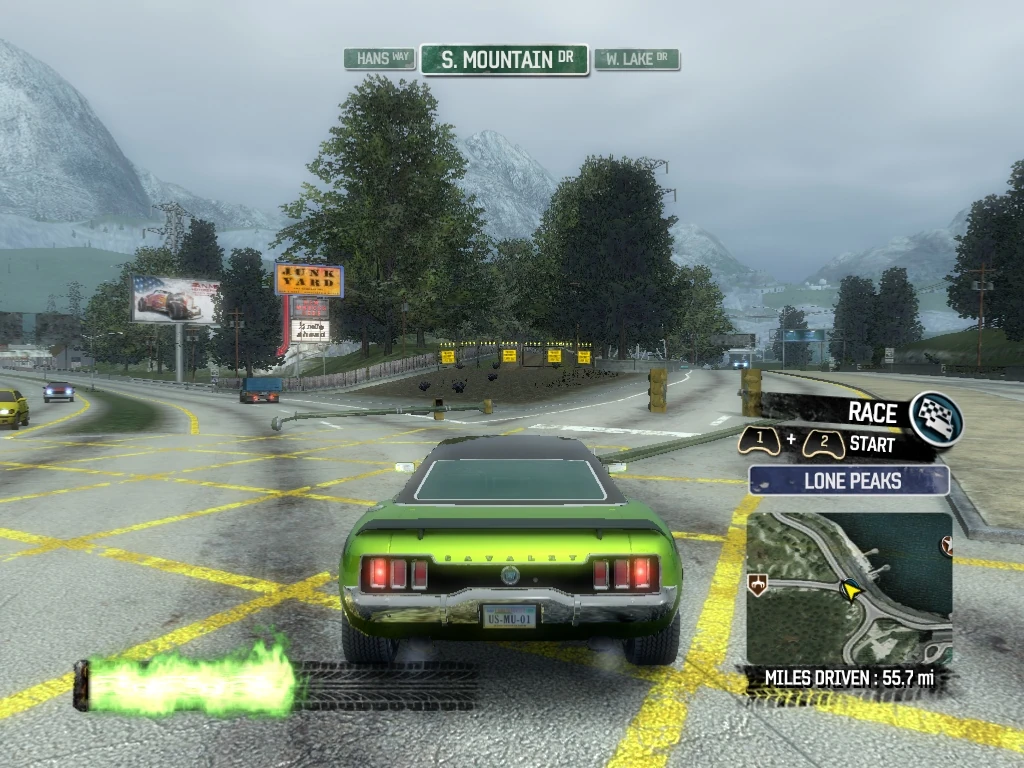
|
| 203 | White Mountain Sunset Valley |
Drive through Smash Gate 203 at the other end of the pathway, exiting back onto W. Lake Drive, northbound. | 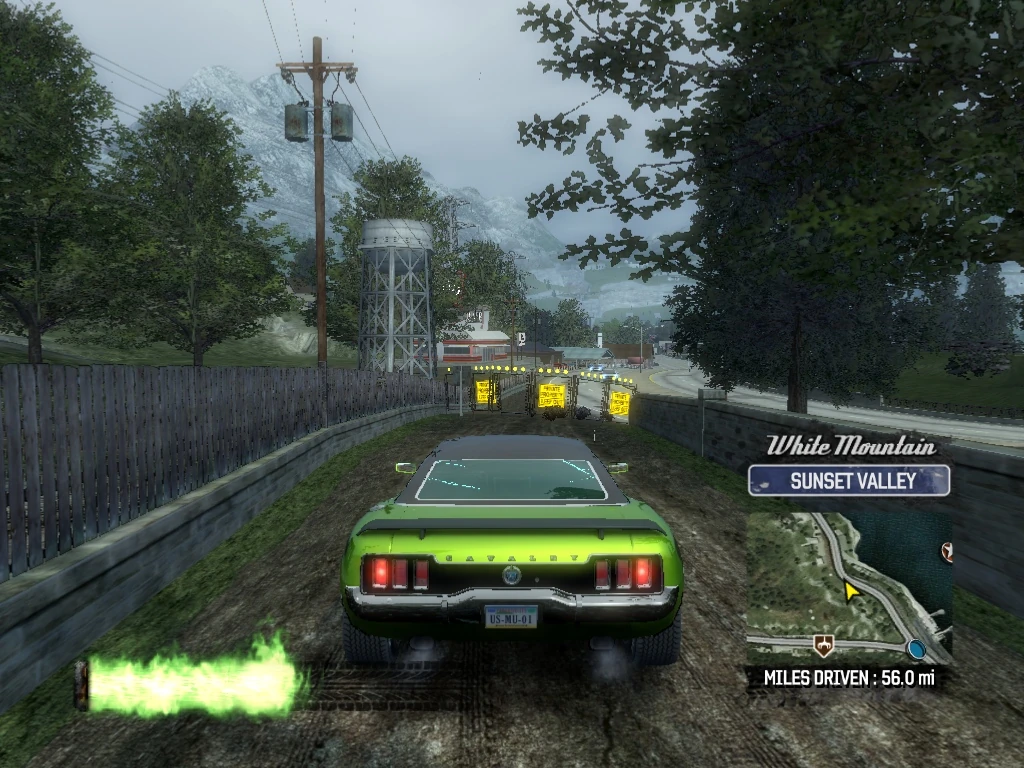
|
| 204 | White Mountain Sunset Valley |
Turn right into the parking lot just before the Hills Motel and Smash Gate 204 is just behind you (leads to a billboard smash and Rockridge Dam via Smash Gate 173). For now, just knock it over and continue north on W. Lake Drive. | 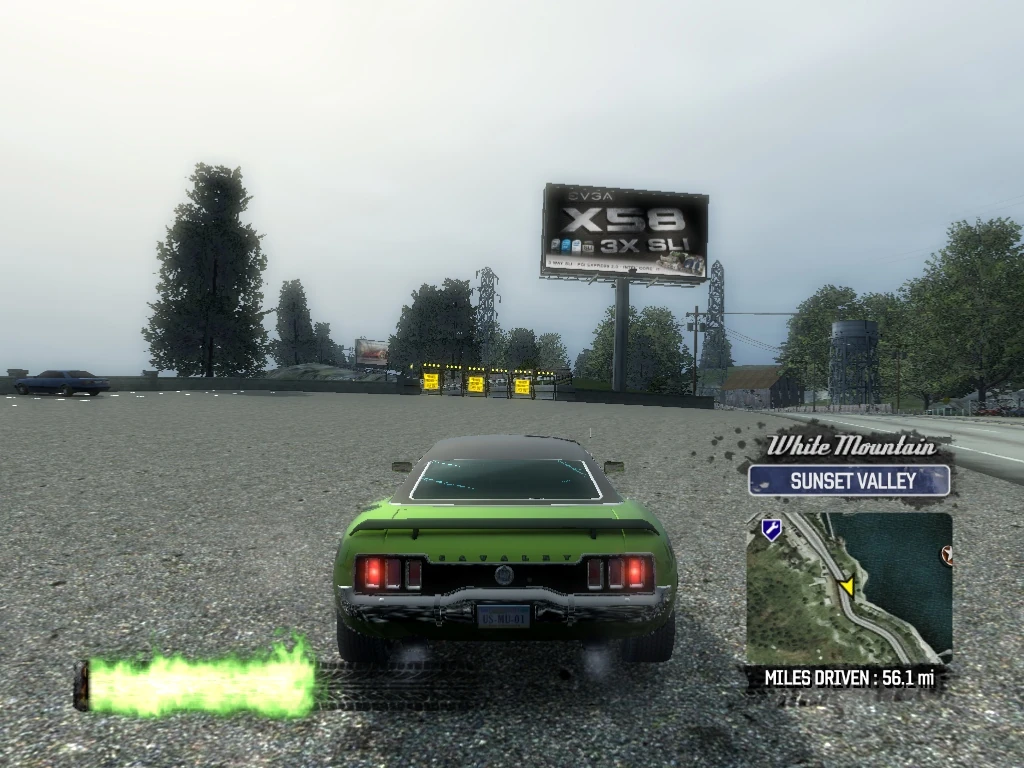
|
| 205 | White Mountain Sunset Valley |
Smash Gates 205 and 206 are located on the right and left sides of W. Lake Drive, respectively, just north of the Hills Motel. Veer right and knock down Smash Gate 205, then cross over W. Lake Drive for Smash Gate 206. | 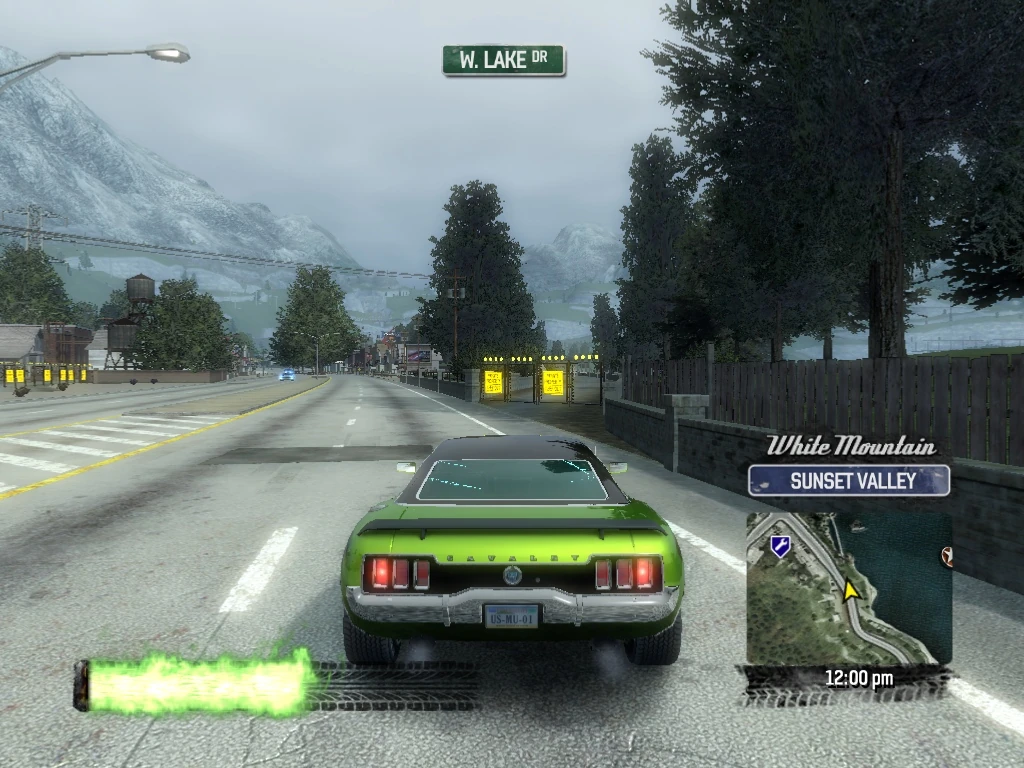
|
| 206 | White Mountain Sunset Valley |
Drive through Smash Gate 206 and follow the alleyway behind it north. | 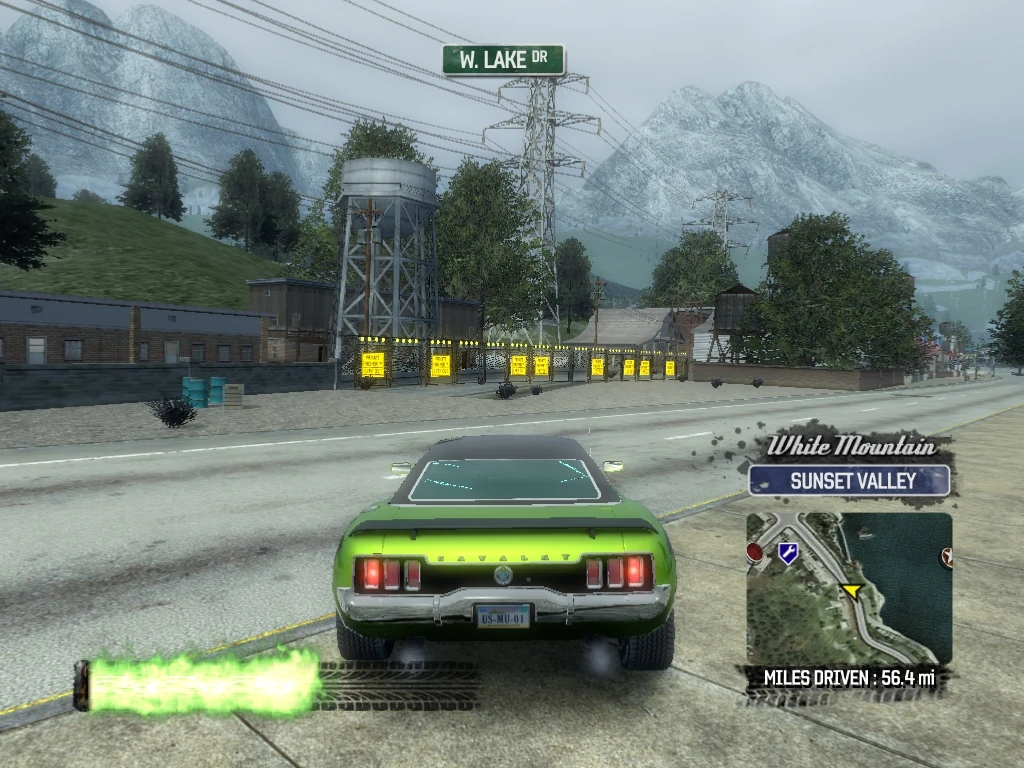
|
| 207 | White Mountain Sunset Valley |
Drive through Smash Gate 207 at the other end of the alleyway at the intersection of W. Lake Drive and Chubb Lane, and turn northeast on Chubb Lane. | 
|
| 208 | White Mountain Sunset Valley |
Smash Gate 208 is on the right, just after King Lam's BBQ. Drive through it onto the pathway. | 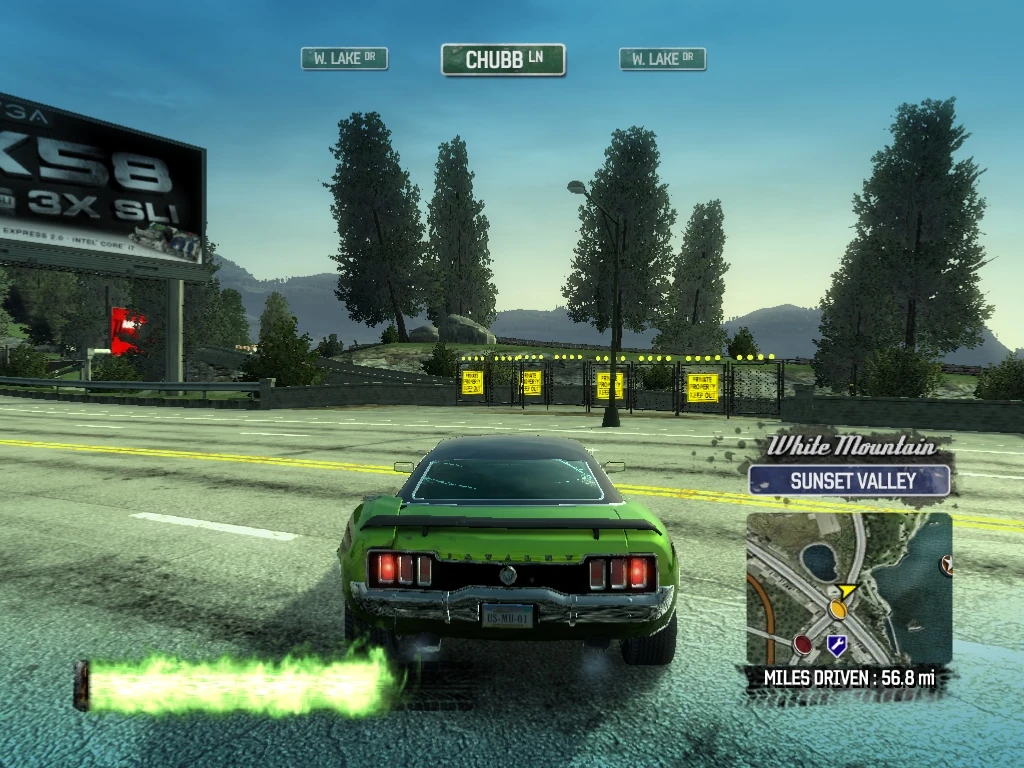
|
| 209 | White Mountain Sunset Valley |
Take an immediate left to knock down Smash Gate 209, then back up. | 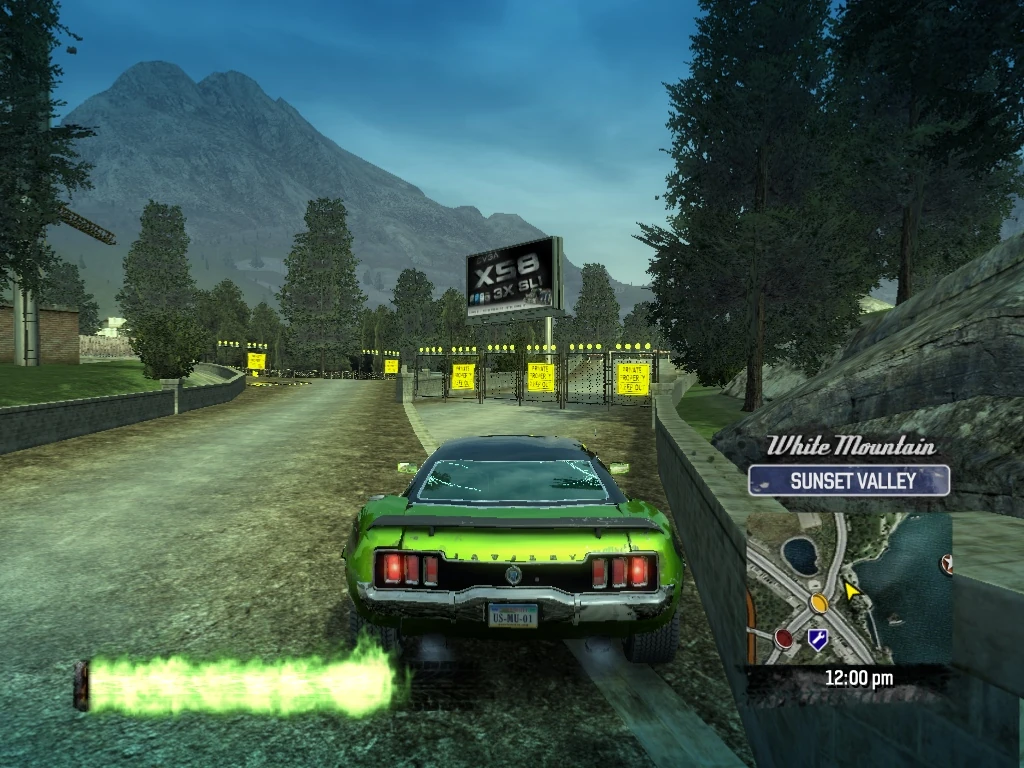
|
| 210 | White Mountain Sunset Valley |
Drive back out through the remains of Smash Gate 208 and Smash Gate 210 is in front of you, just across Chubb Lane. Cross over to knock it down, then continue northeast on Chubb Lane. | 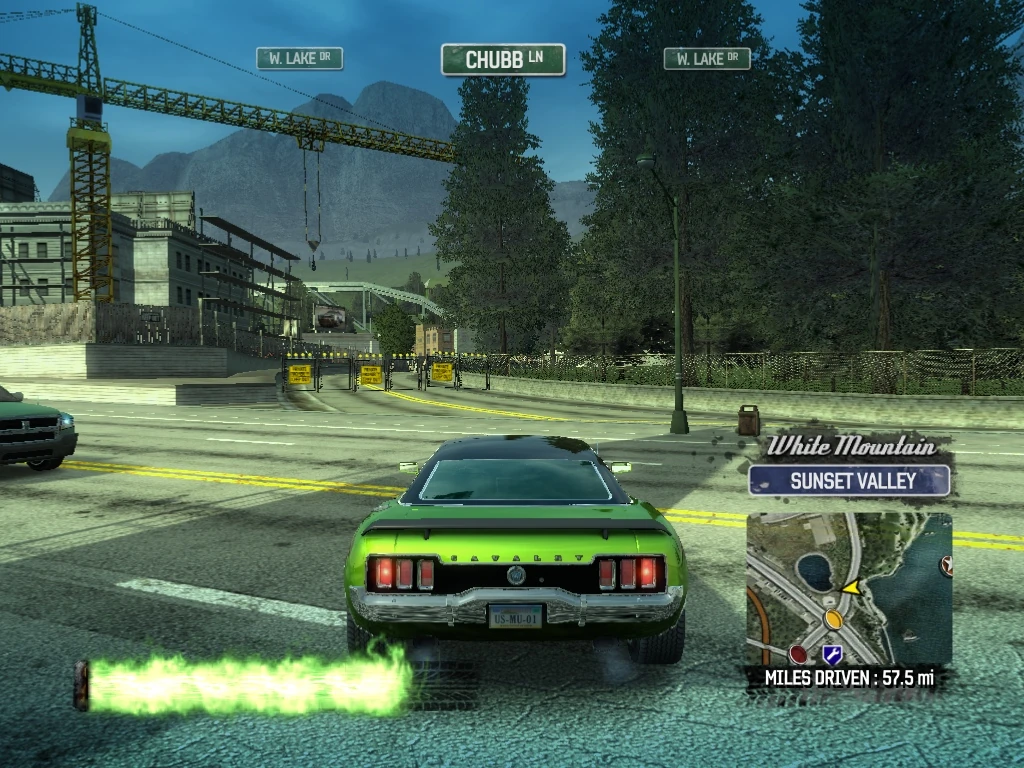
|
| 211 | White Mountain Sunset Valley |
Drive through Smash Gate 211 just ahead on the left and follow the access road behind it. | 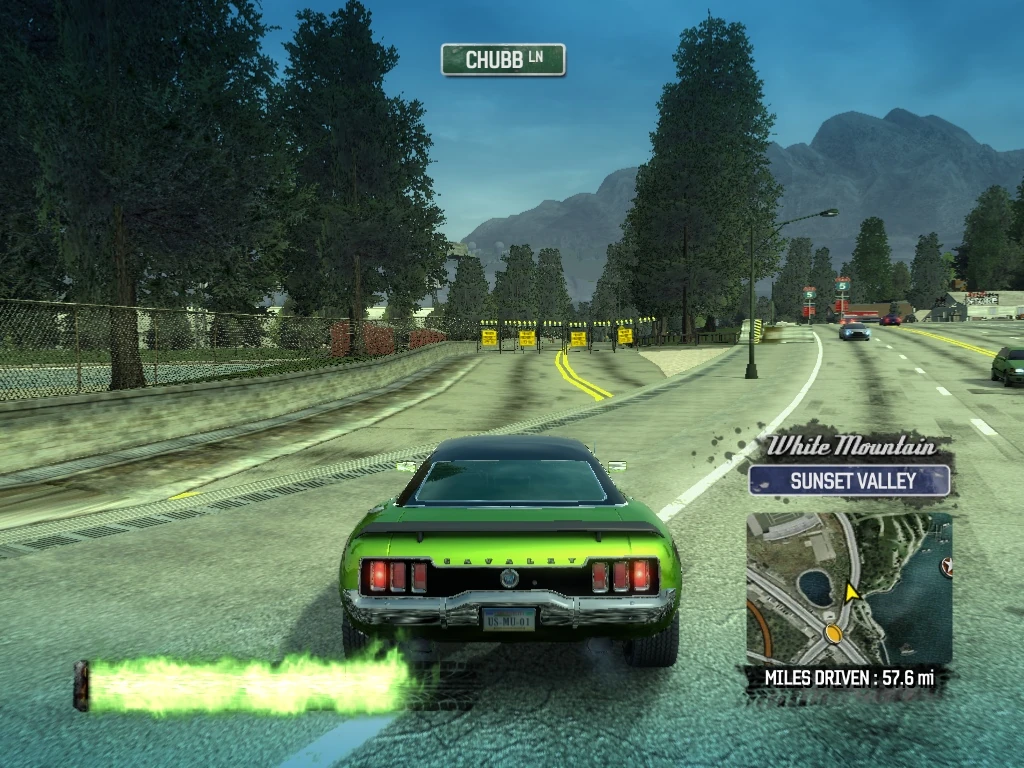
|
| 212 | White Mountain Sunset Valley |
Drive through Smash Gate 212 at the other end of the access road, just past the soccer stadium, exiting back onto Chubb Lane heading northwest. | 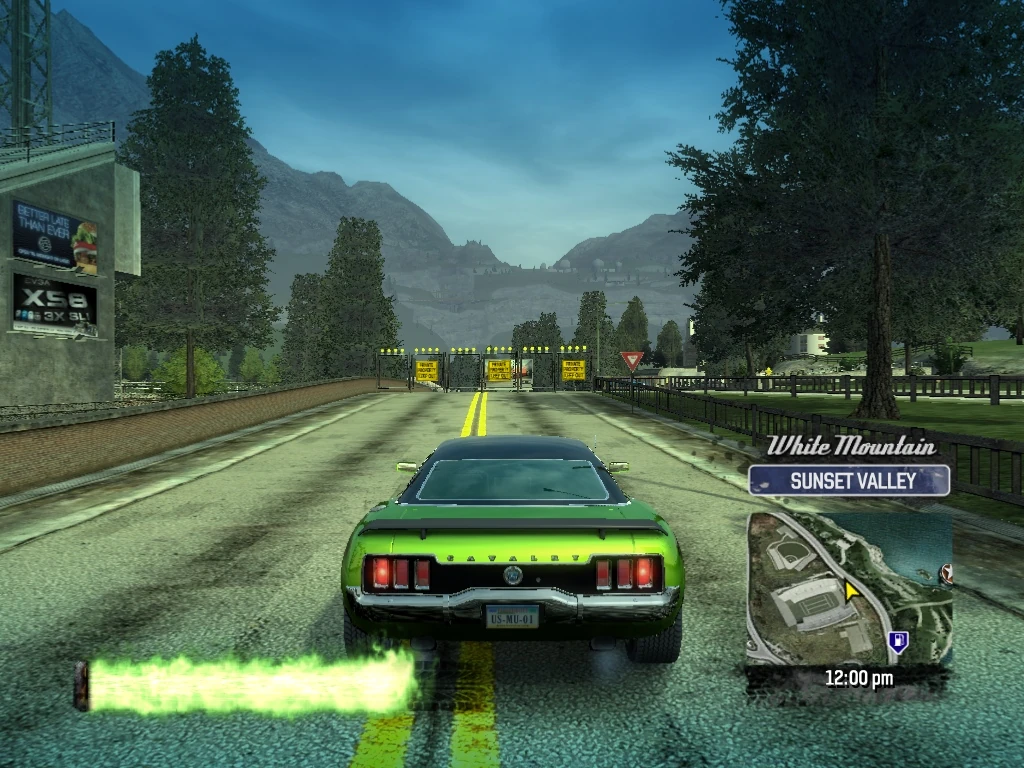
|
| 213 | White Mountain Sunset Valley |
Cross over W. Lake Drive on Chubb Lane, and turn left just after the Paradise Woods Signs and drive through Smash Gate 213, entering a lighted sidewalk. | 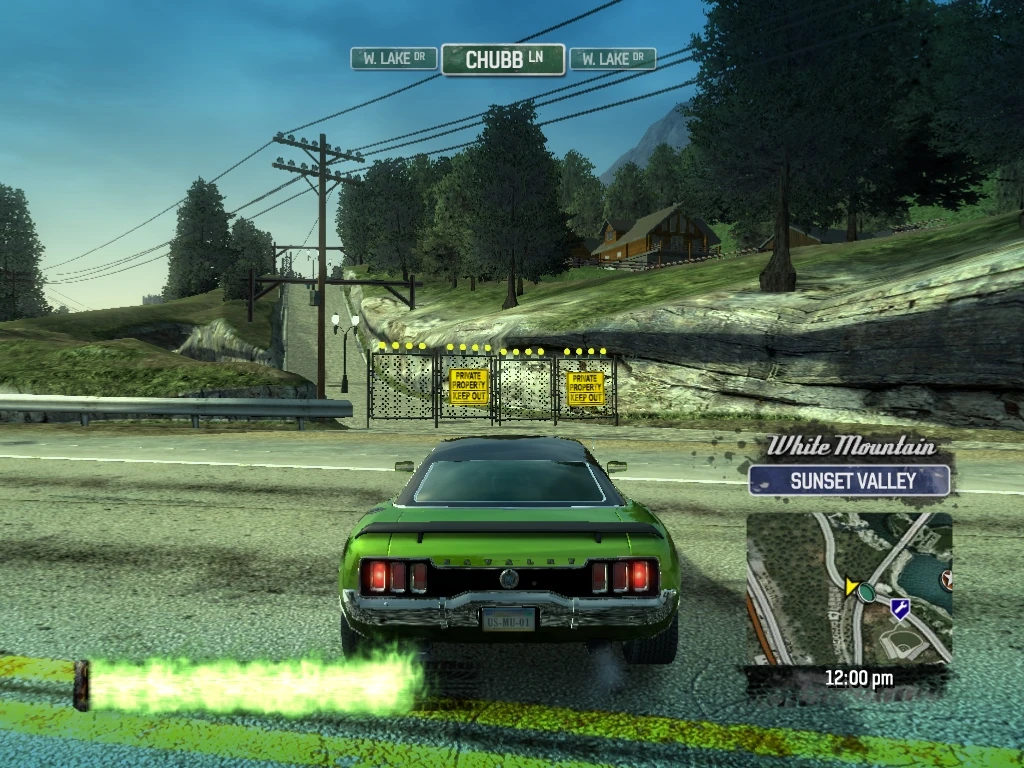
|
| 214 | White Mountain Sunset Valley |
Smash Gate 214 is just ahead and to the left of the lighted sidewalk, exiting back onto W. Lake Drive. Veer left and knock it down, then back up and head south down the lighted sidewalk. | 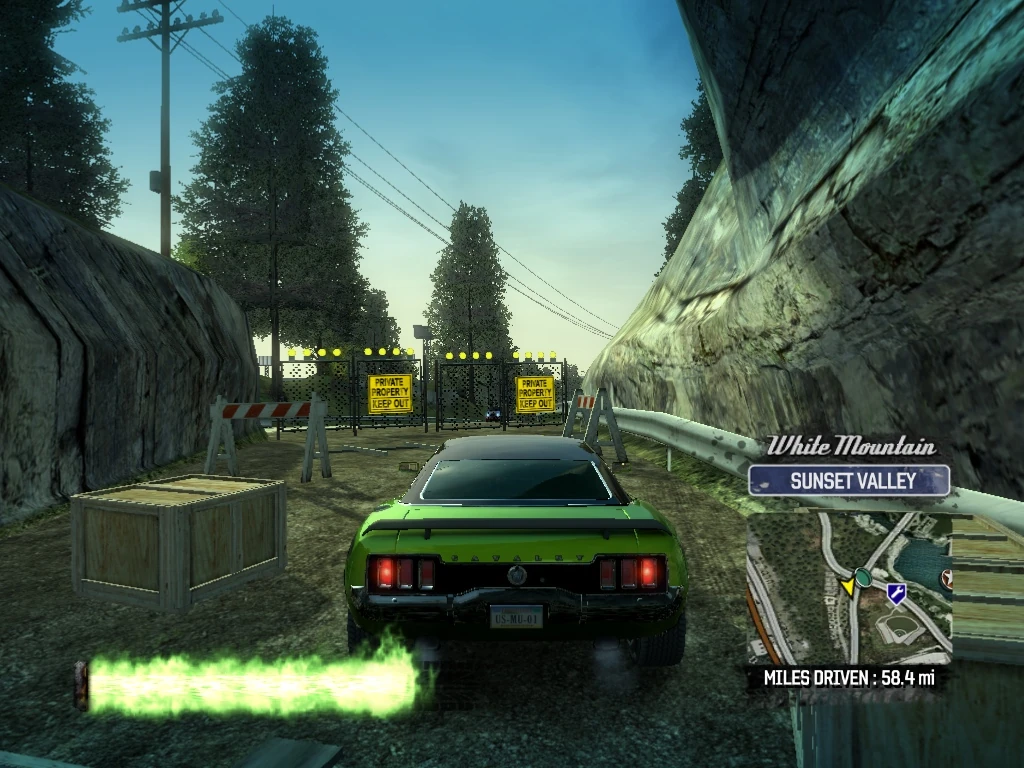
|
| 215 | White Mountain Sunset Valley |
Follow the lighted sidewalk and stay to the left to drive through Smash Gate 215 at the opposite end, exiting back onto W. Lake Drive, southbound. | 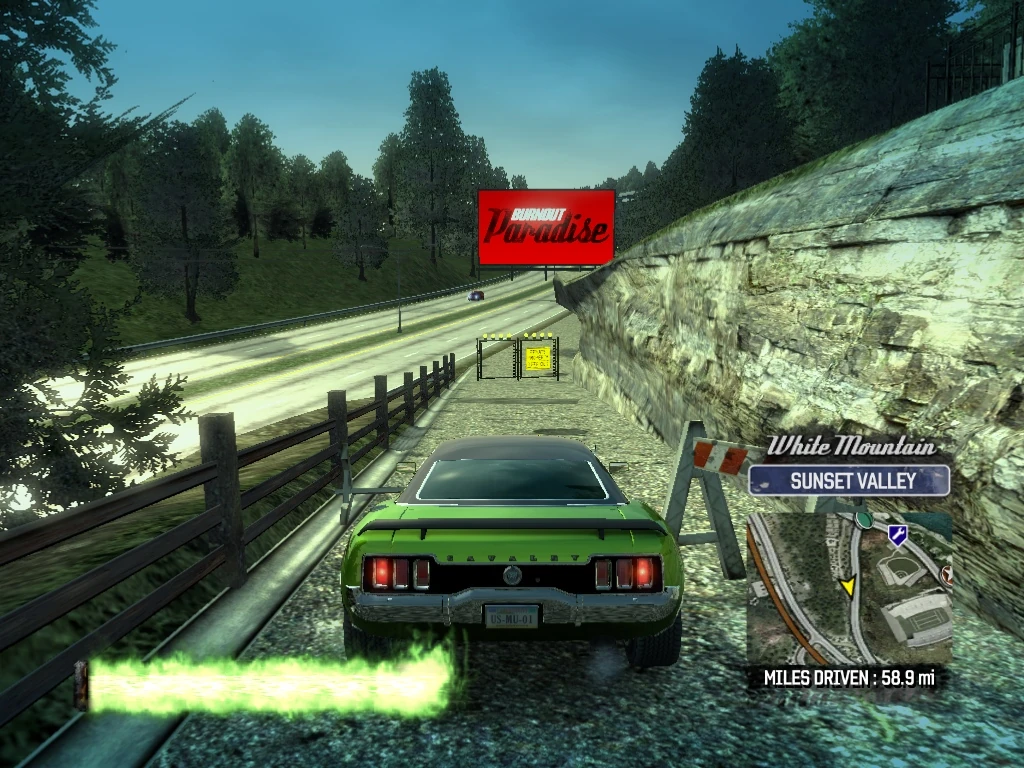
|
| 216 | White Mountain Sunset Valley |
Follow W. Lake Drive southbound, and then drive through Smash Gate 216, which is on the left just before Nelson Way and the metal Sunset Valley entrance sign across the road. | 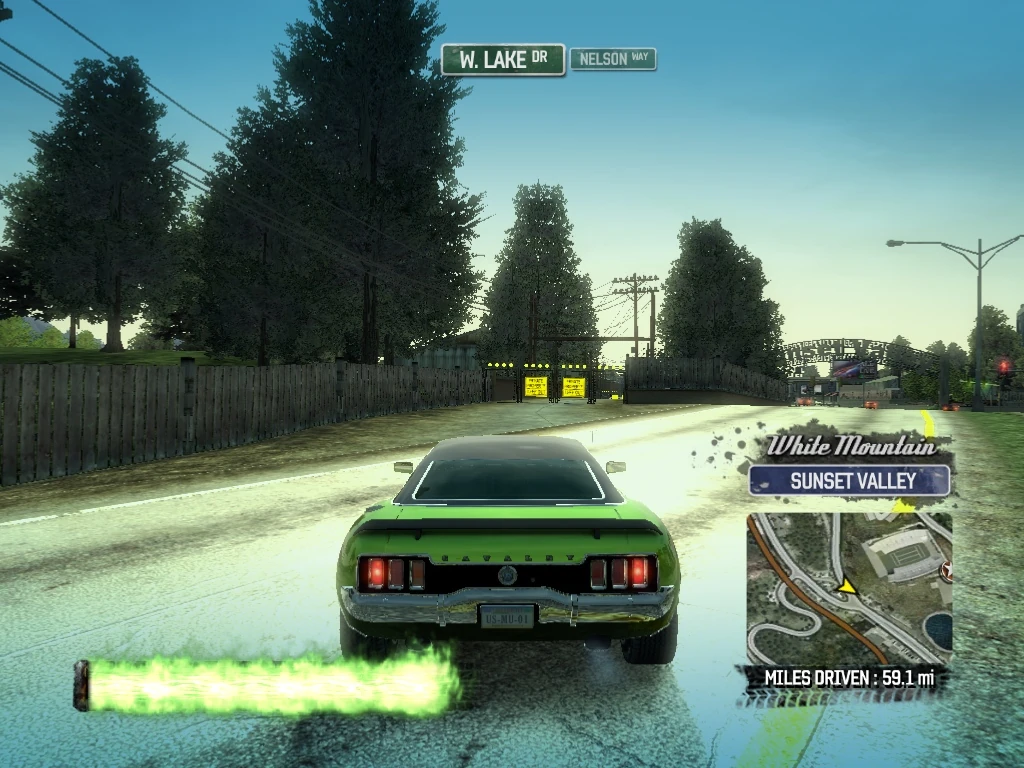
|
| 217 | White Mountain Sunset Valley |
Drive through Smash Gate 217, at the other end of the alleyway you just entered. | 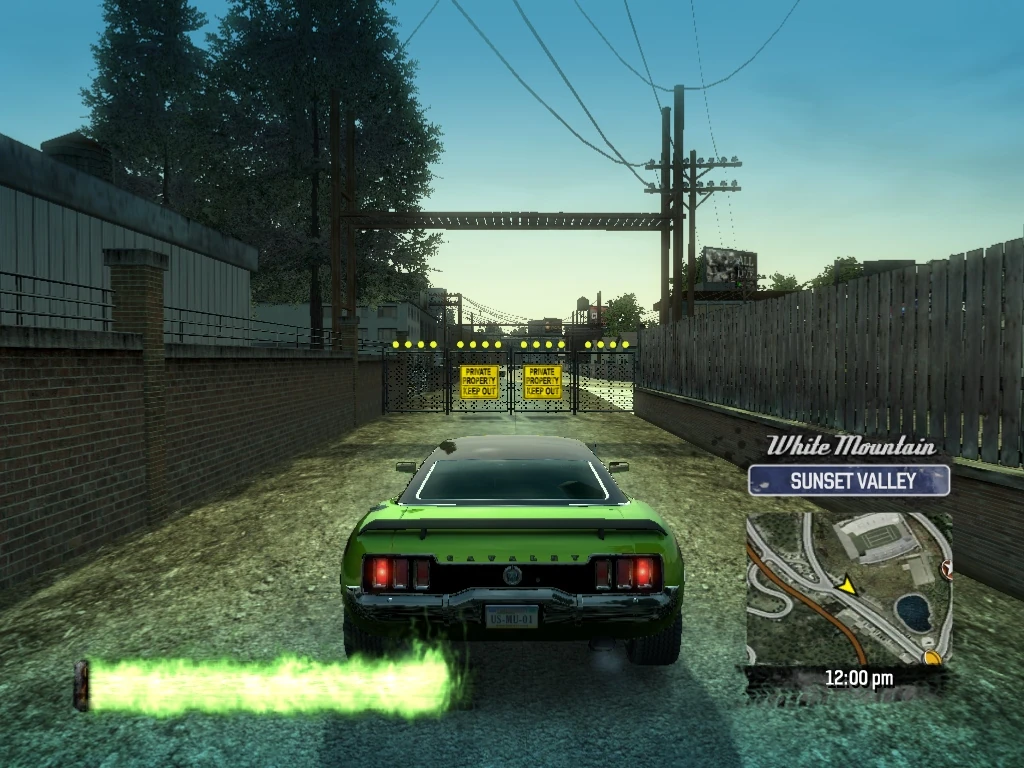
|
| 218 | White Mountain Sunset Valley |
Immediately after driving through Smash Gate 217, take a hard right turn and drive through Smash Gate 218, exiting onto W. Lake Drive. Turn right (northeast) on W. Lake Drive, just south of the intersection with Nelson Way. | 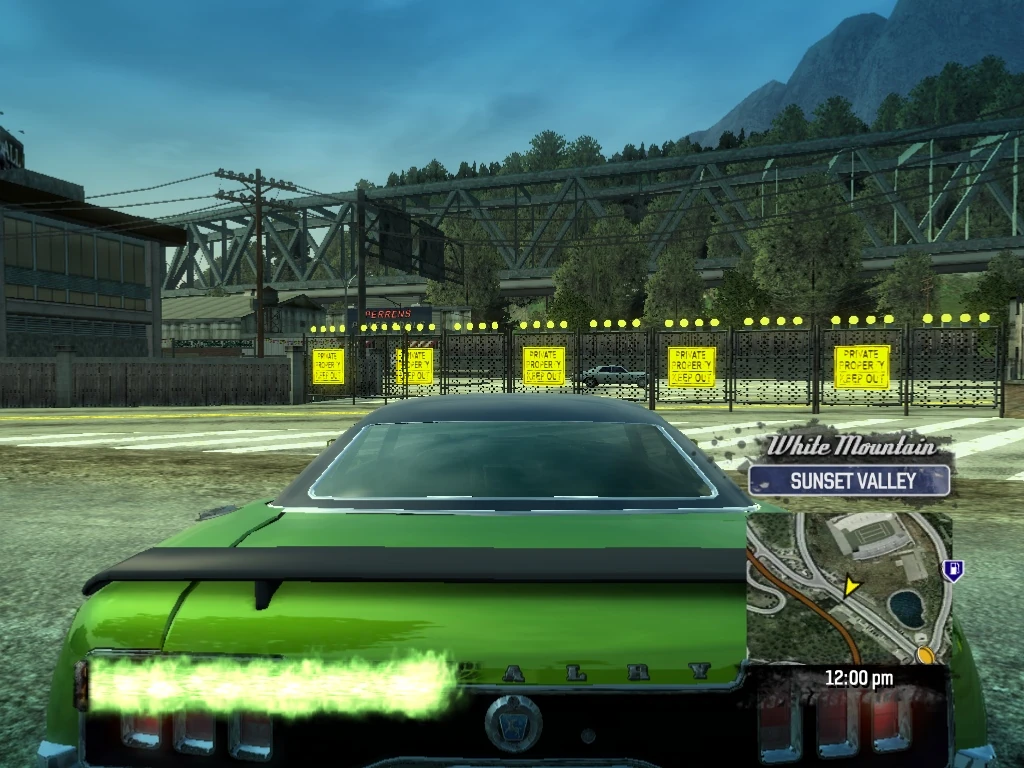
|
| 219 | White Mountain Sunset Valley |
Cross over Nelson Way, and drive through Smash Gate 219 on the left just after the windmill and spanning a dirt path. | 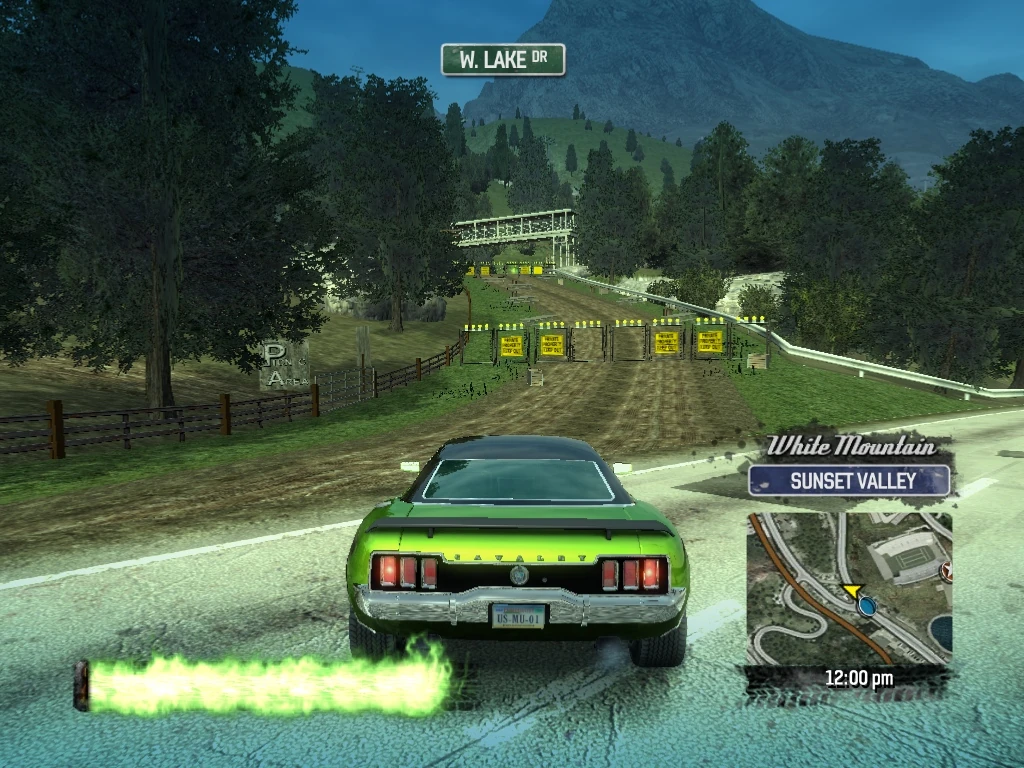
|
| 220 | White Mountain Sunset Valley |
Follow the dirt path and drive through Smash Gate 220, exiting onto Nelson Way, just before the Lucas Way intersection. | 
|
| 221 | White Mountain Lone Peaks |
Cross over Nelson Way and head southwest on Lucas Way. Just after the billboard, turn right (northwest) on Schembri Pass. As you approach N. Mountain Drive, veer right and drive through Smash Gate 221 onto a dirt road. (The dirt road would lead to a pipeline that is a convenient shortcut to the Wind Farm.) | 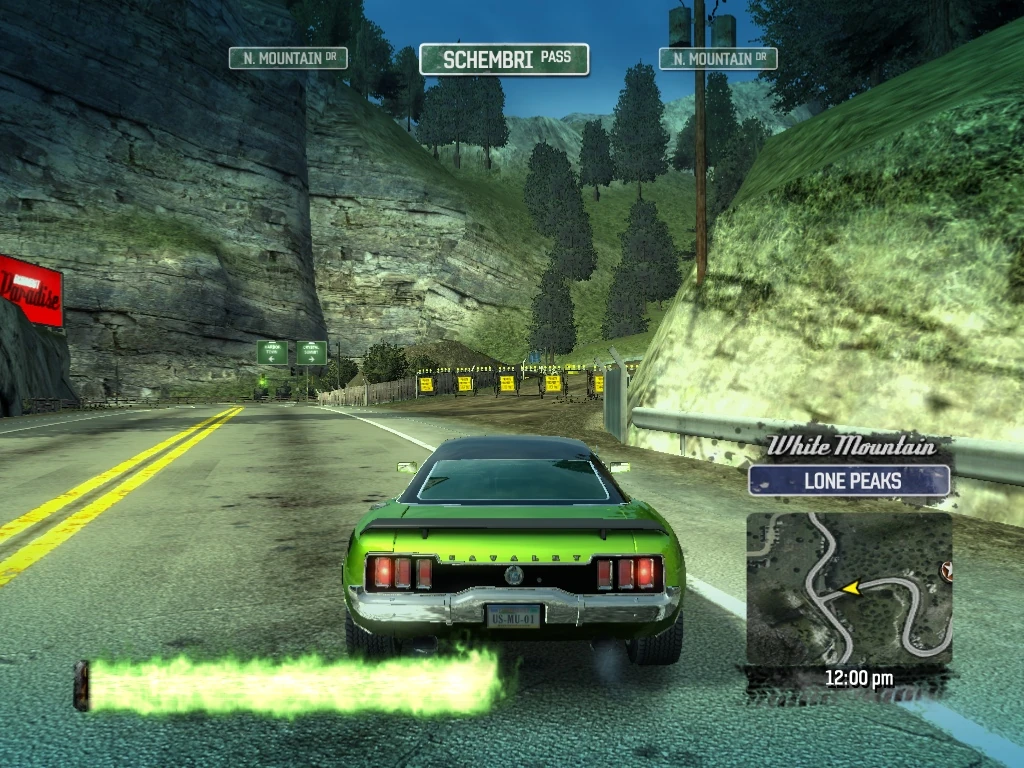
|
| 222 | White Mountain Lone Peaks |
After driving through Smash Gate 221, veer left and drive through Smash Gate 222, exiting onto N. Mountain Road. Turn right and head north. | 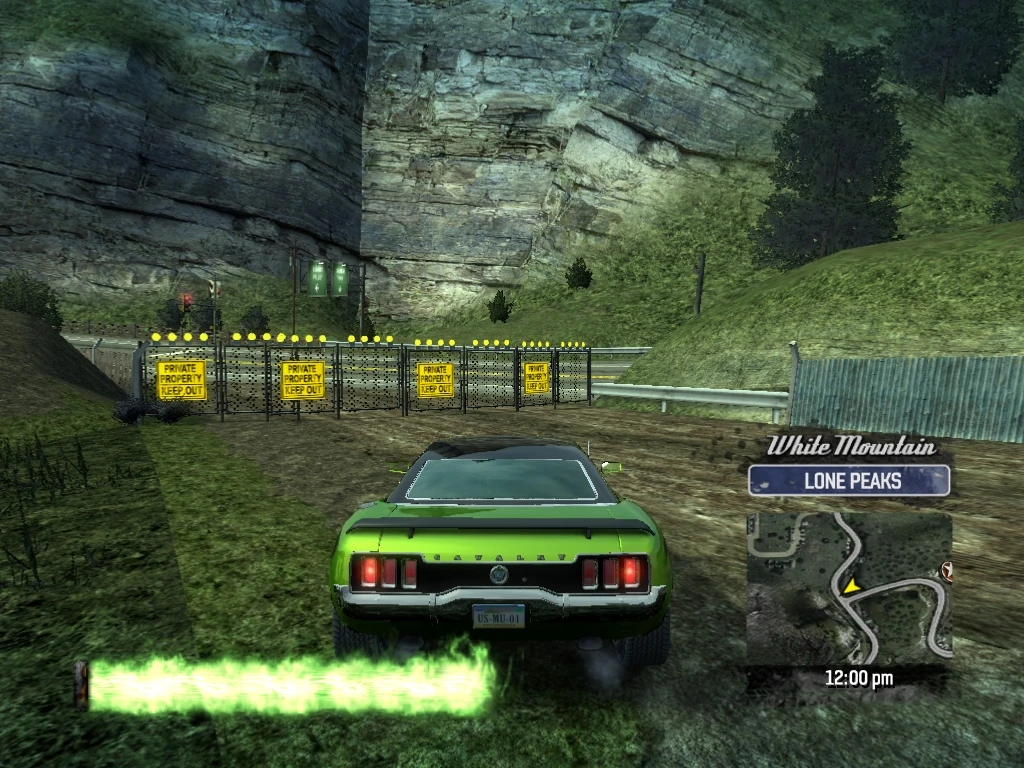
|
| 223 | White Mountain Crystal Summit |
Drive through Smash Gate 223 on the right, just before the first overhead construction crane. | 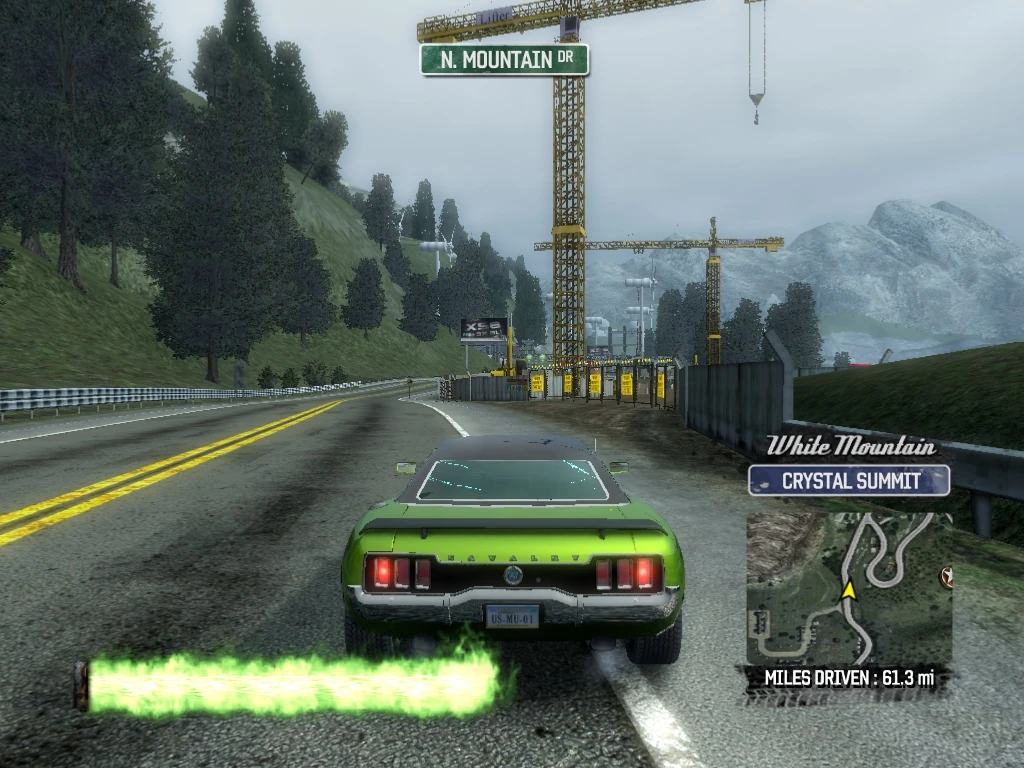
|
| 224 | White Mountain Crystal Summit |
Follow the pipeline north and drive through Smash Gate 224, exiting just before the Wind Farm at the intersection of N. Mountain Drive and Uphill Drive. | 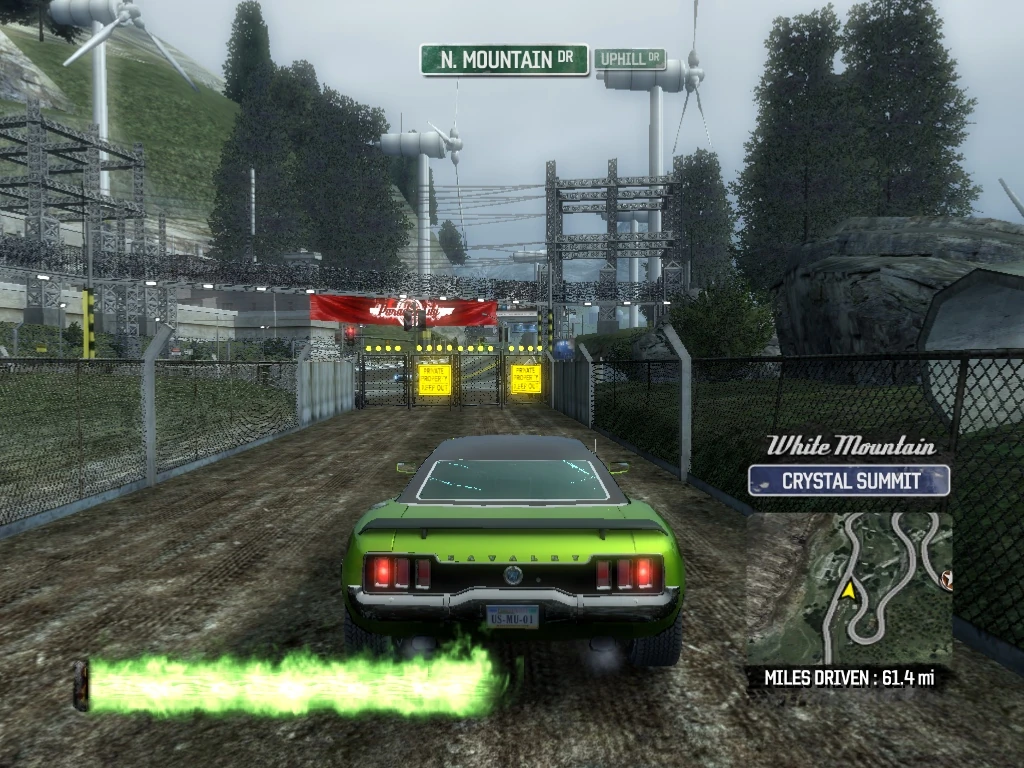
|
| 225 | White Mountain Crystal Summit |
Cross over Uphill Drive and knock over Smash Gate 225 (it leads to some step drops and a Super Jump) then back up and head south on Uphill Drive. | 
|
| 226 | White Mountain Crystal Summit |
Smash Gates 226-229 are all lined up after each other. Follow Uphill Drive through the hairpin and when the road turns back north, Smash Gate 226 is just ahead on the left. Drive through it and follow the dirt path. | 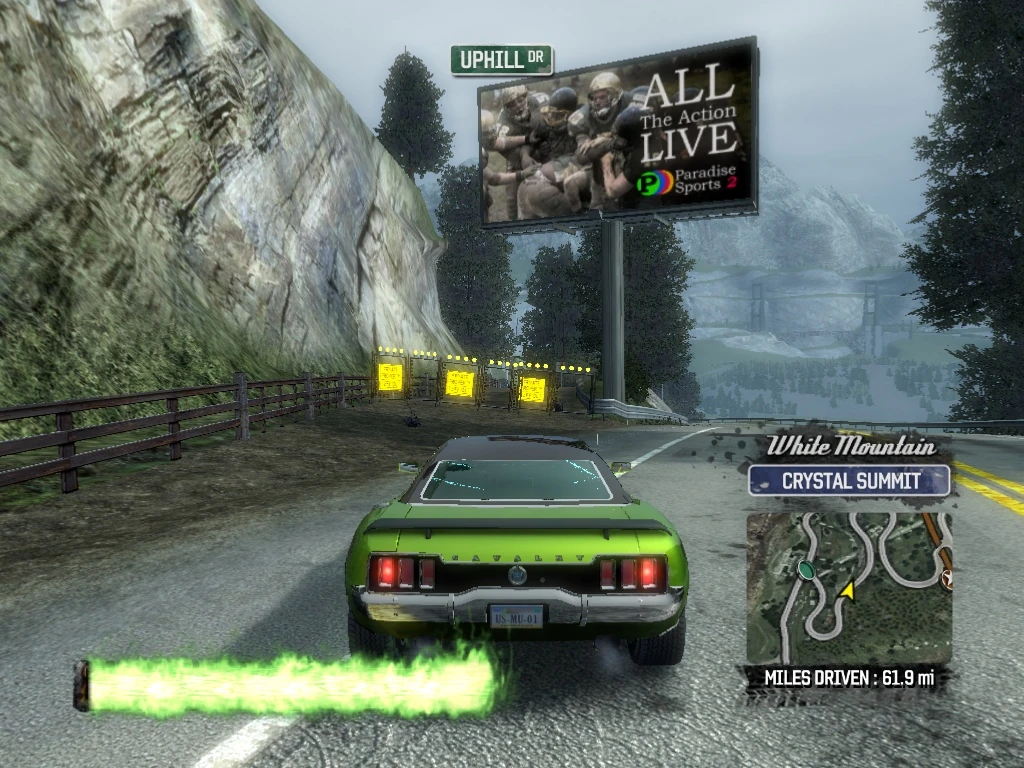
|
| 227 | White Mountain Crystal Summit |
Drive through Smash Gate 227 at the opposite end of the dirt path. | 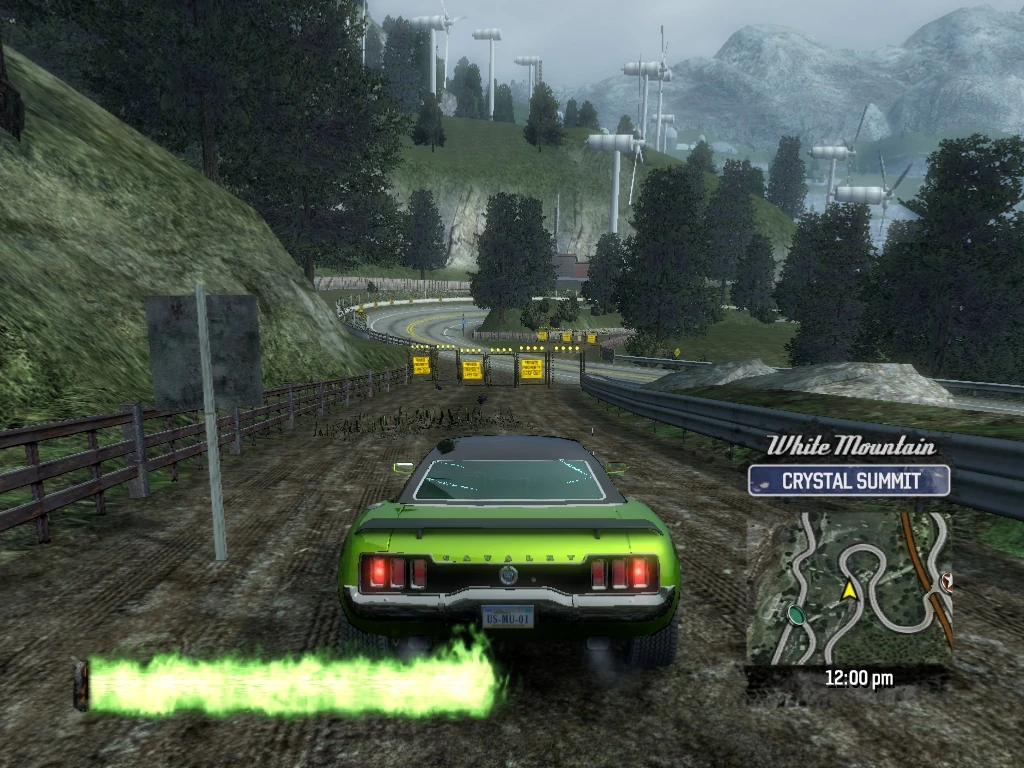
|
| 228 | White Mountain Crystal Summit |
Cross over Uphill Drive and drive through Smash Gate 228, onto yet another dirt path. | 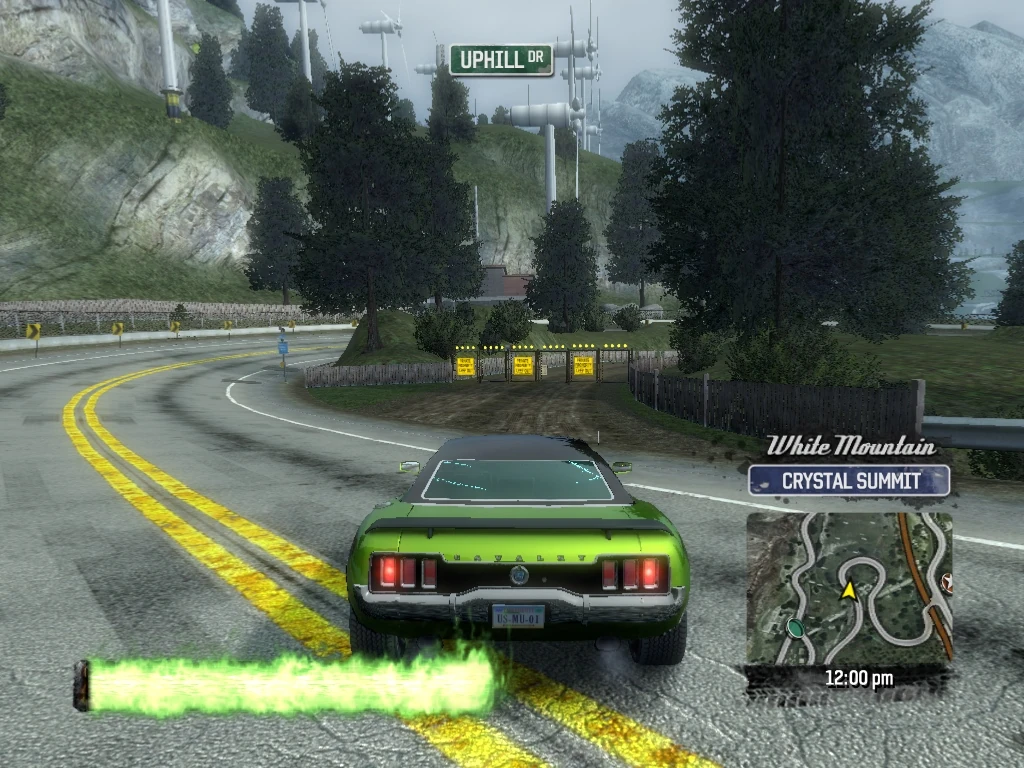
|
| 229 | White Mountain Crystal Summit |
Drive through Smash Gate 229 at the other end of the dirt path, exiting onto Uphill Drive and turn right (south). | 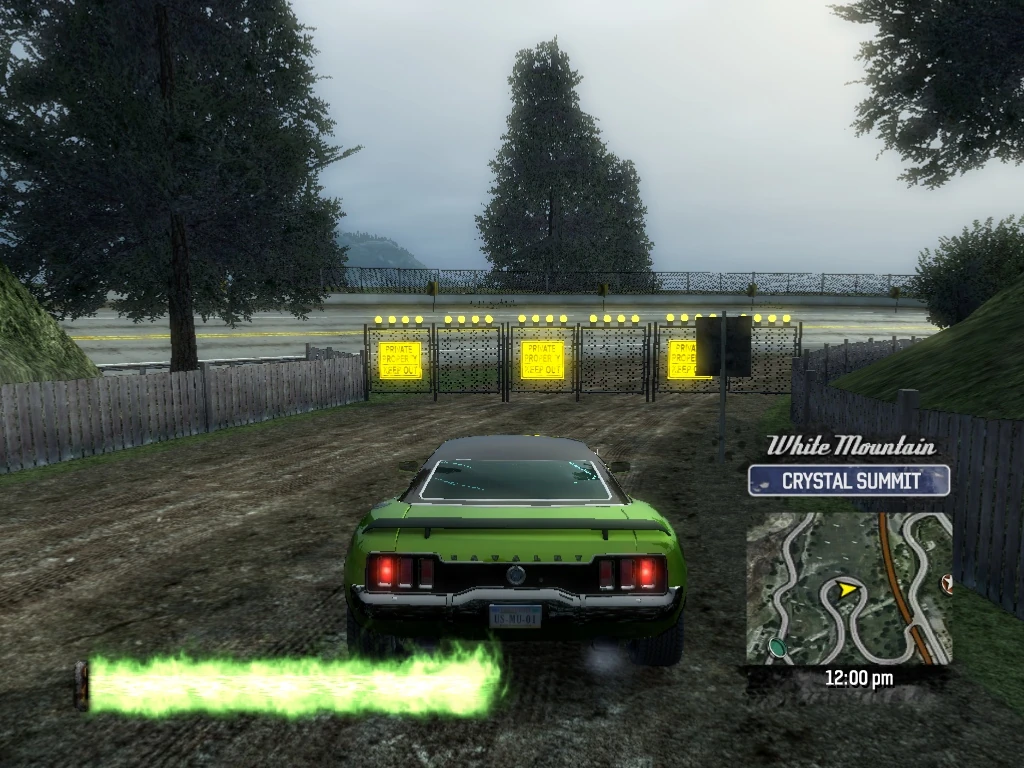
|
| 230 | White Mountain Crystal Summit |
Smash Gate 230 is easy to miss from this direction. Follow Uphill Drive and look to the left and you will see a Paradise Sports Billboard ahead and a yellow construction digger on the left. Turn into the left just before the yellow digger and knock down Smash Gate 230, then continue south on Uphill Drive. (The Smash Gate would drop down to a billboard smash and a convenient shortcut to the Crystal Summit Railroad.) | 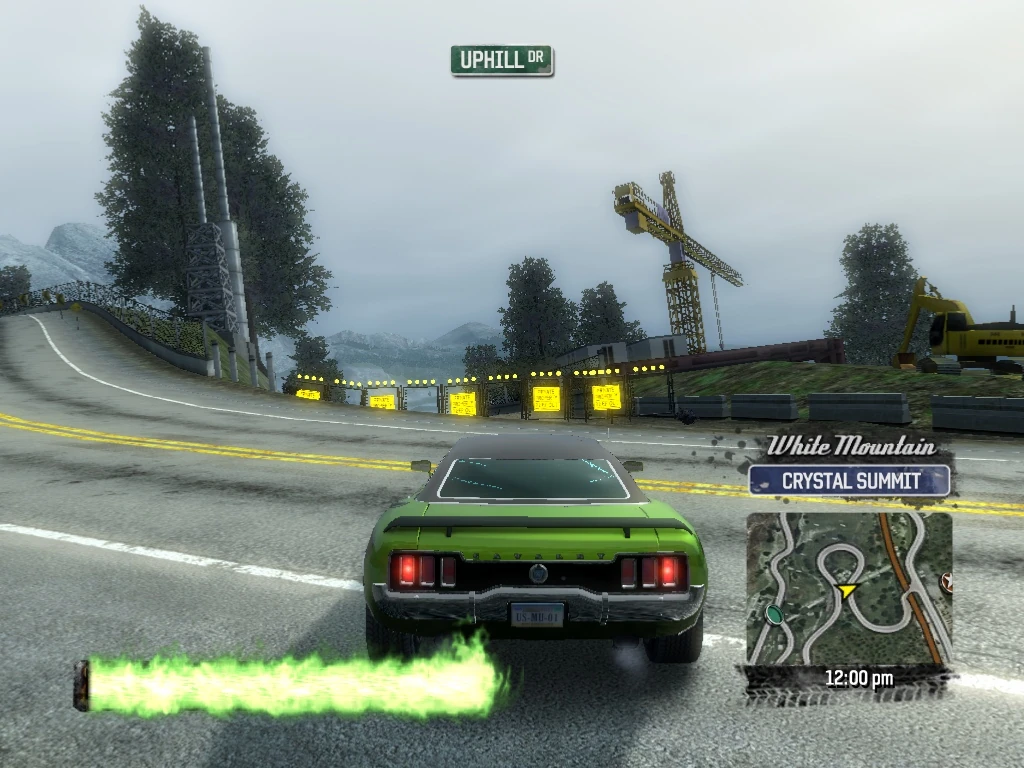
|
| 231 | White Mountain Crystal Summit |
Drive through Smash Gate 231 on the left just before Uphill Drive ends at Nelson Way and just before a billboard. | 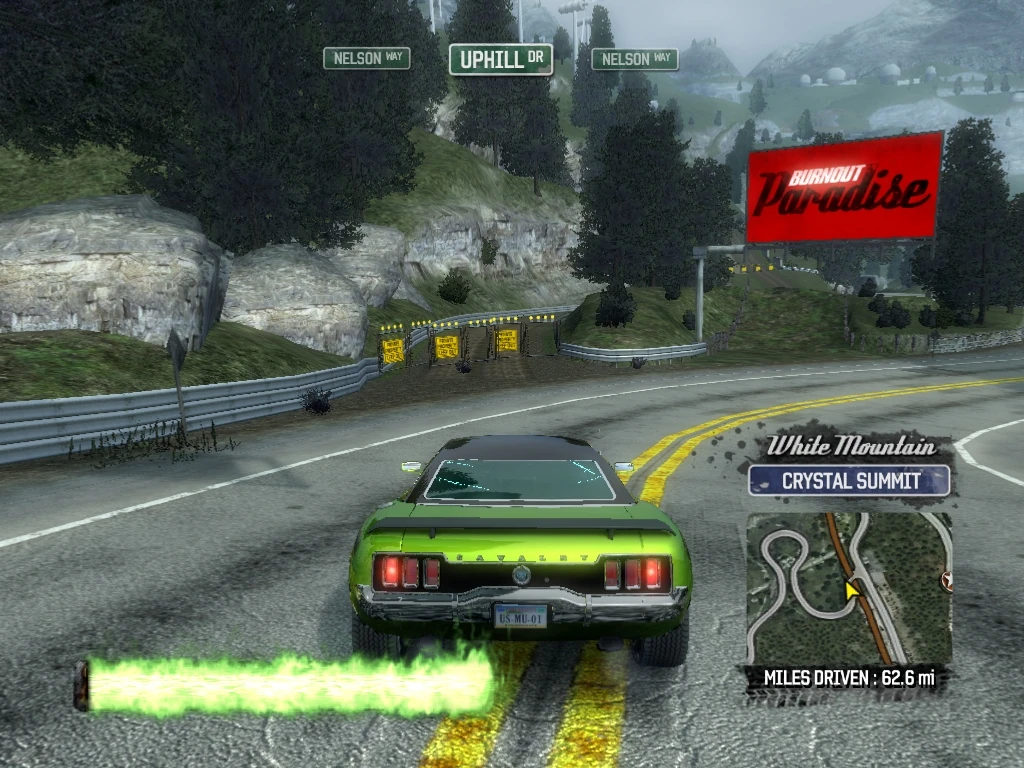
|
| 232 | White Mountain Crystal Summit |
Follow the dirt path and drive through Smash Gate 232, exiting onto the Crystal Summit Railroad tracks. | 
|
| 233 | White Mountain Crystal Summit |
Smash Gate 233 is just in front of you under a covered shed. Drop down the grassy lawn and drive through the Smash Gate and the shed, then climb back onto the tracks, headed north. | 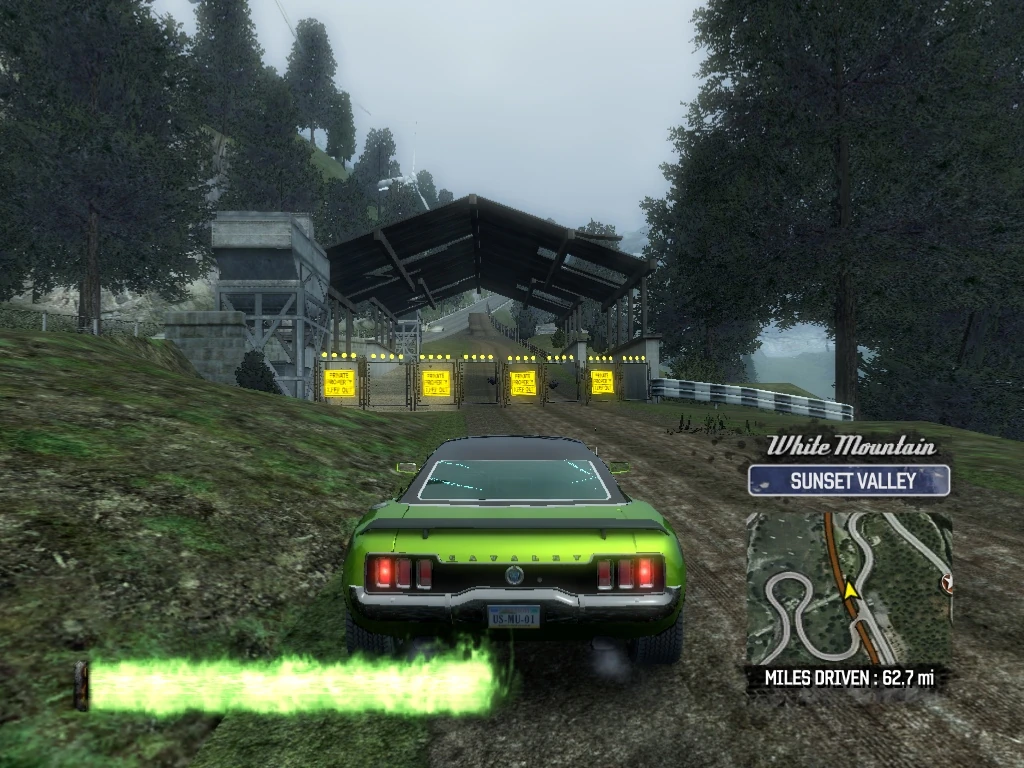
|
| 234 | White Mountain Crystal Summit |
Smash Gates 234 and 235 are quite a ways north on the Crystal Summit Railroad. Drive under the Yellow Bridge and you will see two billboards on either side of the tracks with a boxcar between them under a shed. Drive through the shed and the smash gates are at the entrance ramps to smash the billboards. Circle to the right and knock down Smash Gate 234, then back up. | 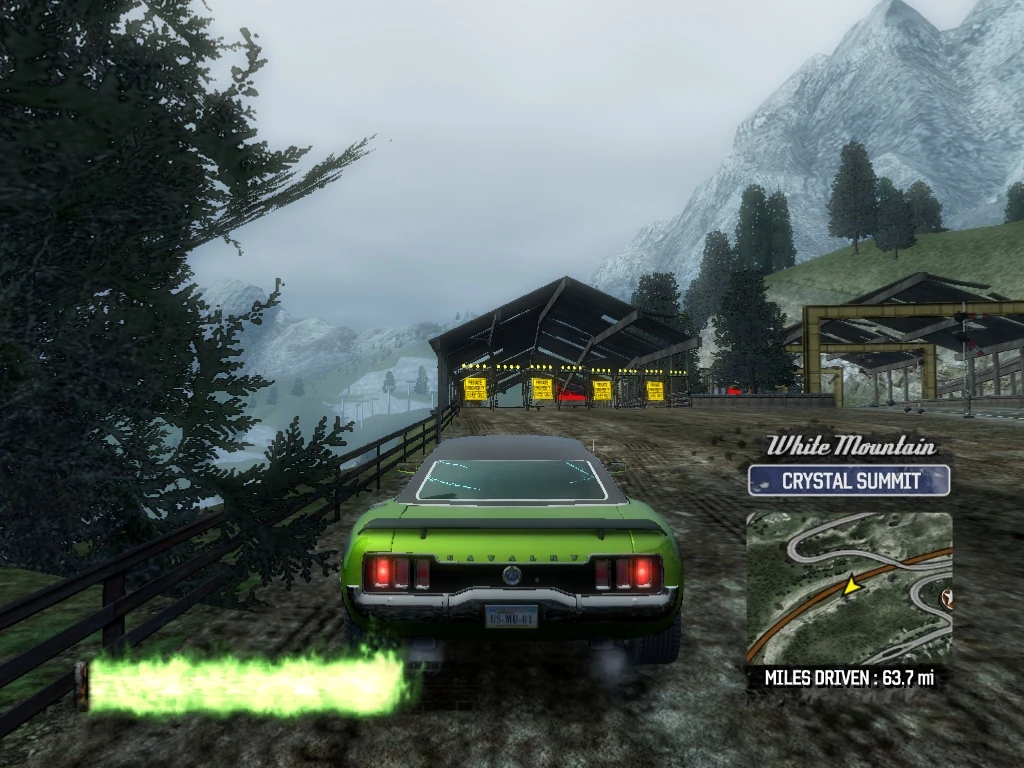
|
| 235 | White Mountain Crystal Summit |
Cross over the tracks to knock down Smash Gate 235, then turn around and head north up the tracks once again. | 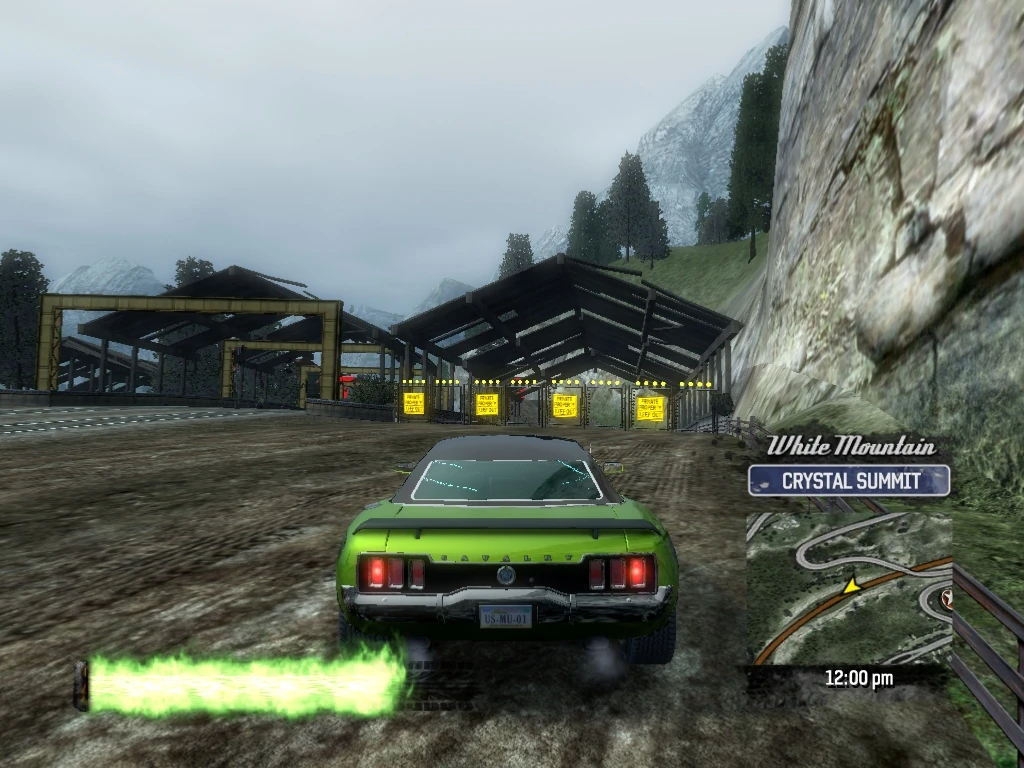
|
| 236 | White Mountain Crystal Summit |
The exit from the tracks onto Read Lane can be tricky if you are not familiar with it. After you exit the tunnel, you will see the road and the tracks become tangent just before the hairpin turn. (If you see the green tank car on the tracks, you went too far). Spin around to the right and take the path onto Read Lane headed west. Follow Read Lane to the intersection with N. Rouse Drive, stop, turn right just before the intersection, and knock down Smash Gate 236, then back up. | 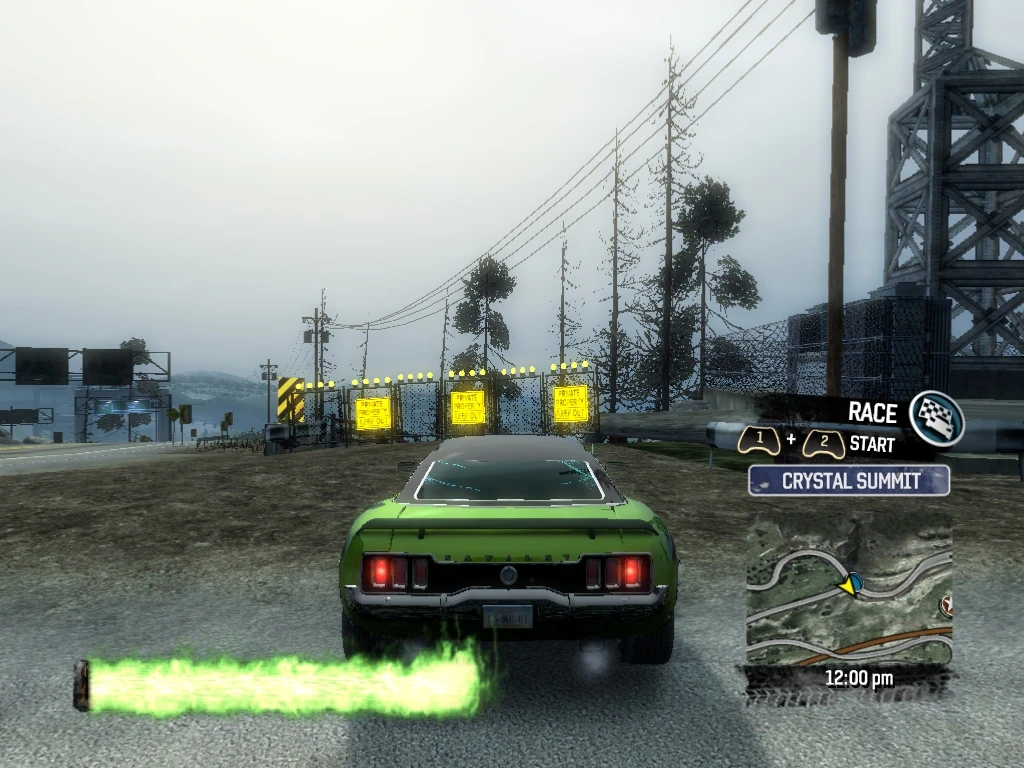
|
| 237 | White Mountain Crystal Summit |
Cross over N. Rouse Drive, and knock down Smash Gate 237, just east of Read Lane. Back up and head west on N. Rouse Drive. | 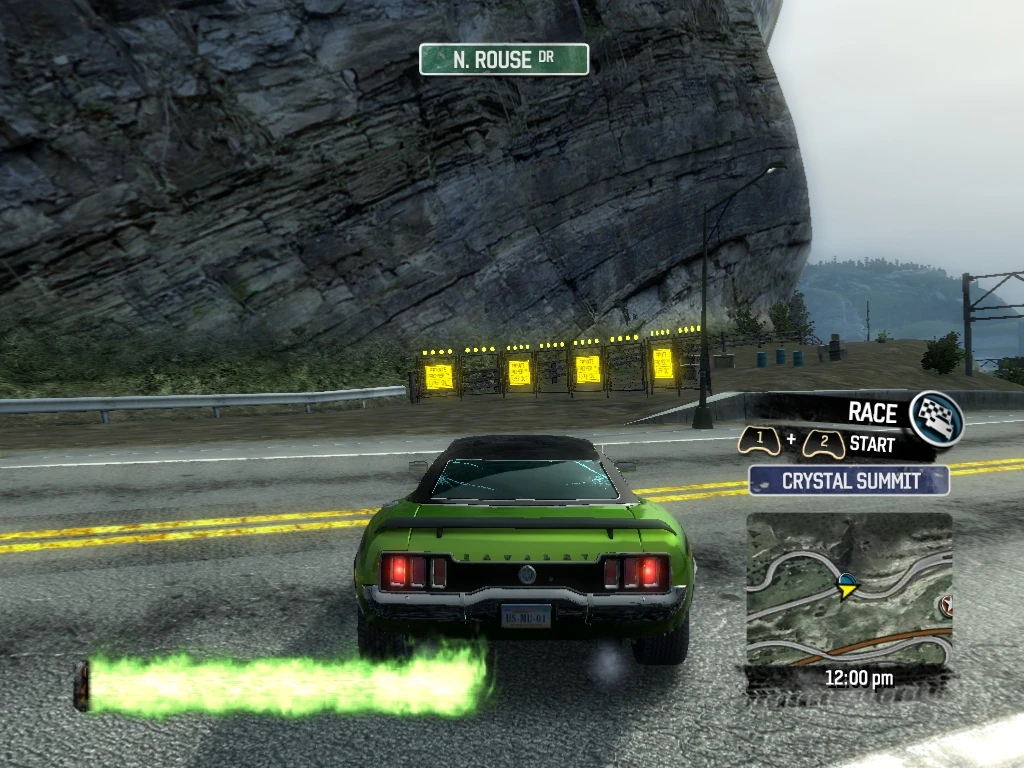
|
| 238 | White Mountain Crystal Summit |
Smash Gate 238 is just ahead on the left after you cross Read Lane (and N. Rouse Drive becomes N. Mountain Drive). Drive through Smash Gate 238 and follow the dirt path. | 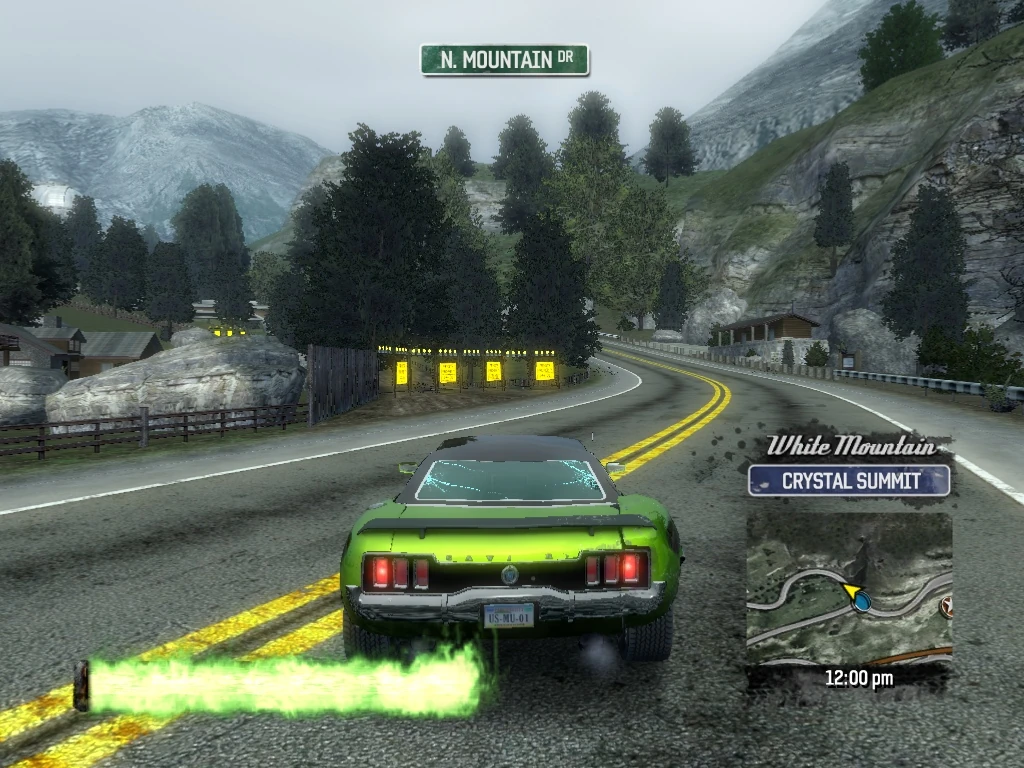
|
| 239 | White Mountain Crystal Summit |
Stay to the left on the dirt path and drive through Smash Gate 239. (If you stay to the right you will drive under N. Mountain drive and end up at a jump right before the finish line for the Crystal Summit Observatory. A great shortcut, but I digress ...) | 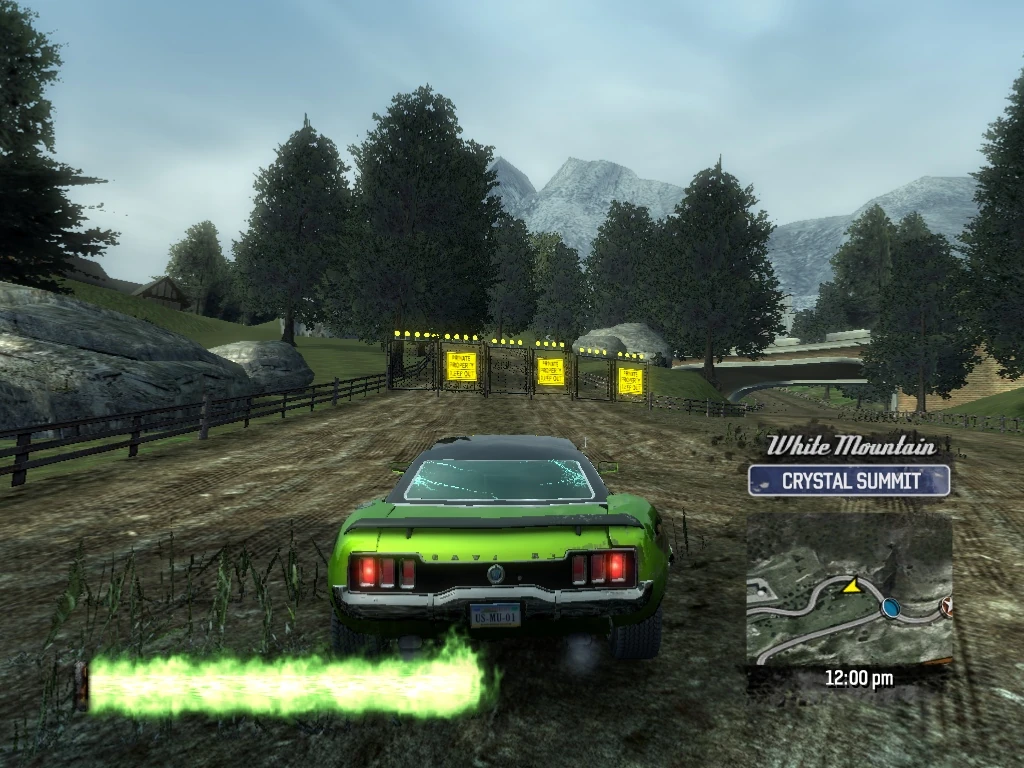
|
| 240 | White Mountain Crystal Summit |
Continue down the path and drive through Smash Gate 240, exiting onto N. Mountain Drive, westbound. | 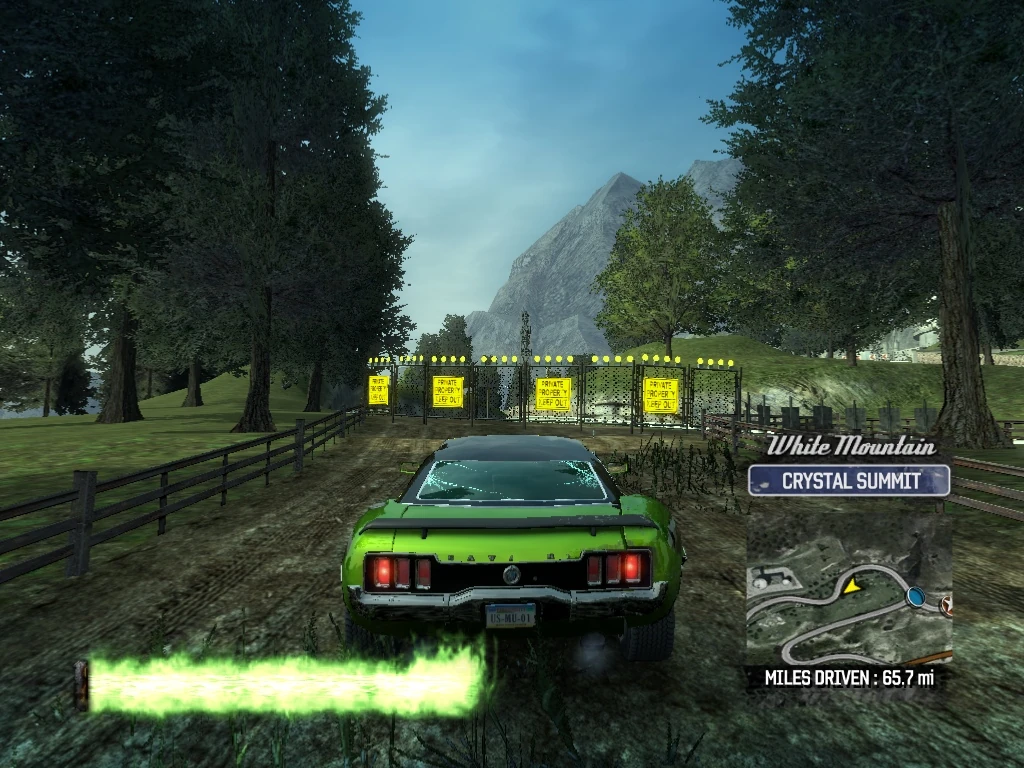
|
| 241 | White Mountain Crystal Summit |
Just before you get to the RD Diner, you will see Smash Gate 241 on the right. Spin around and knock it down, and then continue southwest on N. Mountain Drive. (The Smash Gate leads to an access road which gives you a closer view of the observatory buildings, but otherwise isn't very useful.) | 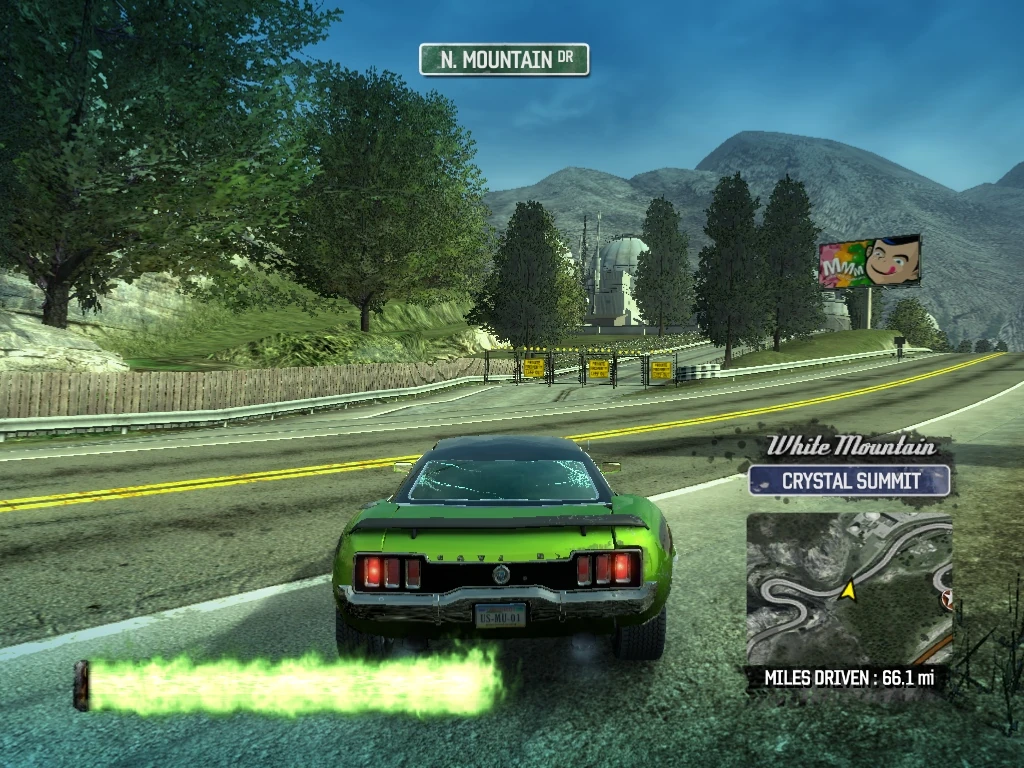
|
| 242 | White Mountain Crystal Summit |
Drive through Smash Gate 242 on the left after the hairpin turn and the second tunnel and follow the dirt path. | 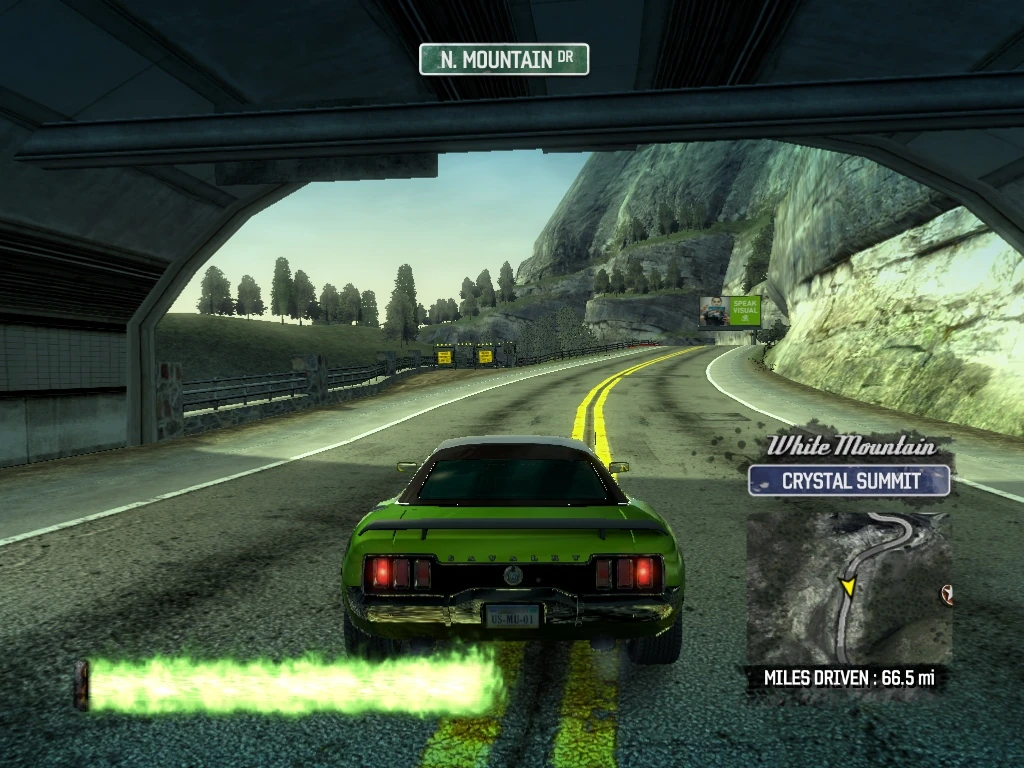
|
| 243 | White Mountain Crystal Summit |
A short ways down the dirt path, you will see Smash Gate 243 on high ground on the left and Smash Gate 244 closer and lower at the entrance to a tunnel on the right. Drive forward and knock over Smash Gate 243, then back up to the tunnel entrance. | 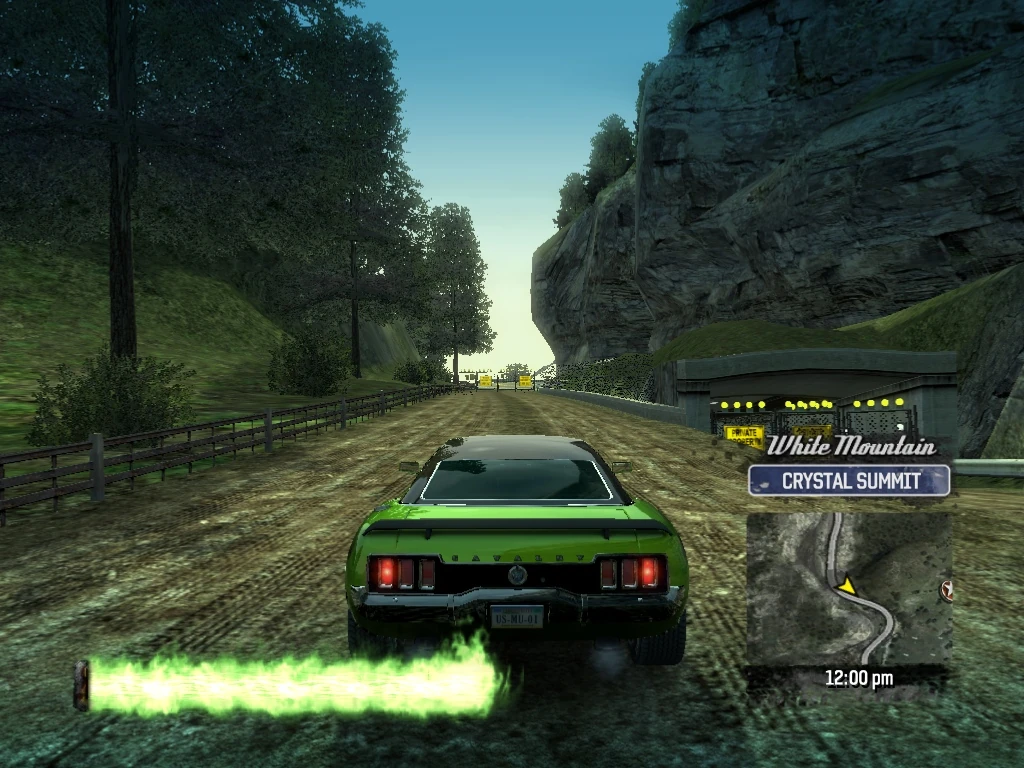
|
| 244 | White Mountain Crystal Summit |
Drive through Smash Gate 244 and follow the tunnel. | 
|
| 245 | White Mountain Crystal Summit |
Drive through Smash Gate 245 at the other end of the path, exiting onto N. Mountain Drive, headed south. | 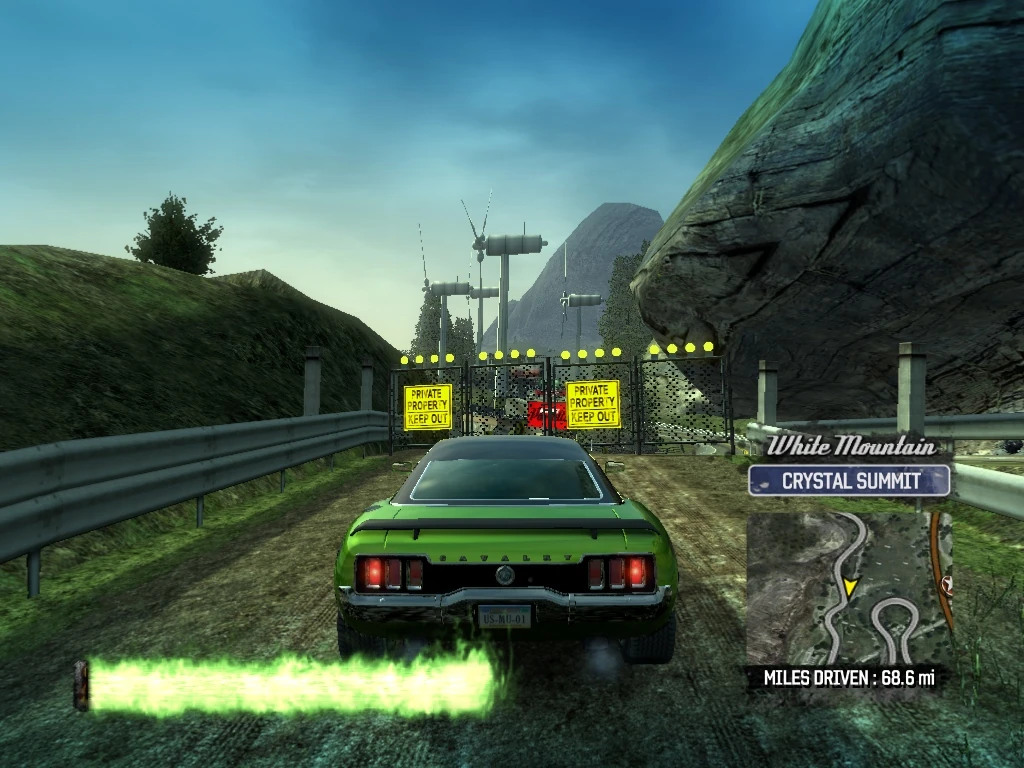
|
| 246 | White Mountain Sunset Valley |
Take the next left onto Uphill Drive and follow it to the end at Nelson Way. Turn left (northwest) on Nelson Way. Drive past the previous covered shed Smash Gate (#233), and Smash Gate 246 is just beyond it, also on the left. Drive through it and follow the dirt path. | 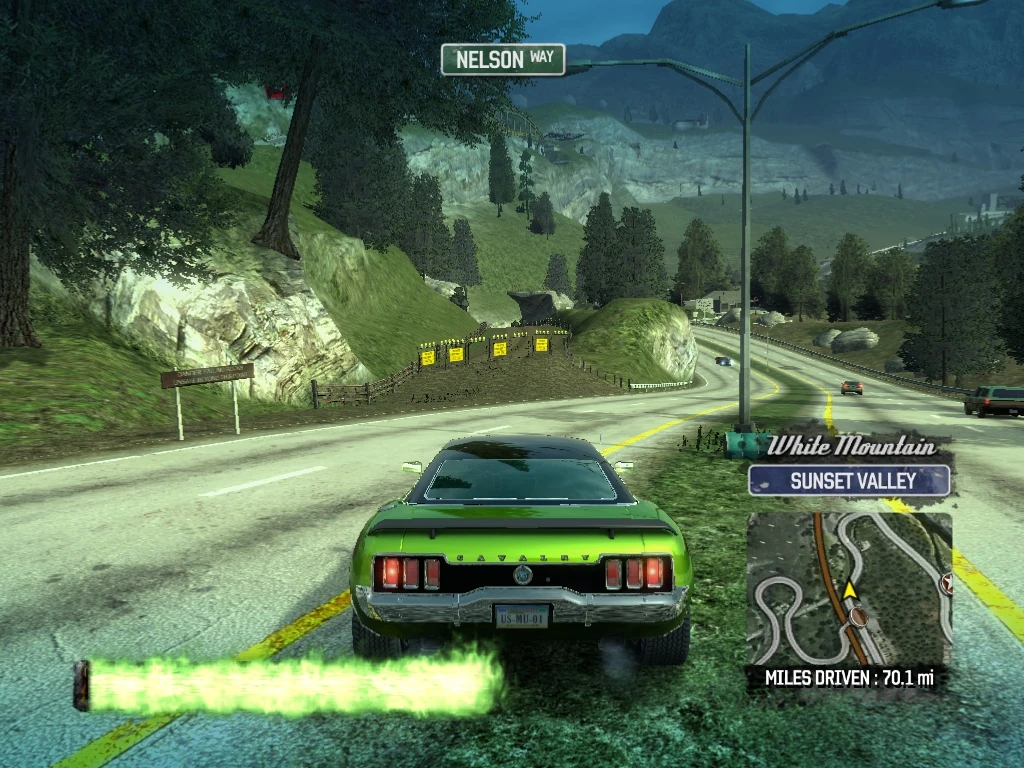
|
| 247 | White Mountain Sunset Valley |
Drive through Smash Gate 247 at the other end of the dirt path. You will see a rock cliff named The Devil's Tongue in front of you. | 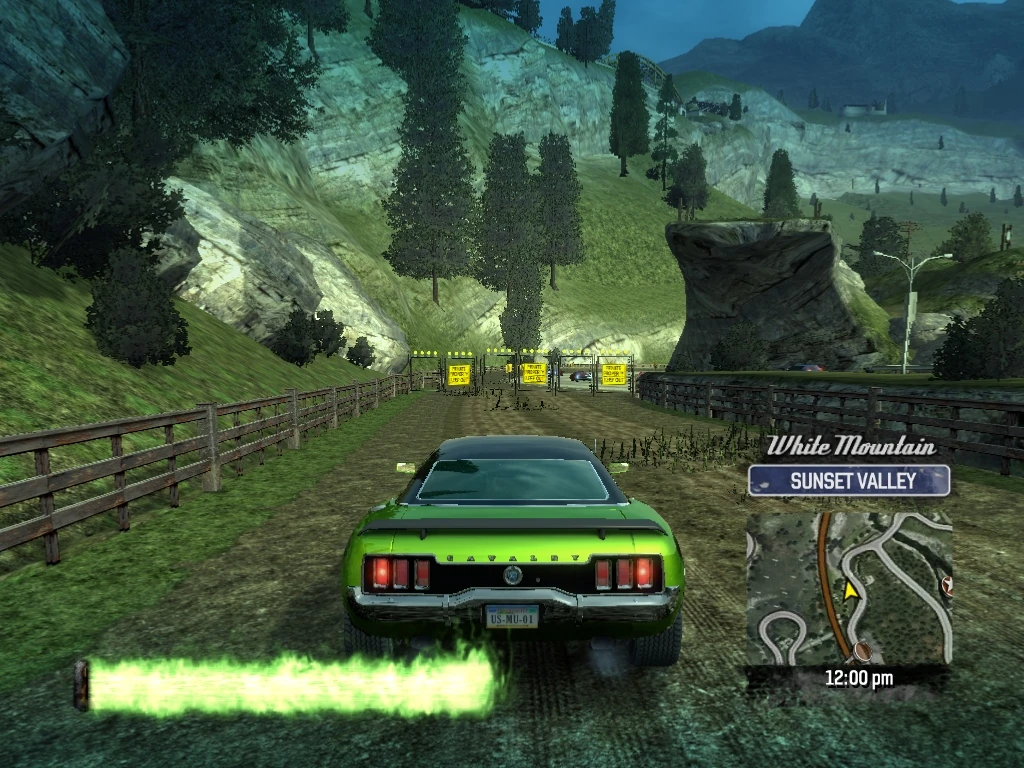
|
| 248 | White Mountain Sunset Valley |
After you drive through Smash Gate 247, you will be near the base of The Devil's Tongue and right in front of Smash Gate 249. Circle to the right and knock down Smash Gate 248 at the entrance to The Devil's Tongue and then back up. | 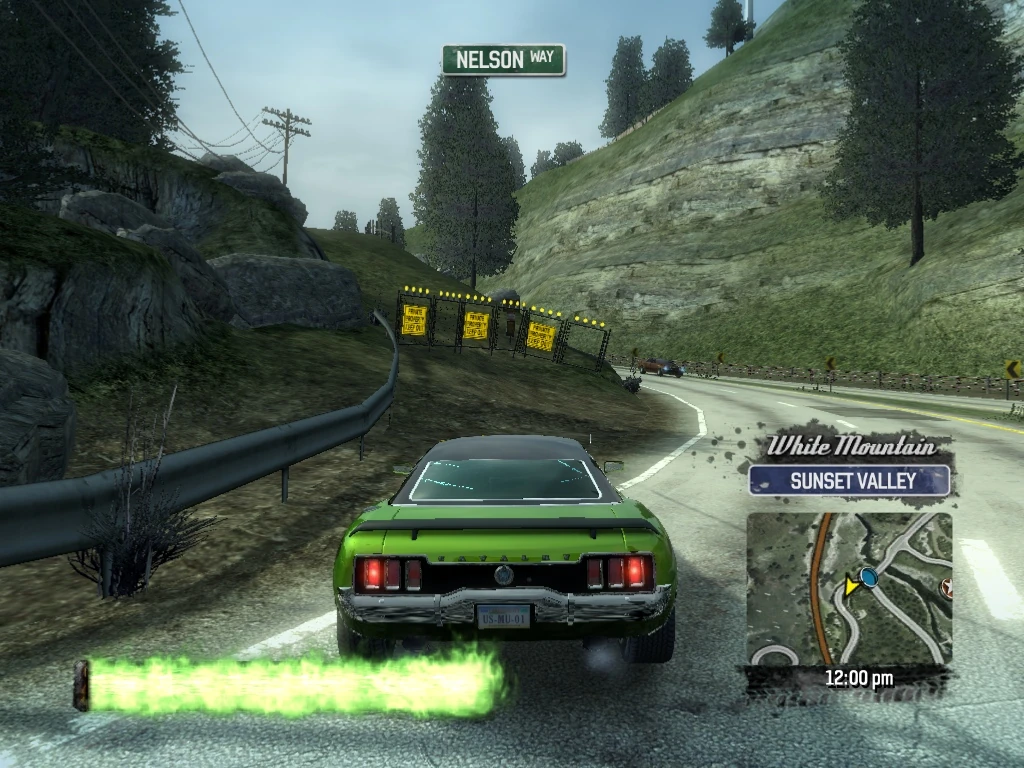
|
| 249 | White Mountain Sunset Valley |
Cross over Nelson Way again and drive through Smash Gate 249, leading to a Billboard Smash. | 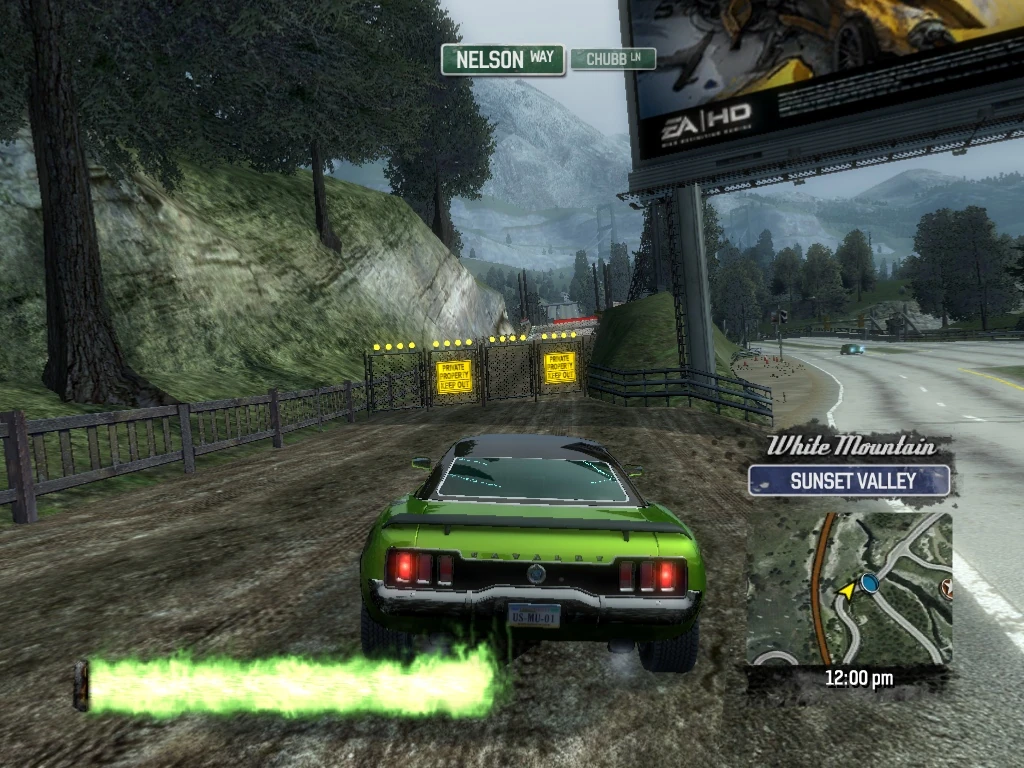
|
| 250 | White Mountain Sunset Valley |
Boost to clear the jump and the Billboard Smash, and then drive through Smash Gate 250, on the other side of the smash. | 
|
| 251 | White Mountain Sunset Valley |
Continue along the path on the left side of Nelson Way, and knock down Smash Gate 251. Then back up. | 
|
| 252 | White Mountain Sunset Valley |
Turn onto Cannon Pass and go a short way and turn left and drive through Smash Gate 252, entering Frankie's Campground. | 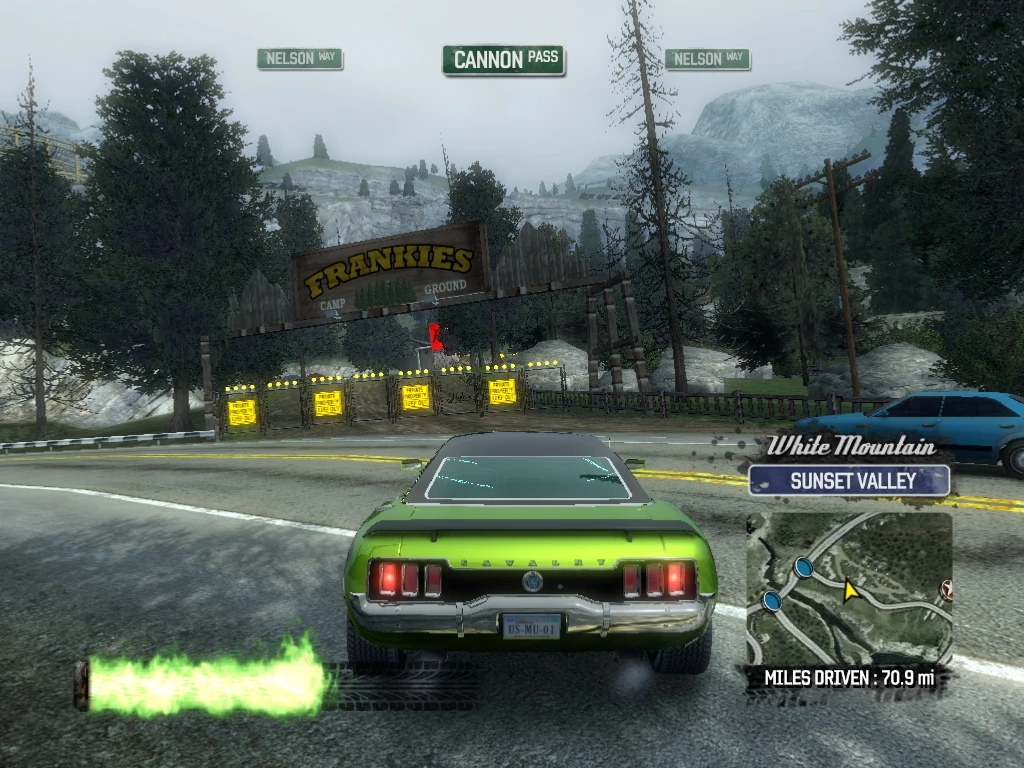
|
| 253 | White Mountain Sunset Valley |
Drive into the campground as far as the billboard and turn right. Smash Gate 253 will be on your right and Smash Gate 254 will be on your left. Stay to the right and drive through Smash Gate 253, exiting onto Cannon Pass, eastbound. | 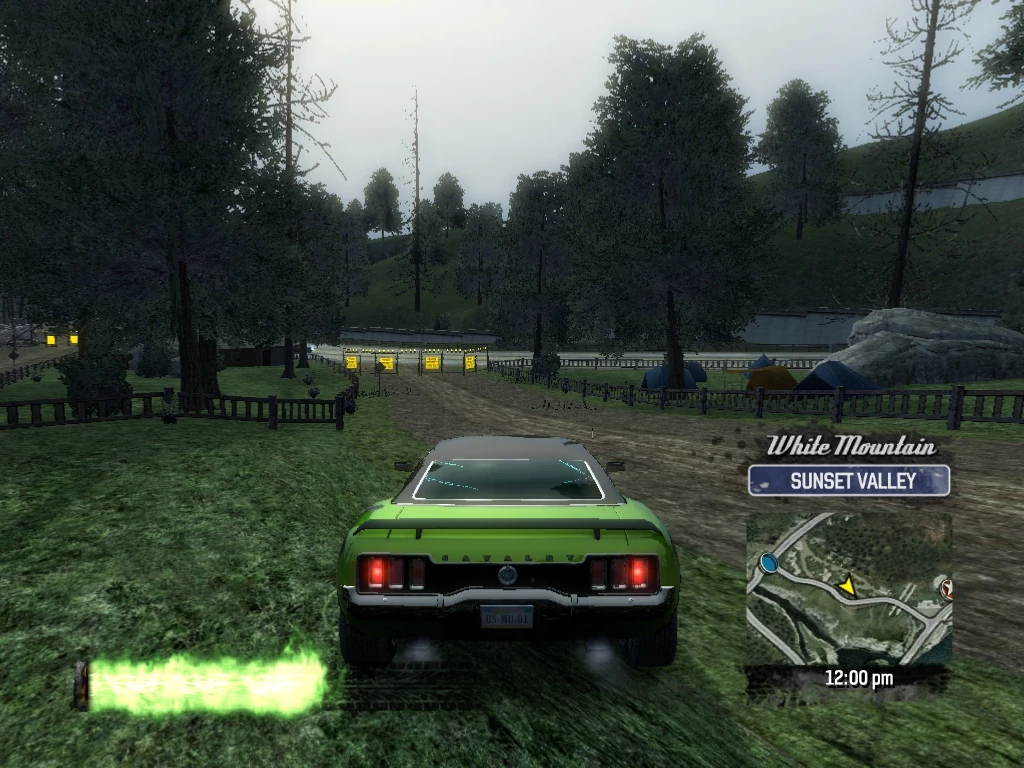
|
| 254 | White Mountain Sunset Valley |
Take an almost immediate left and knock down Smash Gate 254, then continue east on Cannon Pass. | 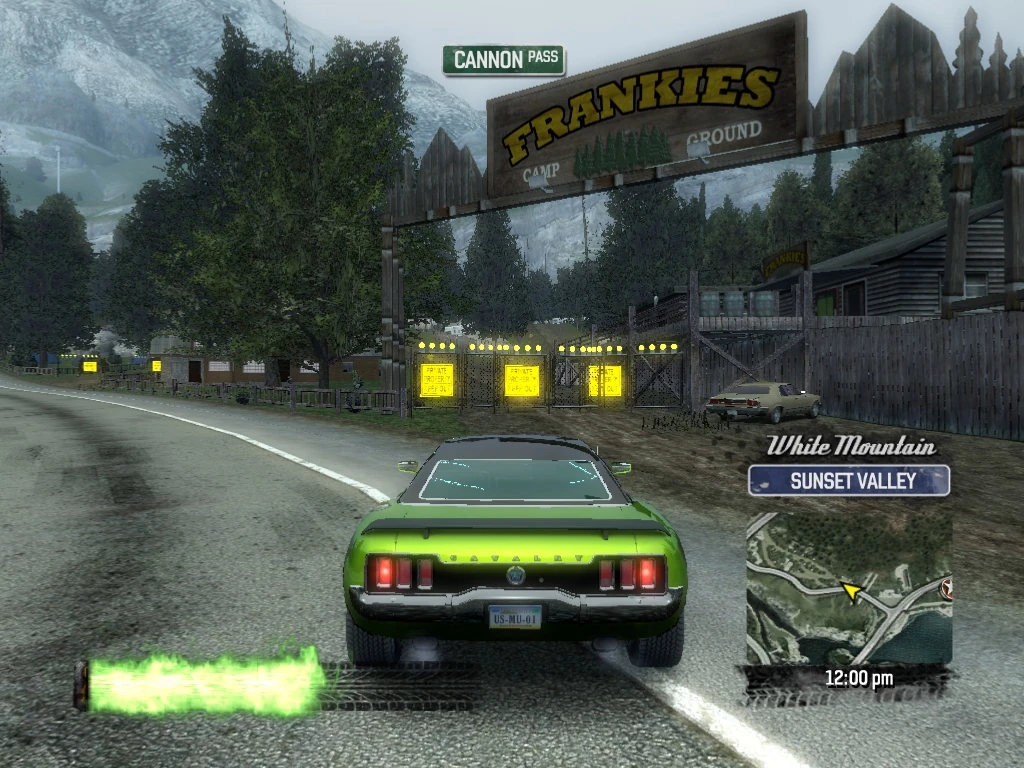
|
| 255 | White Mountain Sunset Valley |
Smash Gate 255 is on the right just after the Waterfall Diner sign. Drive through Smash Gate 255 onto the dirt path. | 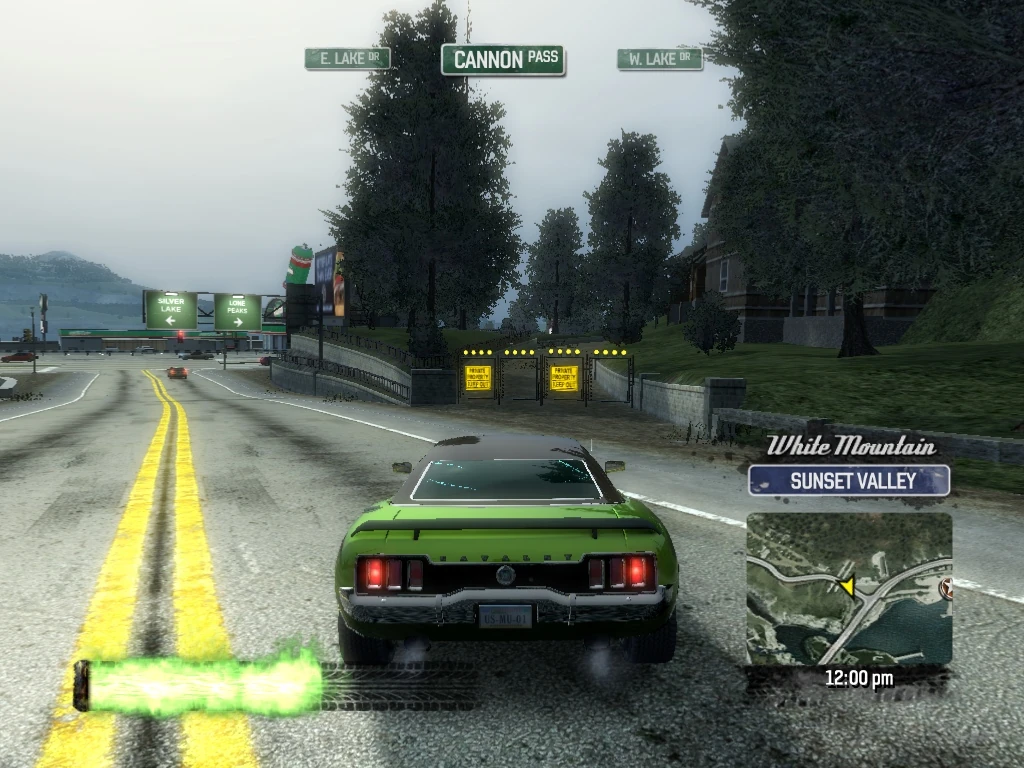
|
| 256 | White Mountain Sunset Valley |
Take the first hard left on the dirt path and knock over Smash Gate 256, then back up. | 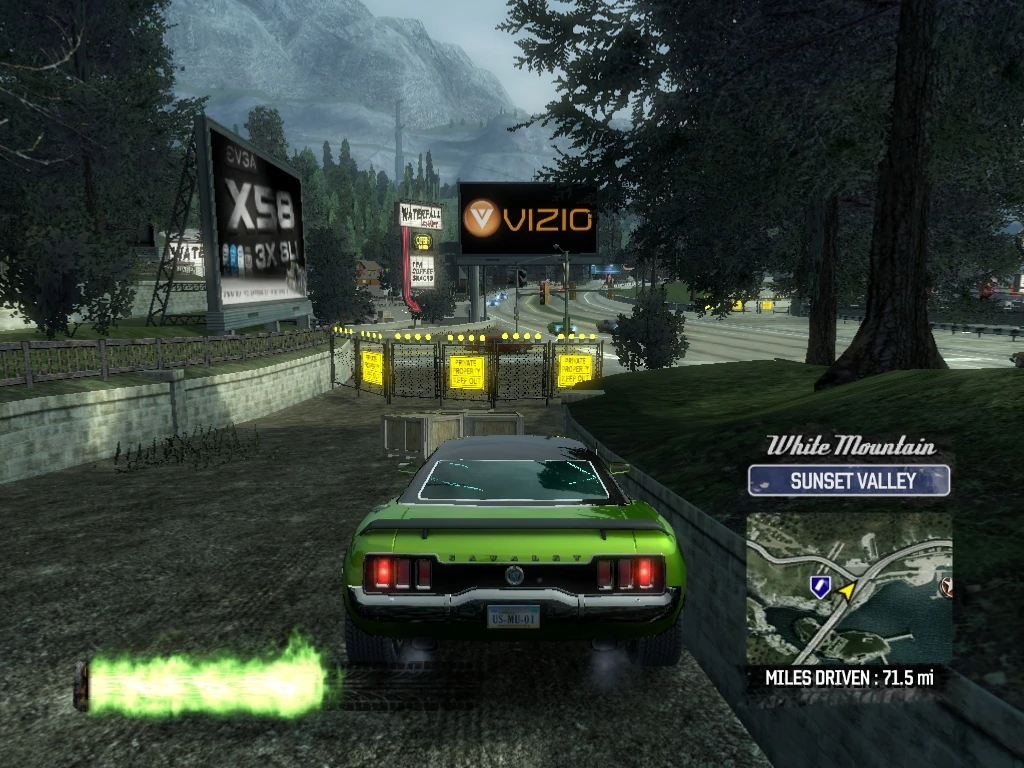
|
| 257 | White Mountain Sunset Valley |
Point your car toward the rusty trestle bridge and drive through Smash Gate 257, exiting onto W. Lake Drive, headed southwest. | 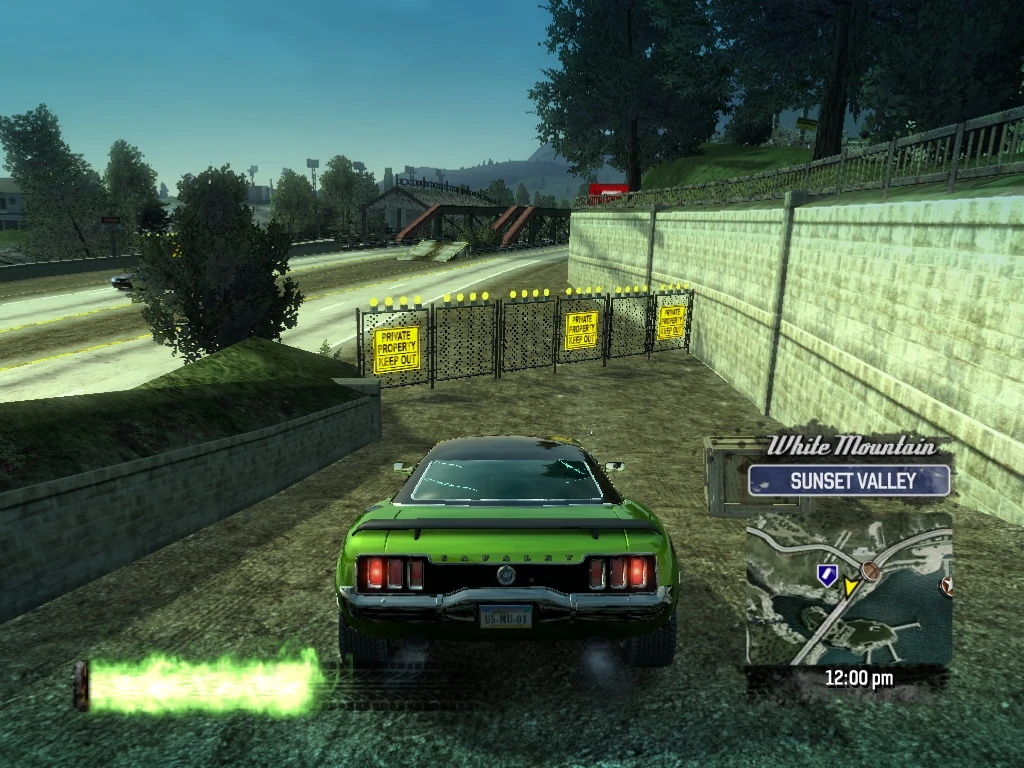
|
| 258 | White Mountain Sunset Valley |
Smash Gate 258 is on the left after the second bridge and before the Auto Repair. Circle to the left and drive through Smash Gate 258. | 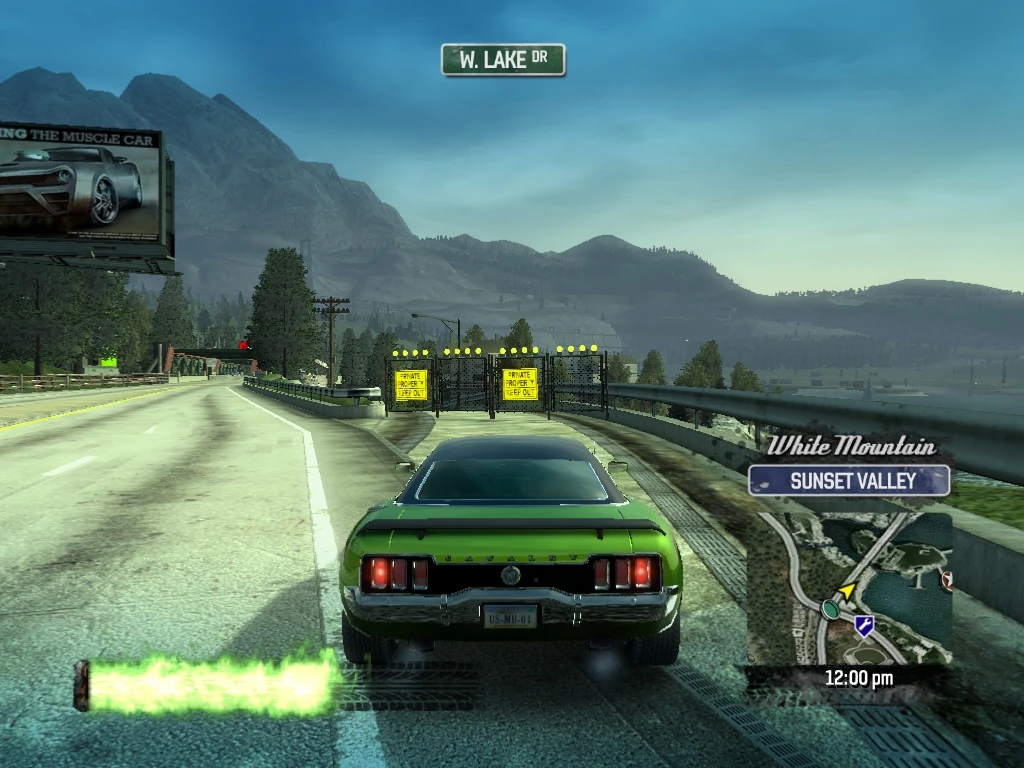
|
| 259 | White Mountain Sunset Valley |
Boost down the path to complete the Super Jump, and drive through Smash Gate 259 on the other side, exiting onto W. Lake Drive, just before the Paint Shop, headed northeast. | 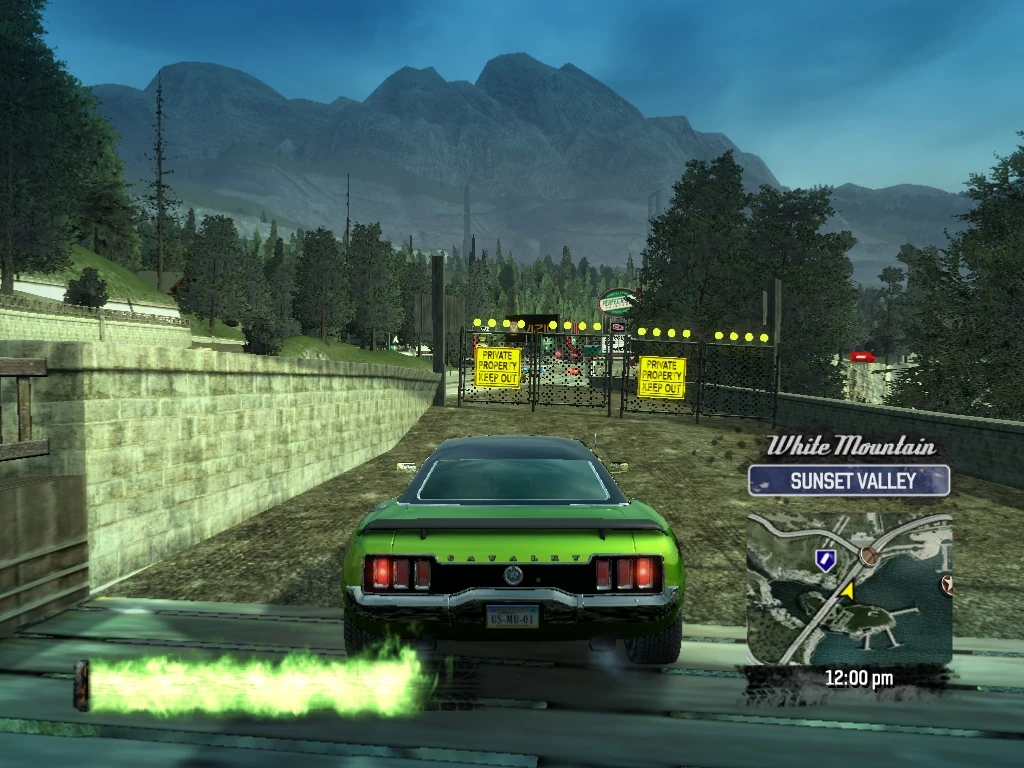
|
| 260 | White Mountain Sunset Valley |
Smash Gate 260 is on the right just beyond the Paint Shop and the Cannon Pass intersection. It leads to the Silver Lake Marina. For now, just knock it down. You have now completed all Smash Gates in White Mountain. | 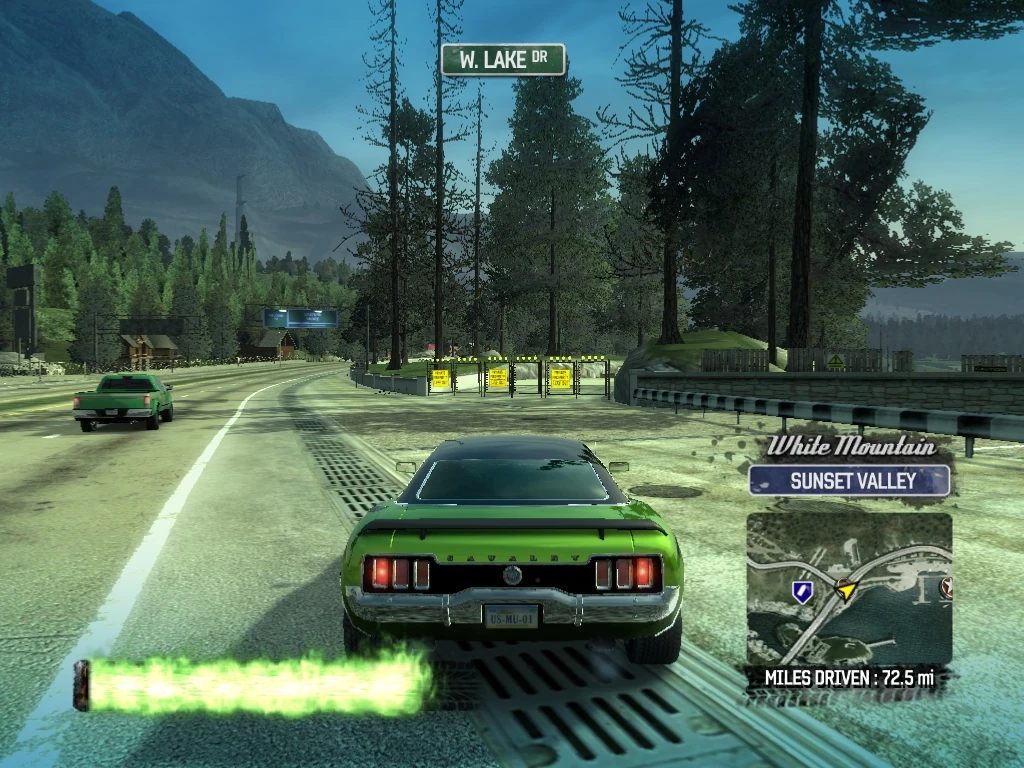
|
| 261 | Silver Lake Eastern Shore |
Back up and continue eastbound on what is now E. Lake Drive. Smash Gate 261 is ahead on the left across a wide dirt path and next to a sign across E. Lake Drive. Drive through the Smash Gate and follow the dirt path. | 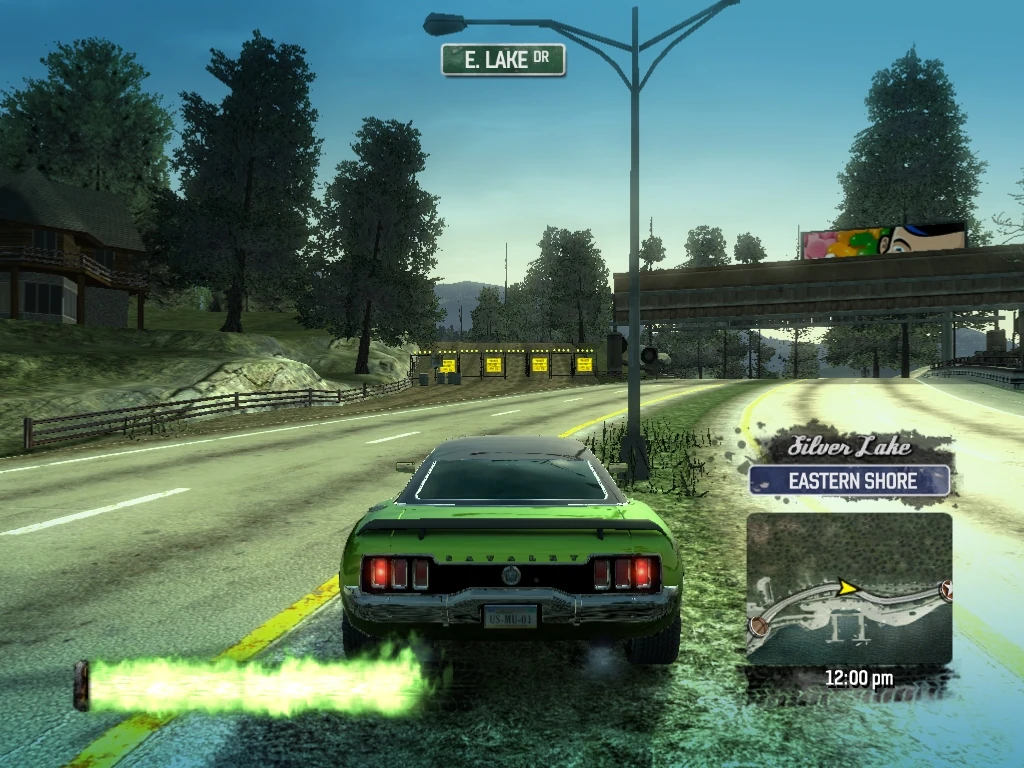
|
| 262 | Silver Lake Eastern Shore |
The dirt path will fork and you will see Smash Gate 262 on the right and Smash Gate 263 on the left in the distance. Stay to the right and drive through Smash Gate 262, exiting onto E. Lake Drive, eastbound. | 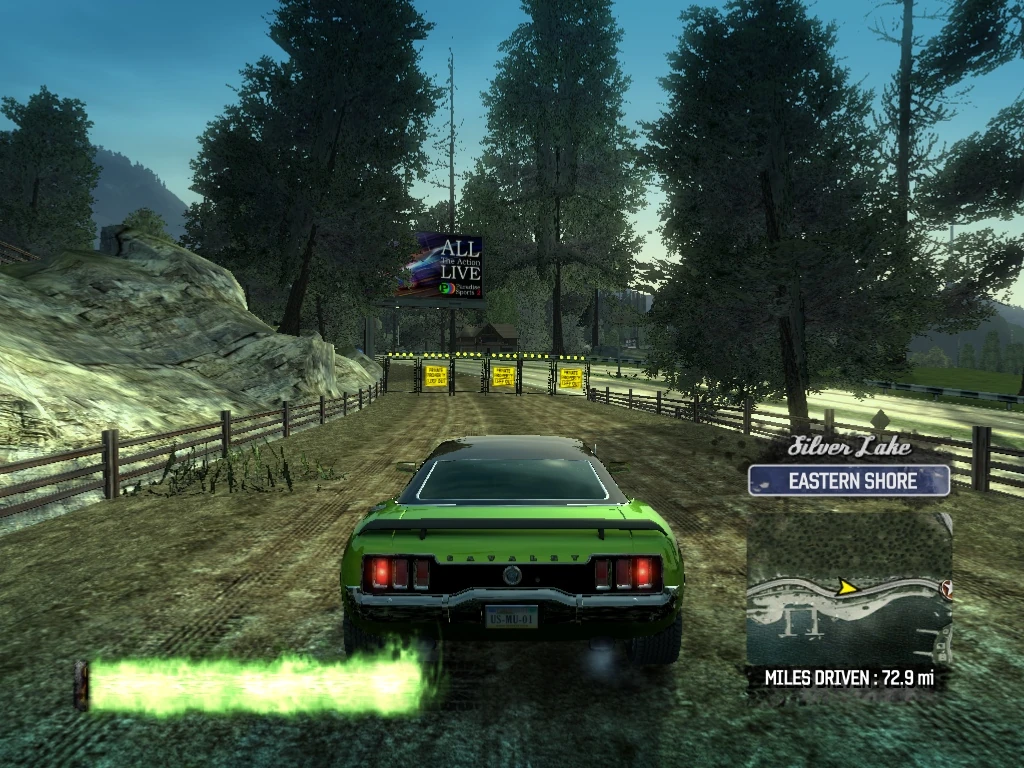
|
| 263 | Silver Lake Eastern Shore |
Circle left and knock down Smash Gate 263, then back up. | 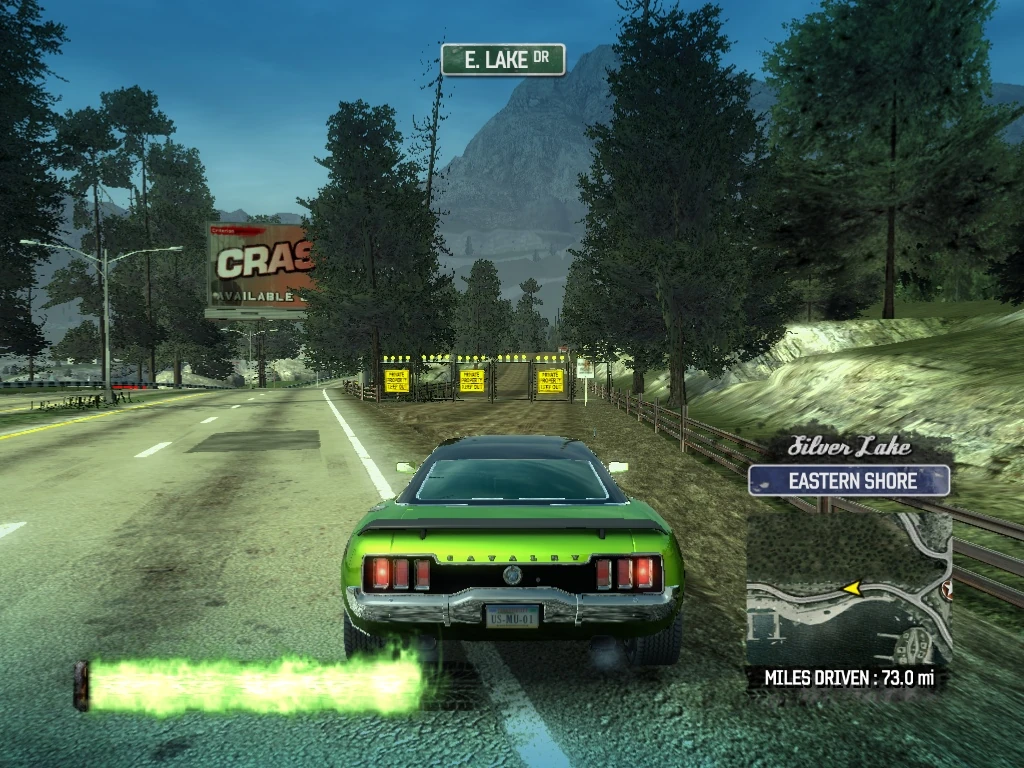
|
| 264 | Silver Lake Eastern Shore |
Smash Gate 264 is just across E. Lake Drive, after a cabin and marking a path that leads to Silver Lake Marina. Drive across the road and knock it down, then continue southeast on E. Lake Drive. | 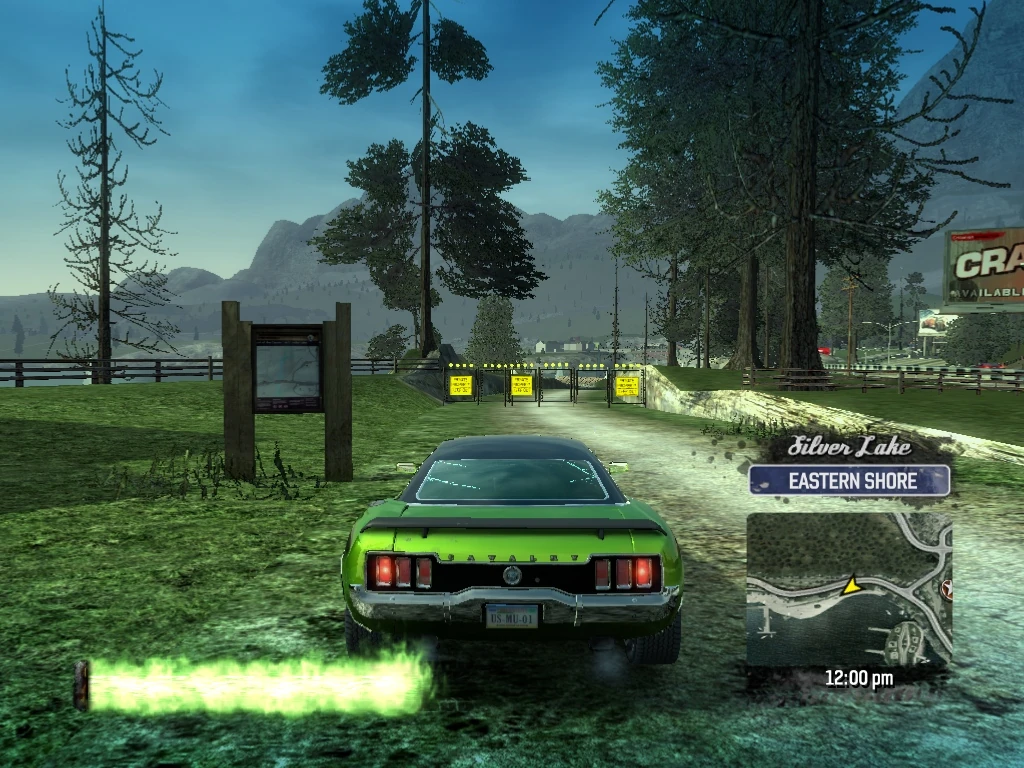
|
| 265 | Silver Lake Eastern Shore |
Take the next left (east) on W. Crawford drive, and drive through Smash Gate 265, which is the first Smash Gate on the right. Follow the dirt path. | 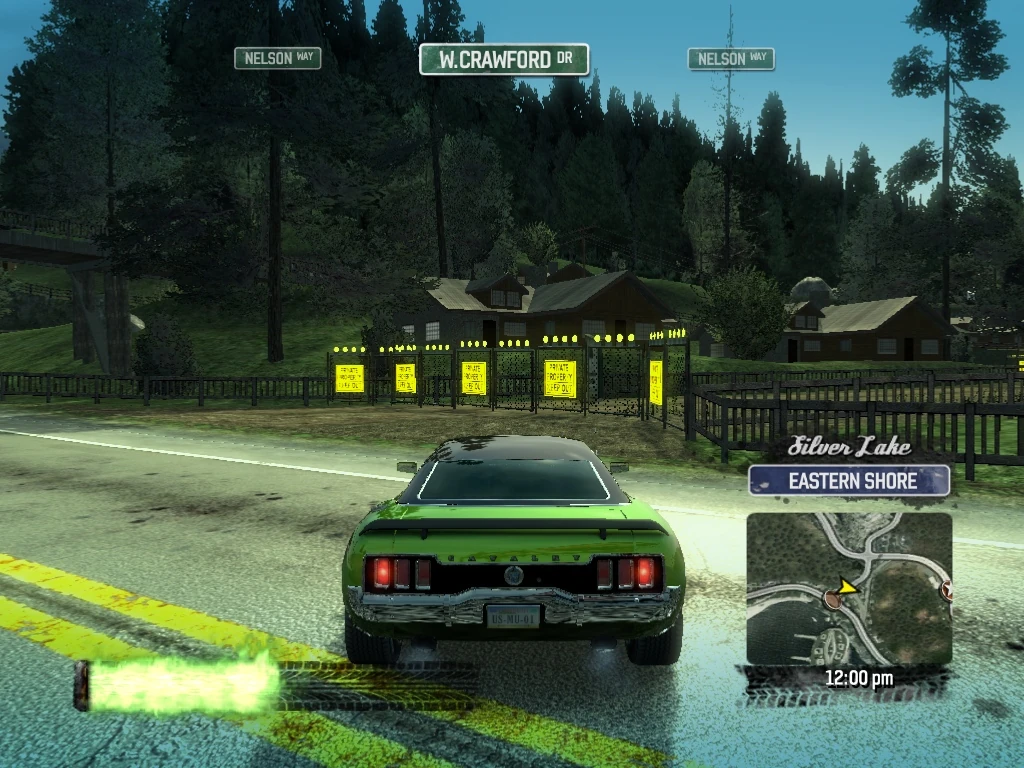
|
| 266 | Silver Lake Eastern Shore |
Stay to the right and Smash Gate 266 is just ahead, exiting back onto E. Lake Drive. Drive through it, then turn back around and come through it again, following the path and staying to the right. | 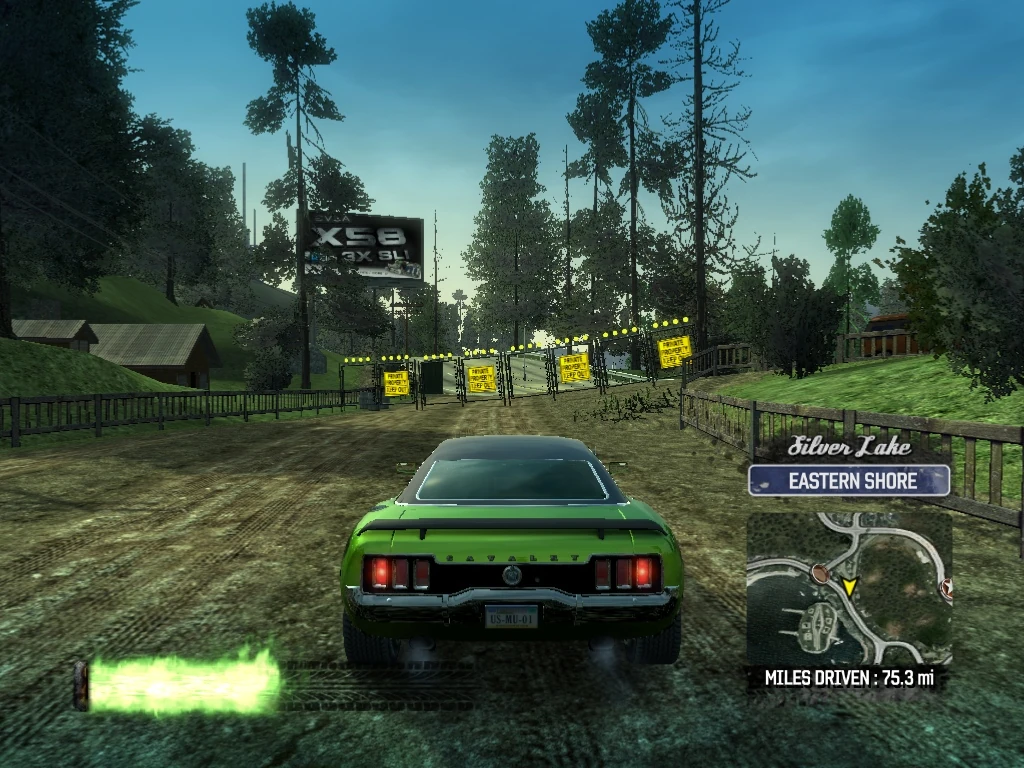
|
| 267 | Silver Lake Eastern Shore |
Drive through Smash Gate 267, where the path forks to the right. | 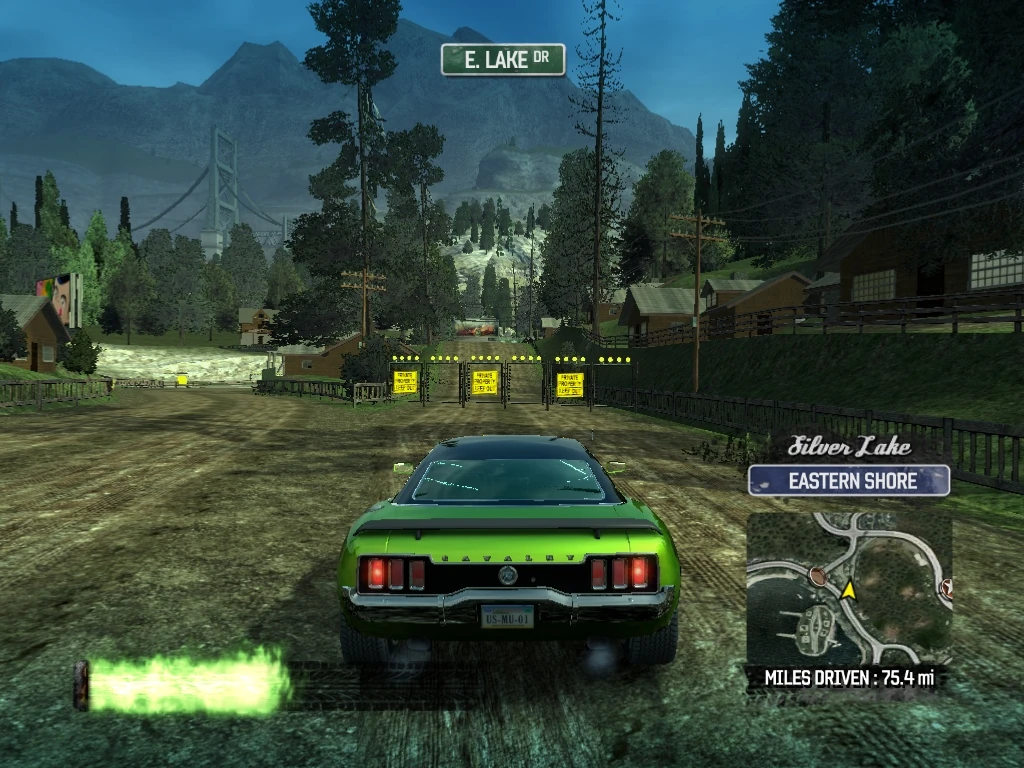
|
| 268 | Silver Lake Eastern Shore |
Drive through Smash Gate 268, where the path exits back onto W. Crawford Drive, and head east. | 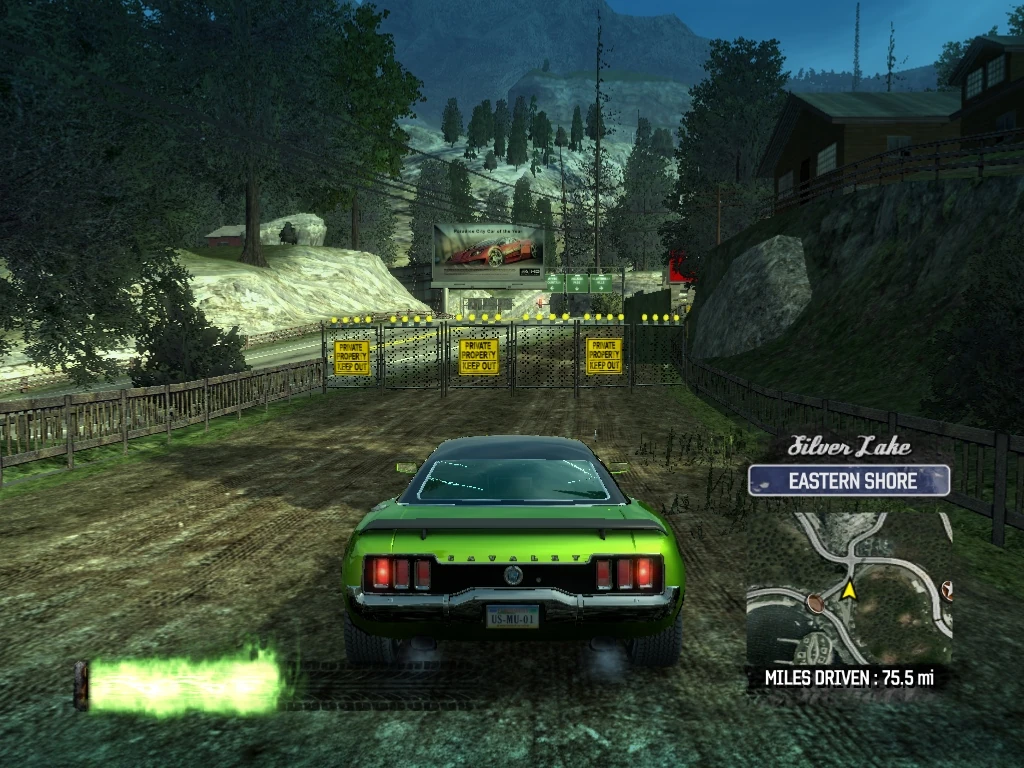
|
| 269 | Silver Lake Eastern Shore |
Smash Gate 269 is just ahead on the right and leads to a plank bridge and a Billboard Smash over Nelson Way. Drive through the Smash Gate, smash the billboard, and follow the path. | 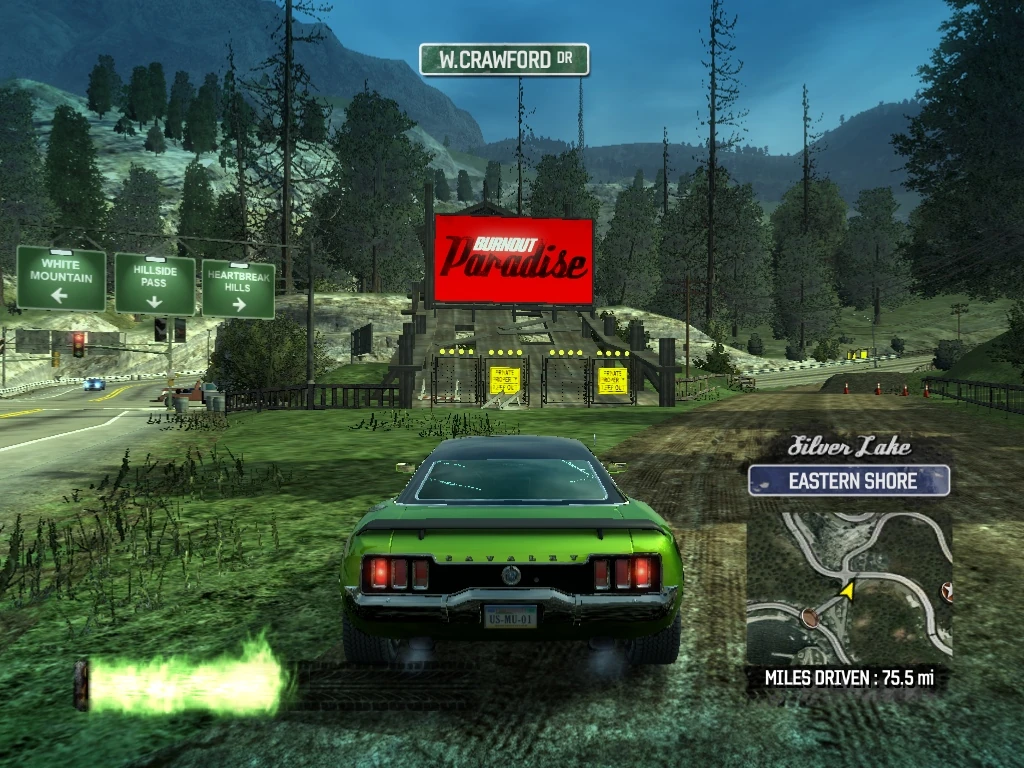
|
| 270 | Silver Lake Eastern Shore |
Drive through Smash Gate 270, where the path rejoins W. Crawford Drive, and head east. Smash Gate 311 is immediately ahead on the right. Drive past it for now, but note the location for later. | 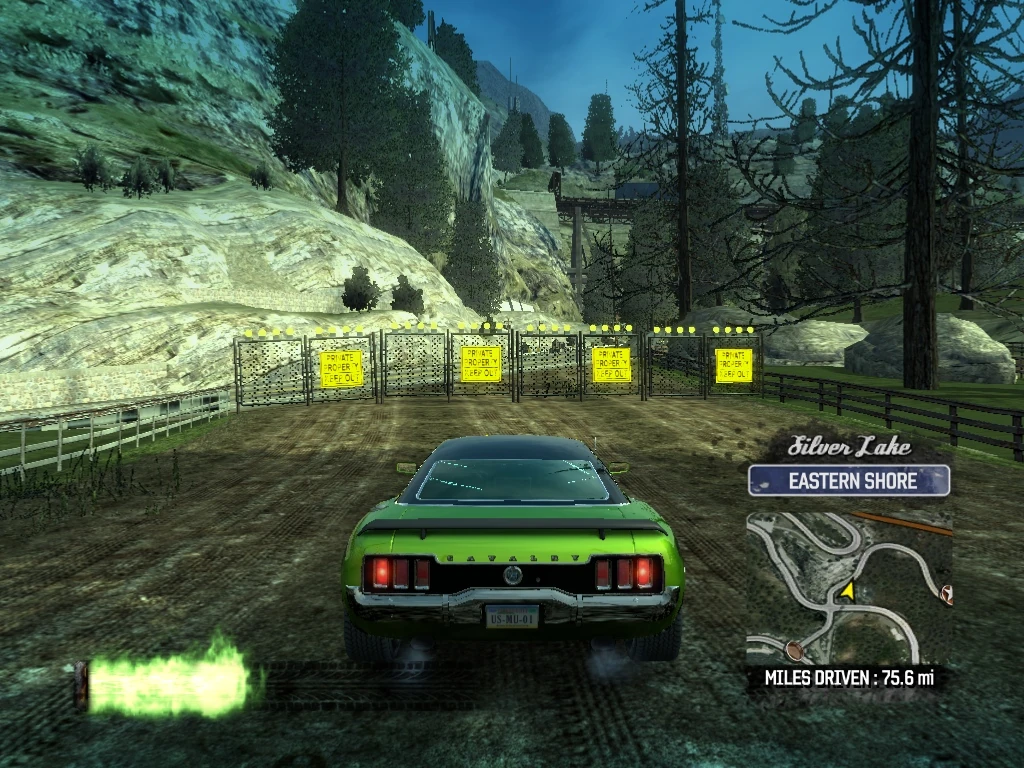
|
| 271 | Silver Lake Eastern Shore |
Smash Gate 271 is easiest to spot on the mini-map, where it shows up as a southeast diagonal line just before N. Rouse Drive crosses over W. Crawford. Look to the right in this area and you will see Smash Gate 271 at the entrance to a tunnel. Drive through it and follow the tunnel, which exits on N. Rouse Drive. | 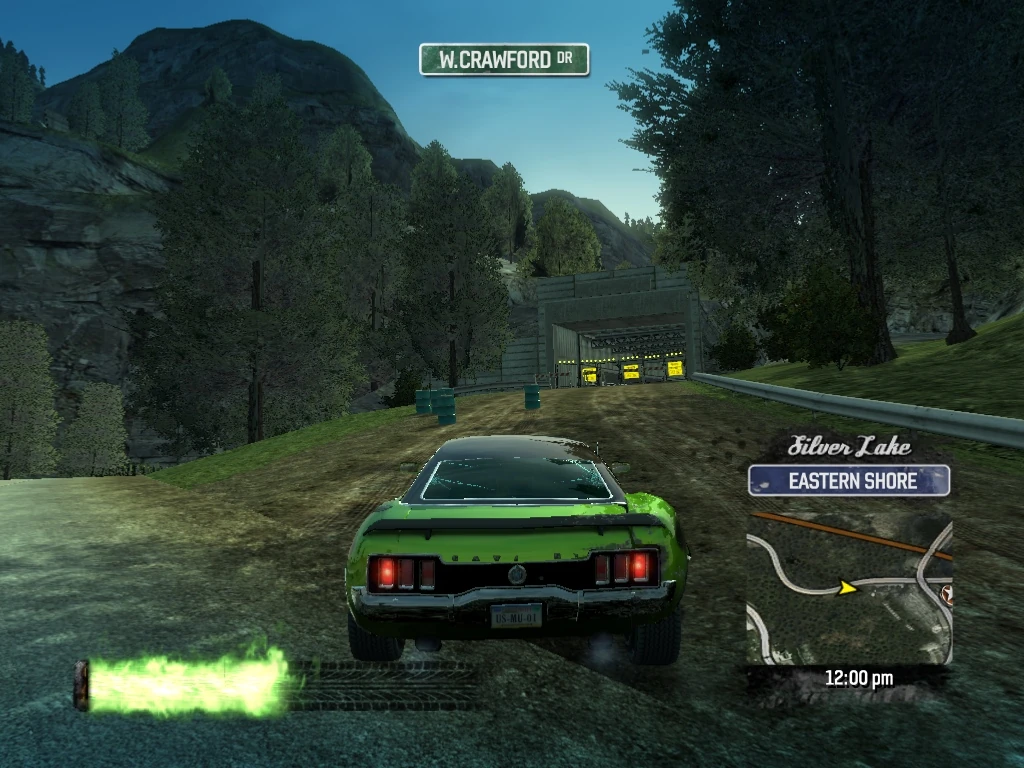
|
| 272 | Silver Lake Heartbreak Hills |
Drive through Smash Gate 272 where the tunnel exits onto N. Rouse Drive, and spin the car left to head northbound. As you spin the car, you will see Smash Gate 350 to the right and slightly behind you (you have to face southeast to smash it), but ignore it for now. | 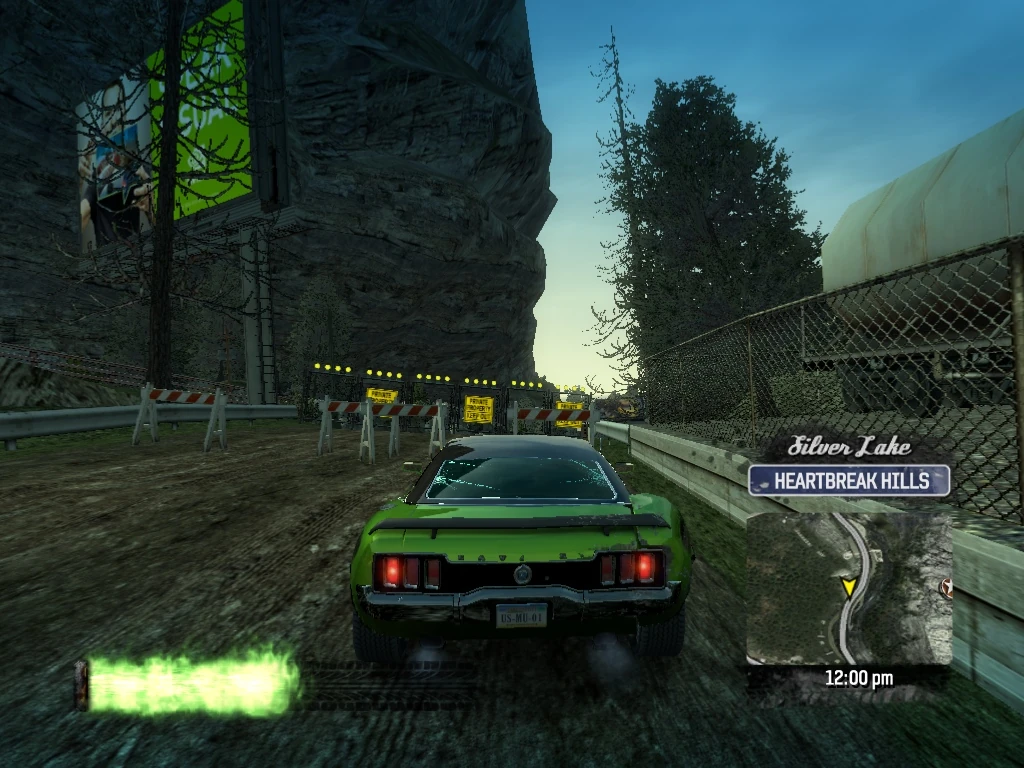
|
| 273 | Silver Lake Heartbreak Hills |
Smash Gate 273 is a short ways up the road at a northeast angle. Drive through it and follow the dirt path. | 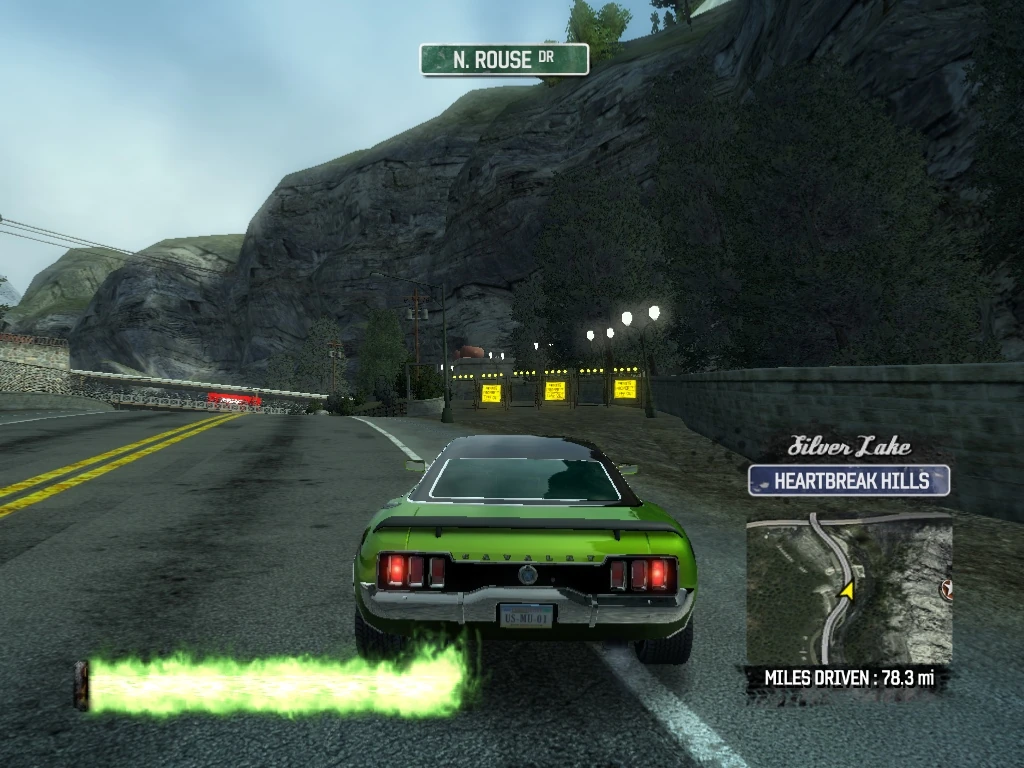
|
| 274 | Silver Lake Heartbreak Hills |
Drive through Smash Gate 274 at the other end of the dirt path, re-joining N. Rouse Drive northbound. | 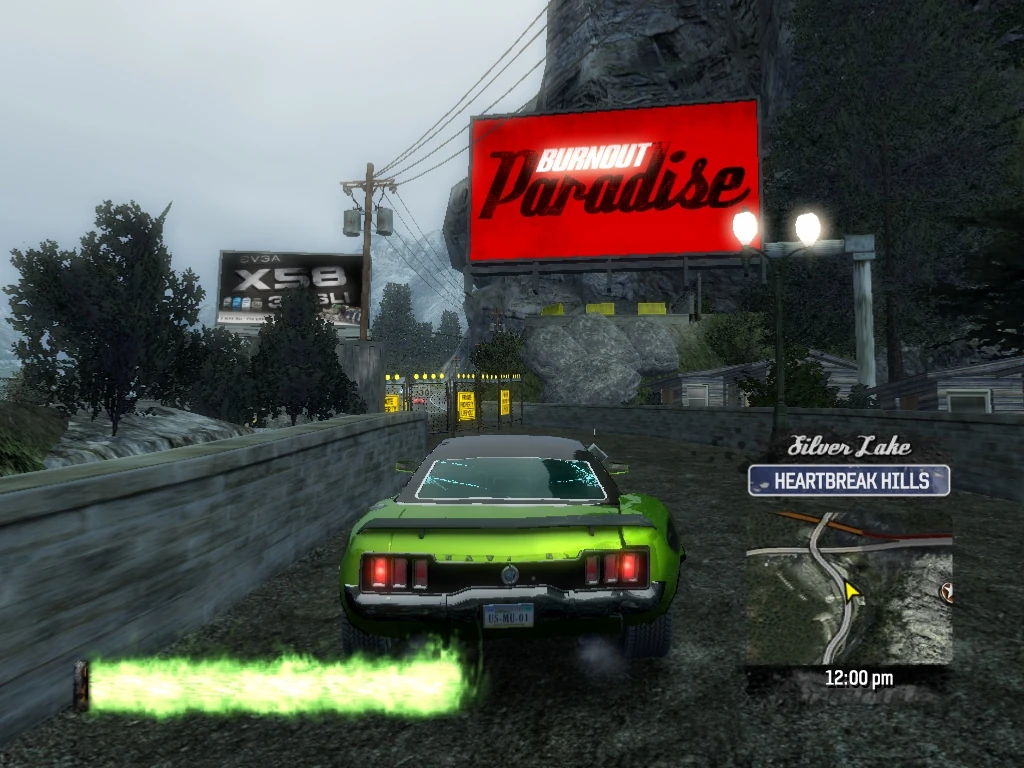
|
| 275 | Silver Lake Hillside Pass |
Continue a long ways on N. Rouse Drive, and take the next left onto Lewis Pass. Smash Gate 275 is just ahead on the right on a boardwalk that leads to a Super Jump. For now, just knock it over and come back up Lewis Pass and turn left on N. Rouse Drive, headed west. | 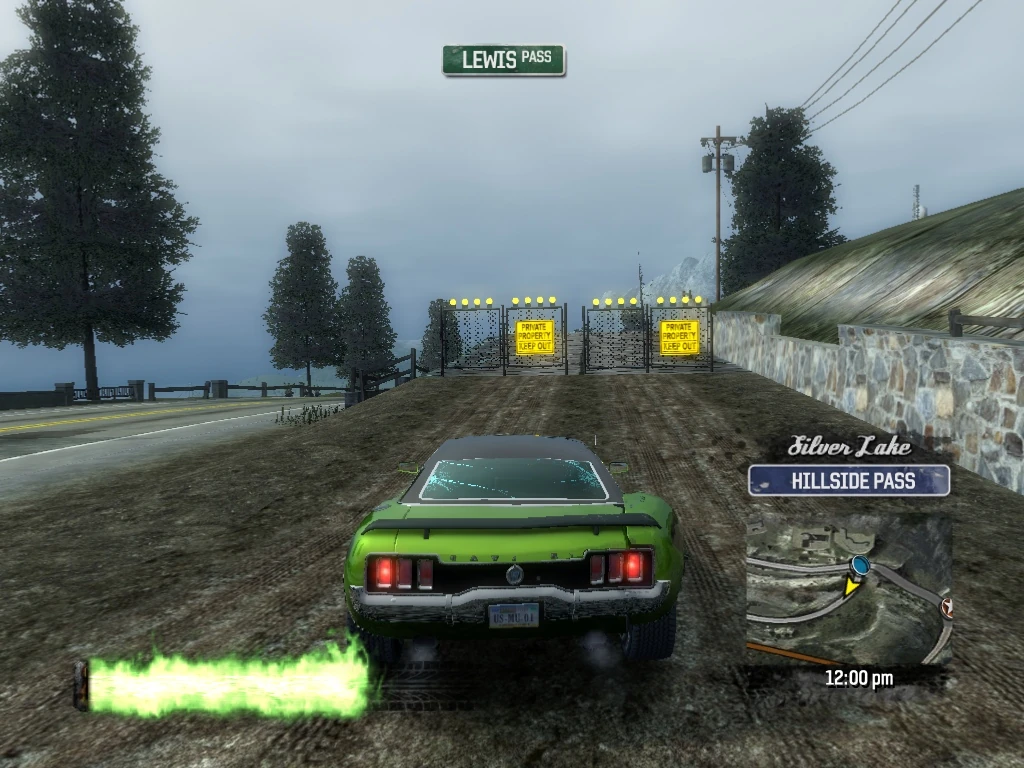
|
| 276 | Silver Lake Hillside Pass |
Drive through Smash Gate 276, follow the dirt path, and boost to make the Super Jump. | 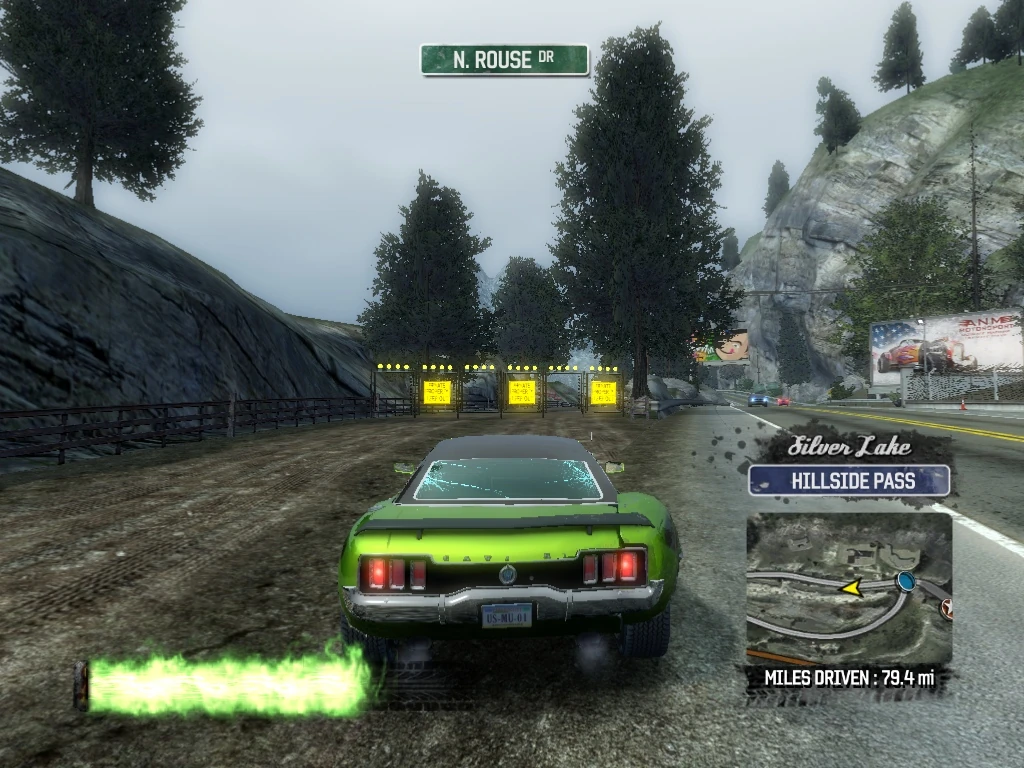
|
| 277 | Silver Lake Hillside Pass |
Drive through Smash Gate 277 at the other end of the path, exiting onto N. Rouse Drive. | 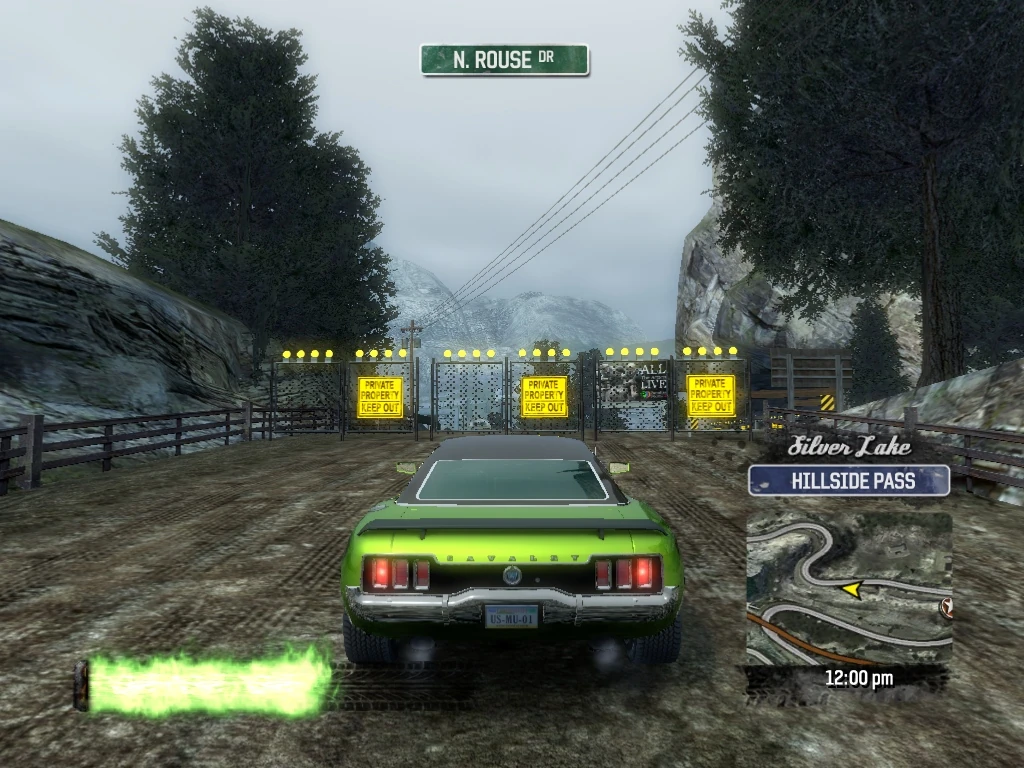
|
| 278 | Silver Lake Hillside Pass |
Cross over N. Rouse Drive and drive through Smash Gate 278, at the entrance to a tunnel. | 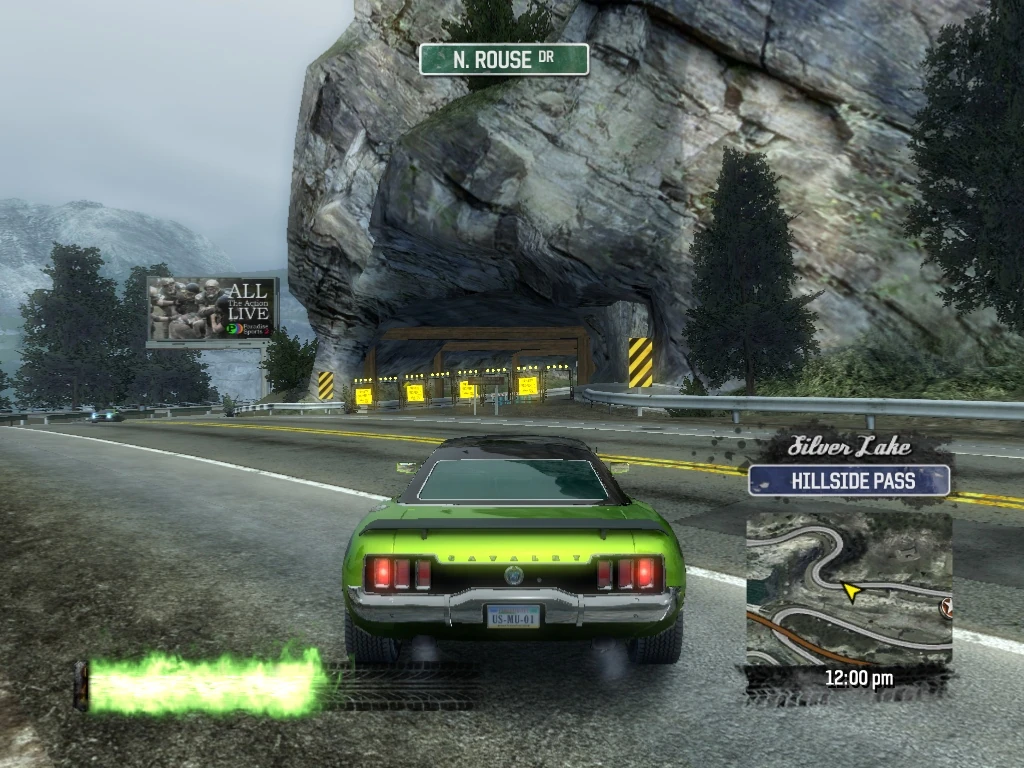
|
| 279 | Silver Lake Hillside Pass |
Drive through Smash Gate 279 at the other end of the tunnel, where it again exits to N. Rouse Drive. | 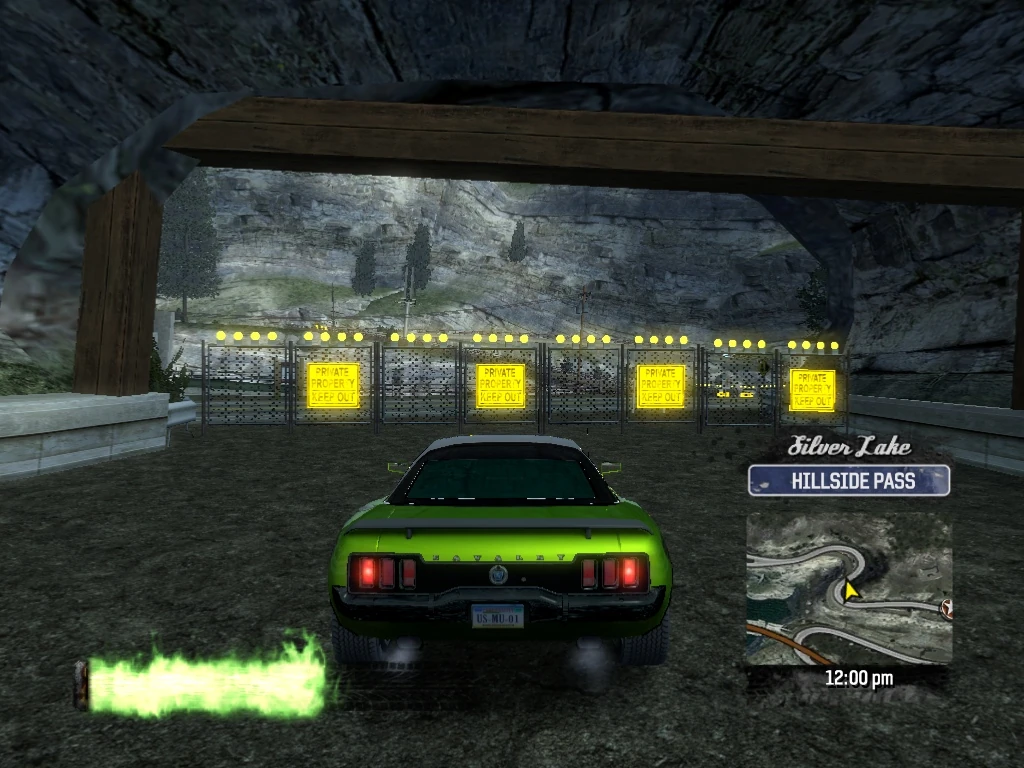
|
| 280 | Silver Lake Hillside Pass |
Cross over N. Rouse Drive yet again, and drive through Smash Gate 280, following the dirt path. | 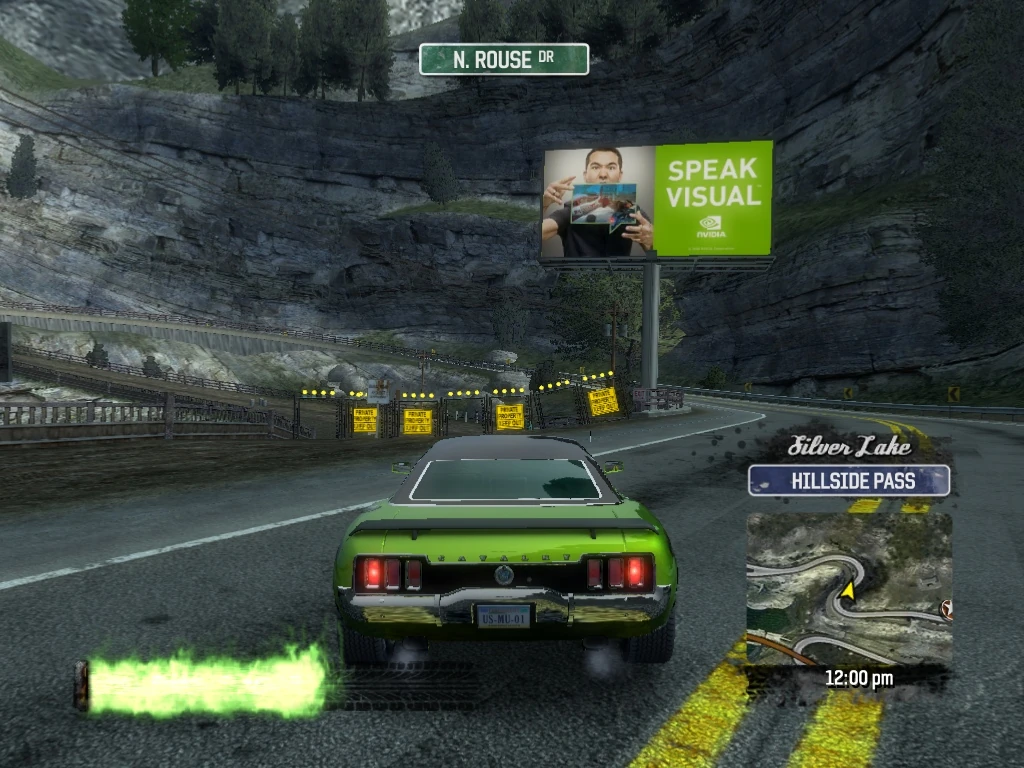
|
| 281 | Silver Lake Hillside Pass |
Drive through Smash Gate 281 at the other end of the dirt path, re-joining N. Rouse Drive, westbound. | 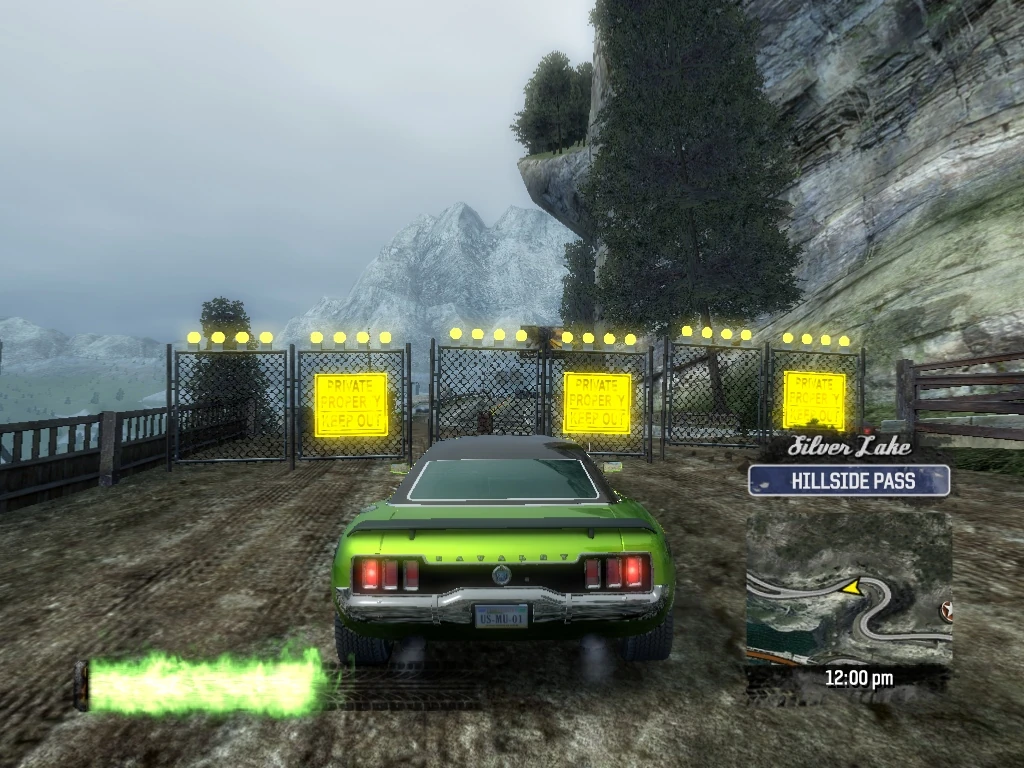
|
| 282 | Silver Lake Hillside Pass |
Smash Gate 282 is just ahead, in the central median of where N. Rouse Drive divides. Drive through it onto the dirt path beneath the roadway. | 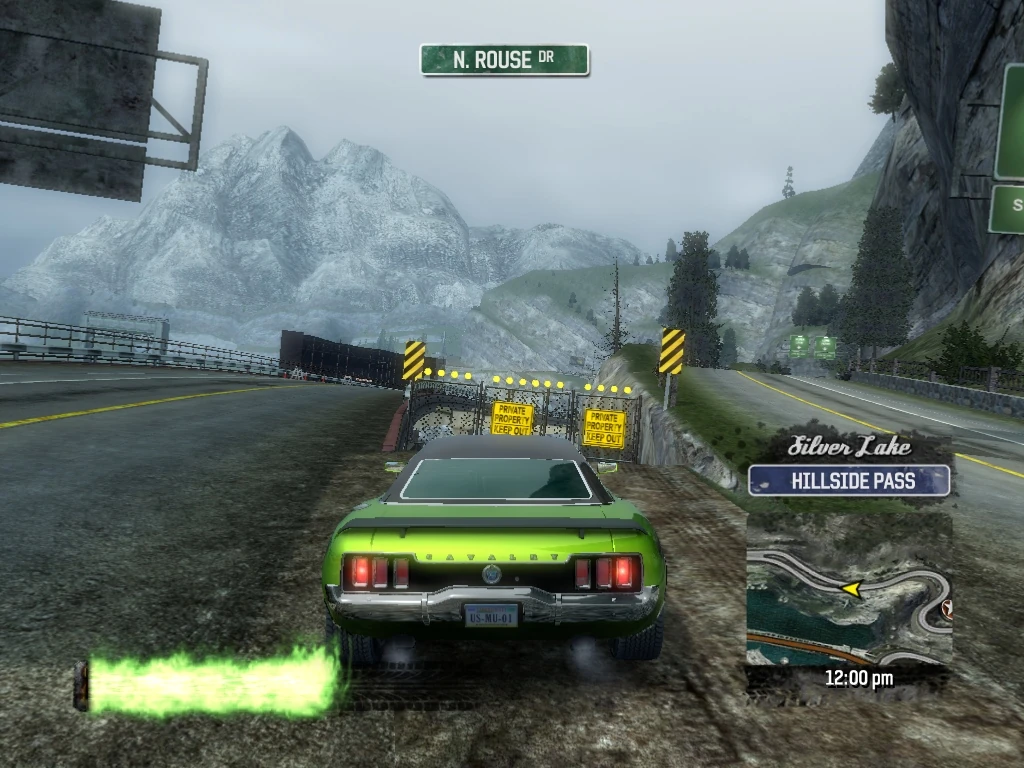
|
| 283 | Silver Lake Hillside Pass |
Boost down the path, completing two Super Jumps, and climb the dirt hill to drive through Smash Gate 283 at the other end of the path. | 
|
| 284 | Silver Lake Hillside Pass |
Smash Gate 284 is directly in front of you and leads to Smash Gate 236. For now, just knock it down and back up. | 
|
| 285 | Silver Lake Hillside Pass |
Cross over N. Rouse Drive, and drive through Smash Gate 285, following the uphill dirt path. | 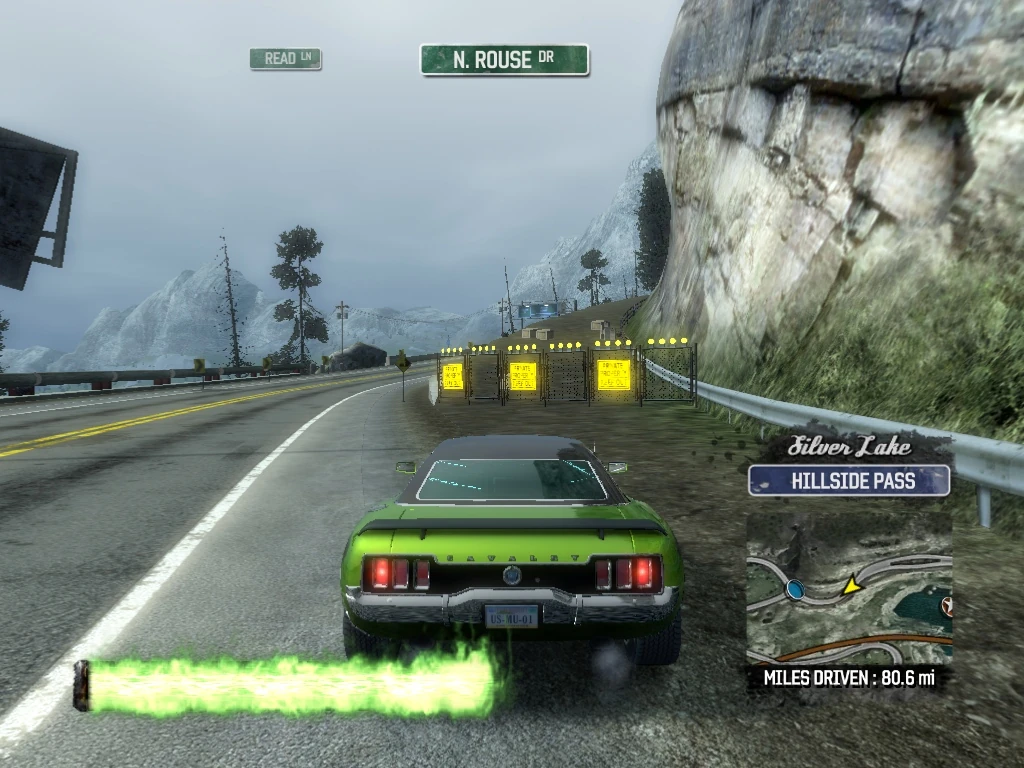
|
| 286 | Silver Lake Eastern Shore |
Follow the path through previously completed Smash Gate 237, and turn left (southwest) on Read Lane and follow it to just before the intersection with Nelson Way. Take a hard right just before the intersection with Nelson Way and drive though Smash Gate 286 onto a walkway. | 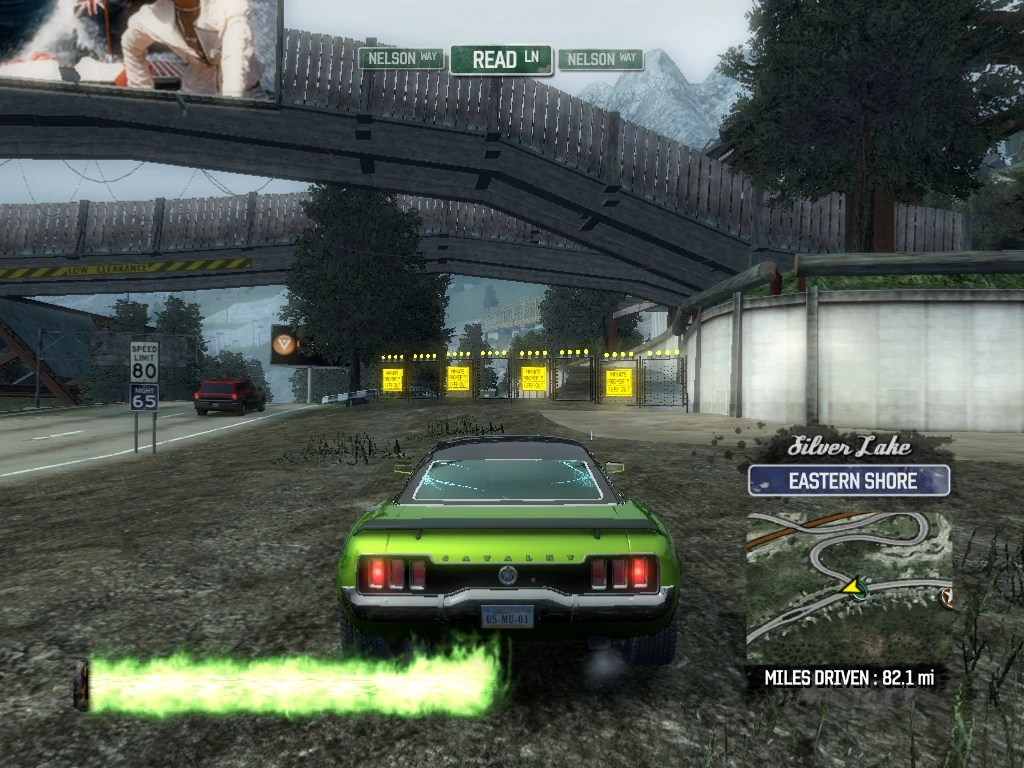
|
| 287 | Silver Lake Eastern Shore |
Going right on the walkway leads to a Billboard Smash, but stay to the left and drive through Smash Gate 287, exiting onto Nelson Way, westbound. | 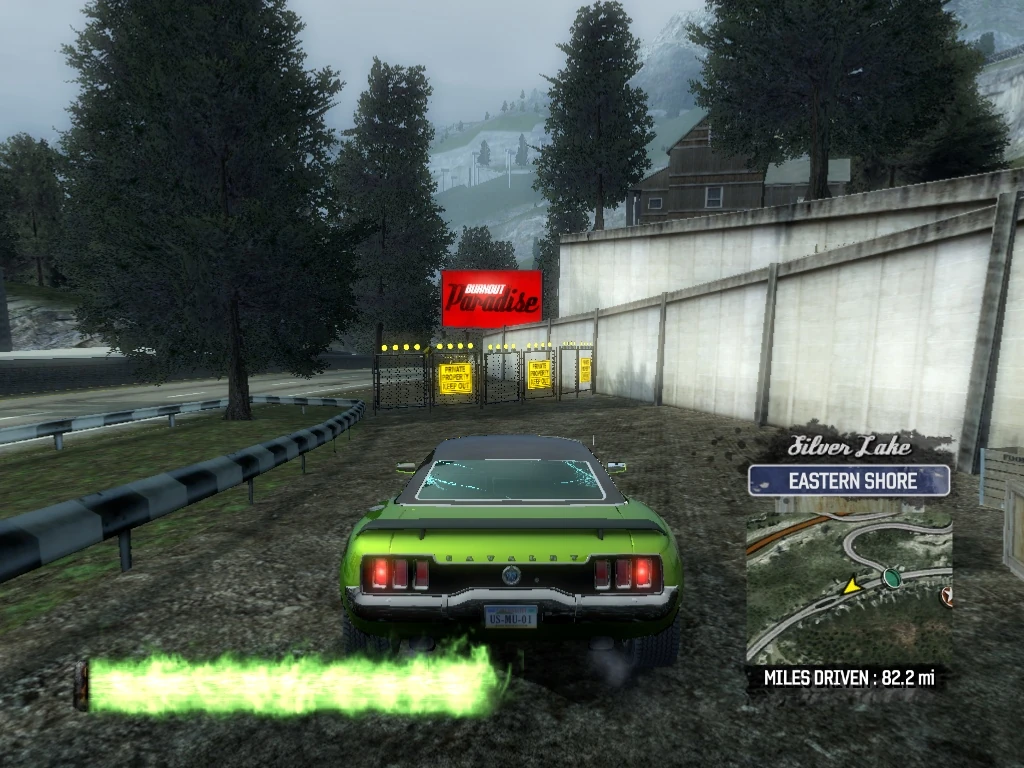
|
| 288 | Silver Lake Eastern Shore |
Smash Gates 288 and 289 are just across Nelson Way on the left, between the divided portions of the highway. Drive through Smash Gate 288. | 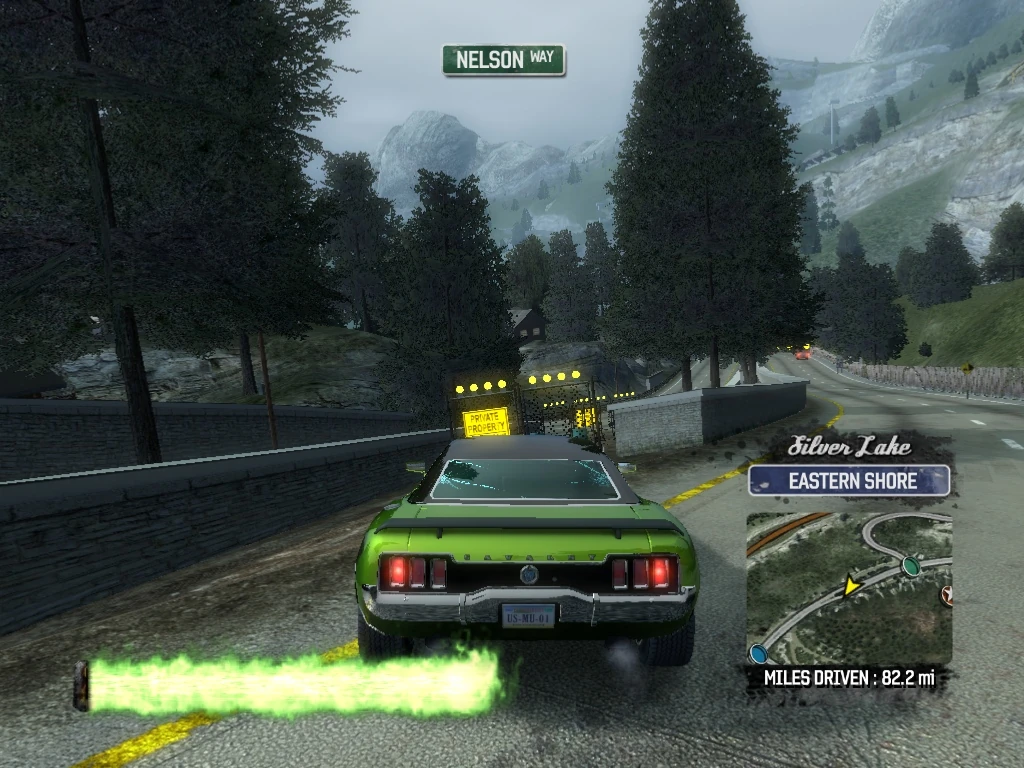
|
| 289 | Silver Lake Eastern Shore |
And knock down Smash Gate 289, then back up through both gates and continue westbound on Nelson Way. | 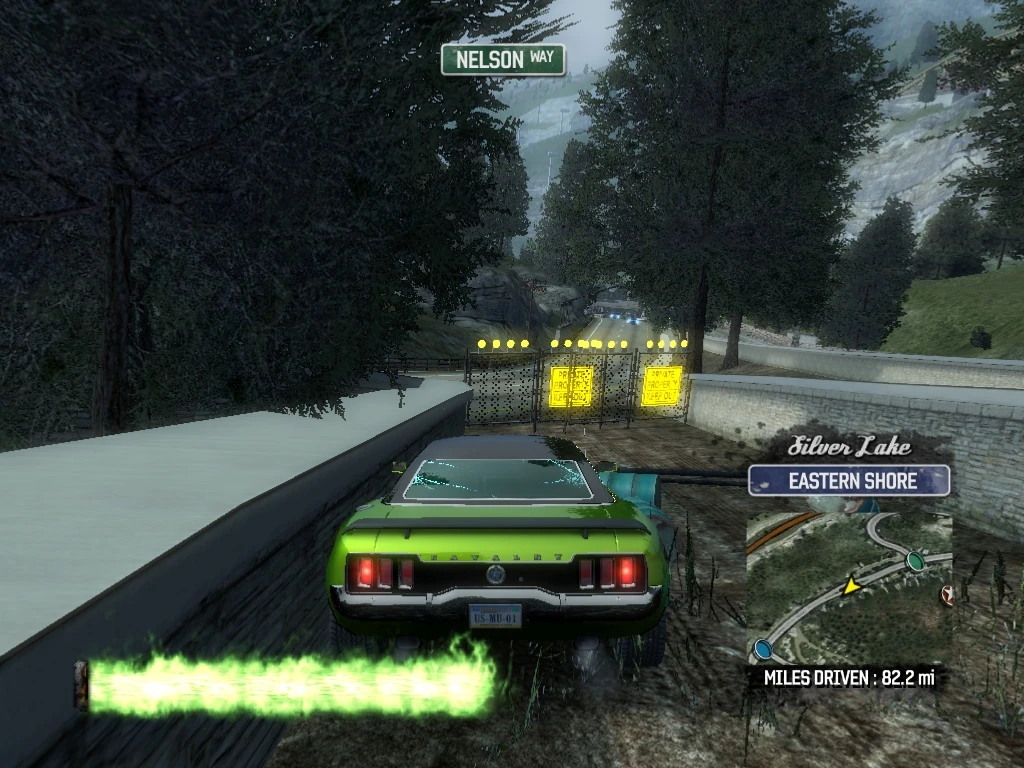
|
| 290 | Silver Lake Eastern Shore |
Smash Gates 290-292 and 251 are all in a straight line. Drive through Smash Gate 290 on the right, just before the Paradise National Park sign and continue down the dirt path. | 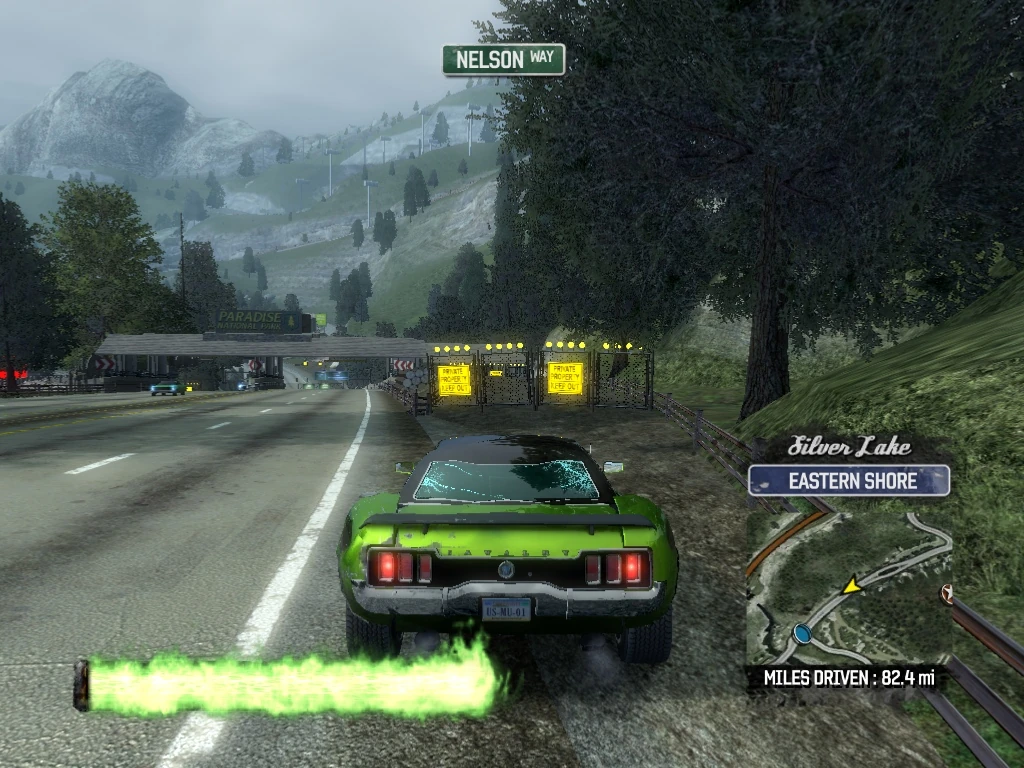
|
| 291 | Silver Lake Eastern Shore |
Drive through Smash Gate 291. | 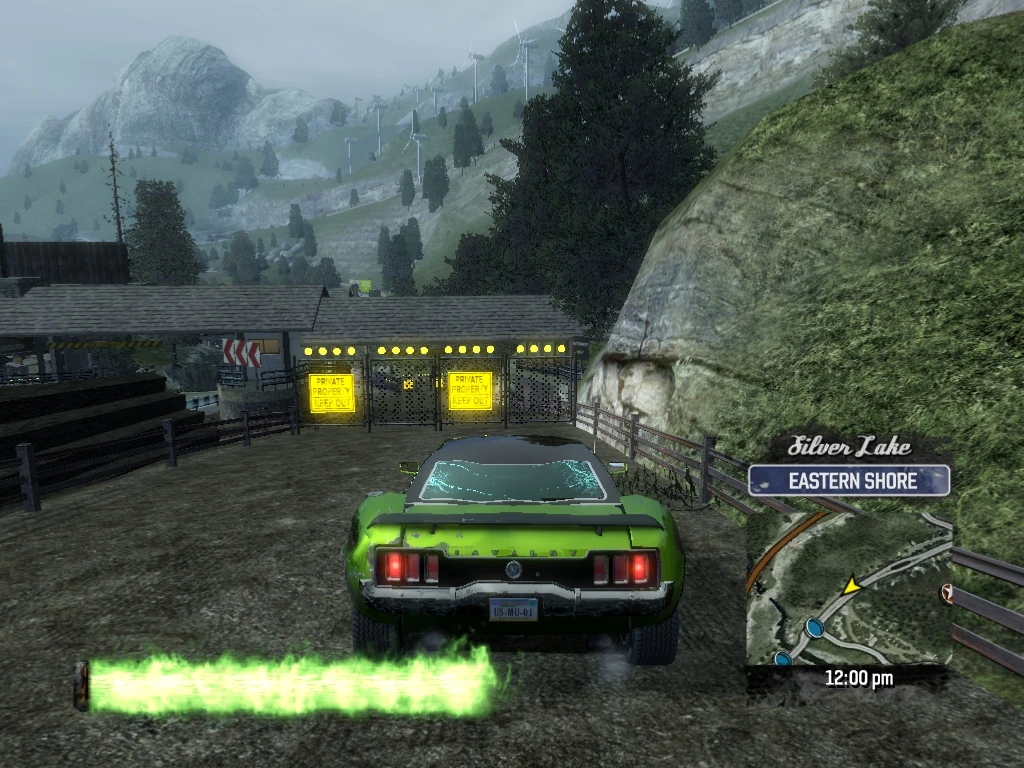
|
| 292 | Silver Lake Eastern Shore |
Drive through Smash Gate 292. | 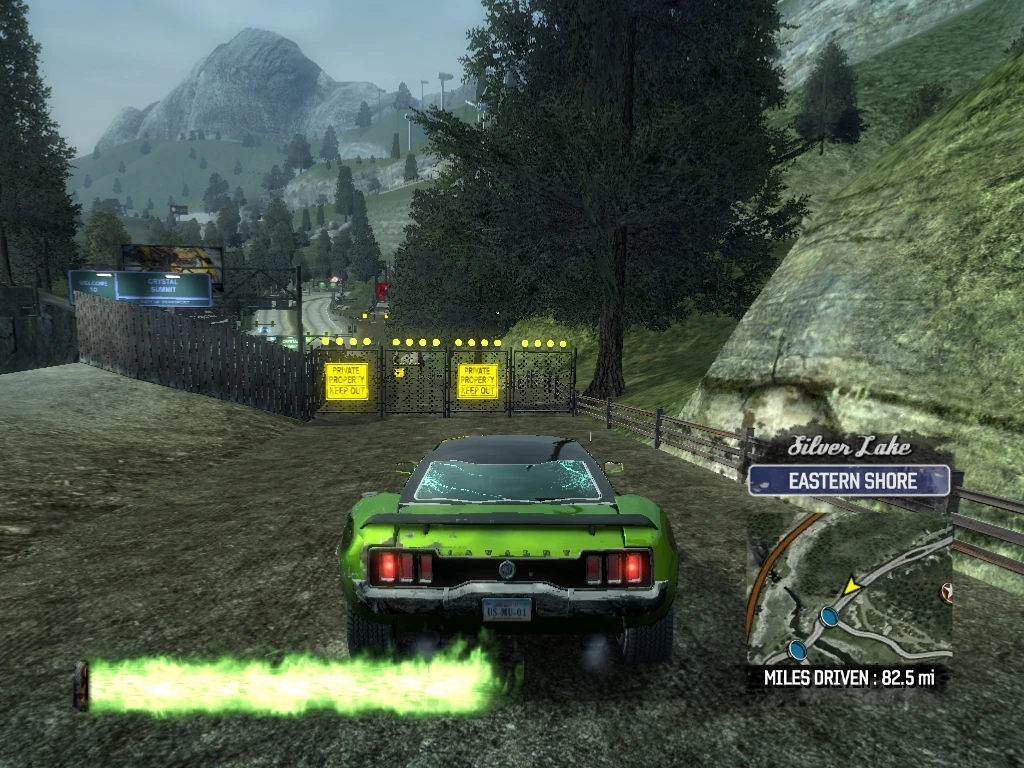
|
| 293 | Silver Lake Eastern Shore |
Drive through previously completed Smash Gate 251, and turn around and head east on Nelson Way. Smash Gate 293 is on your right at the entrance to Frankie's Campground, just before the Paradise National Forest sign (it is easier to see from the westbound direction). For now, just spin around and knock it down, and then continue eastbound on Nelson Way. | 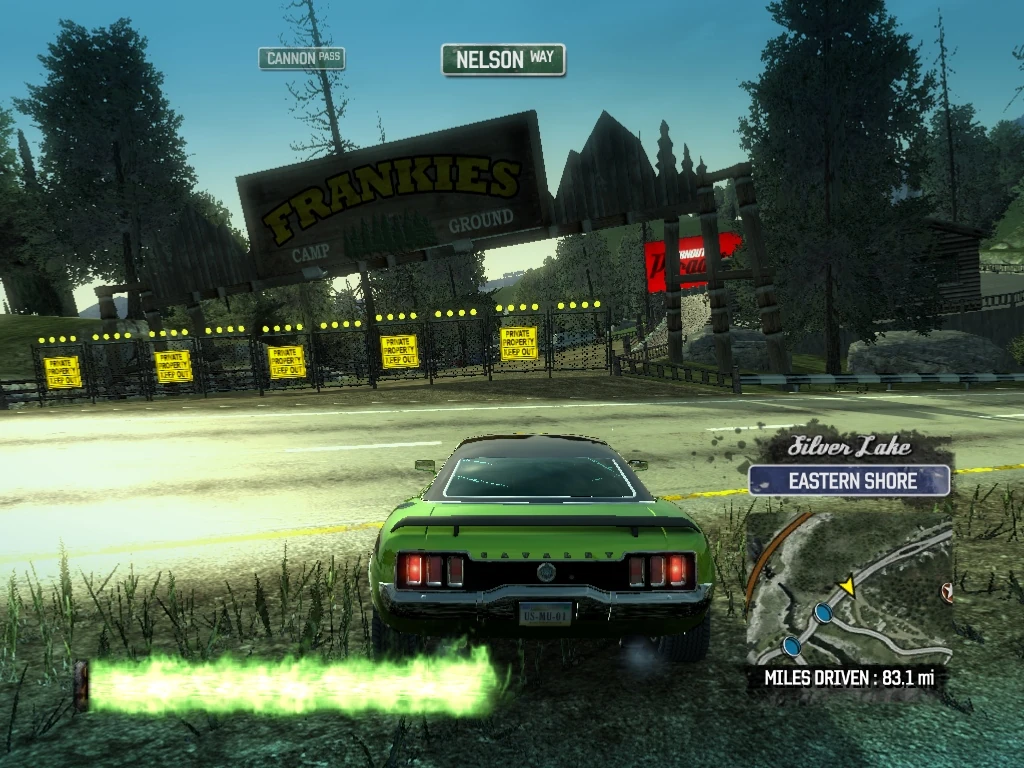
|
| 294 | Silver Lake Eastern Shore |
Smash Gate 294 is on the right just after Smash Gates 288 and 289 in the central divider. The Smash Gate is down a slight incline and not visible from the road, so look for a gap in the right side wall and follow it to drive through the smash Gate and follow the dirt path. | 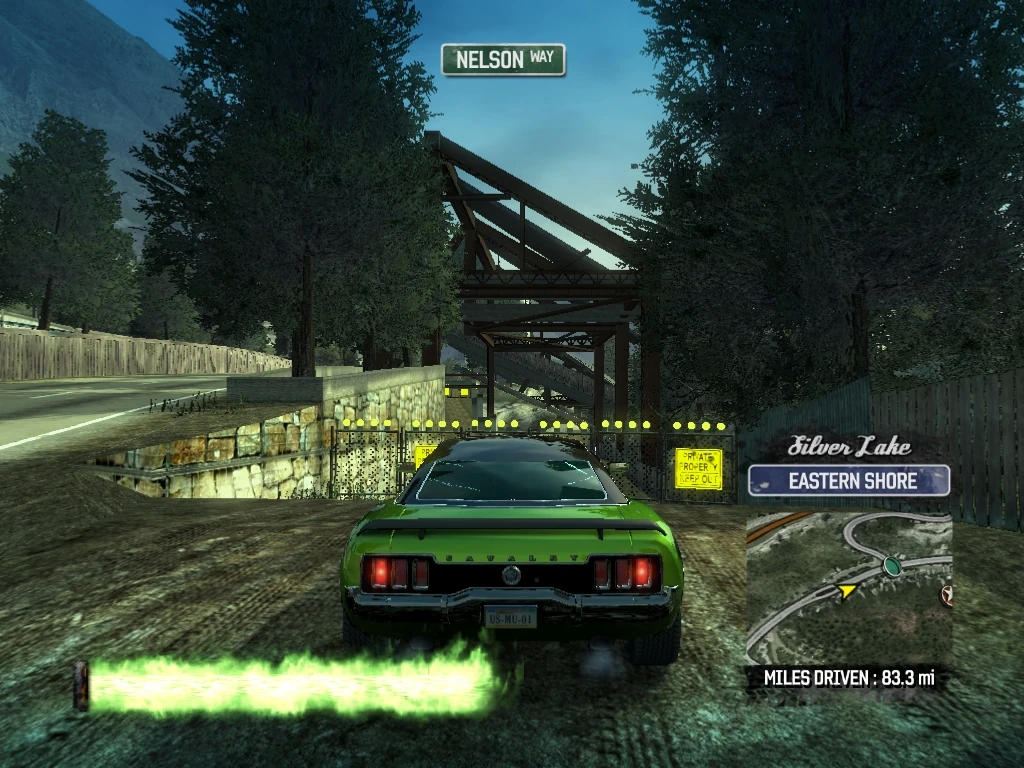
|
| 295 | Silver Lake Eastern Shore |
Stay to the left on the dirt path and drive through Smash Gate 295. You could exit onto Nelson Way at this point, but just stay on the path. | 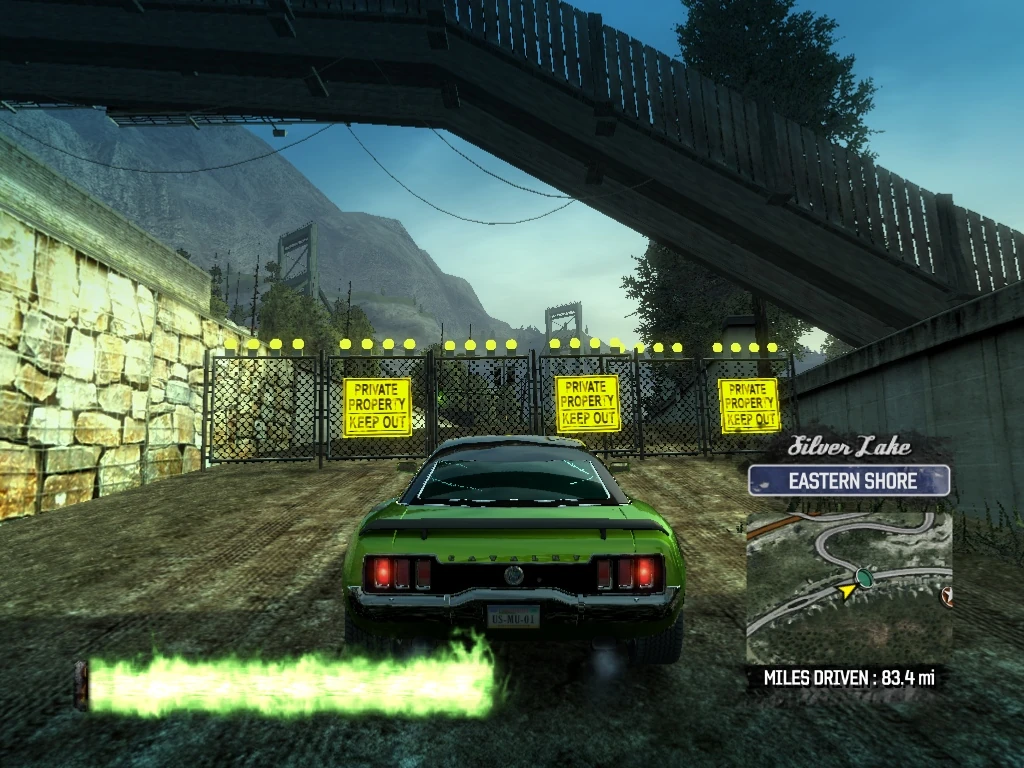
|
| 296 | Silver Lake Eastern Shore |
Drive forward on the path through Smash Gate 296. | 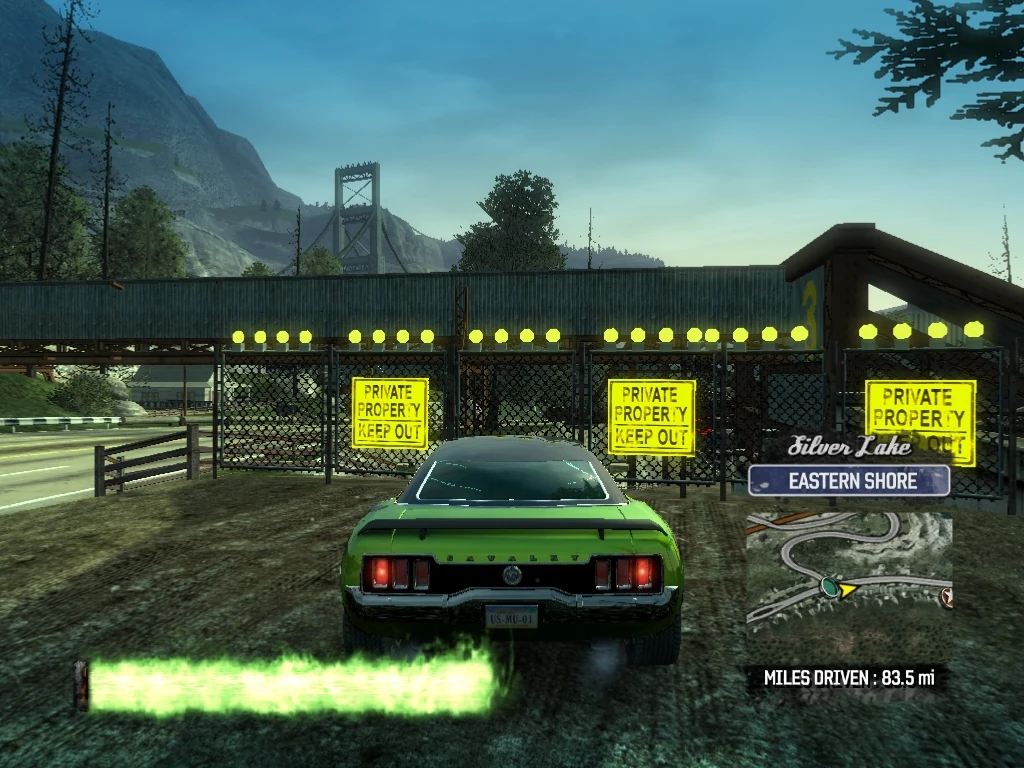
|
| 297 | Silver Lake Eastern Shore |
Follow the path under a Billboard and then drive through Smash Gate 297, exiting onto Nelson Way eastbound. (Smash Gate 297 is actually two lanes wide, but is only a single gate. | 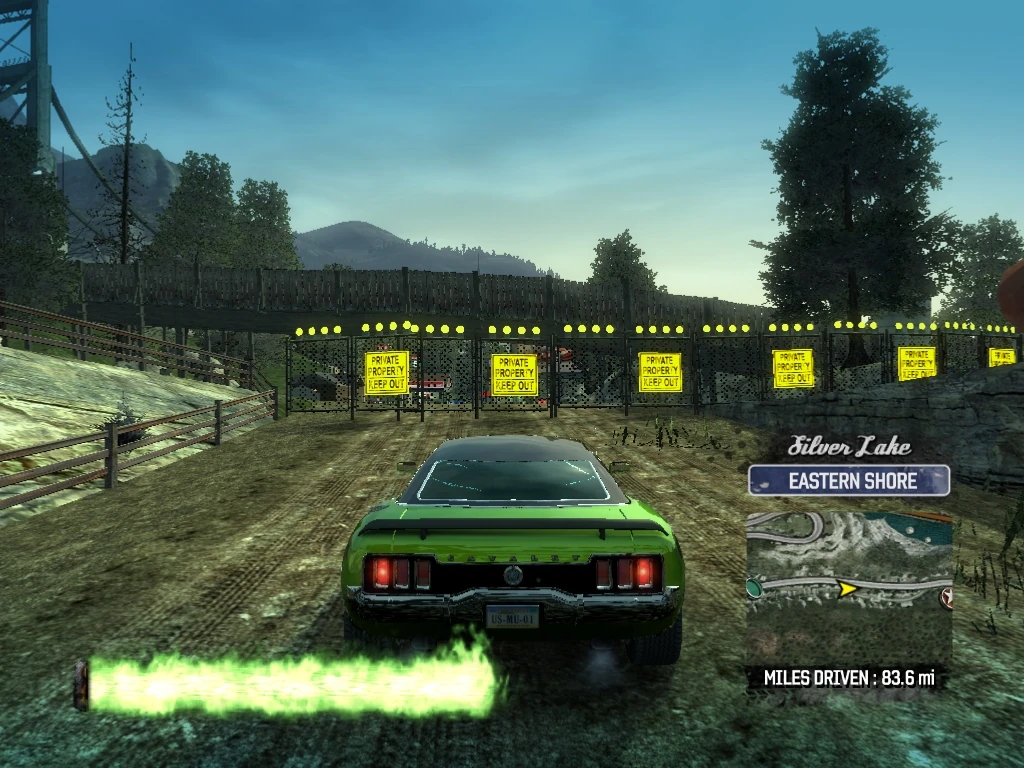
|
| 298 | Silver Lake Eastern Shore |
Drive past the Gas Station, and Smash Gate 298 is on the right just before the Billboard on the left. Spin around to knock it over, then continue eastbound on Nelson Way. | 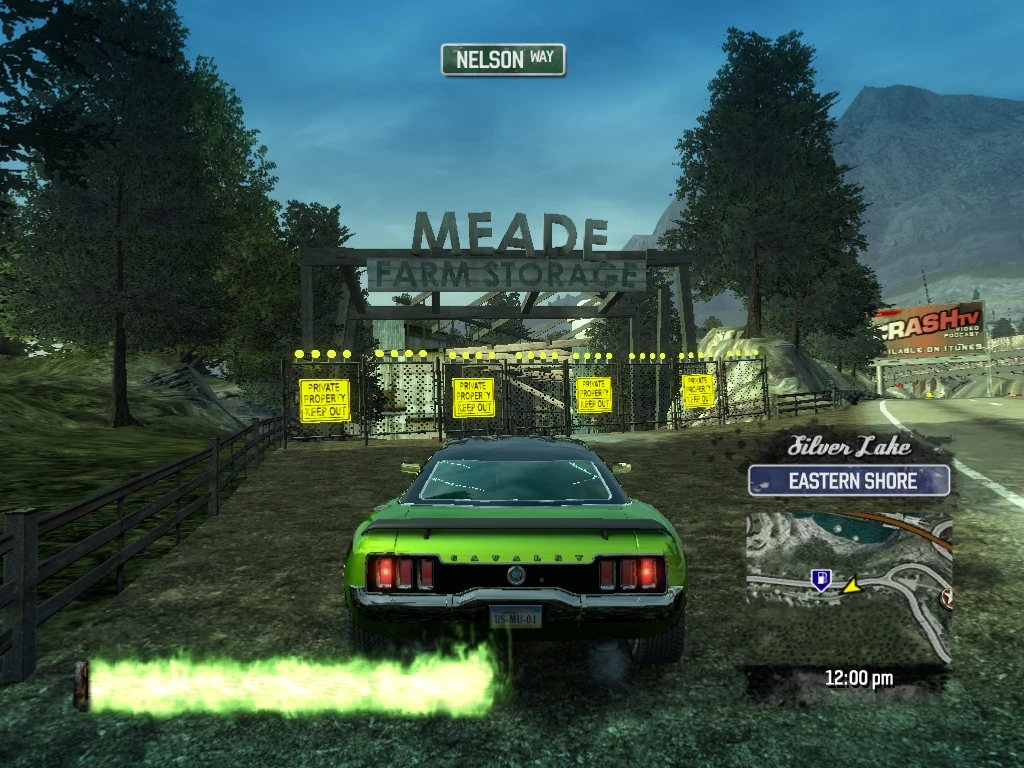
|
| 299 | Silver Lake Eastern Shore |
Veer left when Lewis Pass merges with Nelson Way, and drive through Smash Gate 299 at the entrance to a barn. | 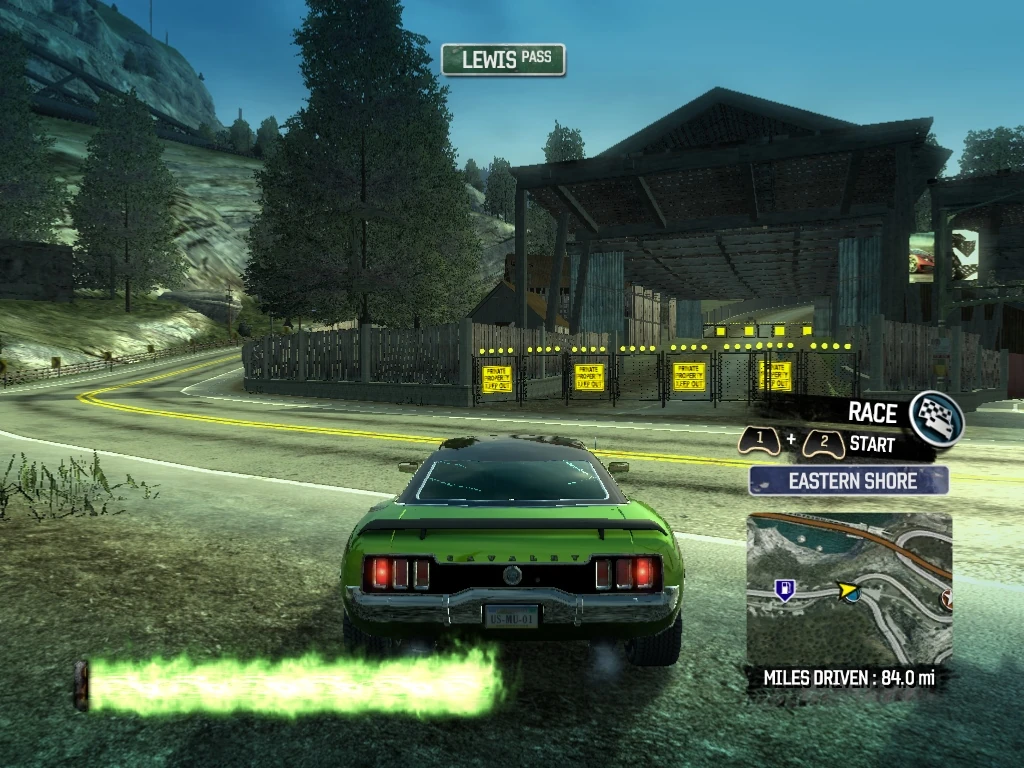
|
| 300 | Silver Lake Eastern Shore |
Drive through Smash Gate 300 at the exit to the barn and continue along the dirt path. | 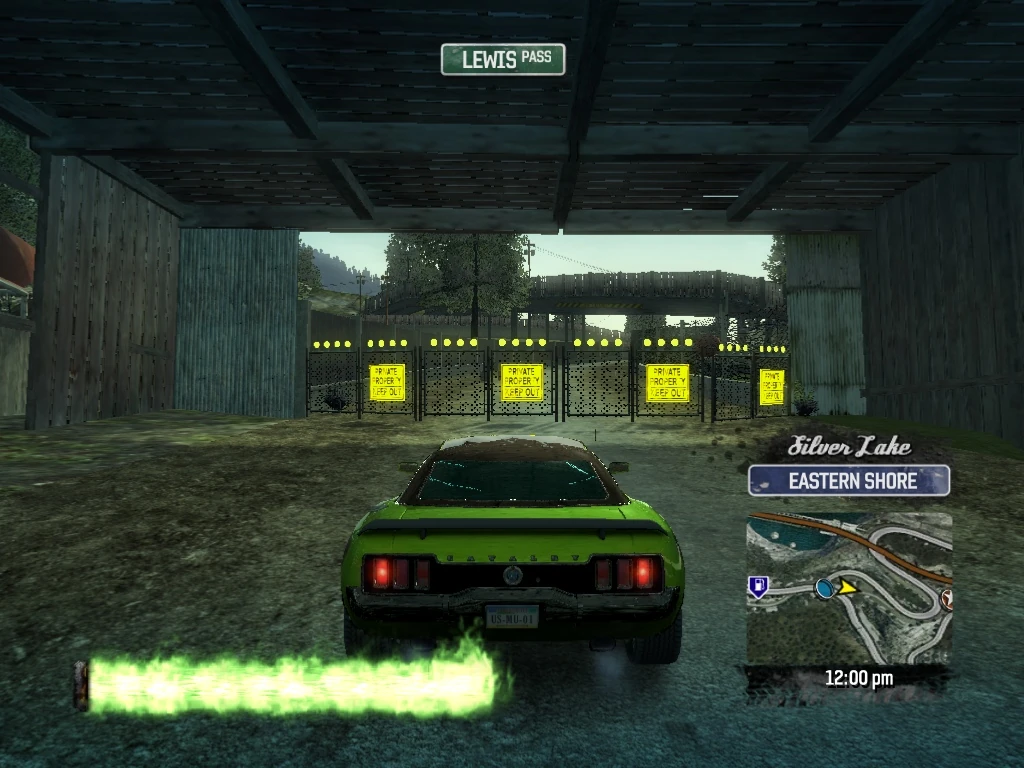
|
| 301 | Silver Lake Hillside Pass |
As you crest the hill, Smash Gate 301 is on your left exiting onto Lewis Pass. Drive over and knock it down and then continue east on the dirt path. | 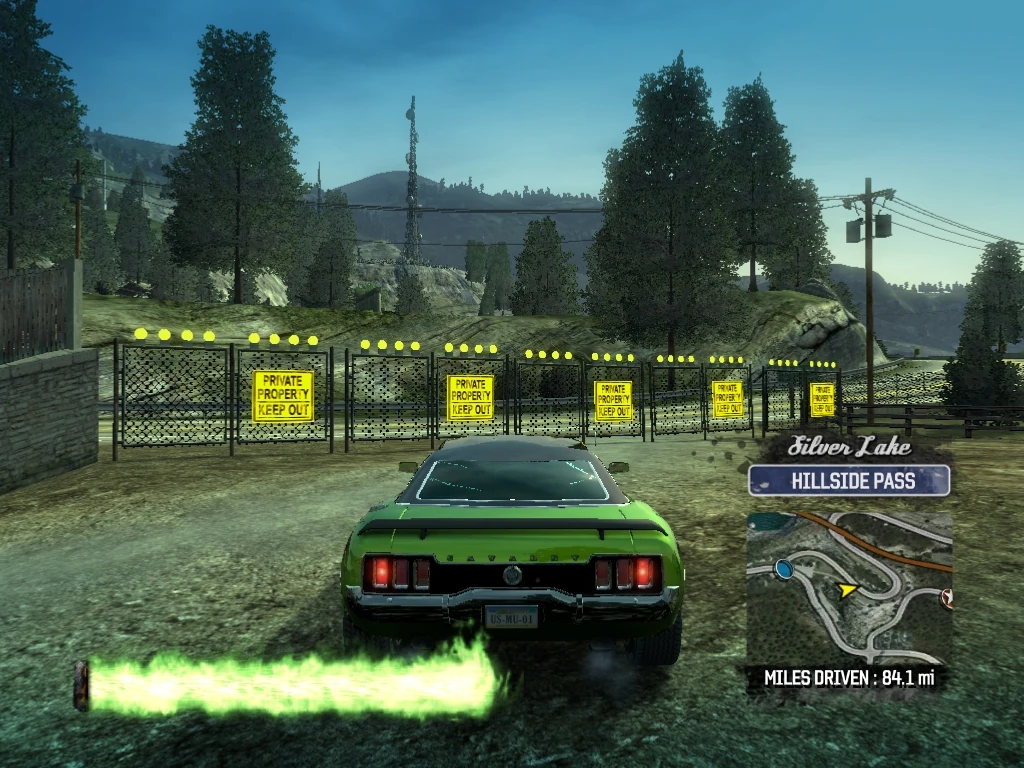
|
| 302 | Silver Lake Hillside Pass |
Drive through Smash Gate 302 at the entrance to a tunnel that leads under Lewis Pass. | 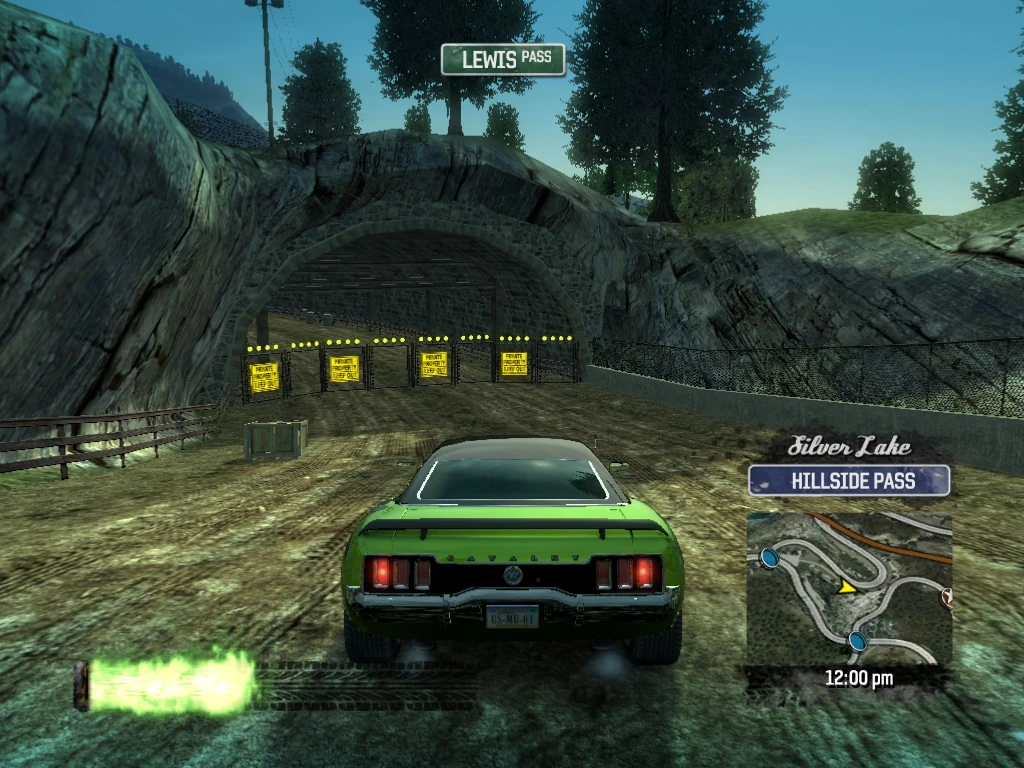
|
| 303 | Silver Lake Hillside Pass |
Drive through Smash Gate 303 at the exit of the tunnel and continue to follow the dirt path. | 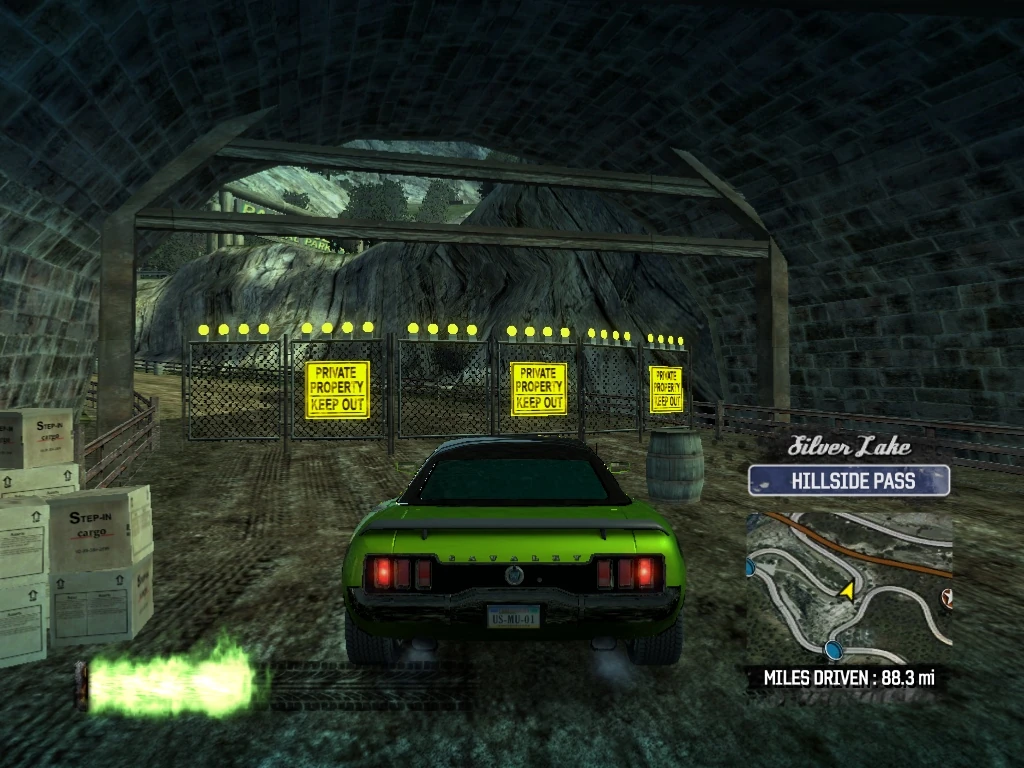
|
| 304 | Silver Lake Hillside Pass |
Drive through Smash Gate 304 where the dirt path exits onto Lewis Pass near the Crystal Summit Railroad tracks. | 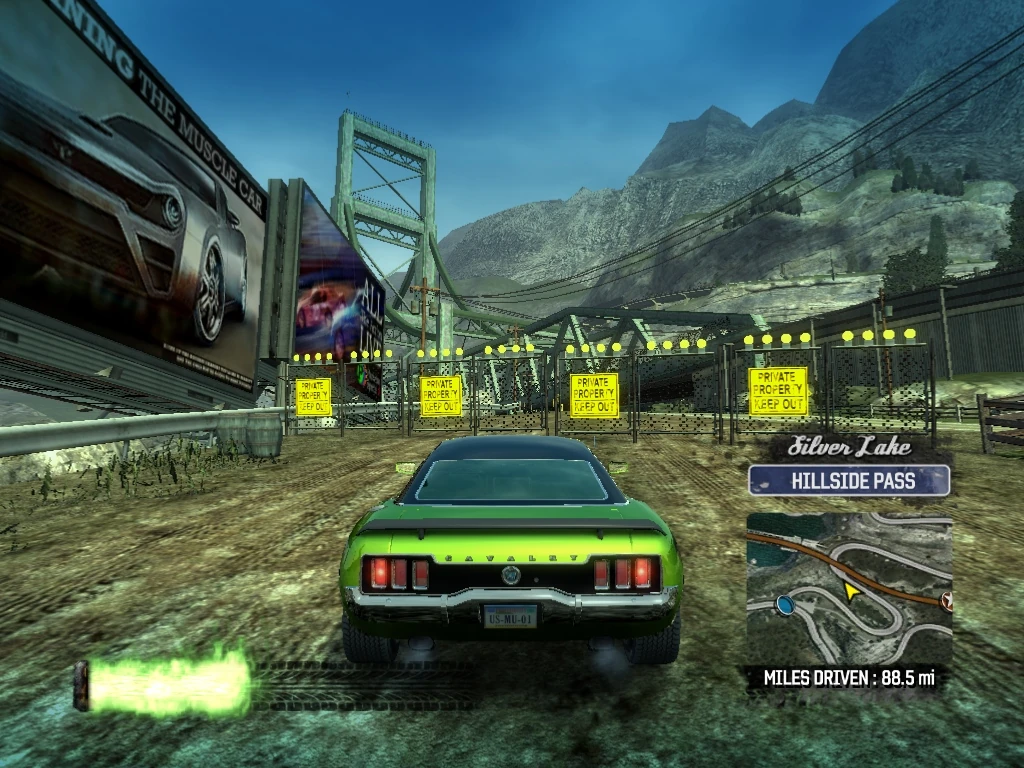
|
| 305 | Silver Lake Hillside Pass |
Turn right (southeast) on Lewis Pass, and you will see some smash gates in an opening on the left. Smash Gates 305 and 306 are on a boardwalk leading northwest on the Crystal Summit Railroad tracks and Smash Gates 307 and 308 are on a boardwalk leading southeast on the tracks. Turn left and drive through Smash Gate 305 and up the boardwalk. | 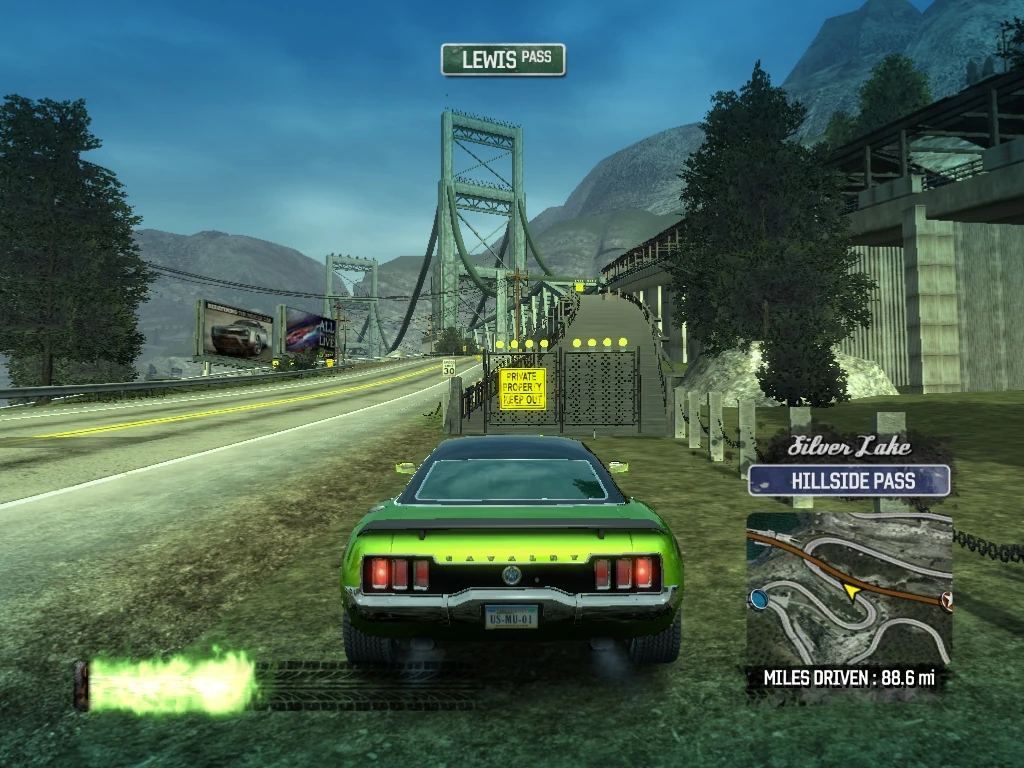
|
| 306 | Silver Lake Hillside Pass |
Drive through Smash Gate 306 at the top of the boardwalk, and then turn around on the tracks and come back down the boardwalk through the locations of Smash Gates 305 and 306. | 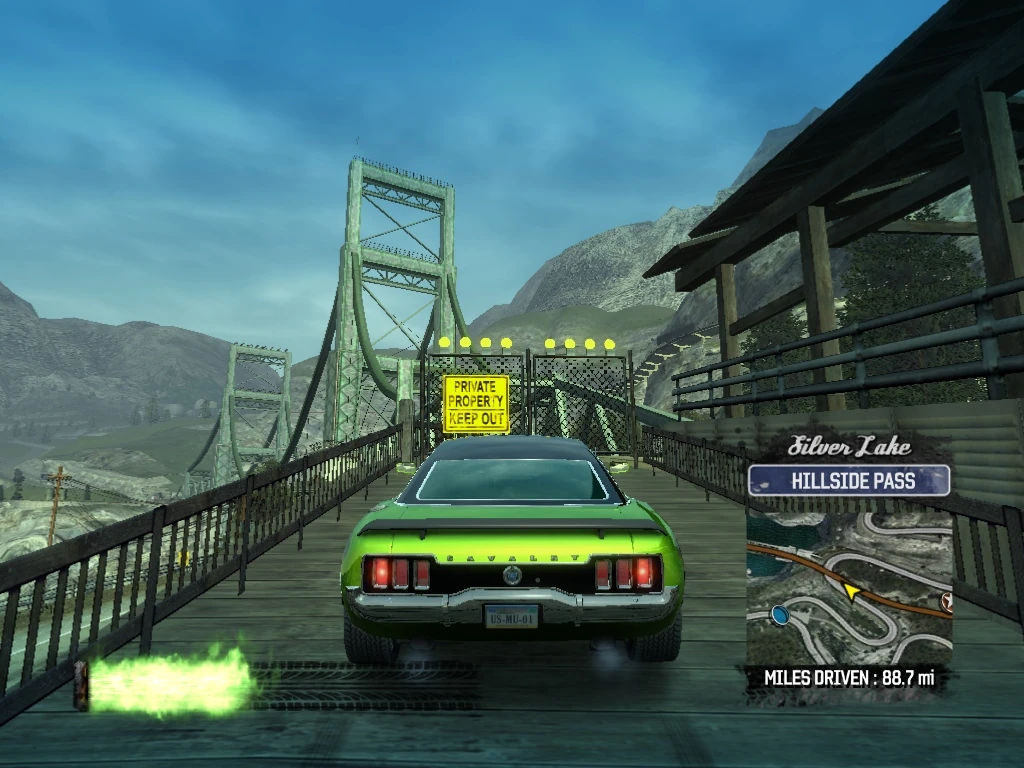
|
| 307 | Silver Lake Hillside Pass |
Stay to the left and drive through Smash Gate 307 and up the opposite boardwalk. | 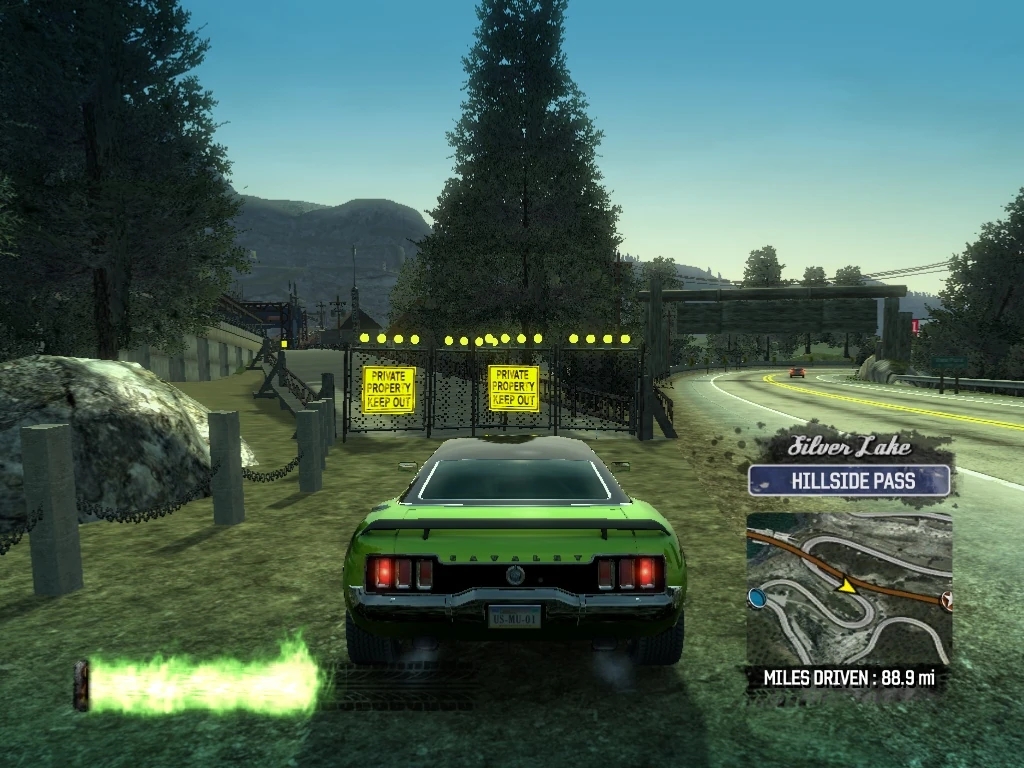
|
| 308 | Silver Lake Hillside Pass |
Drive through Smash Gate 308 and continue southeast down the Crystal Summit Railroad tracks. | 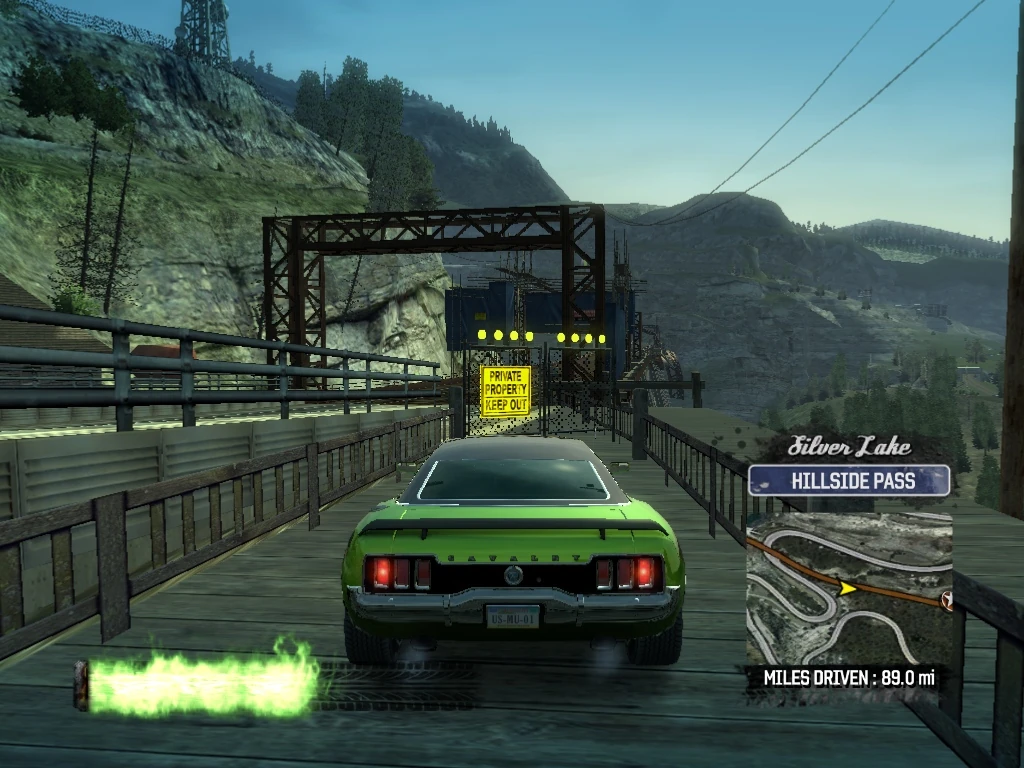
|
| 309 | Silver Lake Heartbreak Hills |
Drive along the derelict bridge and into the tunnel. Follow the wall on the right and you will see an opening with some white barricades across it. Drive through the barricades and turn to the right again and there is a billboard smash straight ahead and tunnels leading to Smash Gate 309 on the right and Smash Gate 310 on the left. Follow the right tunnel and drive through Smash Gate 309, exiting onto W. Crawford Drive. | 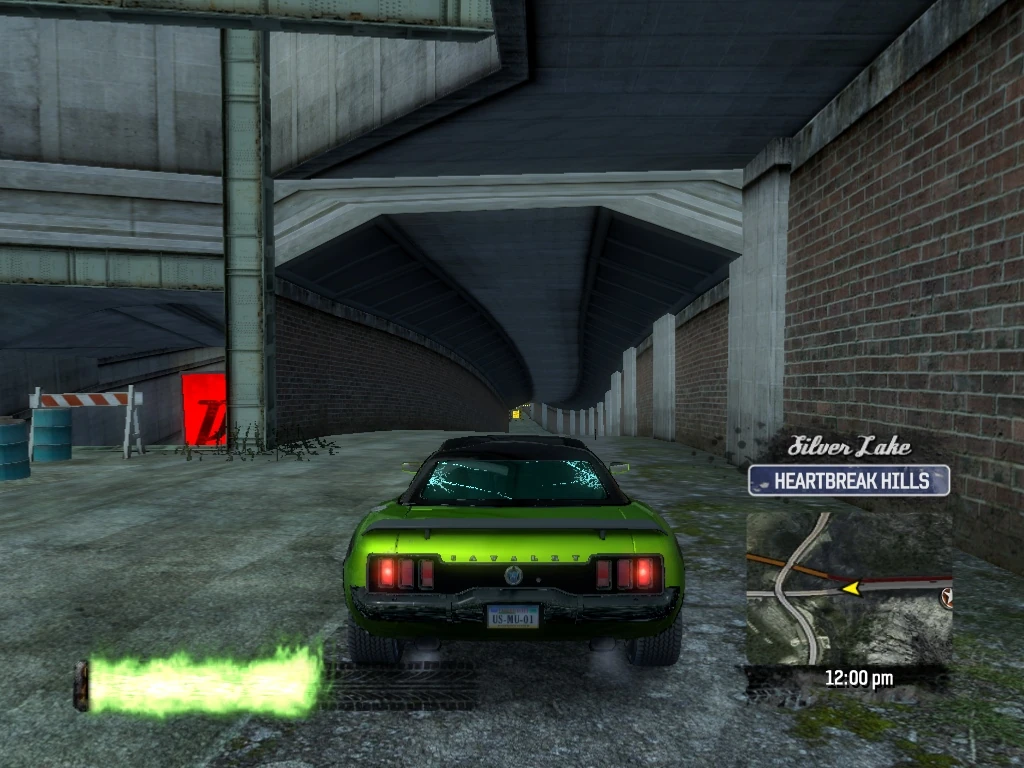
|
| 310 | Silver Lake Heartbreak Hills |
Circle around to the left and knock down Smash Gate 310, then spin back around and head west on W. Crawford Drive. | 
|
| 311 | Silver Lake Eastern Shore |
Follow W. Crawford Drive west and Smash Gate 311 is the first one on the left after the curve in the road when it turns south toward Nelson Way. Drive through the Smash Gate and follow the dirt path. | 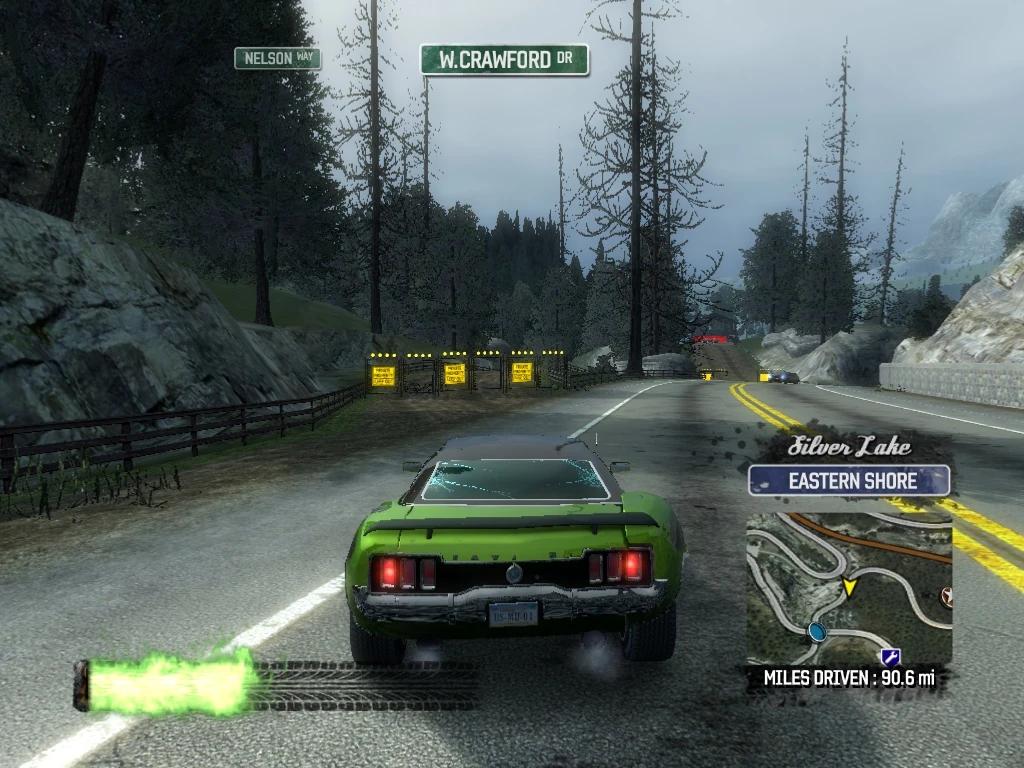
|
| 312 | Silver Lake Eastern Shore |
Drive through Smash Gate 312 at the other end of the dirt path, exiting southeast on Nelson Way, in oncoming. | 
|
| 313 | Silver Lake Eastern Shore |
Drive through Smash Gate 313, at the base of a dirt hill before the Auto Repair. | 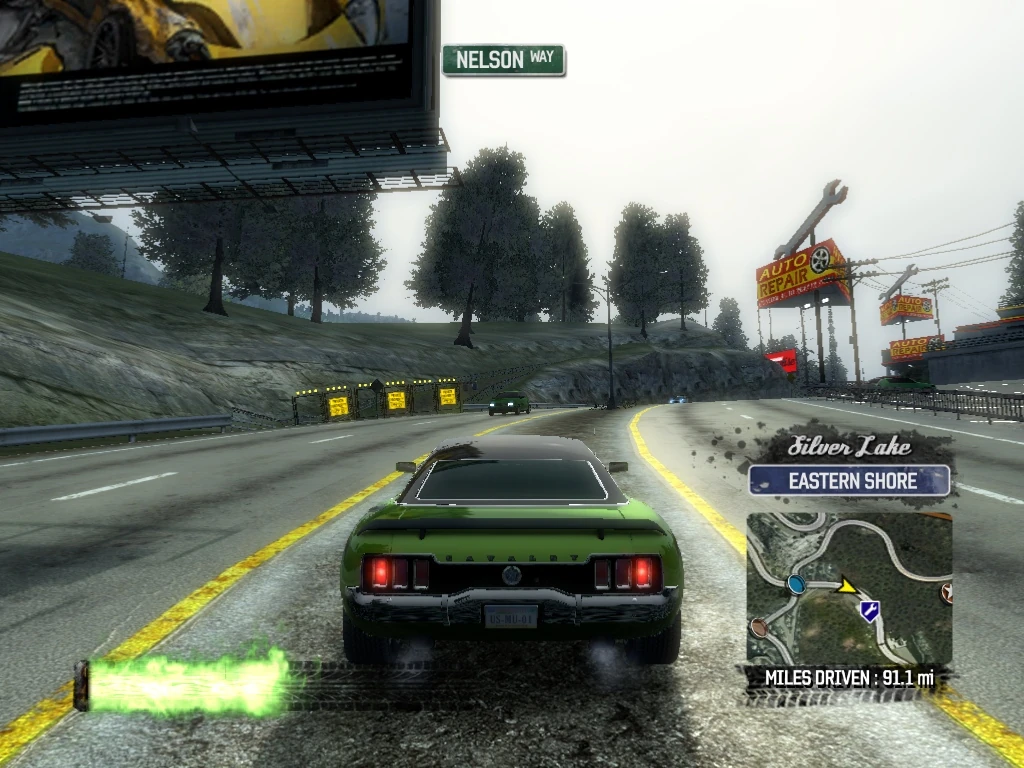
|
| 314 | Silver Lake Eastern Shore |
Climb the hill and boost to complete the Billboard Smash, dropping down to another dirt path and through Smash Gate 314. Continue to follow the dirt path. | 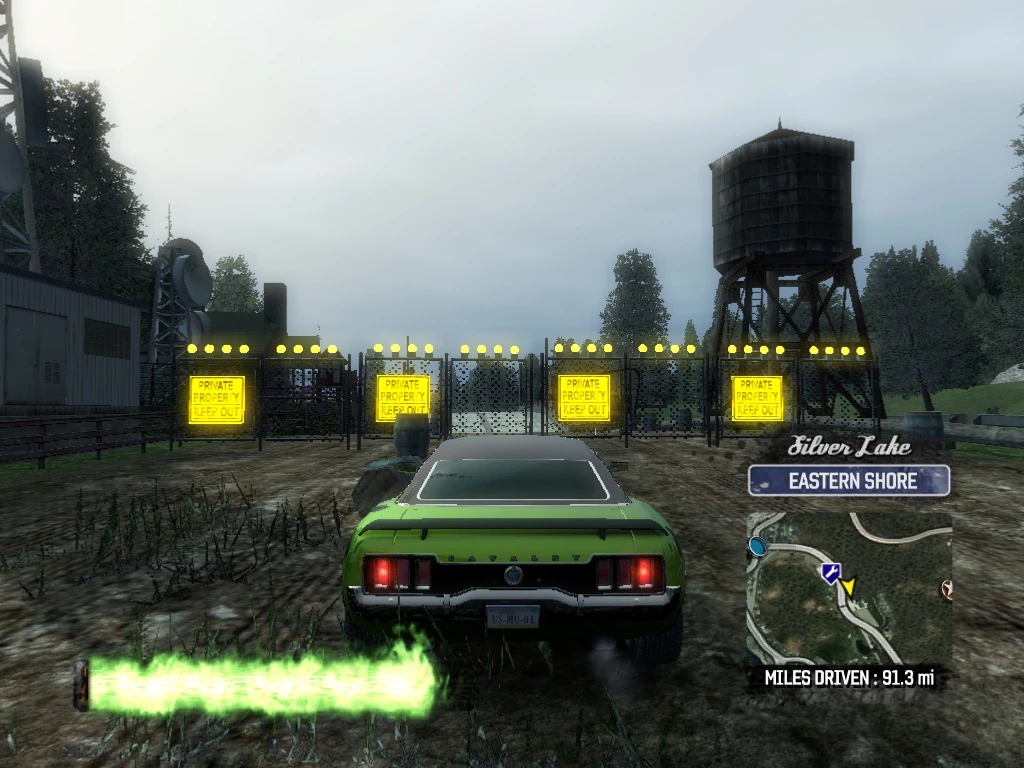
|
| 315 | Silver Lake Eastern Shore |
Climb over some stairs, and drive through Smash Gate 315, where the dirt path exits onto Nelson Way. | 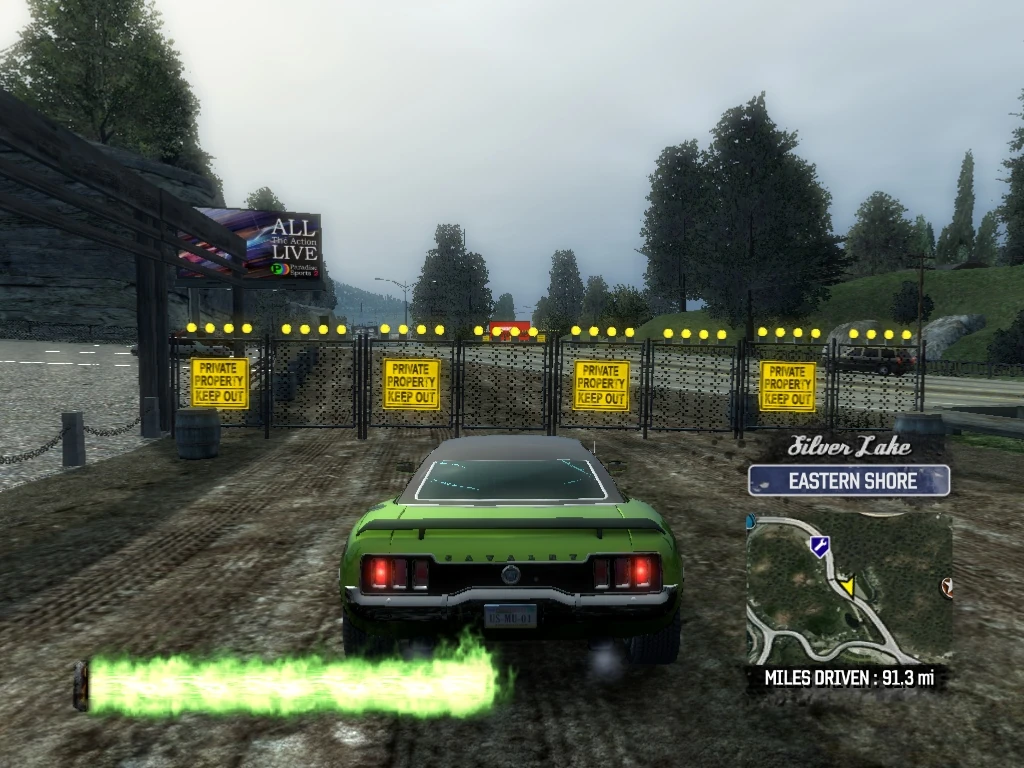
|
| 316 | Silver Lake Eastern Shore |
Cross over Nelson Way, and drive through Smash Gate 316. Follow the dirt path for another billboard smash. | 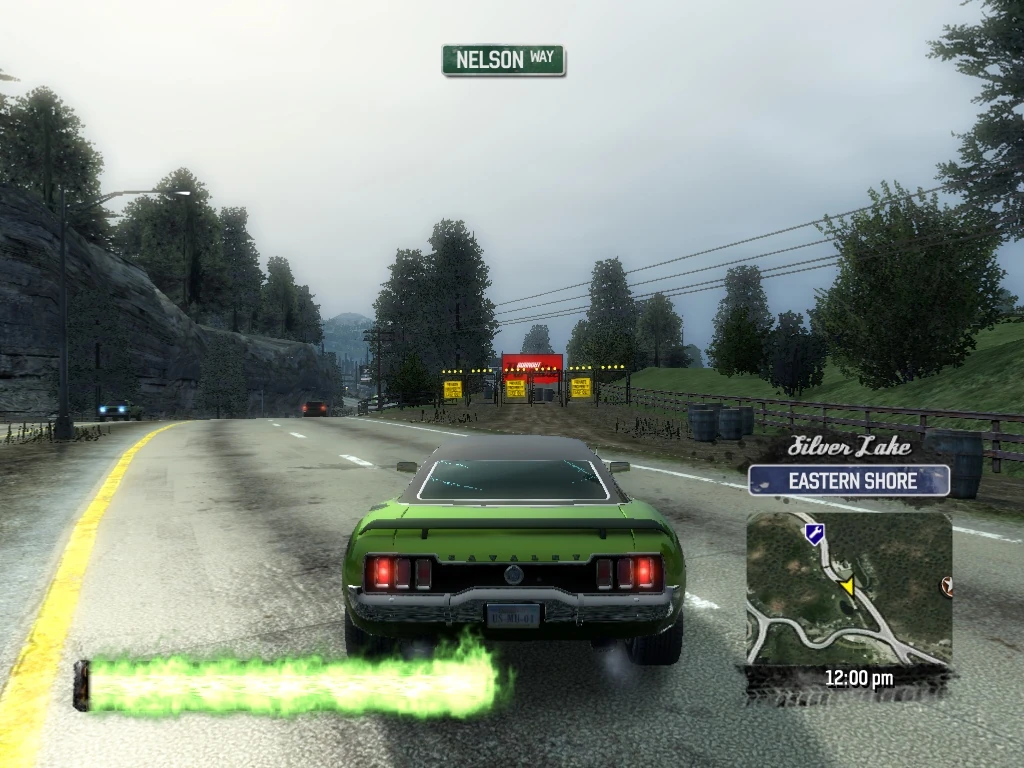
|
| 317 | Silver Lake Eastern Shore |
Jump to smash the billboard and follow the path through Smash Gate 317, exiting on Ross Drive, just before the junkyard. | 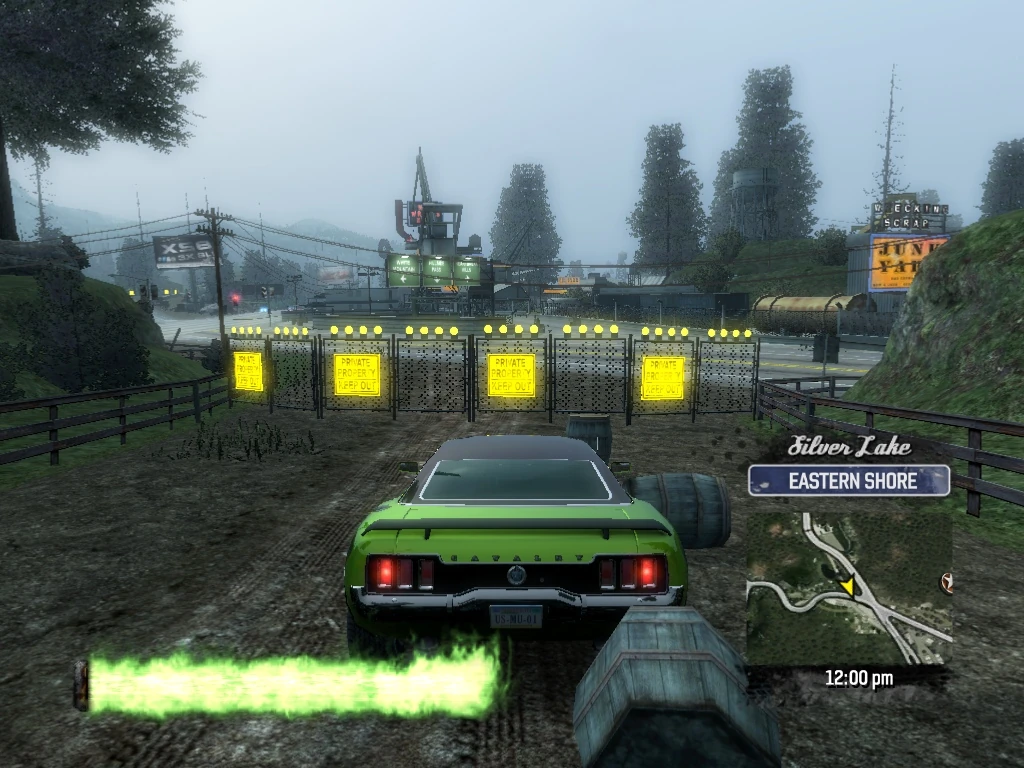
|
| 318 | Silver Lake Eastern Shore |
Turn right (west) on Ross Drive. Smash Gate 318 is just ahead on the right at an opening in the rock wall and leads to a dirt path that cuts out the apex of the curve on Ross Drive. Drive through the Smash Gate. | 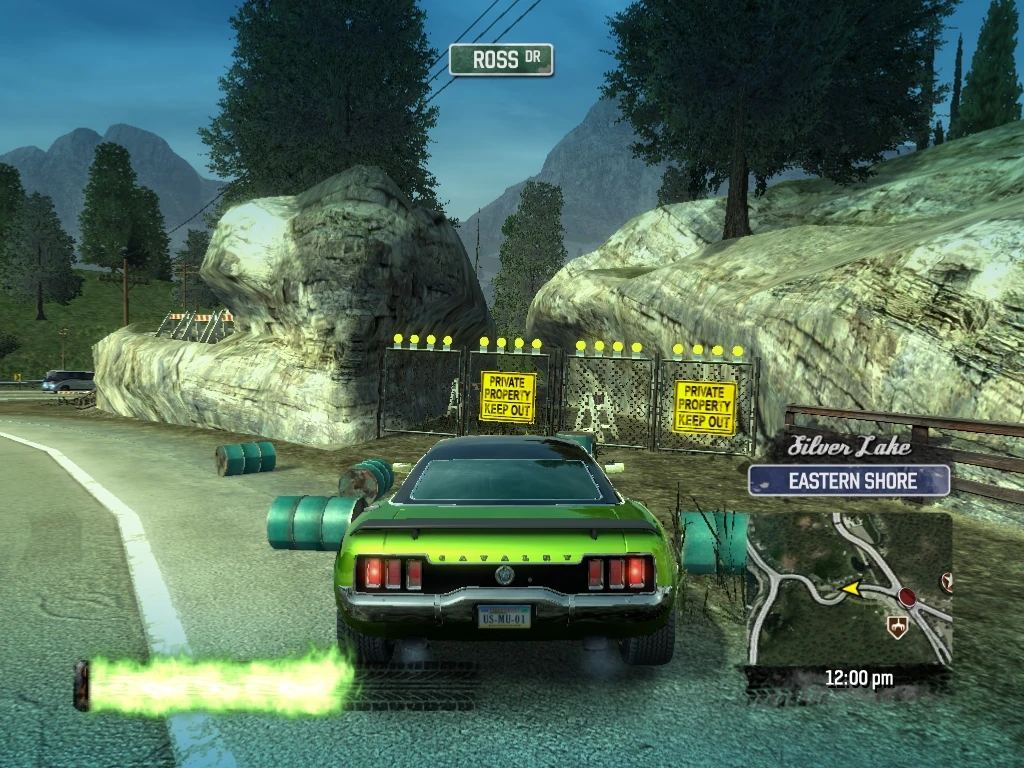
|
| 319 | Silver Lake Eastern Shore |
Drive through Smash Gate 319 at the other end of the dirt path, re-joining Ross Drive westbound. | 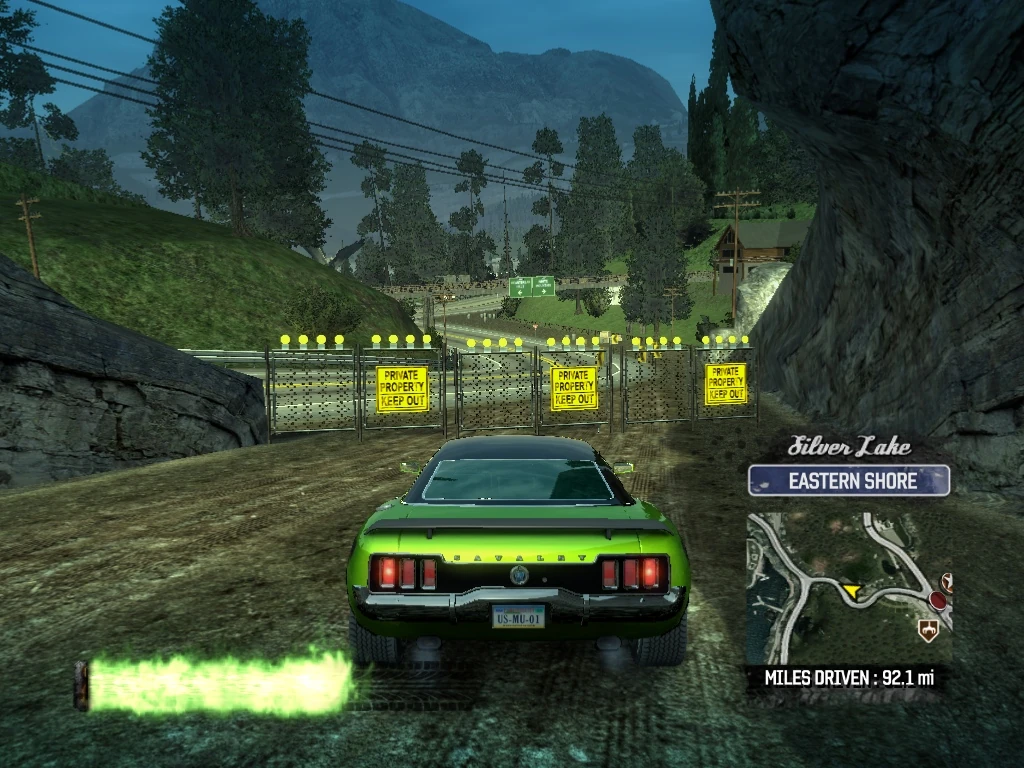
|
| 320 | Silver Lake Eastern Shore |
Take the next left (south) on E. Lake drive and drive through Smash Gate 320 on the right just after the cabin. | 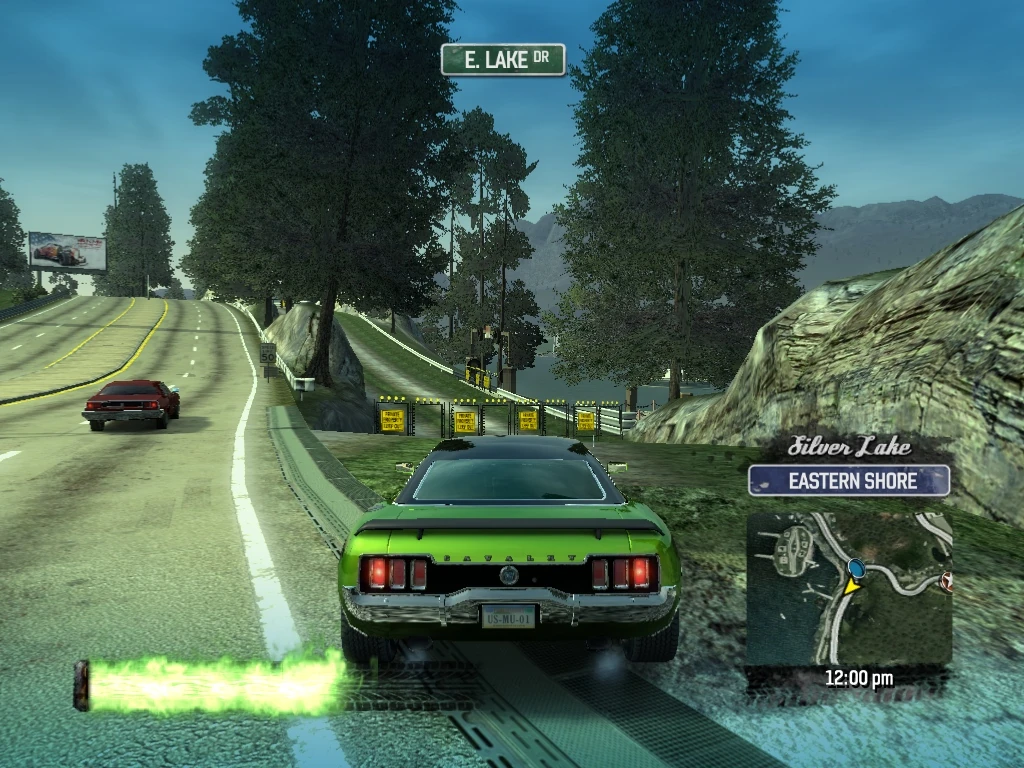
|
| 321 | Silver Lake Eastern Shore |
Smash Gate 321 is immediately after Smash Gate 320 on the right and leads to a Super Jump over to Silver Lake Island. For now, just knock it over and continue south down the gravel road. | 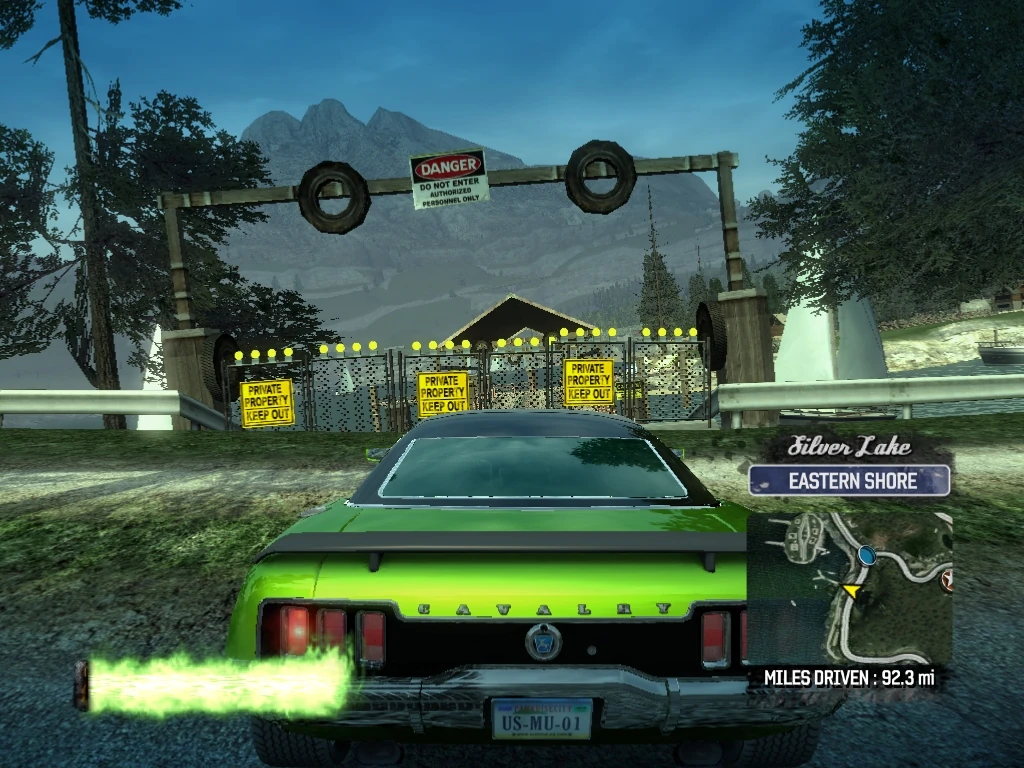
|
| 322 | Silver Lake Eastern Shore |
Smash Gate 322 is on the Gravel road at the crest of a hill where you could exit onto E. Lake Drive. Drive through the Smash Gate, but look to your left and you will see Smash Gate 325 at the entrance to a tunnel. Ignore it for now, but it is easier to see from this angle. | 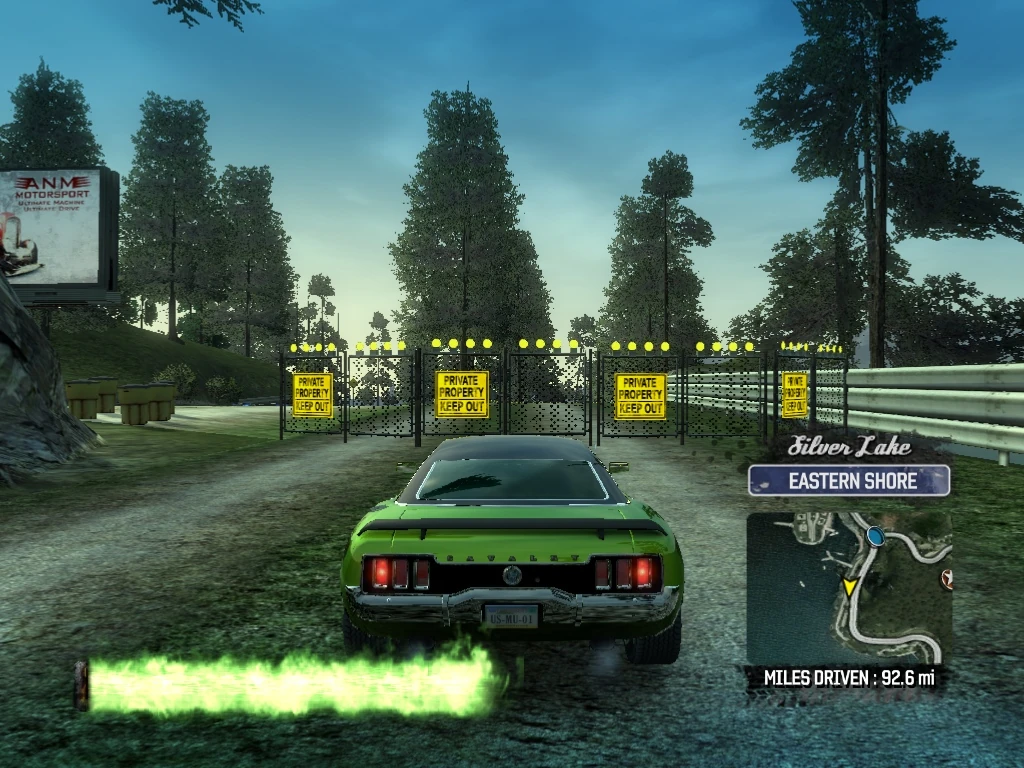
|
| 323 | Silver Lake Eastern Shore |
Drive through Smash Gate 323 on the gravel path as it starts to descend. | 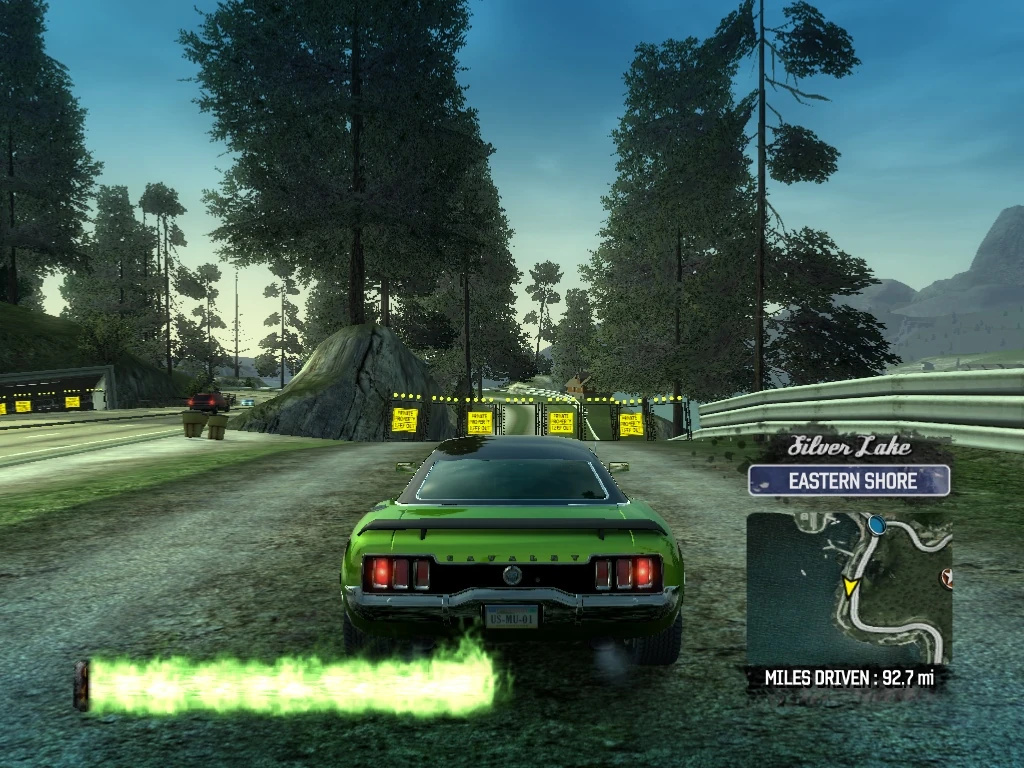
|
| 324 | Silver Lake Eastern Shore |
Follow the gravel path as it curves around to the left, and drive through Smash Gate 324, where it exits onto E. Lake Drive. | 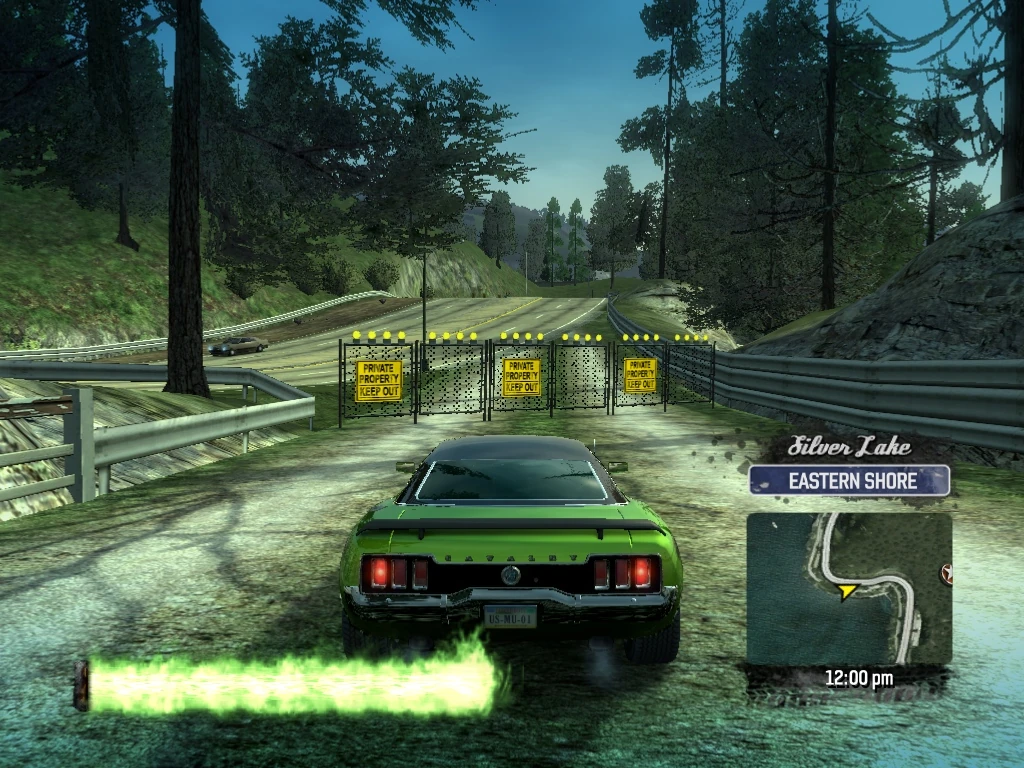
|
| 325 | Silver Lake Eastern Shore |
Make a hard left and head west on E. Lake Drive. As the road curves north, you will see some concrete framework on the right. This is the tunnel that Smash Gate 325 marks. Spin around to the right and drive through the Smash Gate and into the tunnel. | 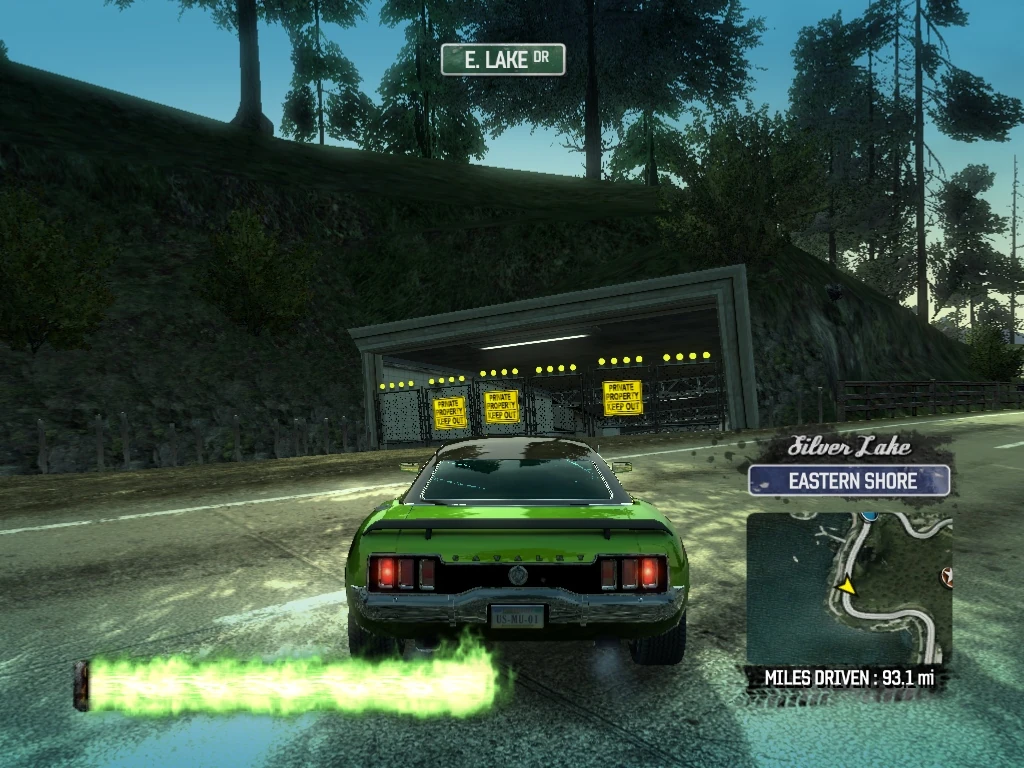
|
| 326 | Silver Lake Eastern Shore |
Follow the tunnel and the next gravel path, driving through Smash Gate 326 and exiting onto E. Lake Drive, just before Rack Way. | 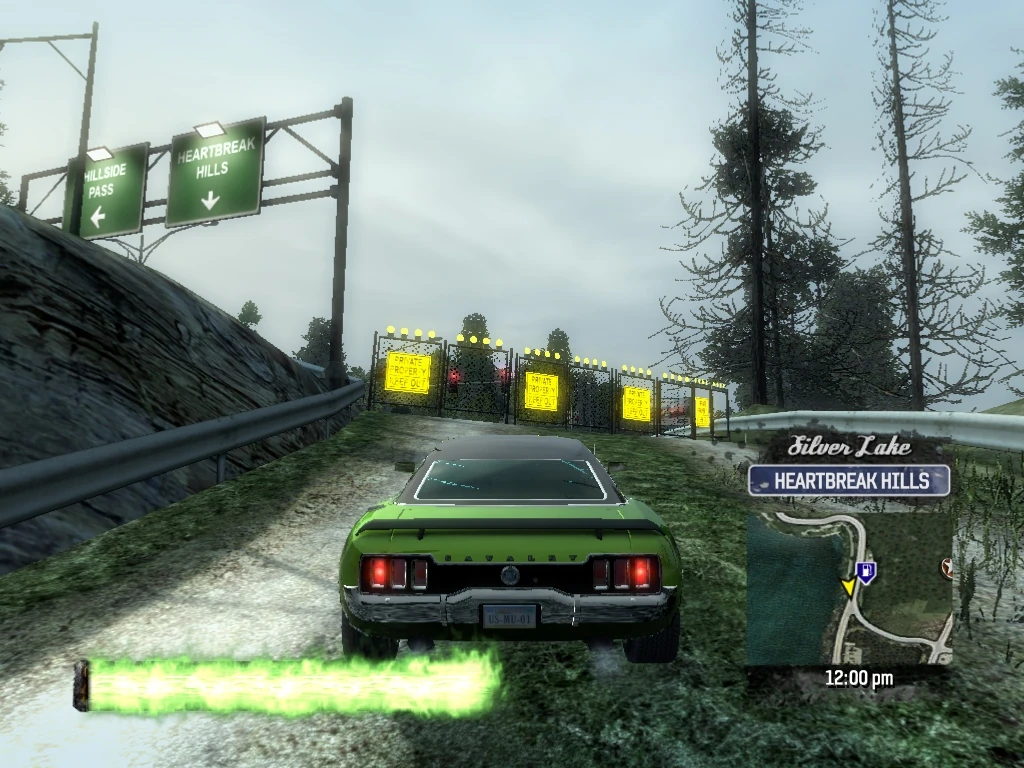
|
| 327 | Silver Lake Heartbreak Hills |
Take a left on Rack Way and turn right to drive through Smash Gate 327 on the right. Follow the path. | 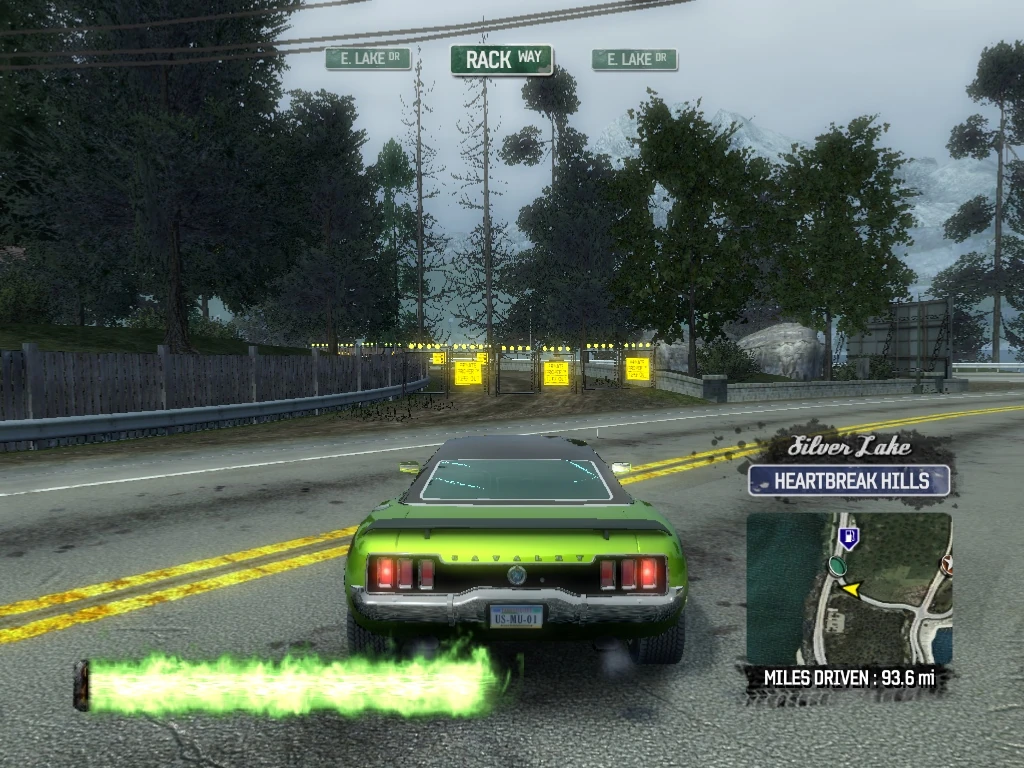
|
| 328 | Silver Lake Heartbreak Hills |
Drive through Smash Gate 328 at the other end of the path, exiting back onto E. Lake Drive. Turn left and head south on E. Lake Drive. | 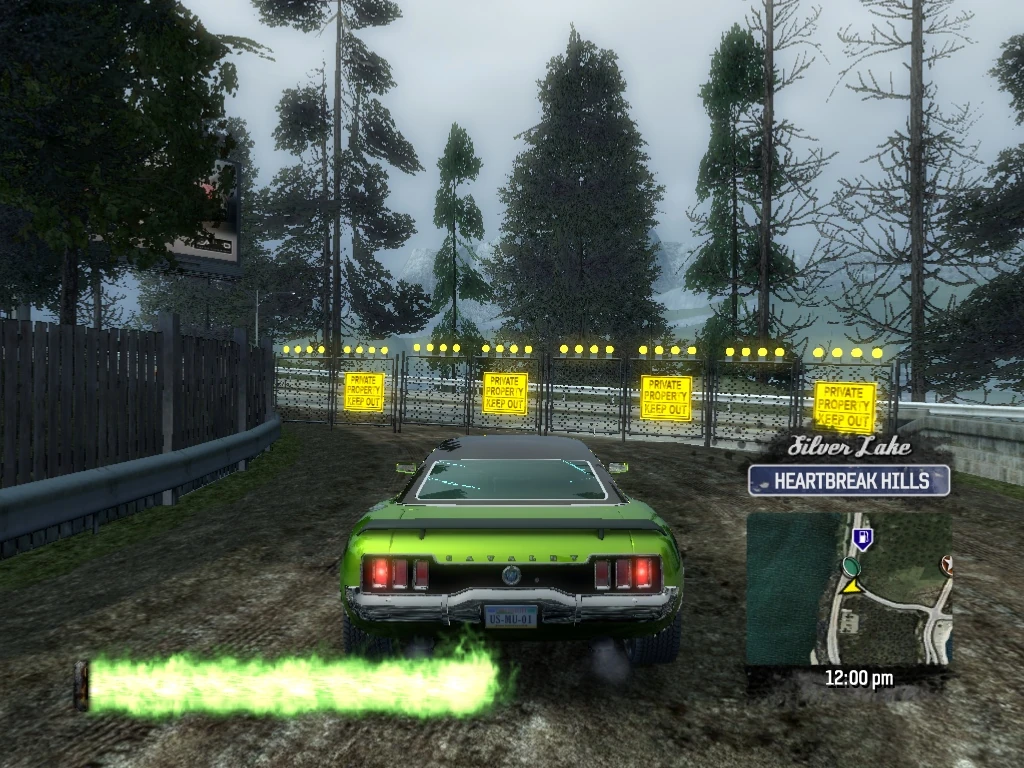
|
| 329 | Silver Lake Heartbreak Hills |
Follow E. Lake Drive and when you see the sign for the Paint Shop on the left, you will see Smash Gate 329 on the right under a sign for Angus Boat Rental. Drive through the smash gate and down the ramp. | 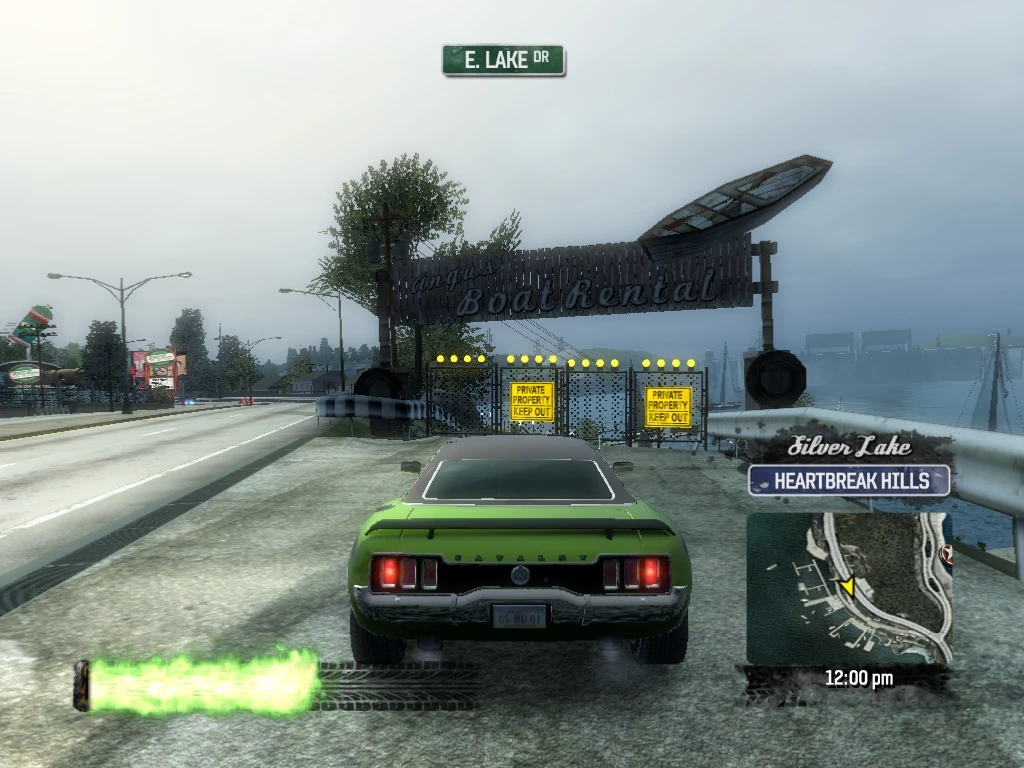
|
| 330 | Silver Lake Heartbreak Hills |
Drive through Smash Gate 330 at the base of the ramp and follow the side road to the left along the dock area. | 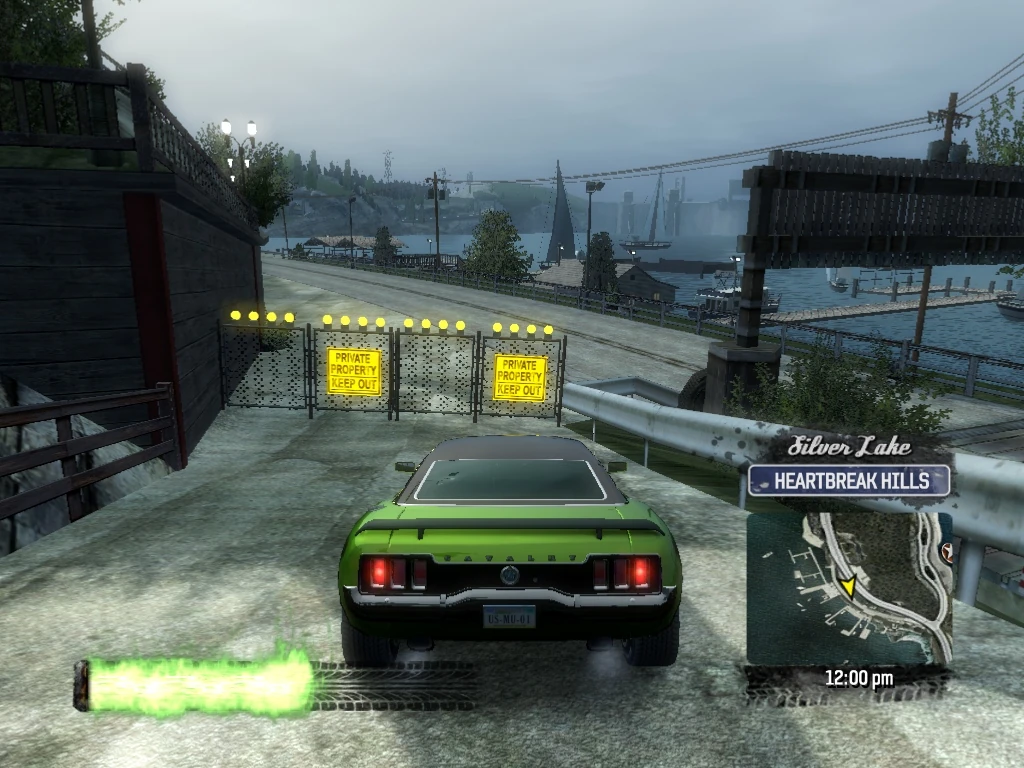
|
| 331 | Silver Lake Heartbreak Hills |
Drive through Smash Gate 331 where the dock road re-joins E. Lake Drive. | 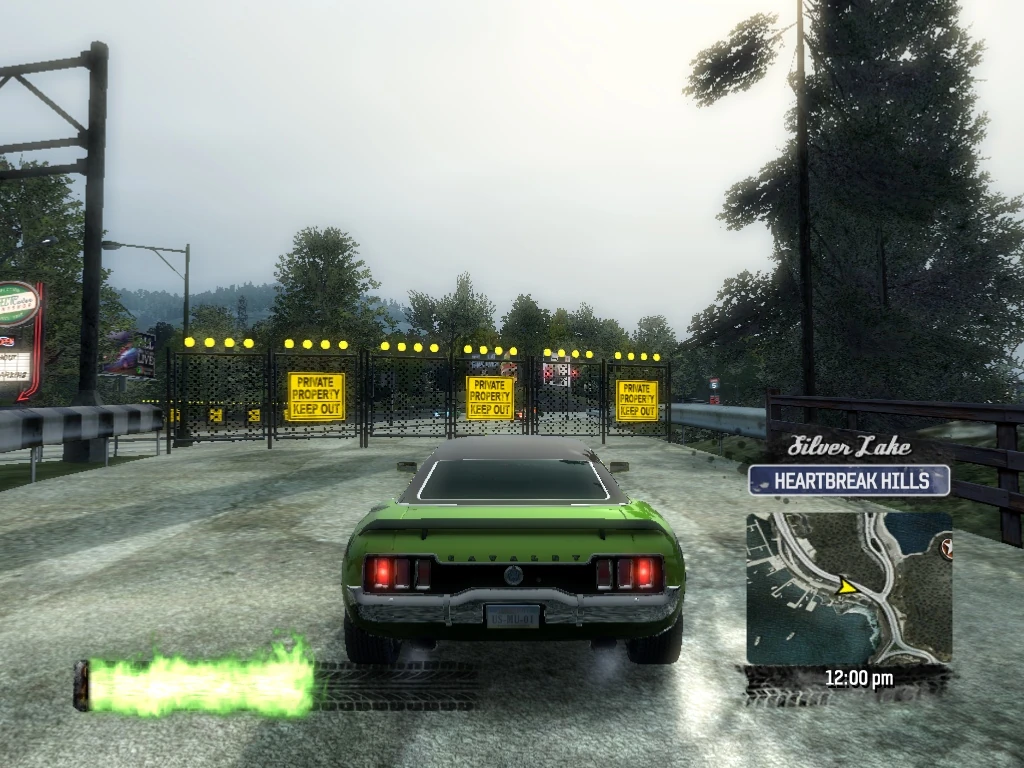
|
| 332 | Silver Lake Heartbreak Hills |
Cross over E. Lake Drive and drive through Smash Gate 332 and follow the dirt path. | 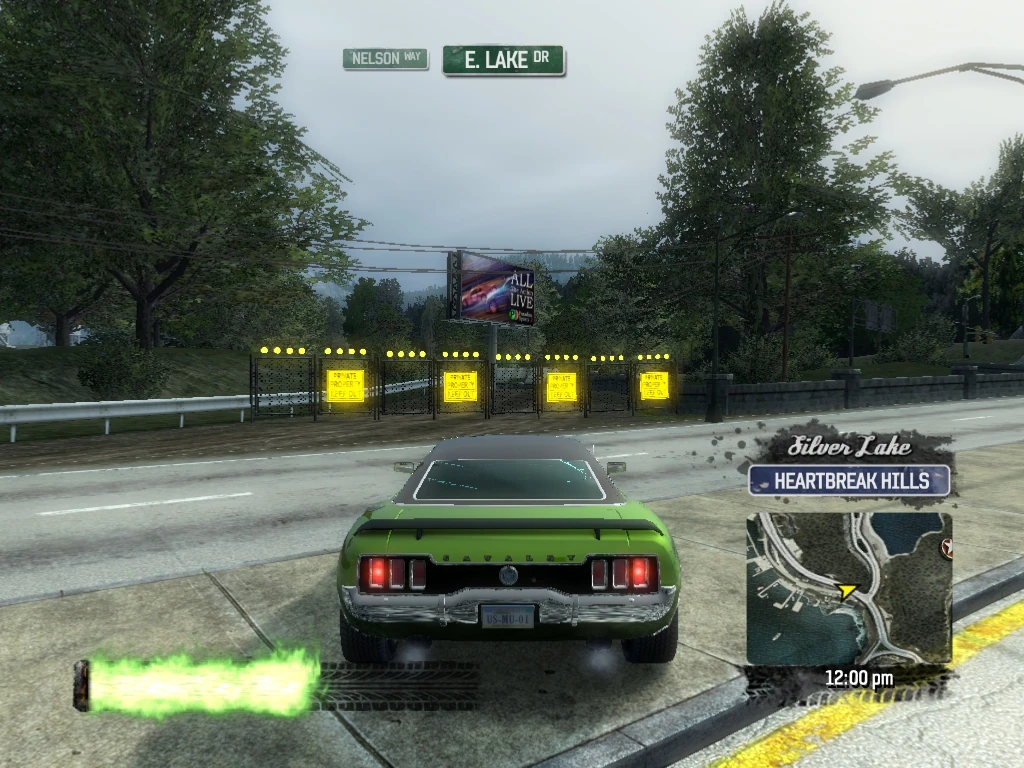
|
| 333 | Silver Lake Heartbreak Hills |
Drive through Smash Gate 333 at the other end of the dirt path, exiting onto Nelson Way northbound. | 
|
| 334 | Silver Lake Heartbreak Hills |
Smash Gate 334 is isolated. Follow Nelson Way north and take the next right (east) on Rack Way. Follow Rack Way and veer left through the parking lot when you see the Auto Repair sign at the intersection with S. Rouse Drive. Smash Gate 334 is across S. Rouse Drive, next to a construction digger. It leads to a Super Jump and some challenging Billboard Smashes, but for now, just knock it over, and turn around and drive back west on Rack Way, then turn right (north) again on Nelson Way. | 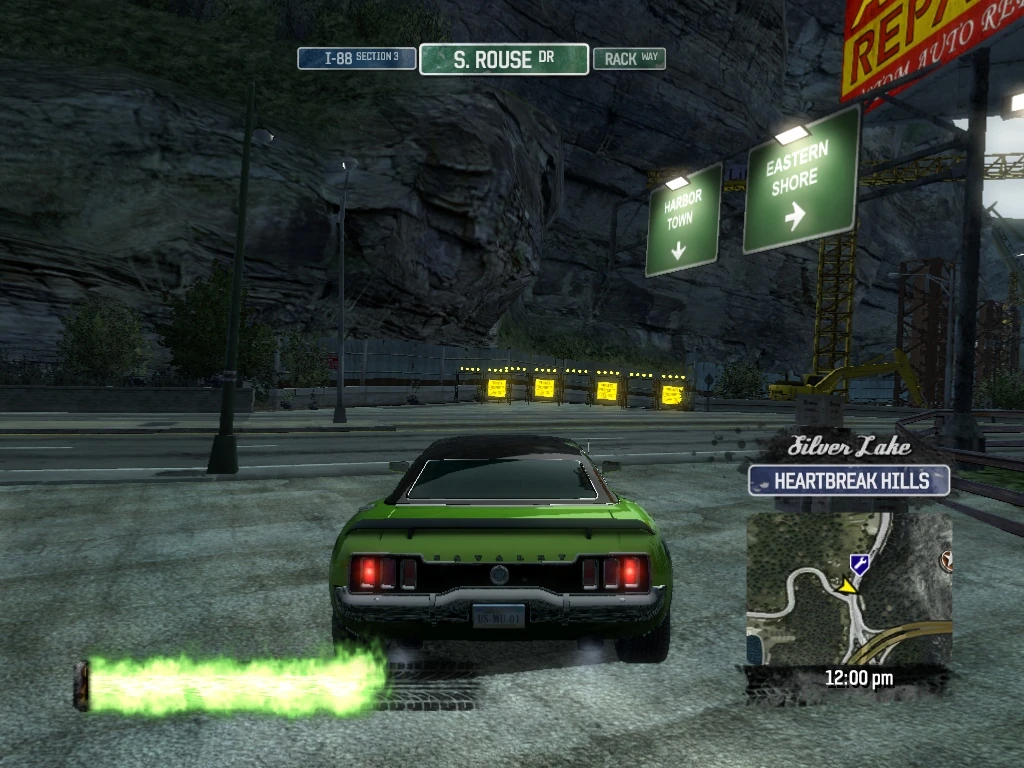
|
| 335 | Silver Lake Heartbreak Hills |
Smash Gate 335 is just ahead on the right with a steel shed beyond it. Drive through the Smash Gate and follow the dirt path through the shed. | 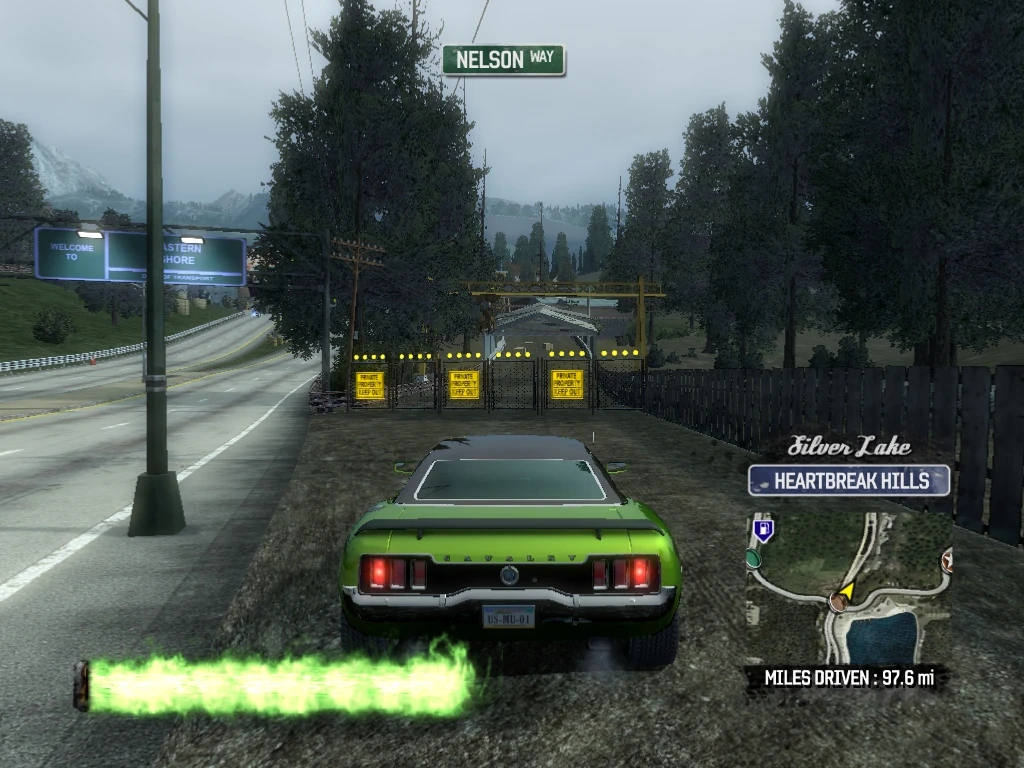
|
| 336 | Silver Lake Eastern Shore |
Smash Gate 336 is further down the dirt path and would allow you to exit onto Nelson Way. Drive through it but stay to the right and continue on the path. | 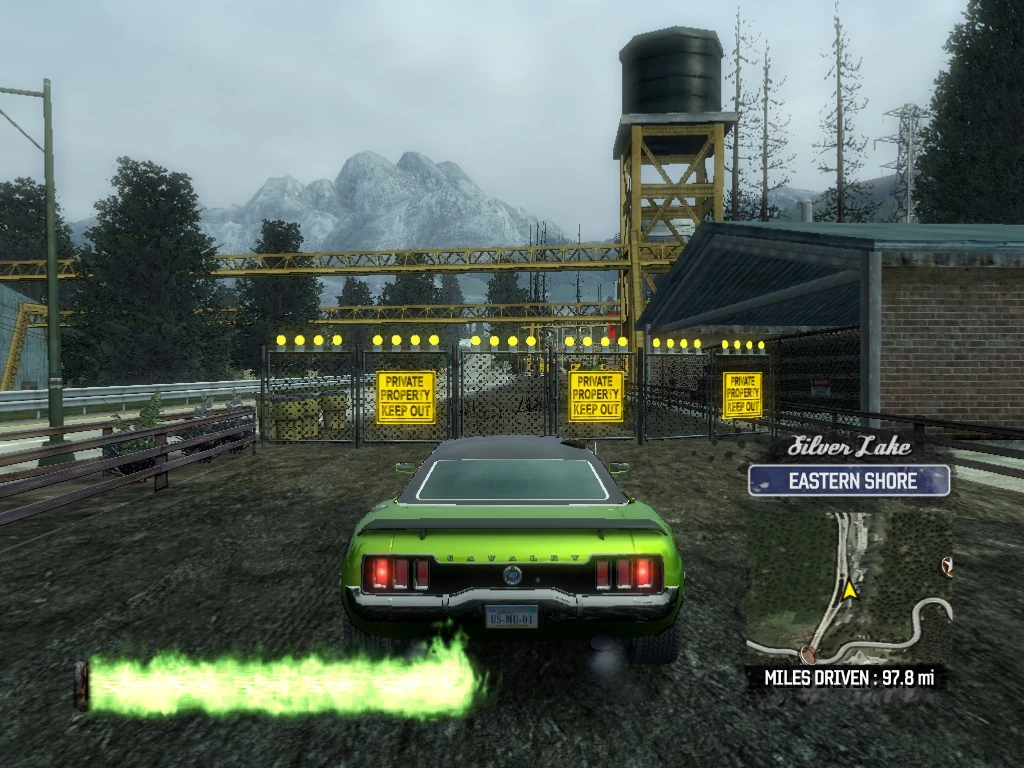
|
| 337 | Silver Lake Eastern Shore |
Drive through Smash Gate 337, just ahead. | 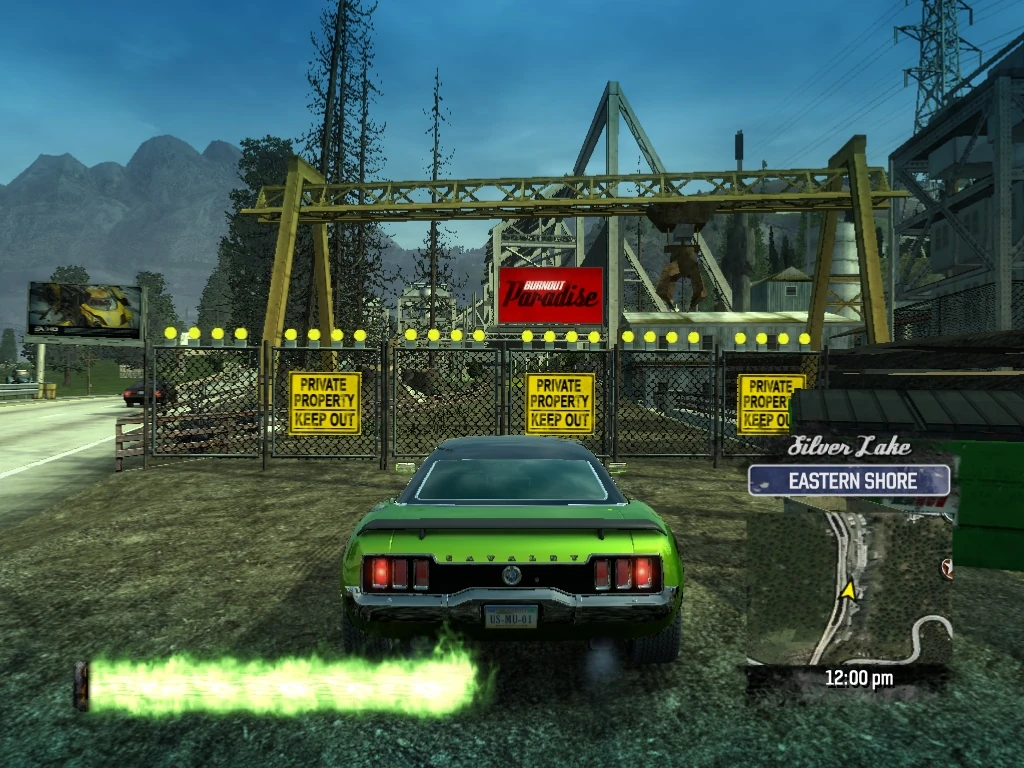
|
| 338 | Silver Lake Eastern Shore |
Smash Gates 338 and 339 are a repeat of Smash Gates 336 and 337 - just farther north. Drive through Smash Gate 338 and stay to the right on the dirt path. | 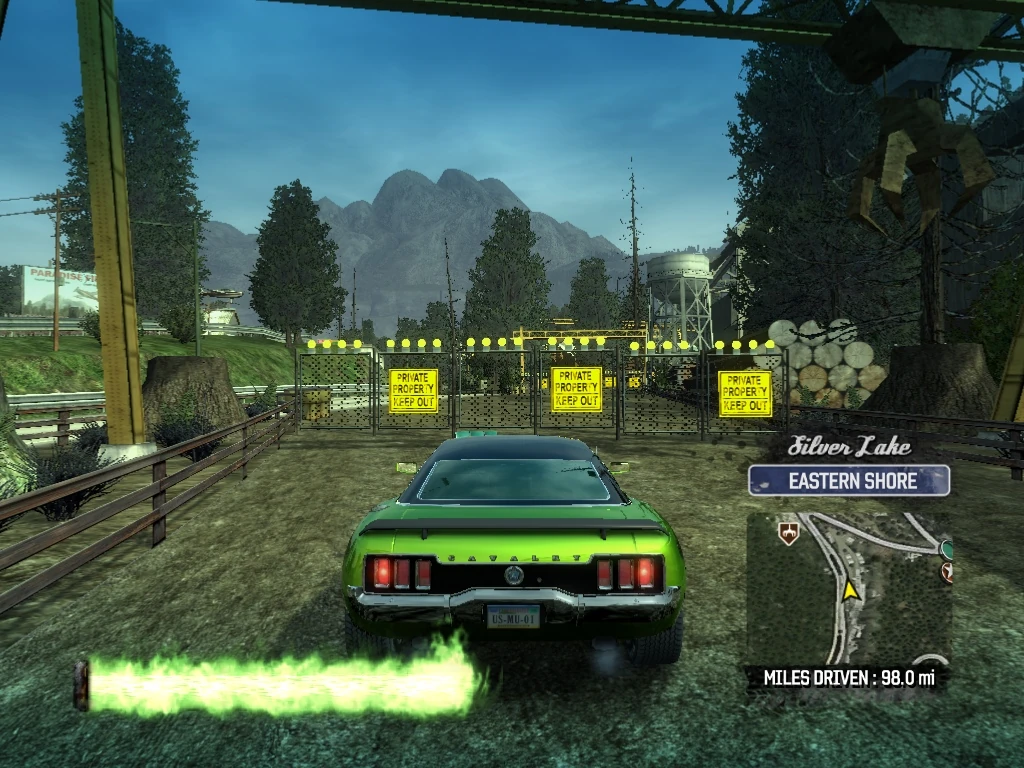
|
| 339 | Silver Lake Eastern Shore |
And drive through Smash Gate 339 and follow the dirt path. | 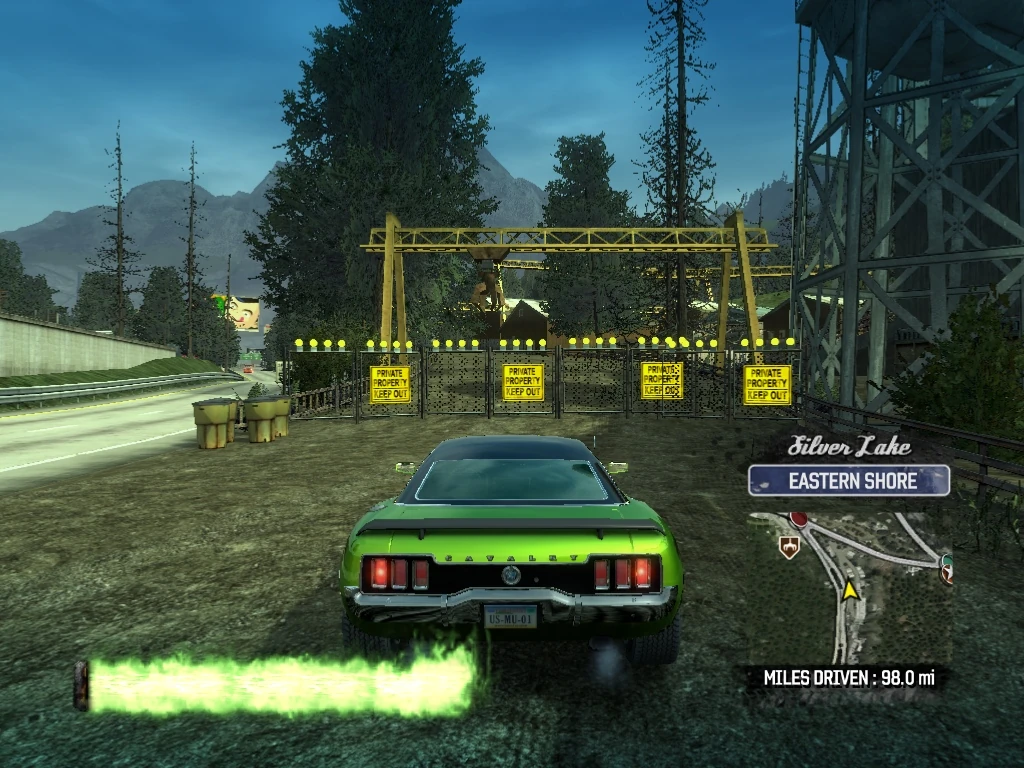
|
| 340 | Silver Lake Eastern Shore |
As you follow the path, you will come to a concrete wall splitting the path, with Smash Gate 340 on the right and Smash Gate 341 on the left. Veer to the right and drive through Smash Gate 340, exiting onto Ross Drive. Turn left and head west. | 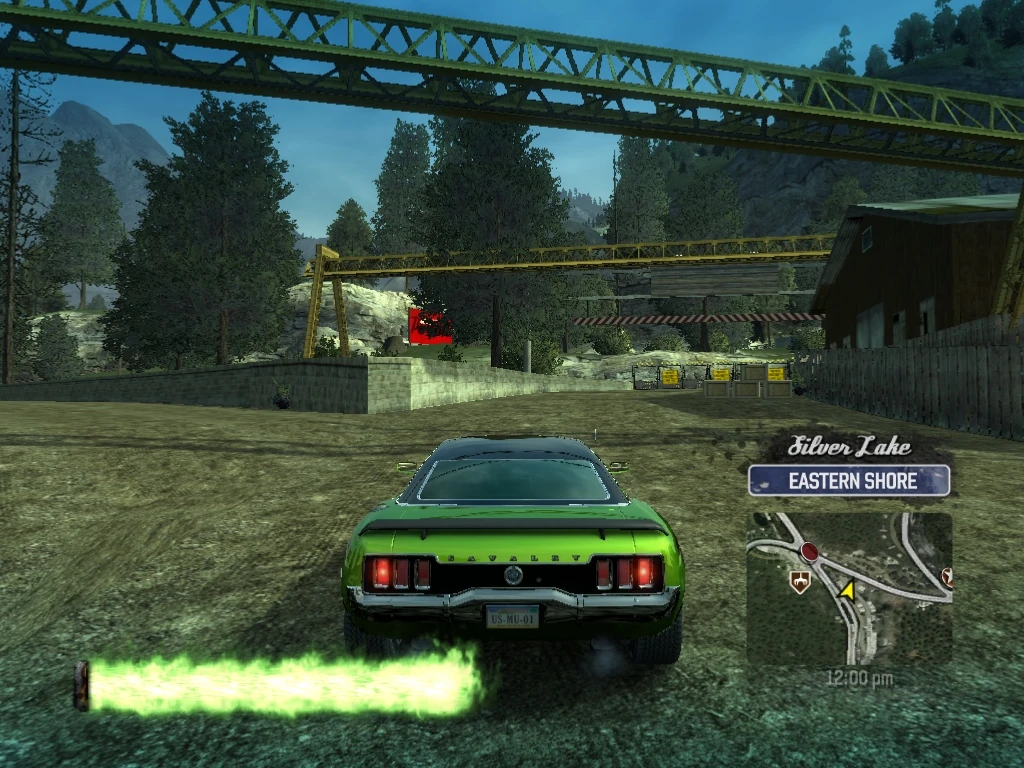
|
| 341 | Silver Lake Eastern Shore |
Smash Gate 341 is just ahead on the left, but it is angled behind you and hard to see from this angle. Spin around and knock it over, then continue west on Ross Drive. | 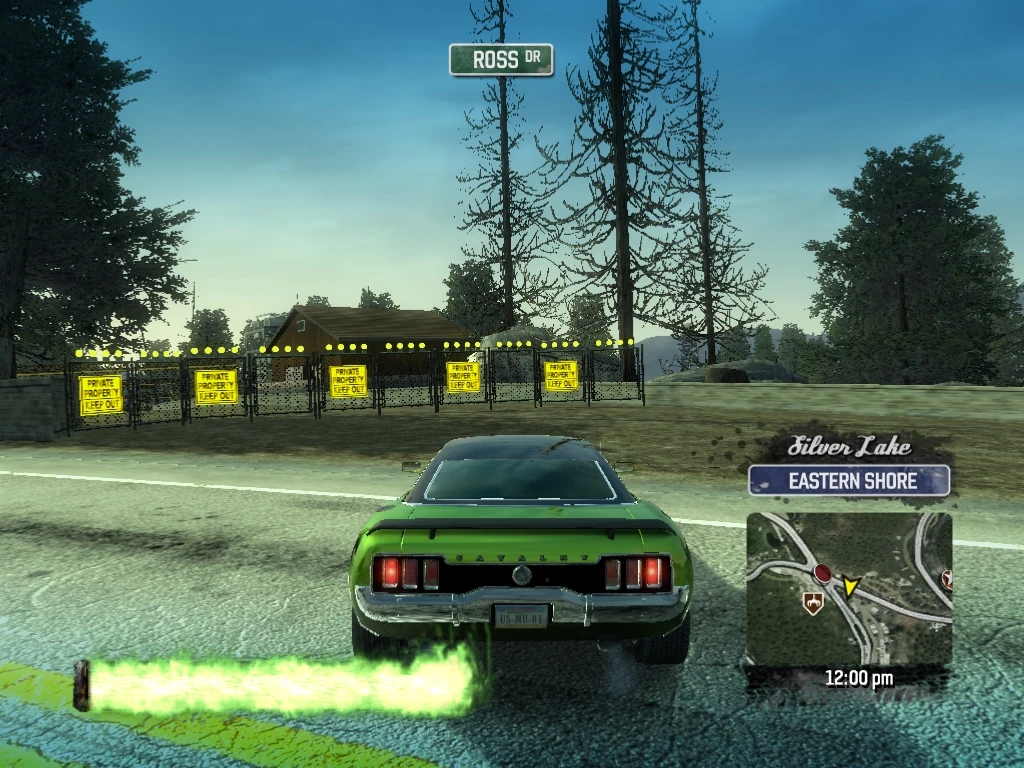
|
| 342 | Silver Lake Eastern Shore |
As you approach Nelson Way, you will see Smash Gate 342 off to the right. Circle to the right just before the intersection and knock it down. Then back up and head south on Nelson Way. | 
|
| 343 | Silver Lake Eastern Shore |
Smash Gates 343 and 344 are at the entrance to the Airfield. As you pass the junkyard, you will see the airfield sign on the right. Turn right at the Airfield entrance and drive through Smash Gate 343. | 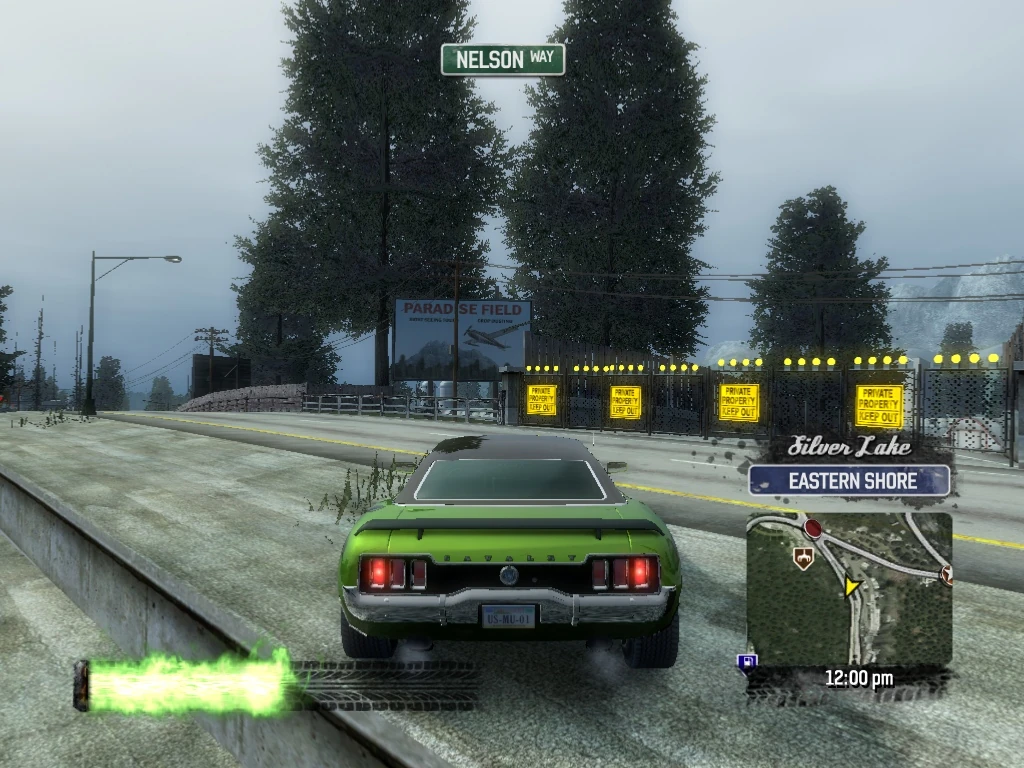
|
| 344 | Silver Lake Eastern Shore |
Drive through Smash Gate 344 at the end of the entrance ramp, then turn around and exit the airfield and turn left (north) on Nelson Way. | 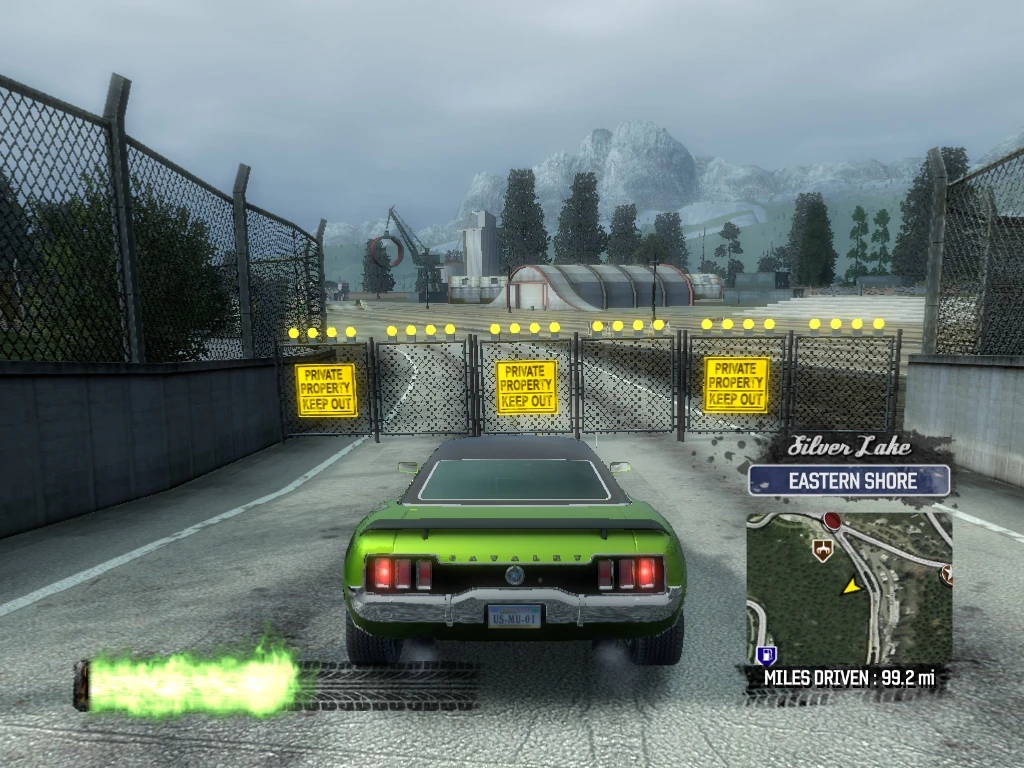
|
| 345 | Silver Lake Eastern Shore |
Take the first right on Ross Drive and Smash Gate 345 is just ahead on the left, under a Paradise Billboard. Drive through it and follow the dirt path east. | 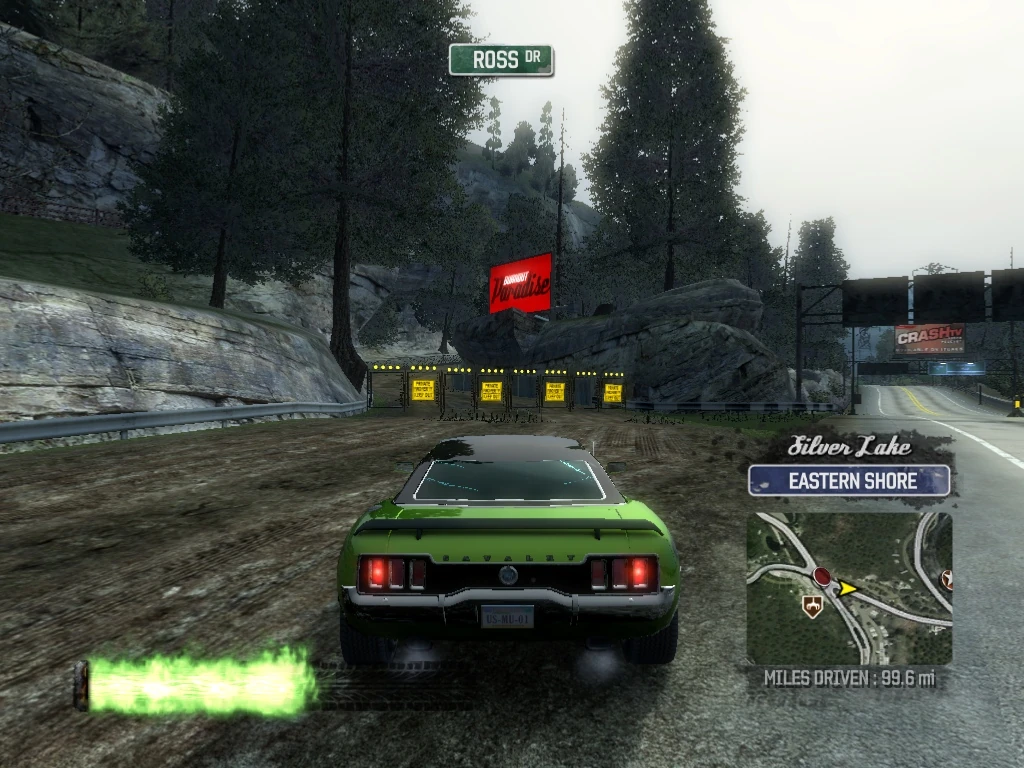
|
| 346 | Silver Lake Heartbreak Hills |
Smash Gate 346 is a bit tricky. There is a jump along the dirt path. What you want to do is miss the jump (go slow) and drop down to the road below and follow it to the left, driving through Smash Gate 346 and exiting onto N. Rouse Drive. If you complete the jump, you will go up a ramp and jump down onto N. Rouse Drive and the Smash Gate will be behind you and you need to turn around and smash it. | 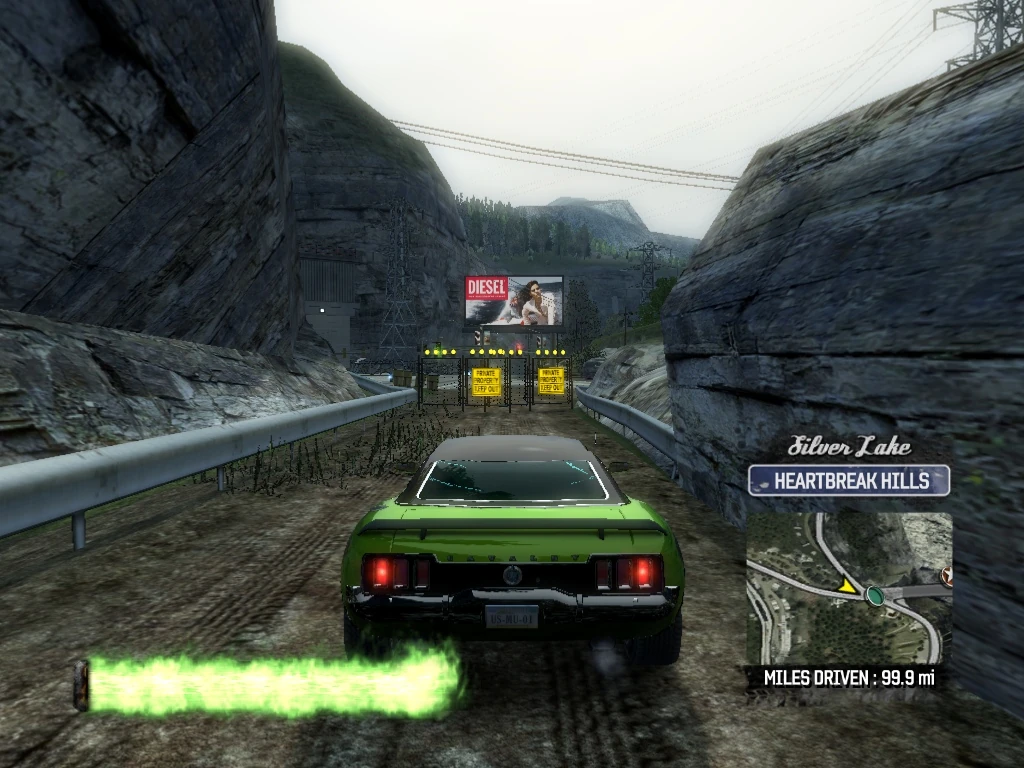
|
| 347 | Silver Lake Heartbreak Hills |
Turn left (north) on N. Rouse Drive and Smash Gate 347 is just ahead on the left. Drive through it and follow the dirt path. | 
|
| 348 | Silver Lake Heartbreak Hills |
Drive through Smash Gate 348 with the dirt path re-joins N. Rouse Drive. | 
|
| 349 | Silver Lake Heartbreak Hills |
Cross over N. Rouse Drive and drive through Smash Gate 349 and follow the dirt path. | 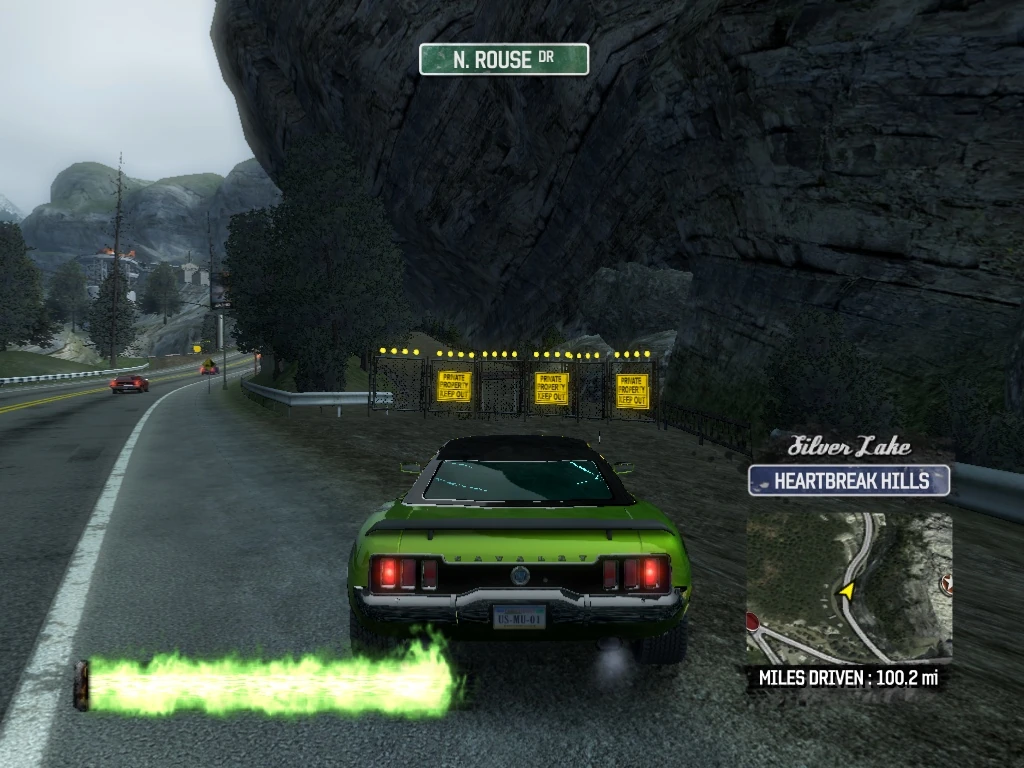
|
| 350 | Silver Lake Heartbreak Hills |
Drive through Smash Gate 350 where the dirt path rejoins N. Rouse Drive. You have now completed all Smash Gates in Silver Lake. | 
|
| 351 | Palm Bay Heights Ocean View |
Turn left (south) on N. Rouse Drive, and take the next left through Lawrence Tunnel. Cross over Lambert Parkway onto 7th Street and Smash Gate 351 is ahead on the right after the brick portion of Record Store, where it becomes concrete. Knock it over and back up into 7th Street. | 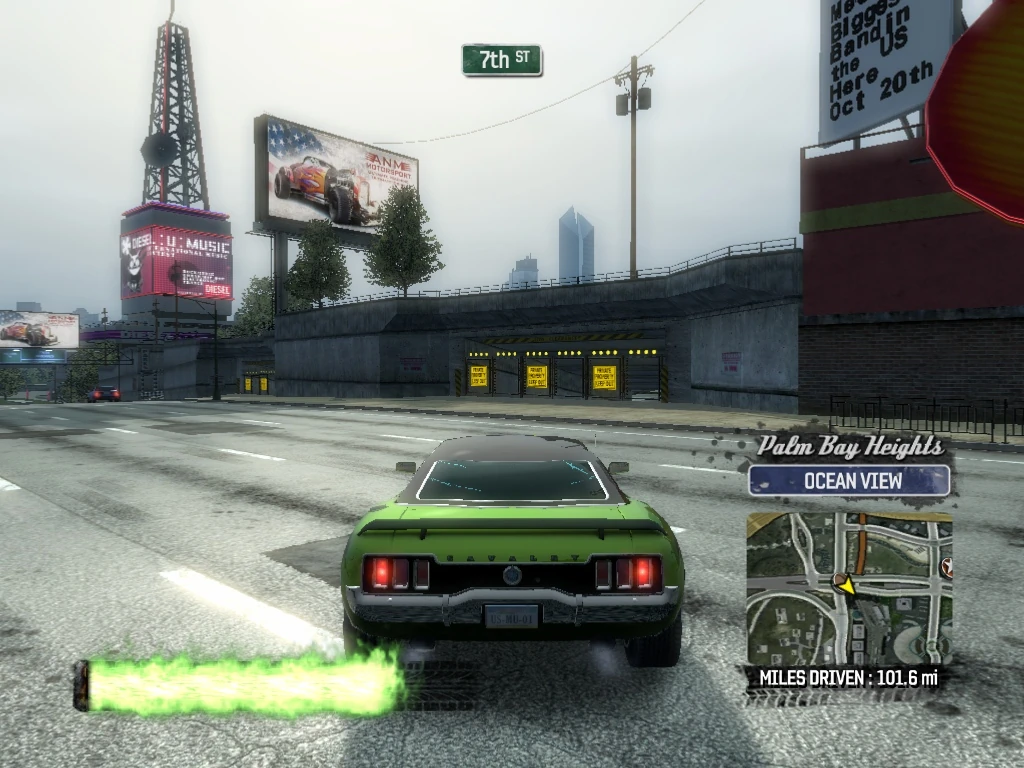
|
| 352 | Palm Bay Heights Ocean View |
Drive through Smash Gate 352, which is just a bit further east in the same building. | 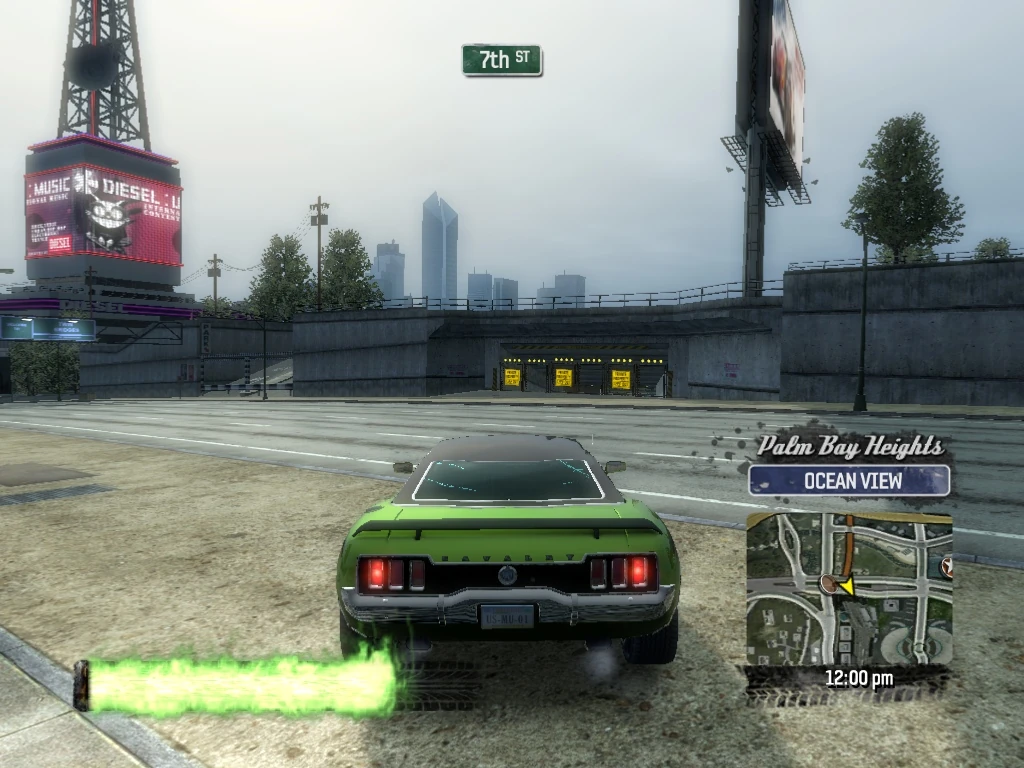
|
| 353 | Palm Bay Heights Ocean View |
Drive down the concrete path and drop down onto the train tracks below, then spin around heading north. Drive through Smash Gate 353, which is under the south side of 7th Street, across the tracks. | 
|
| 354 | Palm Bay Heights Ocean View |
Drive through Smash Gate 354, which is across the tracks across the north side of 7th Street. Follow the tracks north and exit left (west) on 9th Street (where cars are crossing the tracks), and then take the next left (south) on Lambert Parkway. | 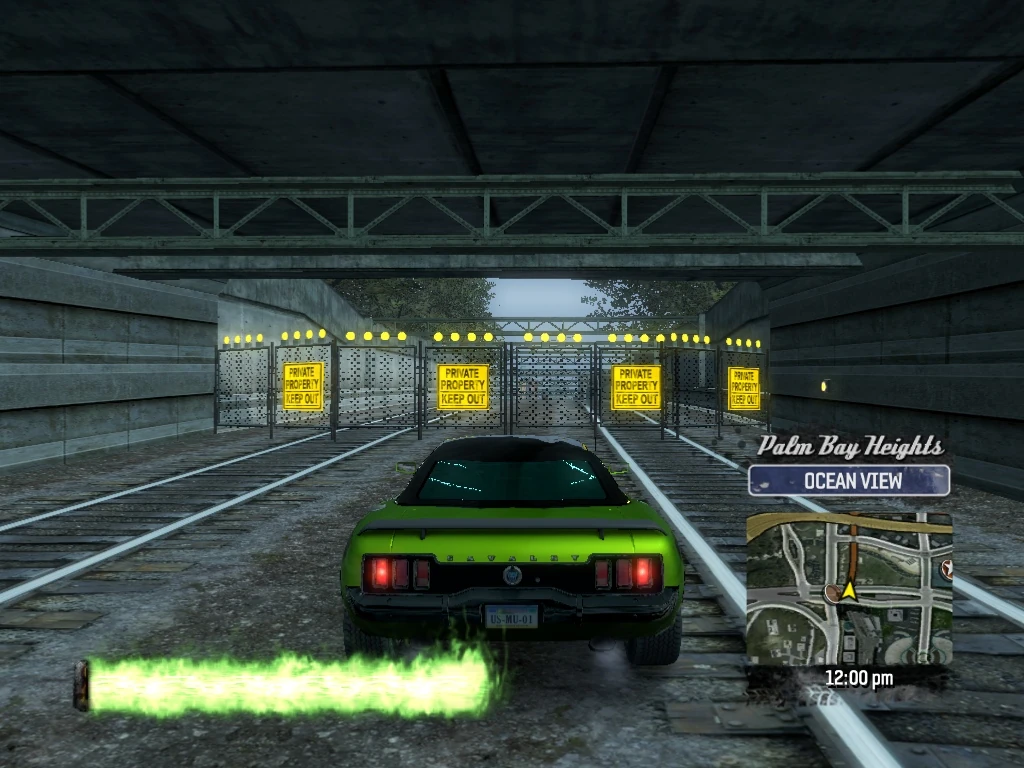
|
| 355 | Palm Bay Heights Ocean View |
Cross over 7th Street and make a hard right just before the Auto Repair onto Hubbard Avenue. Follow Hubbard Avenue, and just before the road curves to head south, you will see Smash Gate 355 on the left leading to a sidewalk/covered terrace. Drive through it and under the terrace. | 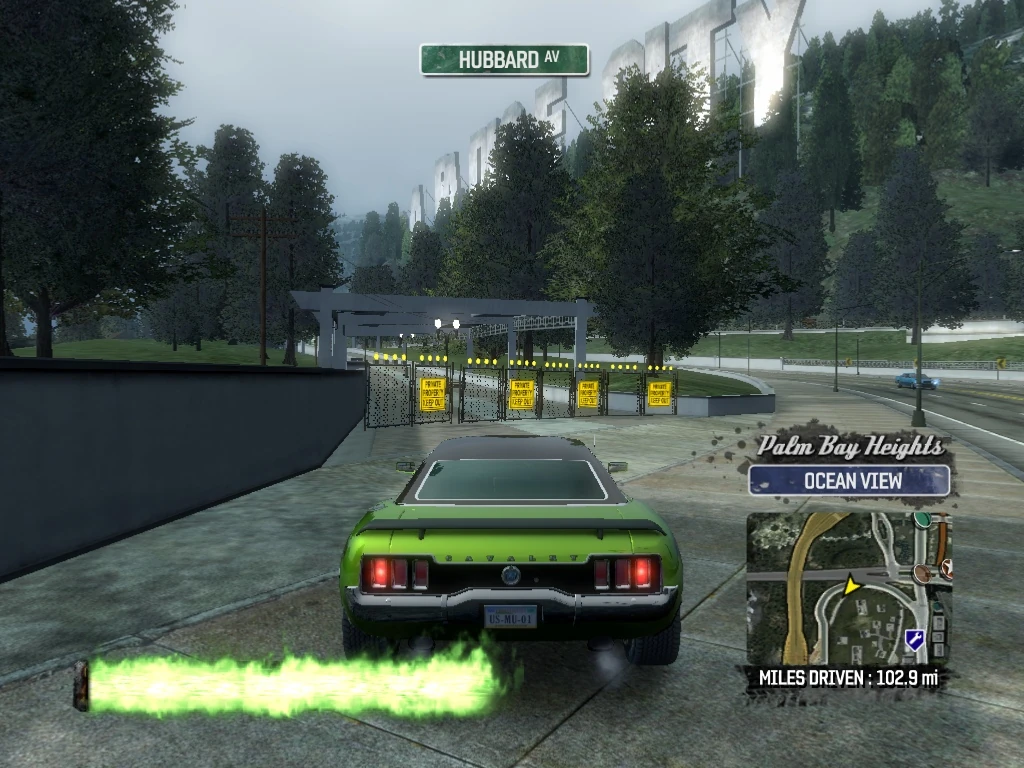
|
| 356 | Palm Bay Heights Ocean View |
Drive through Smash Gate 356, where the sidewalk re-joins Hubbard Avenue. Turn right (north) and head back along Hubbard Avenue.
NOTE: This gate failed to register on three attempts through the game for me (headed south). It works about 50% with a clean save, but if that is not an option or if you can't clear out a missing gate in Palm Bay Heights, I would suspect this one!!! |
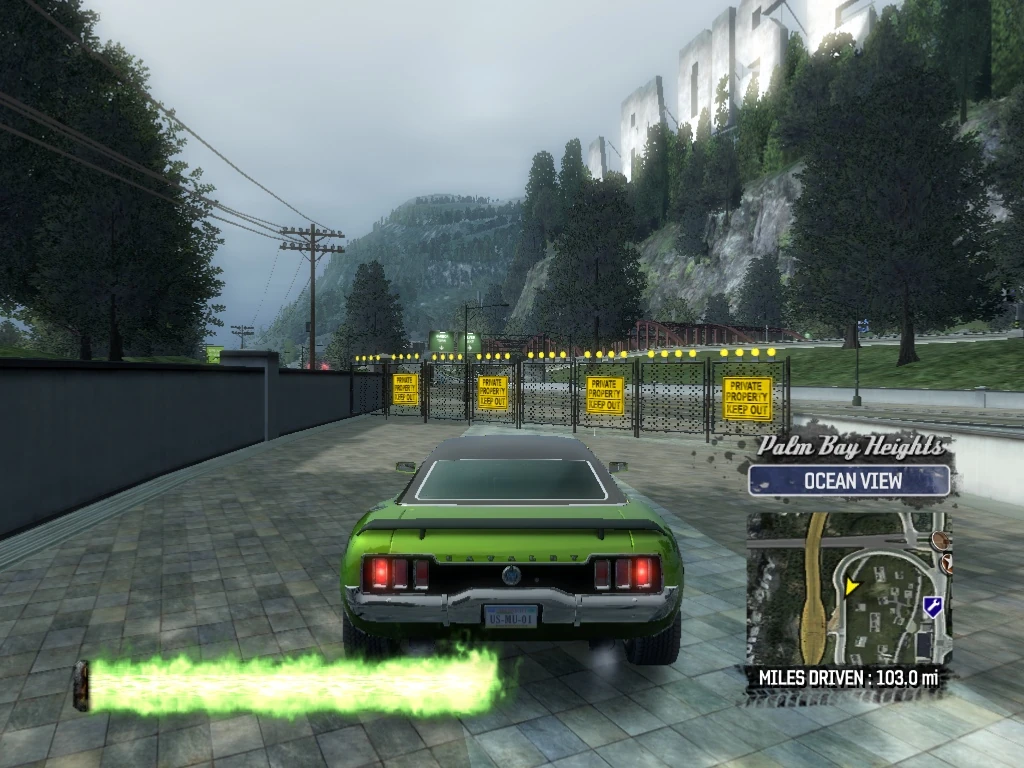
|
| 357 | Palm Bay Heights Ocean View |
Just before Hubbard Avenue merges onto Lambert Parkway, you will see Smash Gate 357 on the right leading to a similar sidewalk/terrace. Drive through Smash Gate 357 and along the sidewalk. | 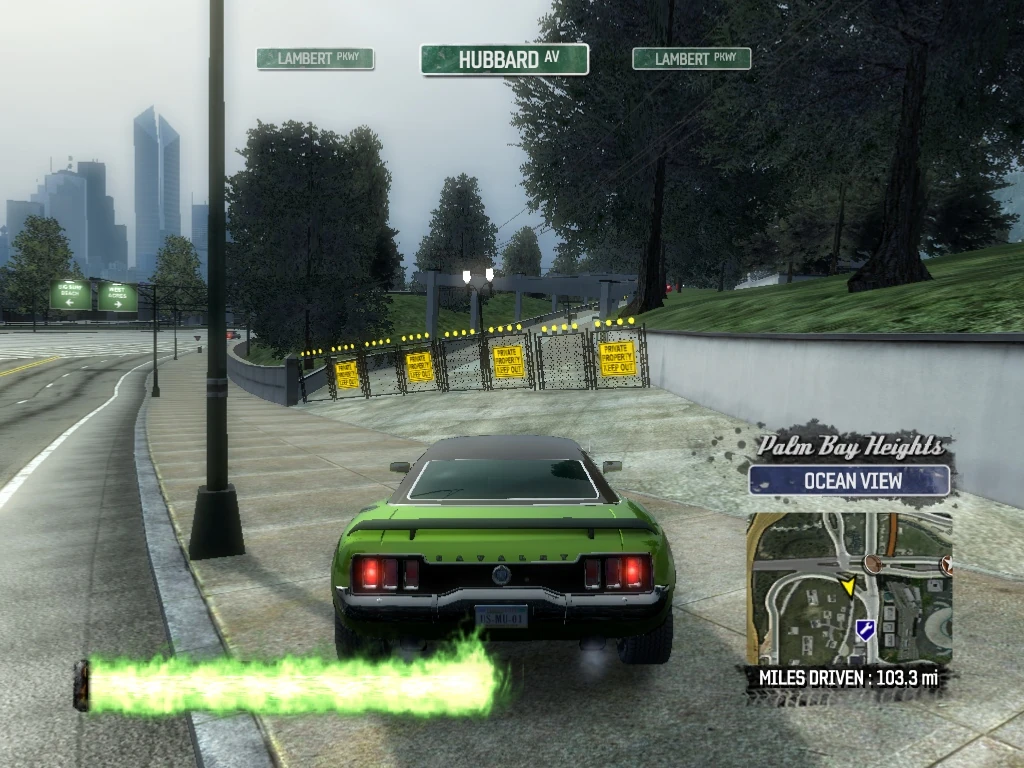
|
| 358 | Palm Bay Heights Ocean View |
Smash Gate 358 is a wide gate on the left side of the sidewalk, leading back to Lambert Parkway. For now, just knock it over and continue south on the sidewalk. | 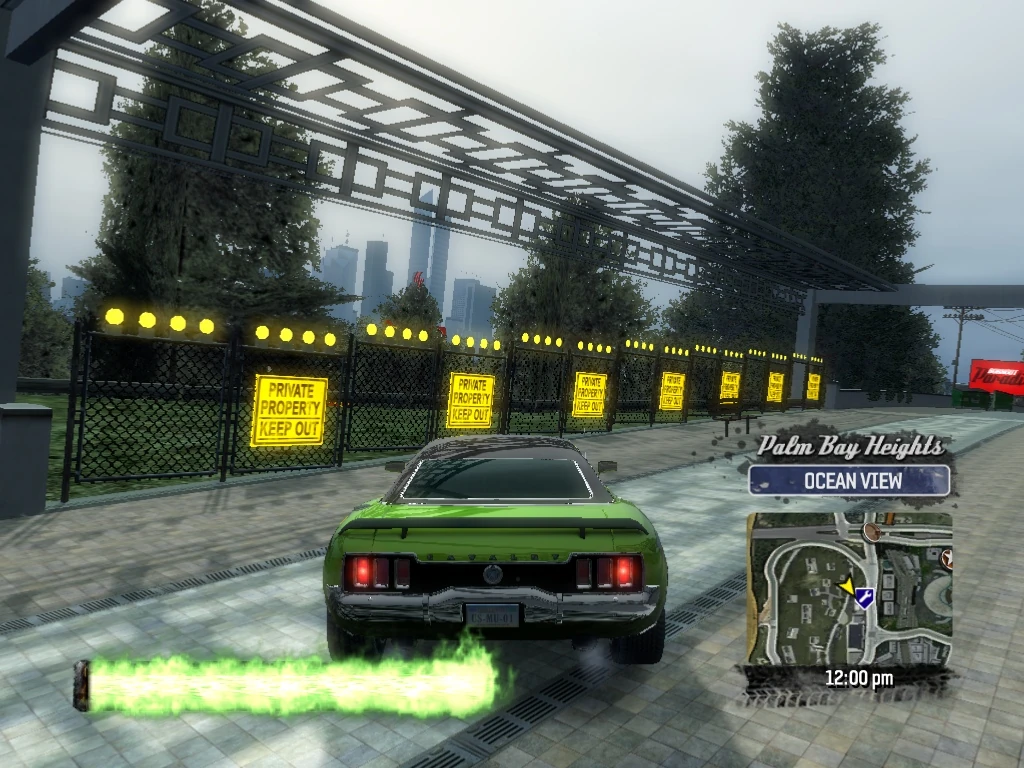
|
| 359 | Palm Bay Heights Ocean View |
Drive through Smash Gate 359 at the other end of the sidewalk where it re-joins Lambert Parkway across from 3rd Street. | 
|
| 360 | Palm Bay Heights Ocean View |
Start east on 3rd Street, and Smash Gate 360 is almost immediately ahead on the left. Spin around to drive through it and follow the short sidewalk. | 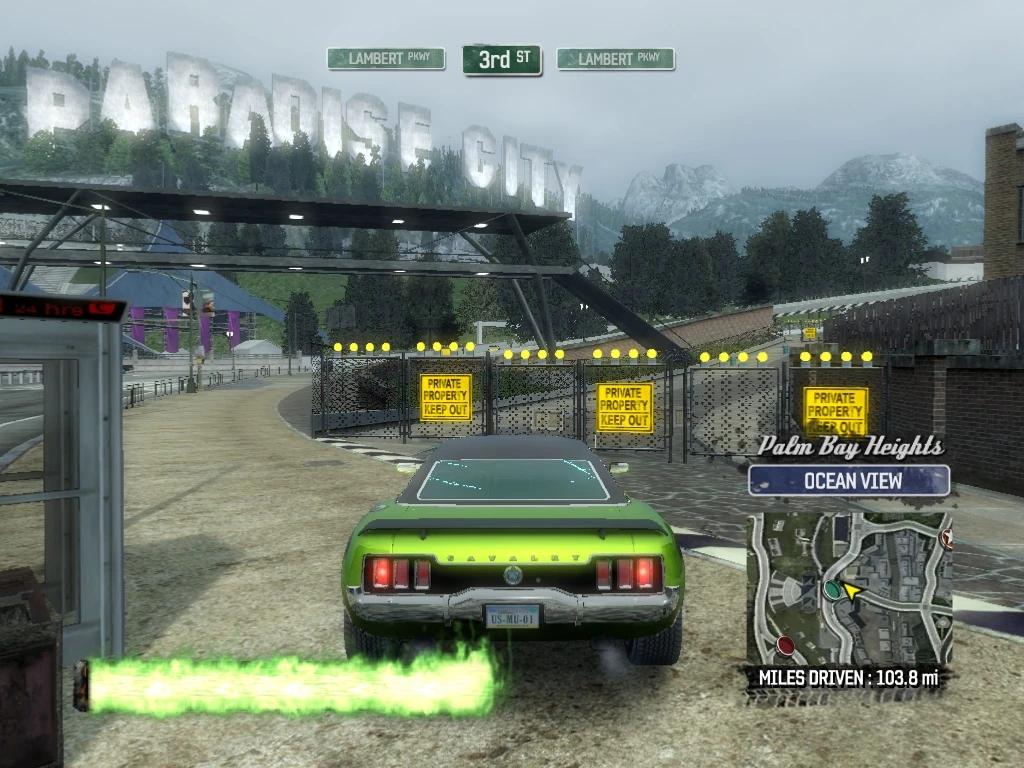
|
| 361 | Palm Bay Heights Ocean View |
Drive through Smash Gate 361 where the sidewalk re-joins Lambert Parkway, headed north. | 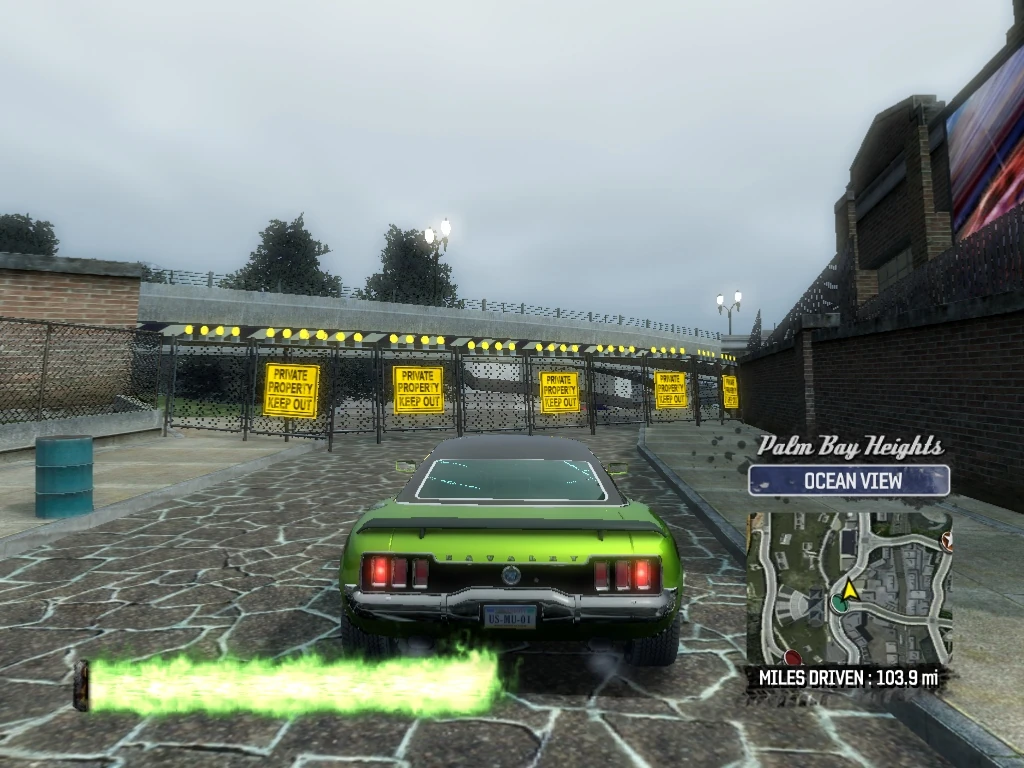
|
| 362 | Palm Bay Heights Ocean View |
Smash Gate 362 is at the entrance to the Parking Garage across from 5th Street. The garage leads to a couple of Billboard Smashes. For now, just knock the Smash Gate over and back up and head east on 5th Street. | 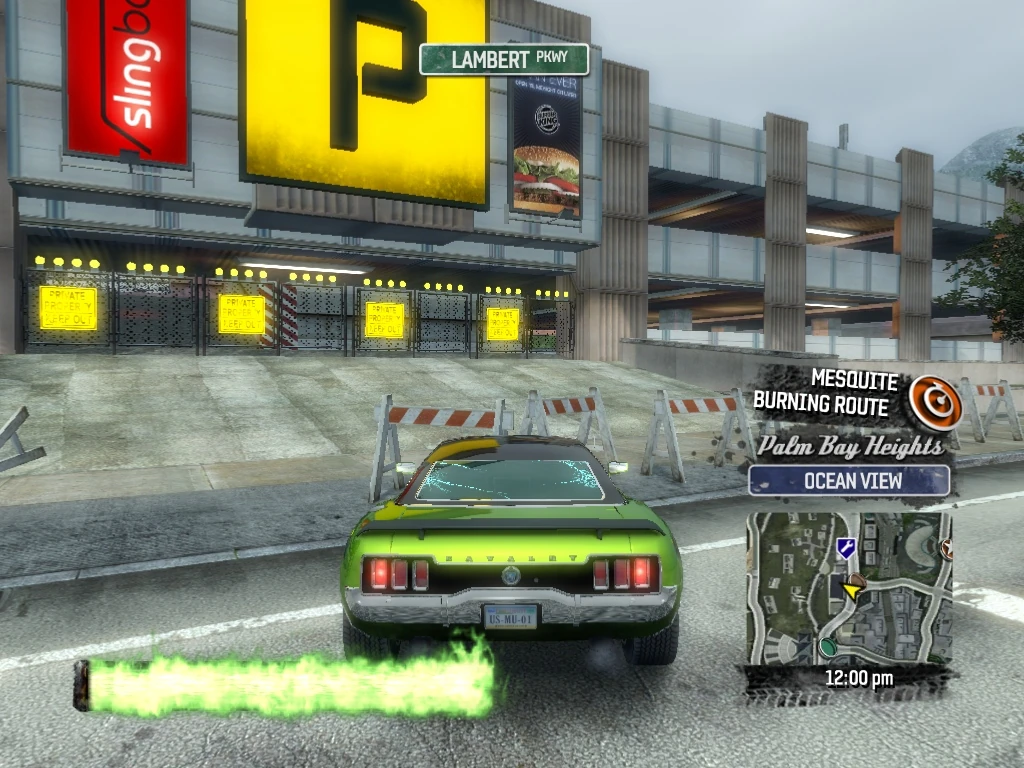
|
| 363 | Palm Bay Heights West Acres |
Take the next right (south) on Hamilton Avenue. Cross over 3rd Street and drive through Smash Gate 363 at the entrance to the Parking Garage on the right. Climb to the top of the garage. | 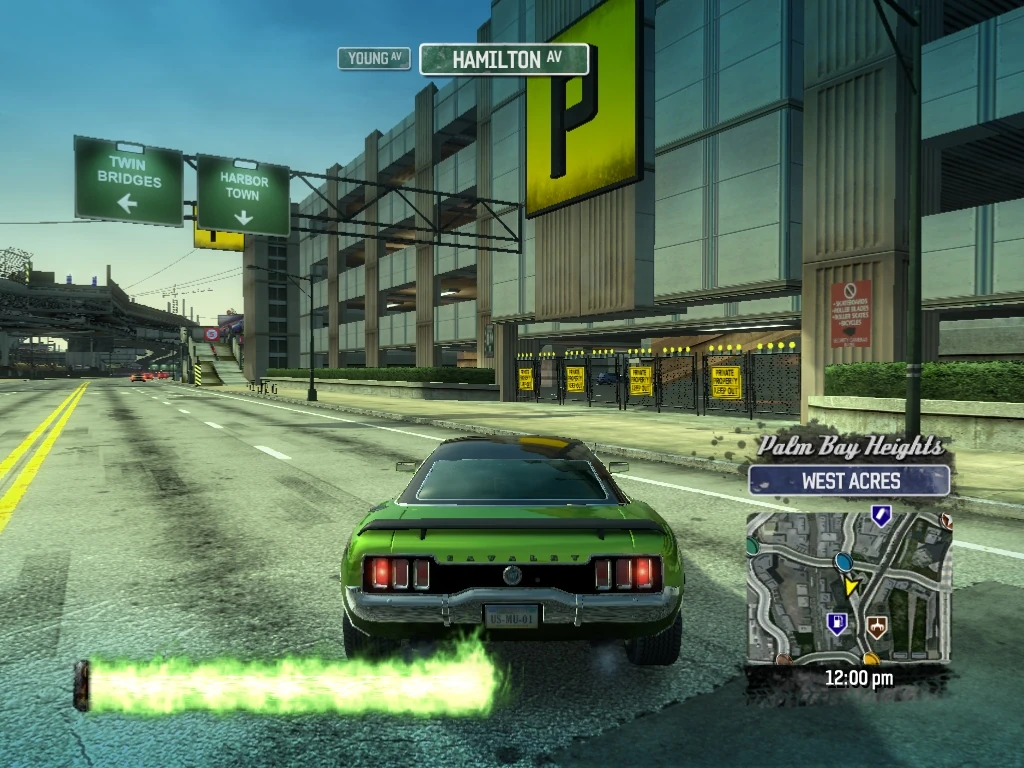
|
| 364 | Palm Bay Heights West Acres |
Smash Gate 364 is marking a ramp on the northwest corner of the garage. Drive through it and you will jump down to a roof with another ramp leading to a Billboard Smash. When you reach the ground, head south on Hamilton Avenue. (If you are in a hurry to complete the achievement, just knock it over and jump off the southeast ramp, which should put you on Hamilton near the Gas Station.) | 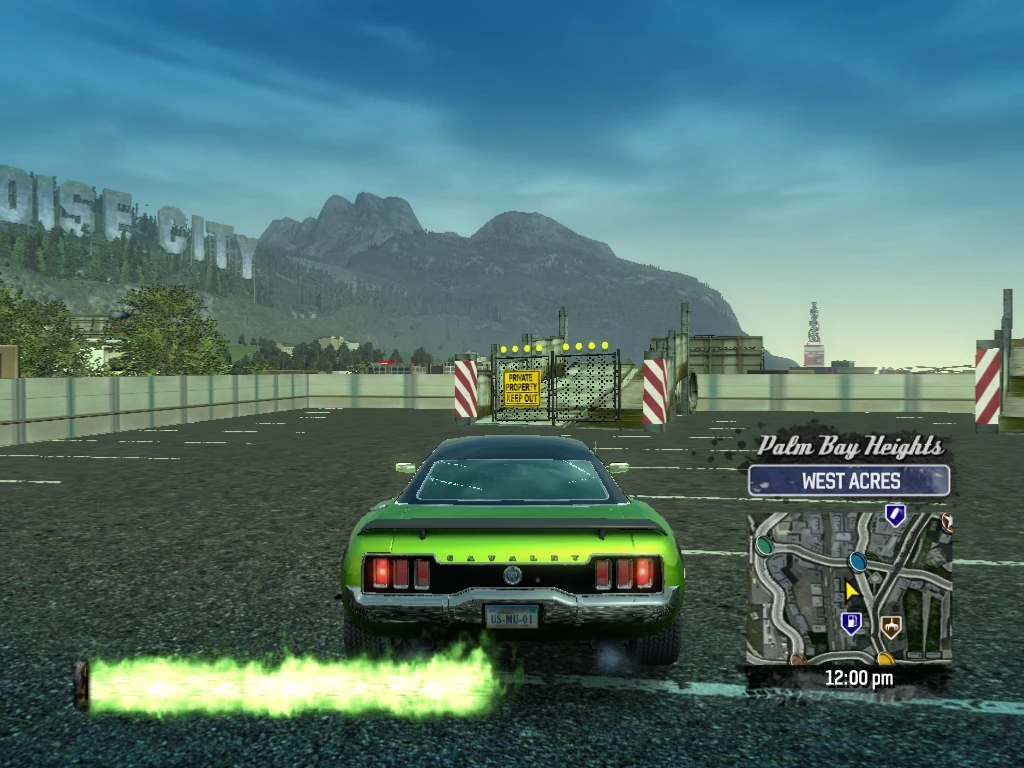
|
| 365 | Palm Bay Heights West Acres |
Smash Gates 365-367 and 104 are in a line. Just after the Gas Station on the right, veer right through the parking lot of Doktor's Disco and cross over 2nd Street and drive through Smash Gate 365 and follow the alleyway south. | 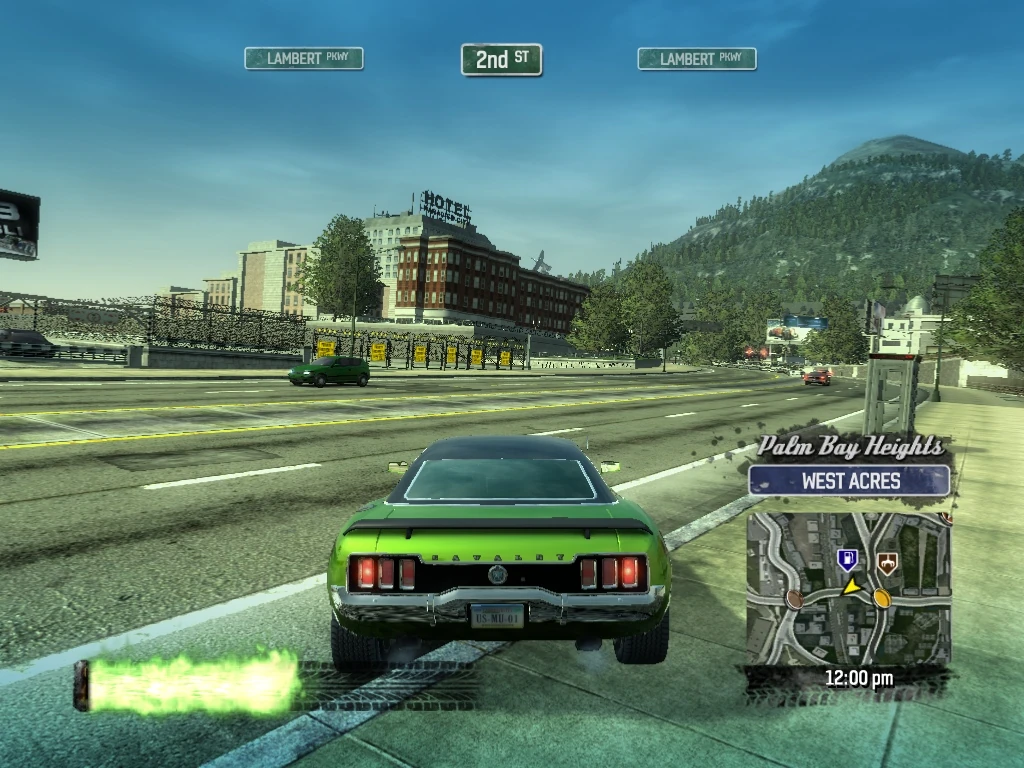
|
| 366 | Palm Bay Heights West Acres |
Drive through Smash Gate 366 in the middle of the block. (There is a cut-through on the right that leads to a Super Jump). | 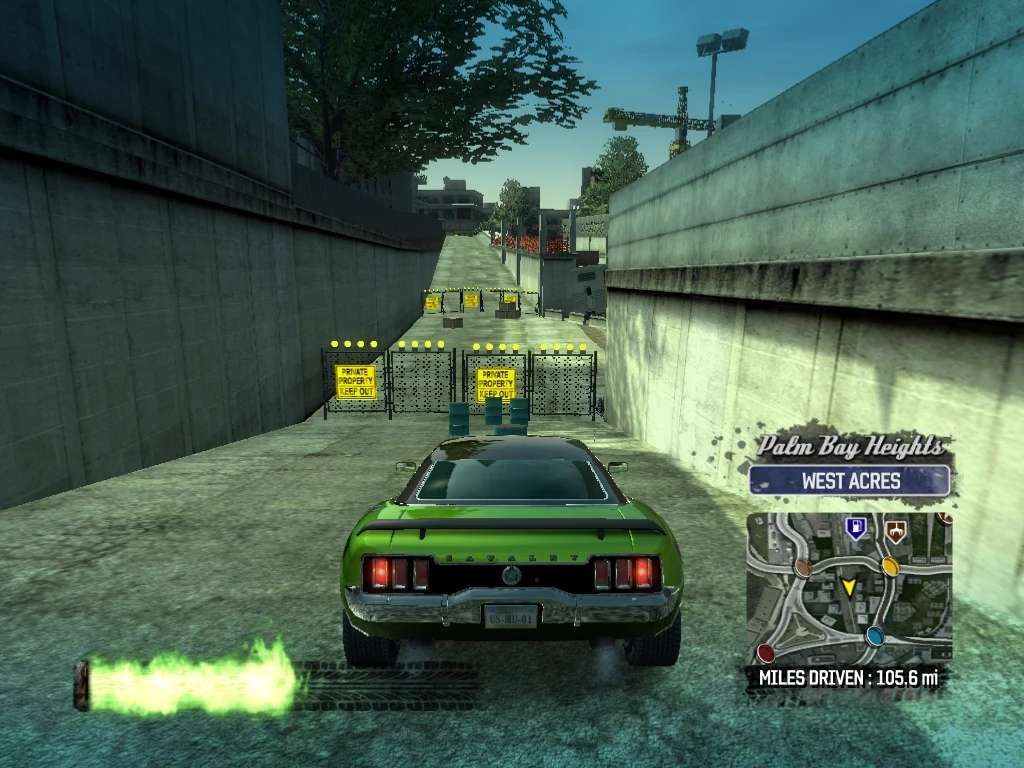
|
| 367 | Palm Bay Heights West Acres |
Drive through Smash Gate 367 just ahead (at the entrance to the cut-through from the south). Drive through previously accomplished Smash gate 104 and turn left (east) on 1st Street. | 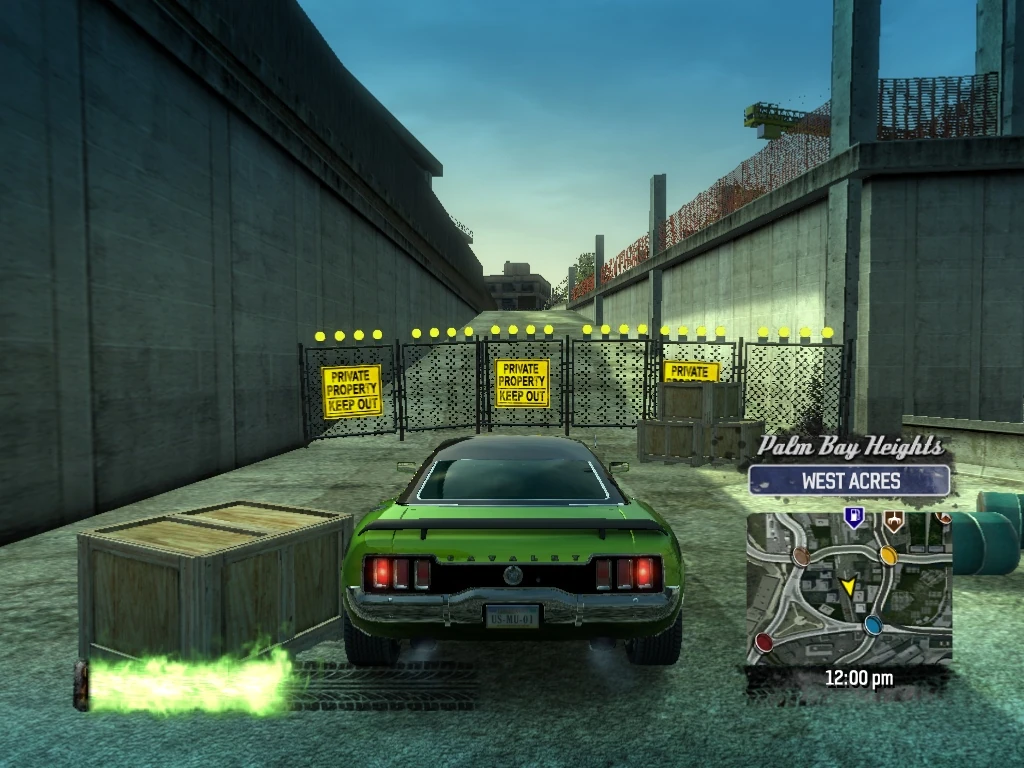
|
| 368 | Palm Bay Heights West Acres |
Cross over Hamilton Avenue and you will see previously accomplished Smash Gates 101 and 100 on the left. Drive through Smash Gate 100 again, just before Evans Boulevard. Drive up a ramp and through Smash Gate 368 under the billboard, dropping down to the concrete below. | 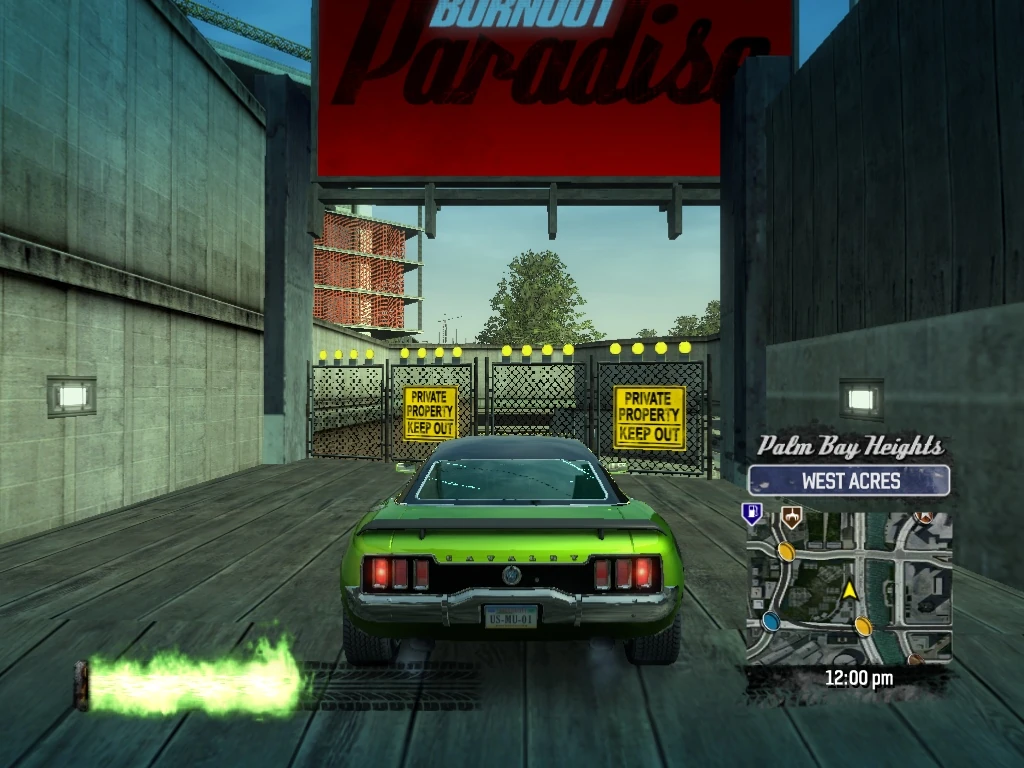
|
| 369 | Palm Bay Heights West Acres |
Drive forward through Smash Gate 369 and stop. | 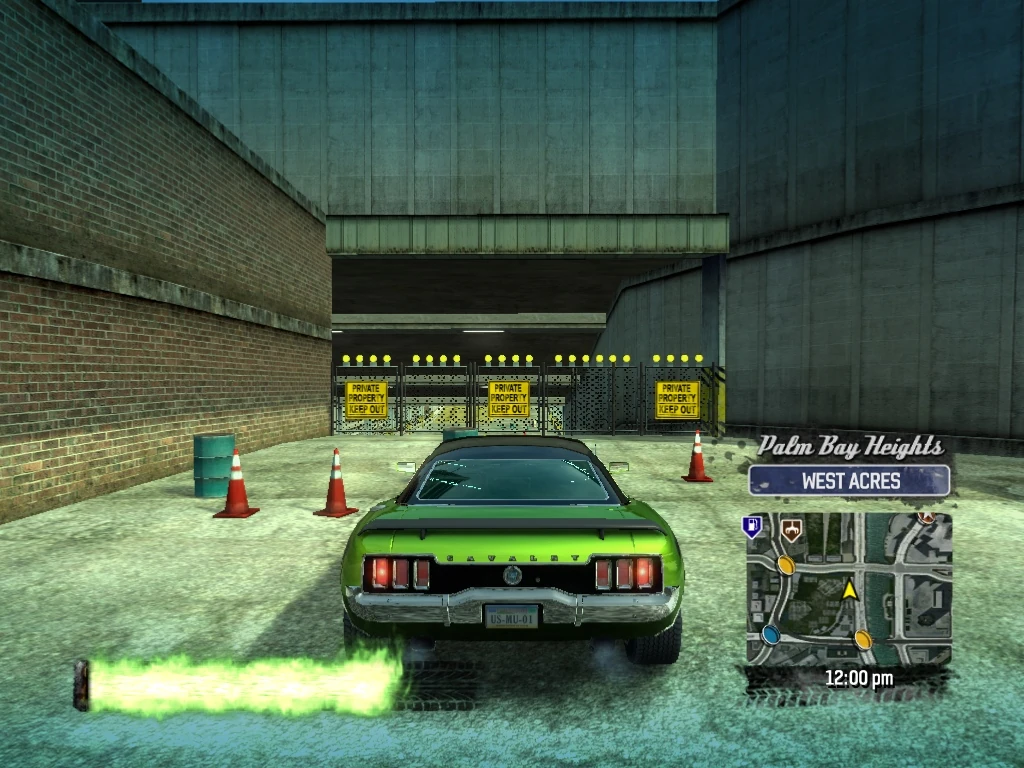
|
| 370 | Palm Bay Heights West Acres |
Smash Gates 370 and 371 are parallel with and west of Smash Gates 368 and 369. Normally you would smash them from Smash Gate 101, but since we are here and we can ... Turn the car around to the left and drive through Smash Gate 370. | 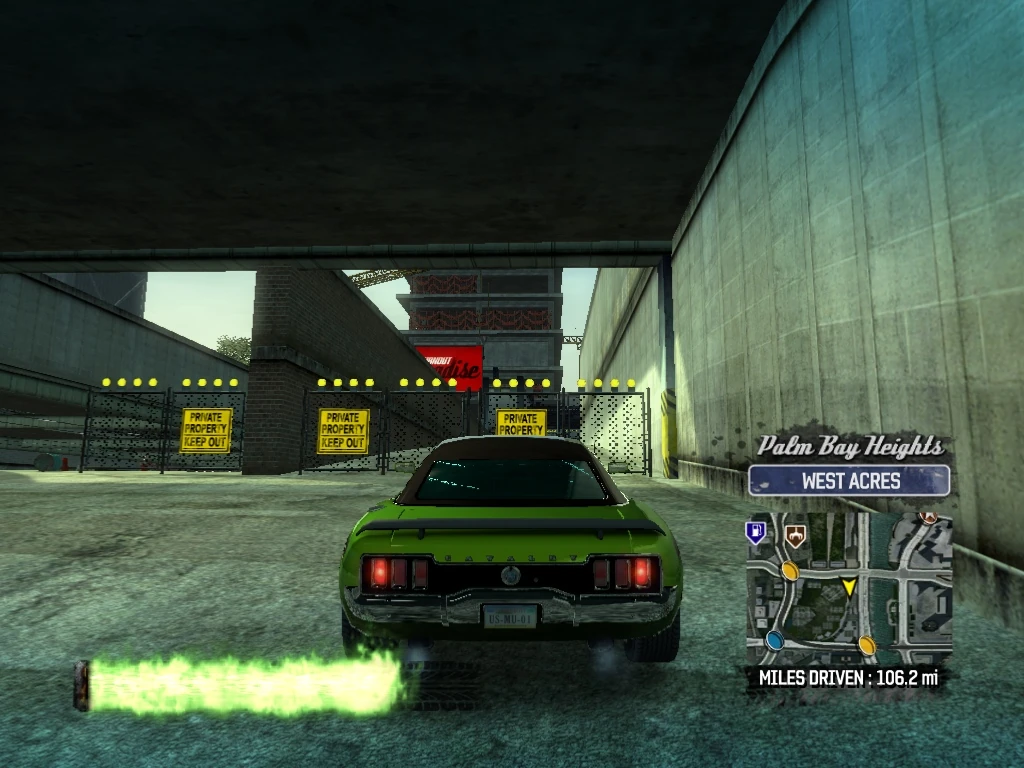
|
| 371 | Palm Bay Heights West Acres |
Continue up the ramp and drive through Smash Gate 371, then turn back around and drive back past Smash Gate 369 and continue north on the concrete path. | 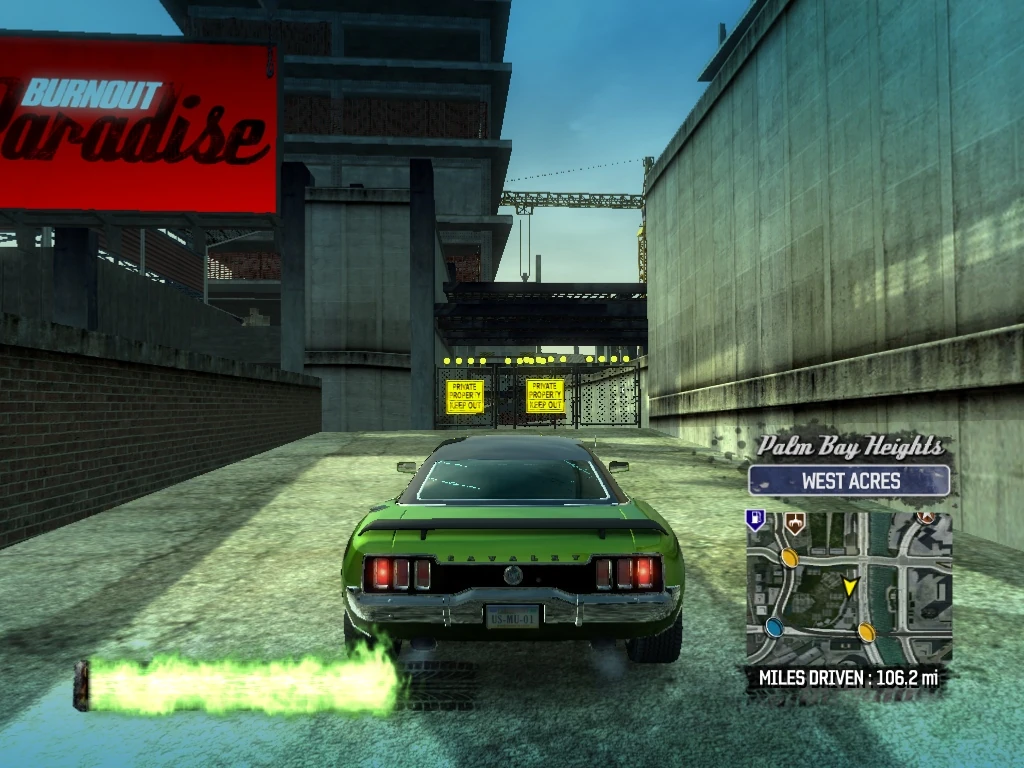
|
| 372 | Palm Bay Heights West Acres |
Drive through Smash Gate 372 just ahead on the concrete path. | 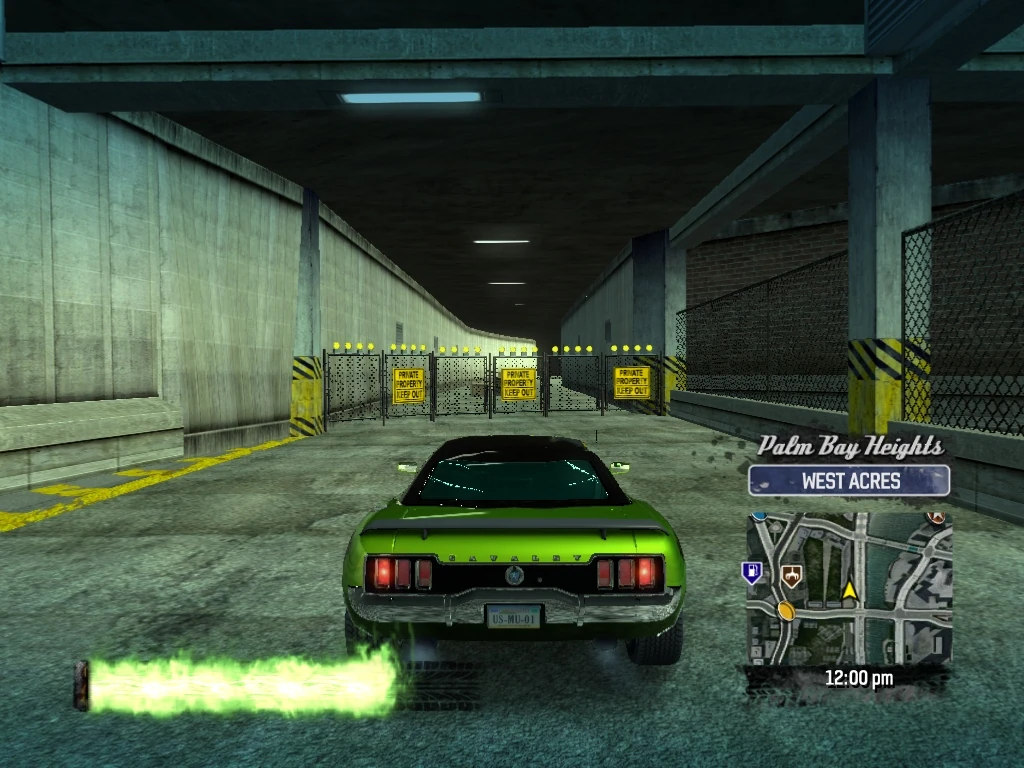
|
| 373 | Palm Bay Heights West Acres |
Smash Gate 373 is a wide gate on the right just after Smash Gate 372, exiting onto Evans Boulevard. For now, just knock it over and continue north on the concrete path. | 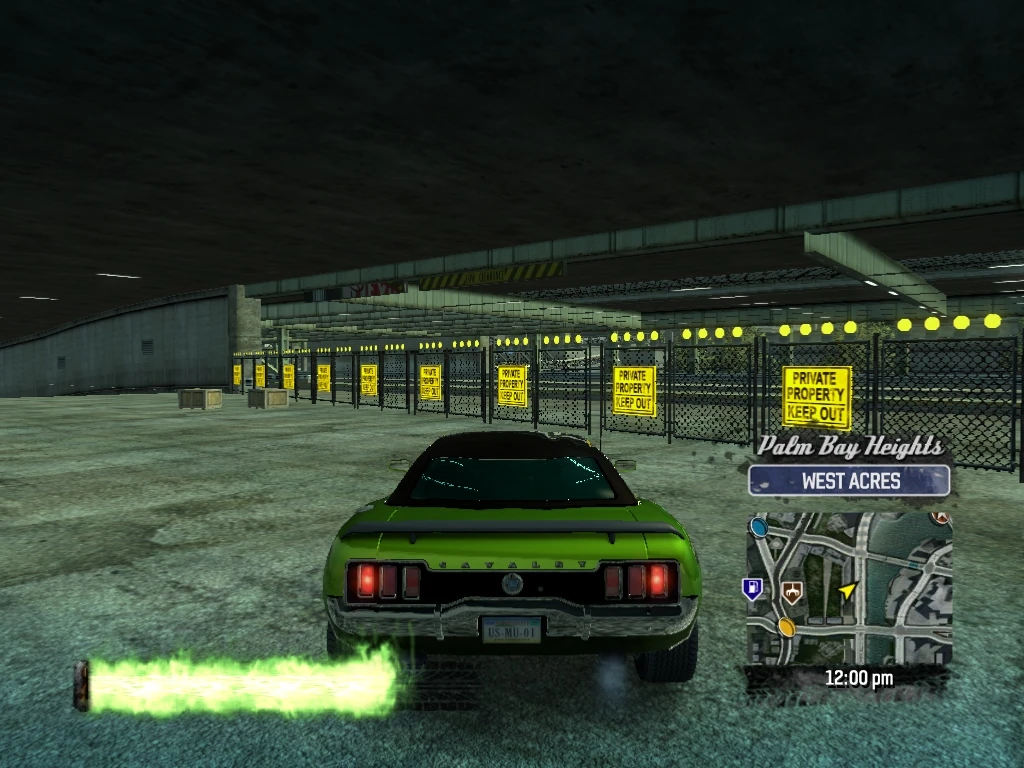
|
| 374 | Palm Bay Heights West Acres |
Drive through Smash Gate 374 on the right, where the concrete path exits onto Evans Boulevard northbound, just before 5th Street. | 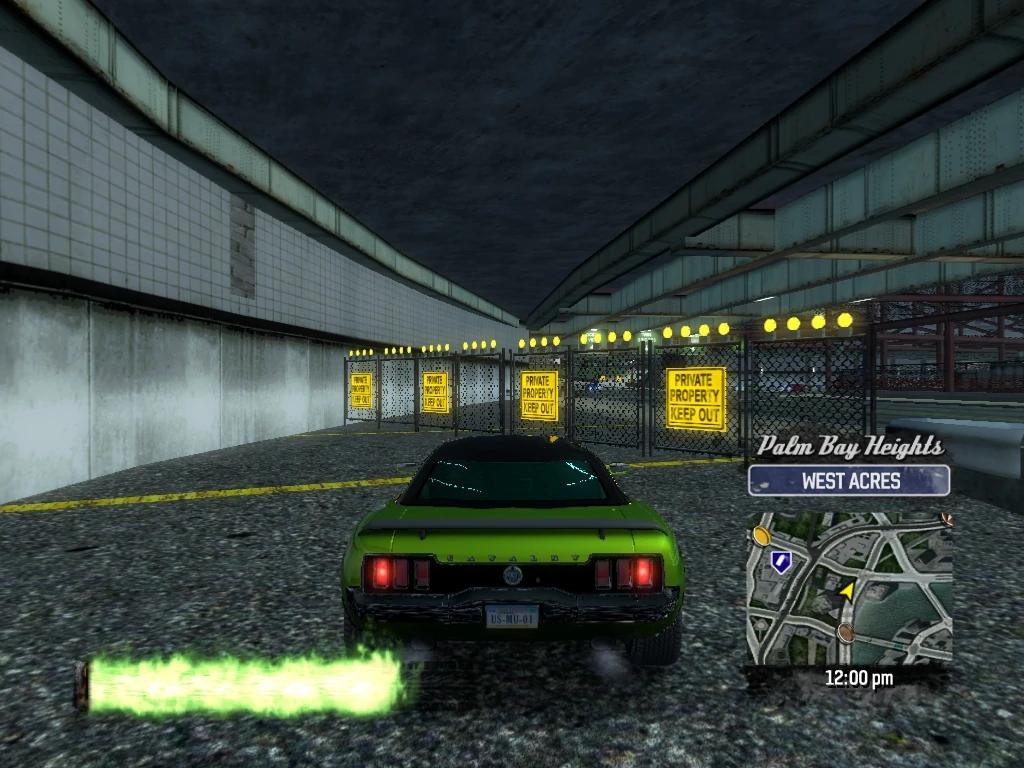
|
| 375 | Palm Bay Heights West Acres |
Smash Gates 375-378 are also in a line. Diagonally cross over 5th Street (northeast) and drive through Smash Gate 375 on the right and follow the sidewalk. | 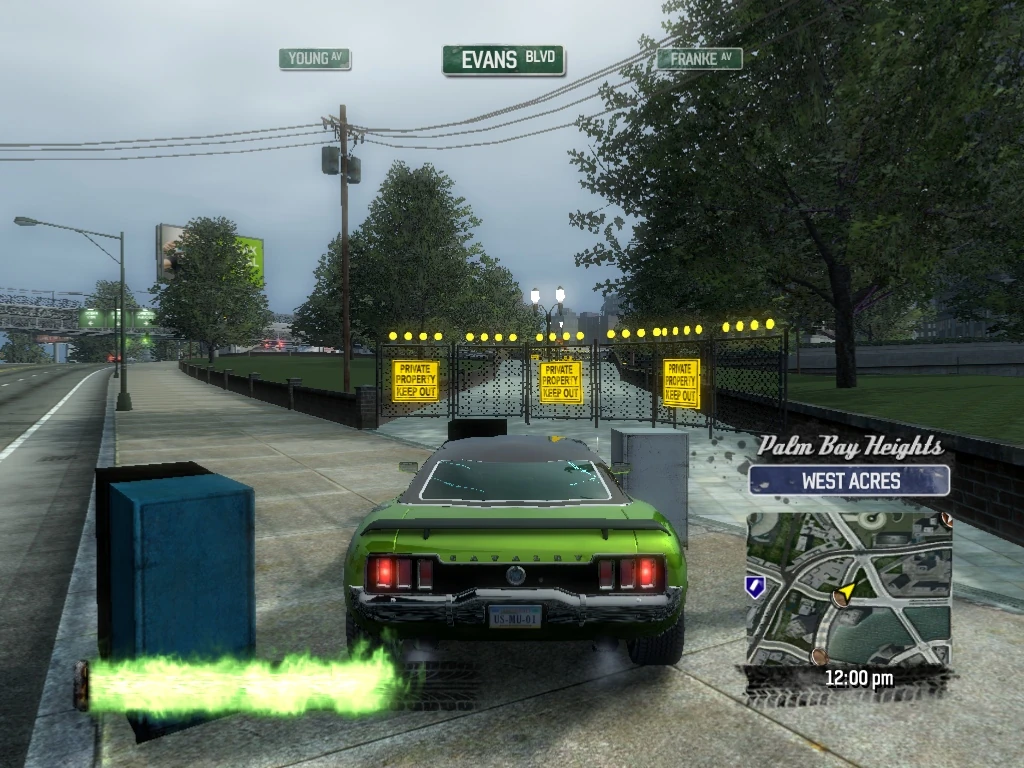
|
| 376 | Palm Bay Heights West Acres |
Drive through Smash Gate 376 at the end of the sidewalk, just before Franke Avenue. | 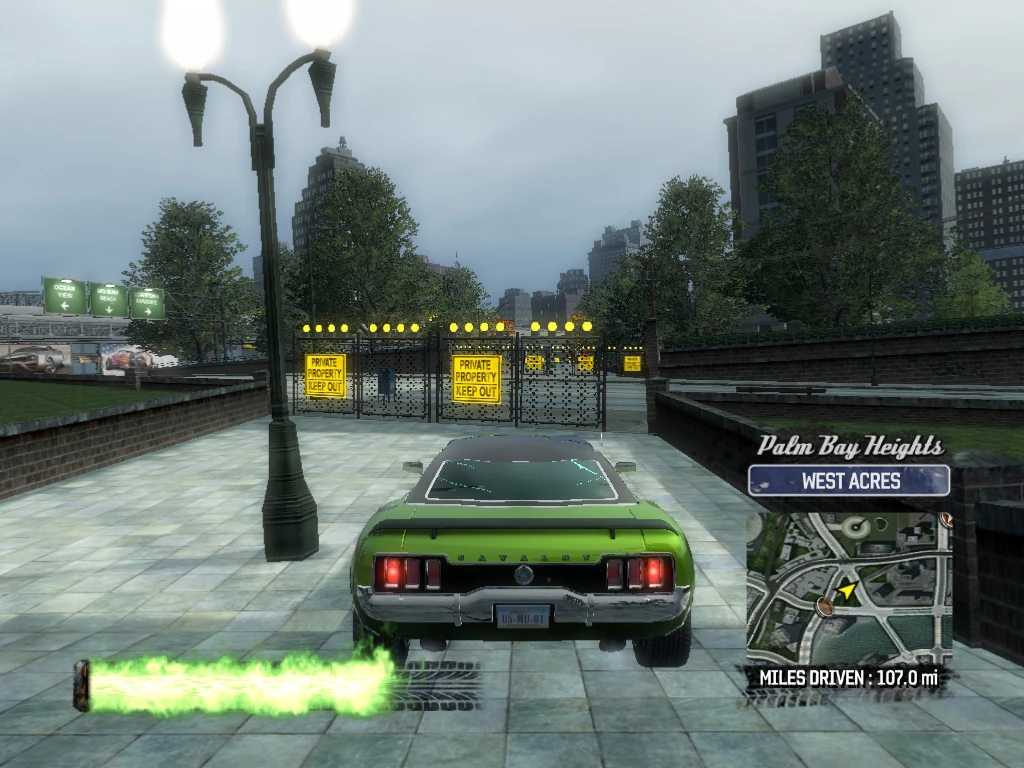
|
| 377 | Palm Bay Heights West Acres |
Cross over Franke Avenue and drive through Smash Gate 377 and follow the alleyway. | 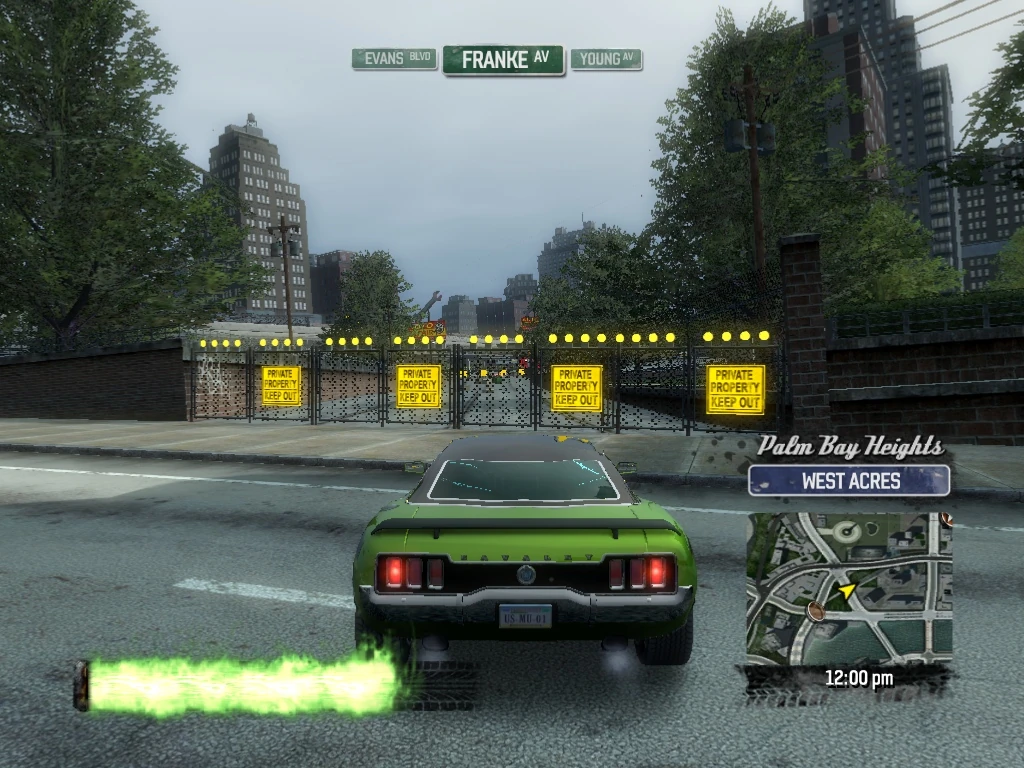
|
| 378 | Palm Bay Heights Twin Bridges |
Drive through Smash Gate 378 at the end of the alleyway, exiting onto Young Avenue eastbound, just before the Auto Repair. | 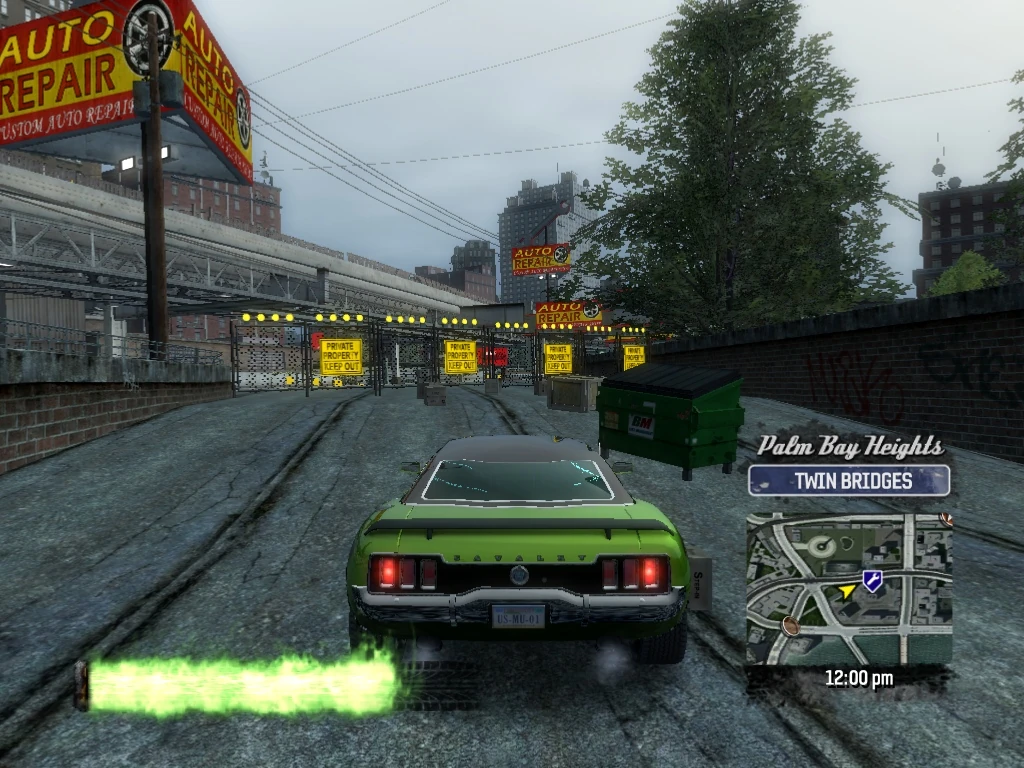
|
| 379 | Palm Bay Heights Twin Bridges |
Cross over Paradise Avenue, and take the next right (south) on Root Avenue. Take the next left (east) on 5th Street. Just after the end of the divided median, cross over and drive through Smash Gate 379 at the base of the gray building on the left. | 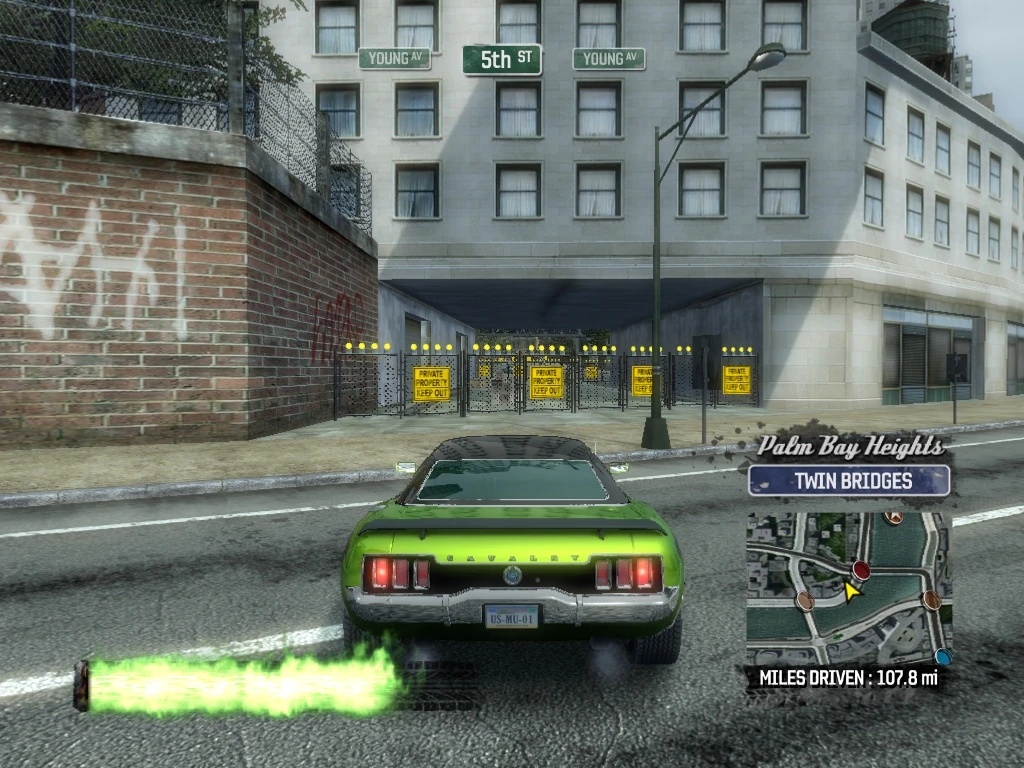
|
| 380 | Palm Bay Heights Twin Bridges |
Drive through Smash Gate 380 exiting the building at Young Avenue. | 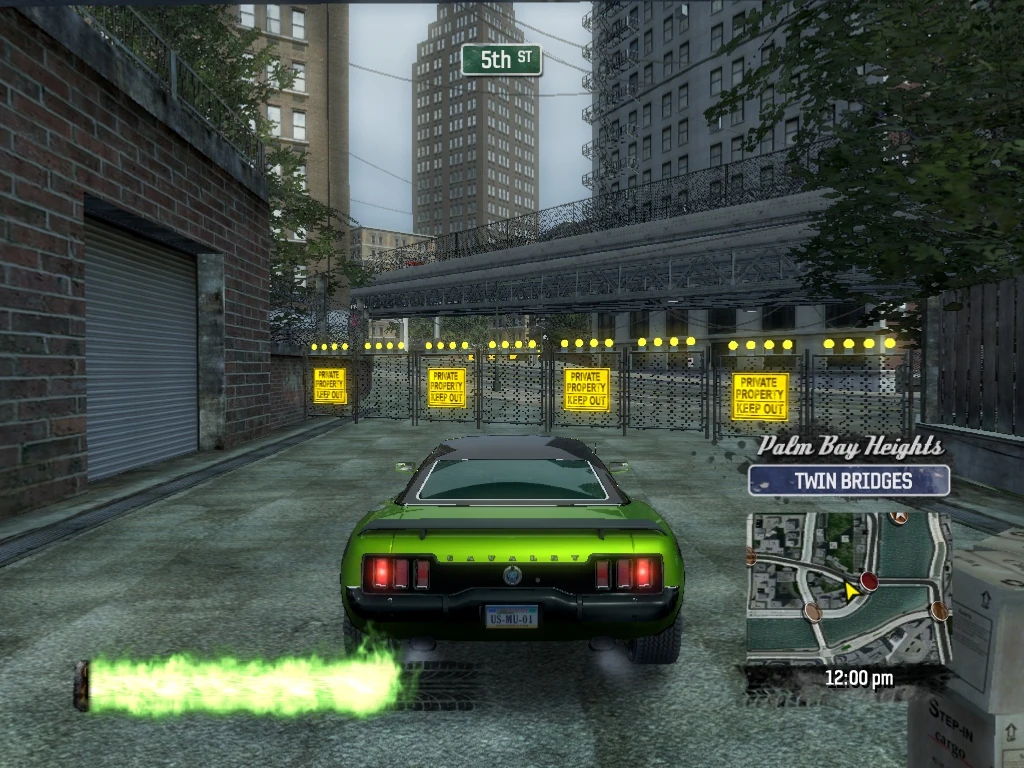
|
| 381 | Palm Bay Heights Twin Bridges |
Cross over Young Avenue and drive through Smash Gate 381 at the entrance to the alleyway ahead and drive down the alleyway. | 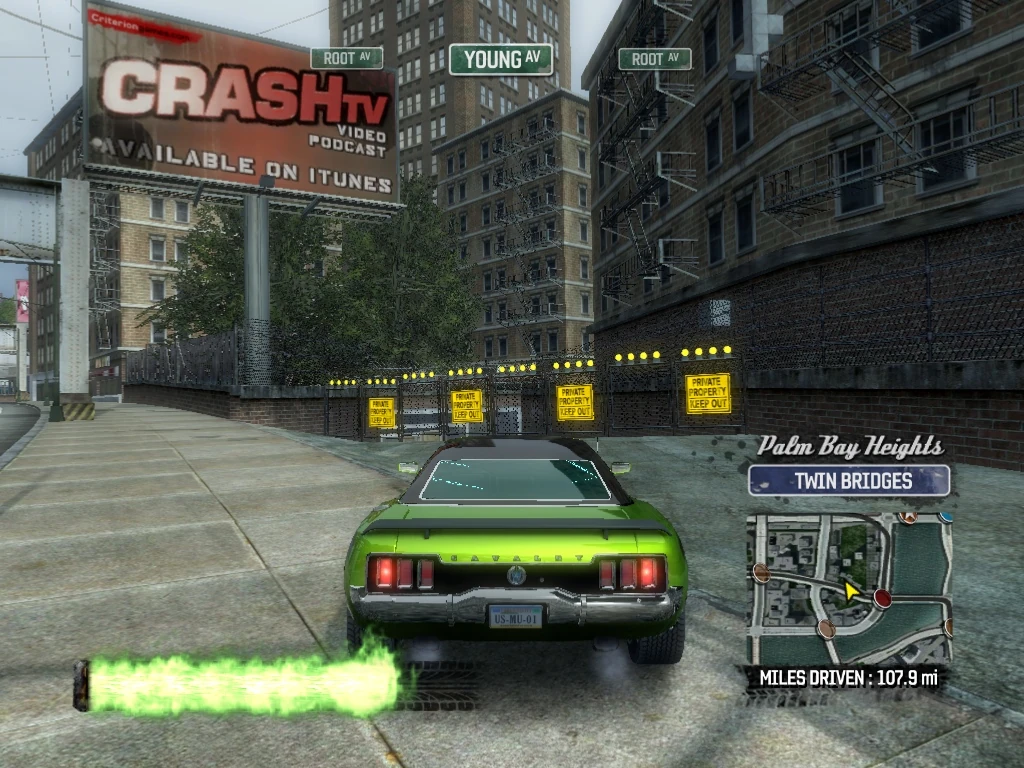
|
| 382 | Palm Bay Heights Twin Bridges |
Drive through Smash Gate 382 at the end of the alleyway, exiting onto Young Avenue westbound just before Paradise Avenue. | 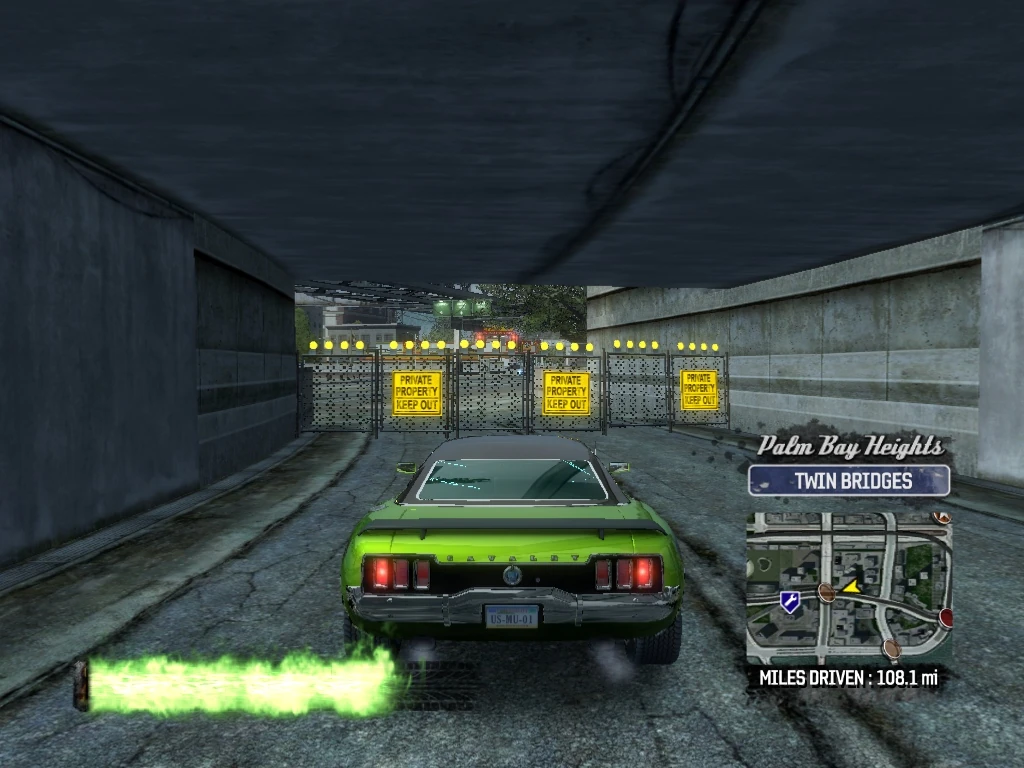
|
| 383 | Palm Bay Heights Twin Bridges |
Turn right (north) on Paradise Avenue. Smash Gate 383 is difficult to see from this direction, but almost immediately after the intersection (before the mid-rise apartment buildings), turn right and knock it down, then back up and continue north on Paradise Avenue. | 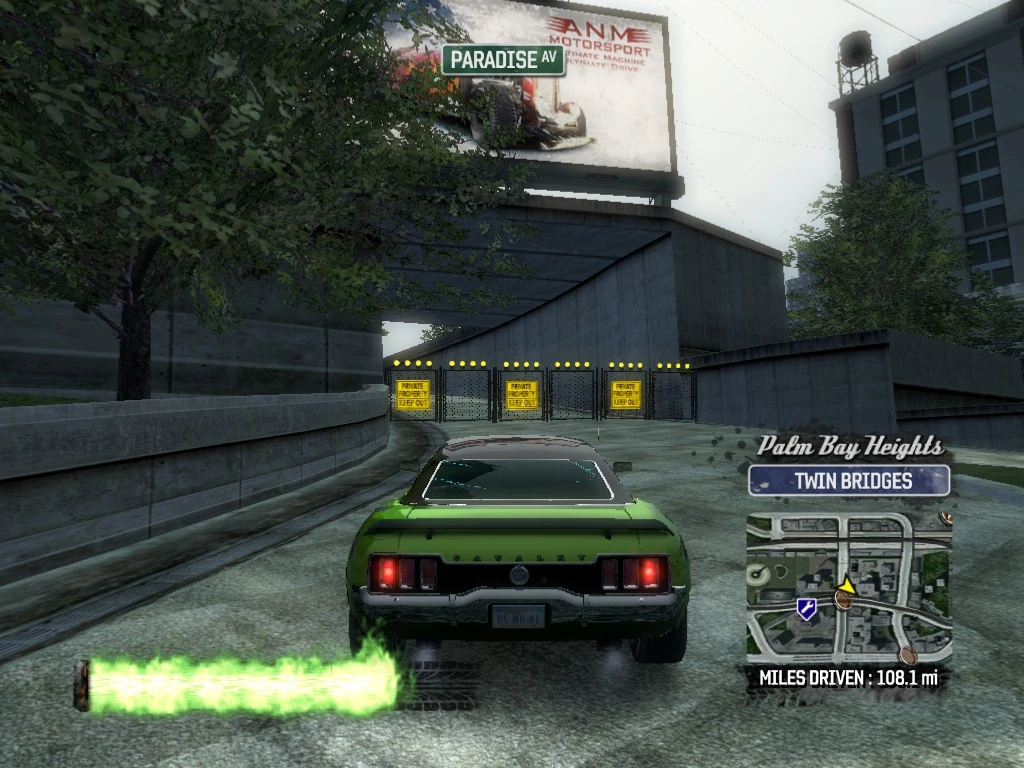
|
| 384 | Palm Bay Heights Twin Bridges |
Smash Gate 384 is also difficult to see from this direction. Follow the roadside on the left, and there is a cut-back to the rear just before the tall gray building on the left. Spin around and drive through the Smash Gate in the cut-back, entering the covered parking area. | 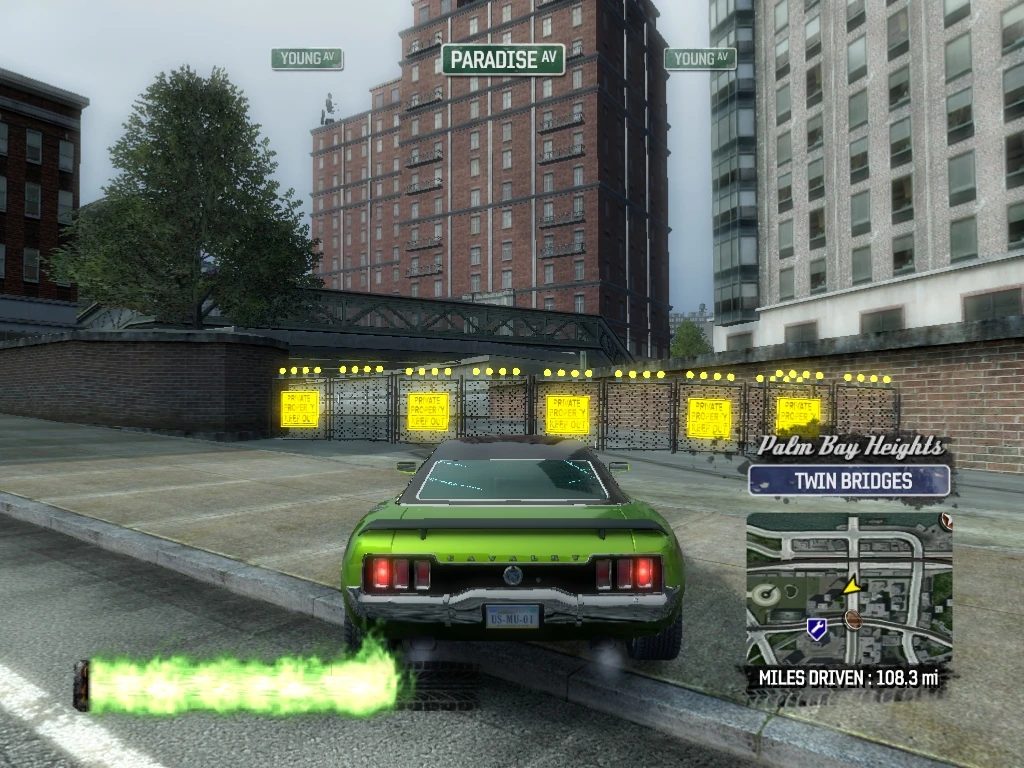
|
| 385 | Palm Bay Heights Twin Bridges |
Drive south to the end of the parking area and turn left and climb the incline to knock down Smash Gate 385 (exits to Paradise Avenue), then back up and turn around (west). | 
|
| 386 | Palm Bay Heights Twin Bridges |
Drive west through the parking area, exiting westbound onto Young Avenue just opposite the Auto Repair. | 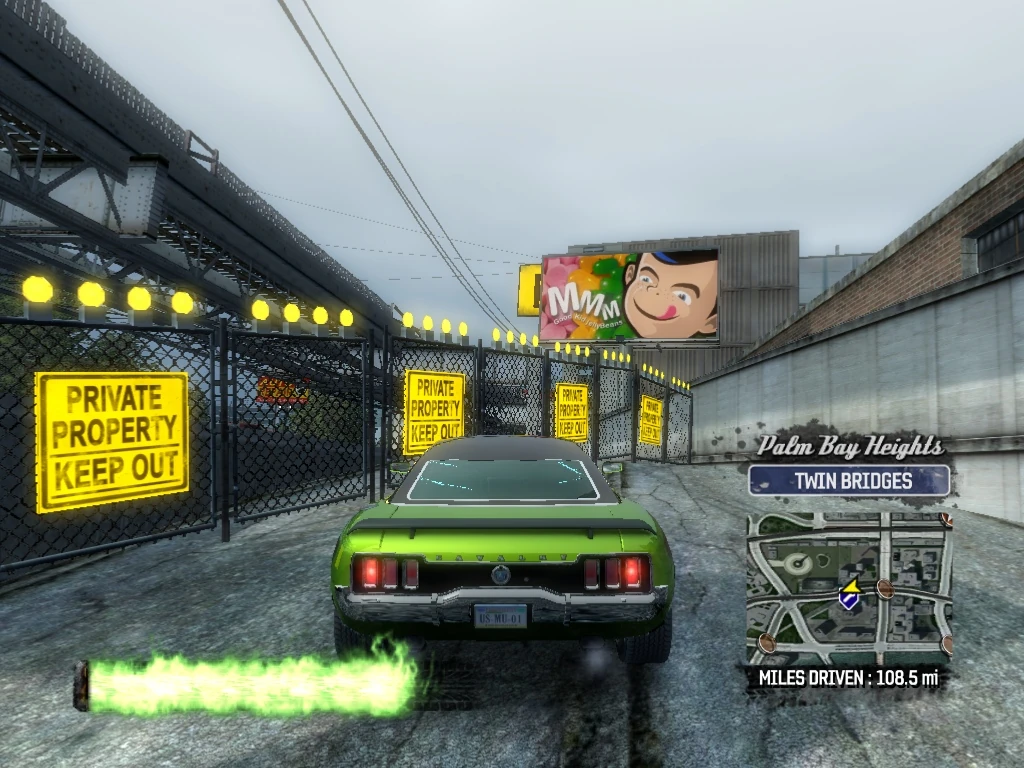
|
| 387 | Palm Bay Heights Twin Bridges |
Smash Gate 387 is at the entrance to the Parking Garage on the right. Just knock it over and then continue west on Young Avenue and take the next right (northwest) on Franke Avenue. | 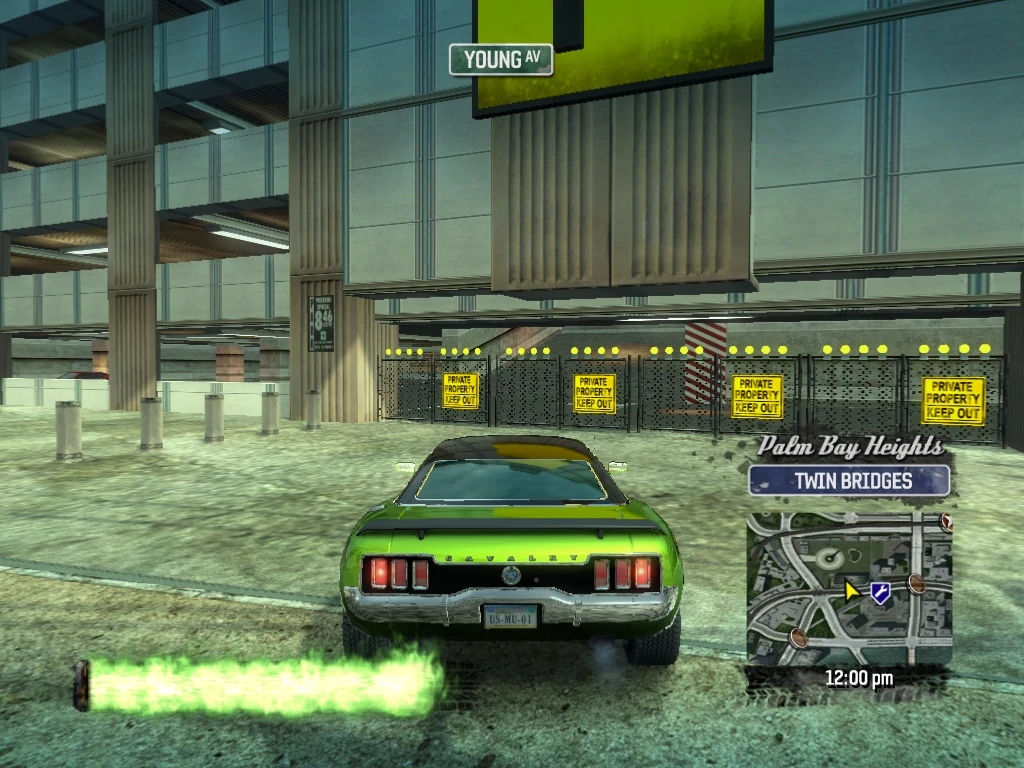
|
| 388 | Palm Bay Heights West Acres |
Smash Gate 388 is on the left just before the first tall building on Franke Avenue, and leads back to Young Avenue, just knock it down and back up. | 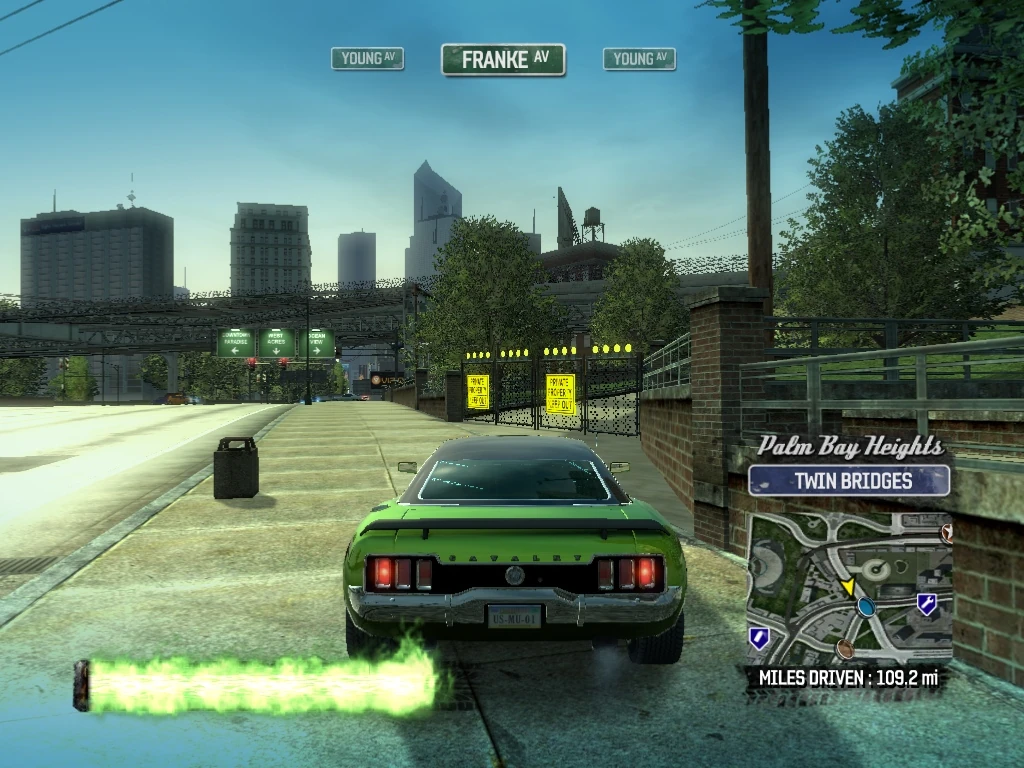
|
| 389 | Palm Bay Heights West Acres |
Smash Gate 389 is just north of Smash Gate 388 in the alleyway in front of the building with the MCS sign on it. Drive through it and follow the alleyway. | 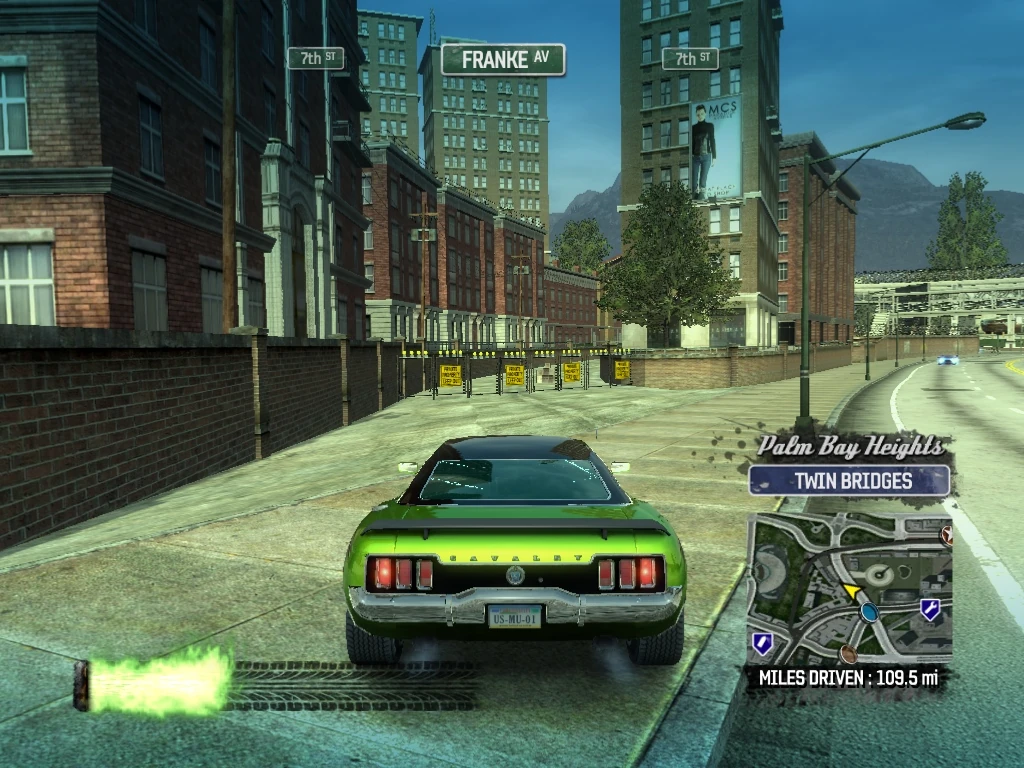
|
| 390 | Palm Bay Heights Twin Bridges |
Drive through Smash Gate 390 at the other end of the alleyway, exiting onto 7th Street westbound, oncoming. | 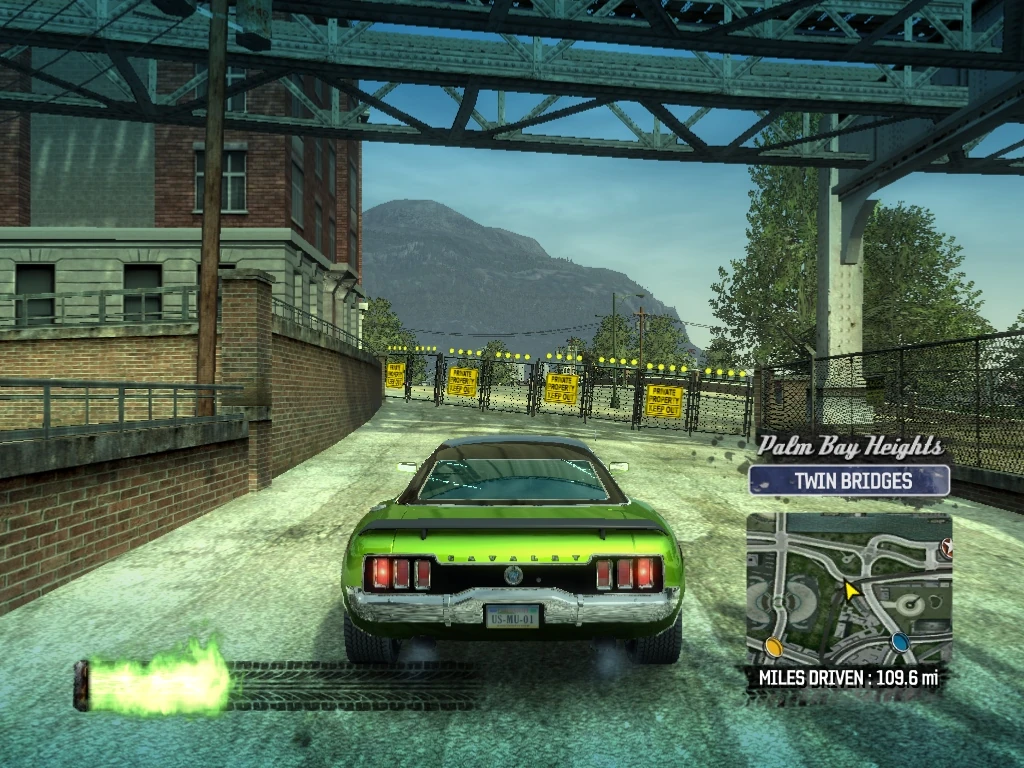
|
| 391 | Palm Bay Heights Twin Bridges |
Drive through Smash Gate 391, which is just ahead on the left-hand sidewalk. | 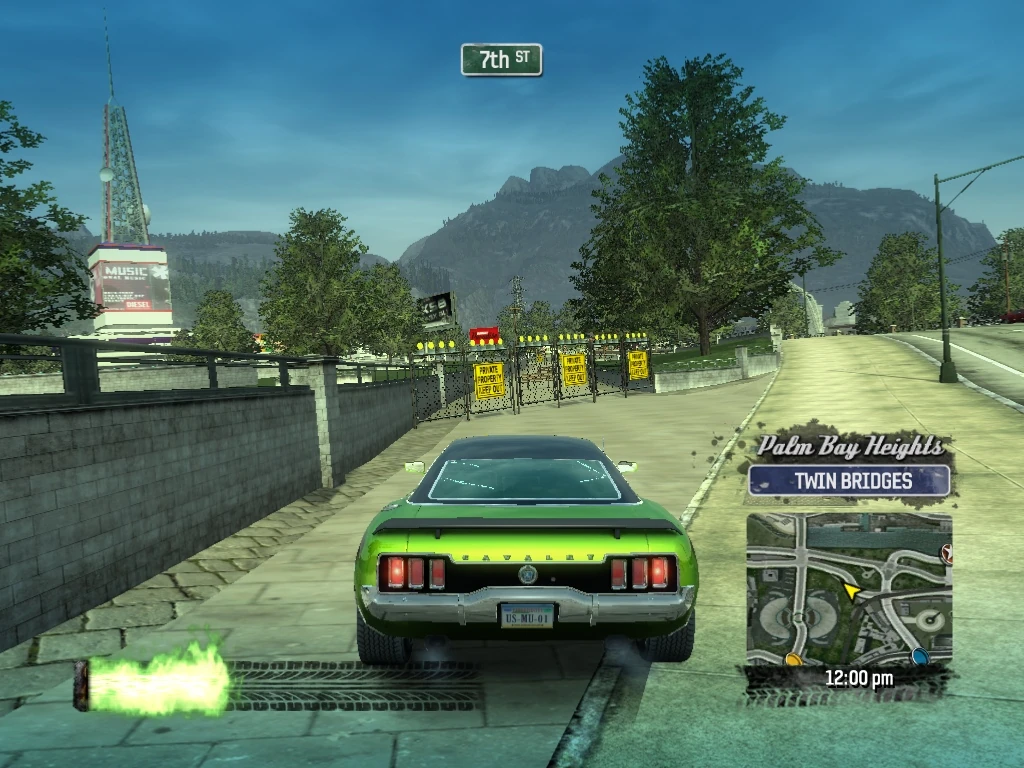
|
| 392 | Palm Bay Heights Twin Bridges |
Drive through Smash Gate 392, at the other end of the sidewalk, exiting onto 7th Street westbound just before Hamilton Avenue. | 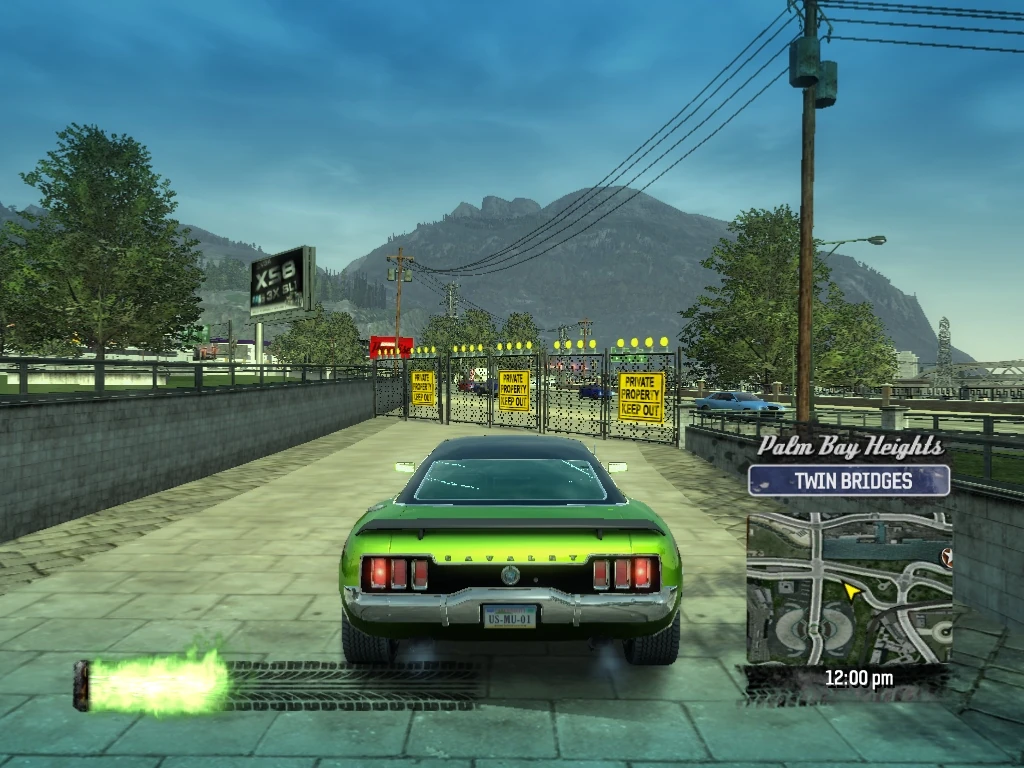
|
| 393 | Palm Bay Heights Ocean View |
Turn right (north) on Hamilton Avenue and cross over the Hamilton Avenue bridge. Just before you get to 9th Street, turn right and knock down Smash Gate 393. (The gate leads to a pair of Billboard Smashes and some fun jumps, but it is hard to find Smash Gate 394 from there, so just knock it over for now). | 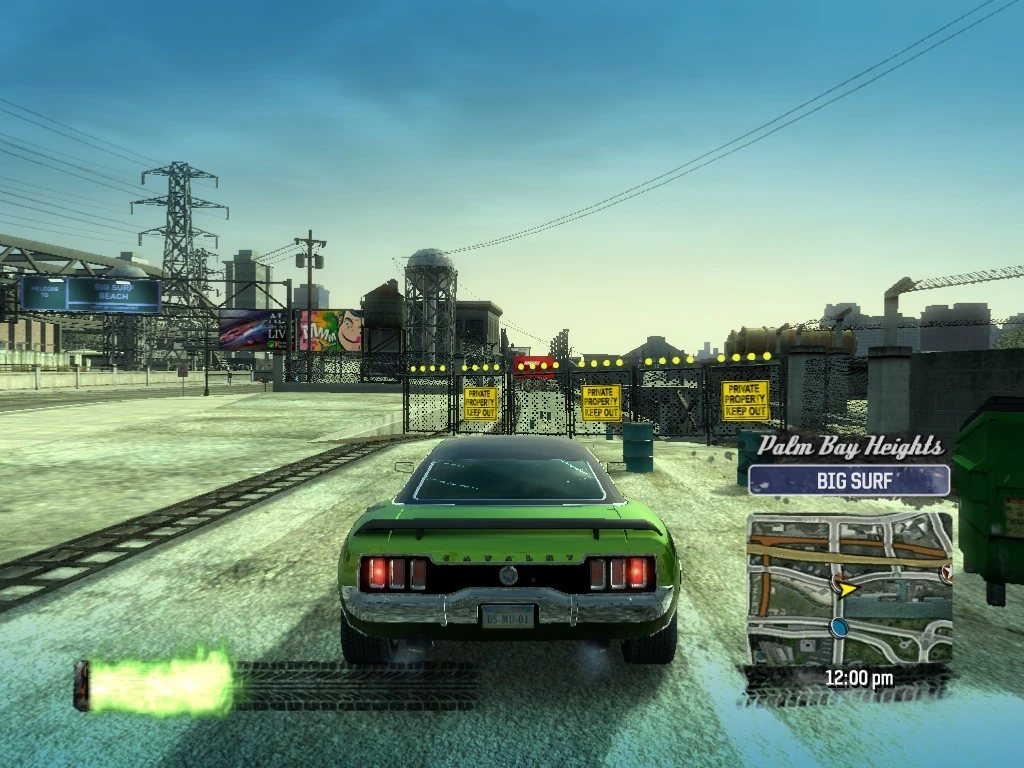
|
| 394 | Palm Bay Heights Big Surf |
Head east on 9th Street and Smash Gate 394 is about midway down the block on the right side. Just knock it down for now and continue east on 9th Street. | 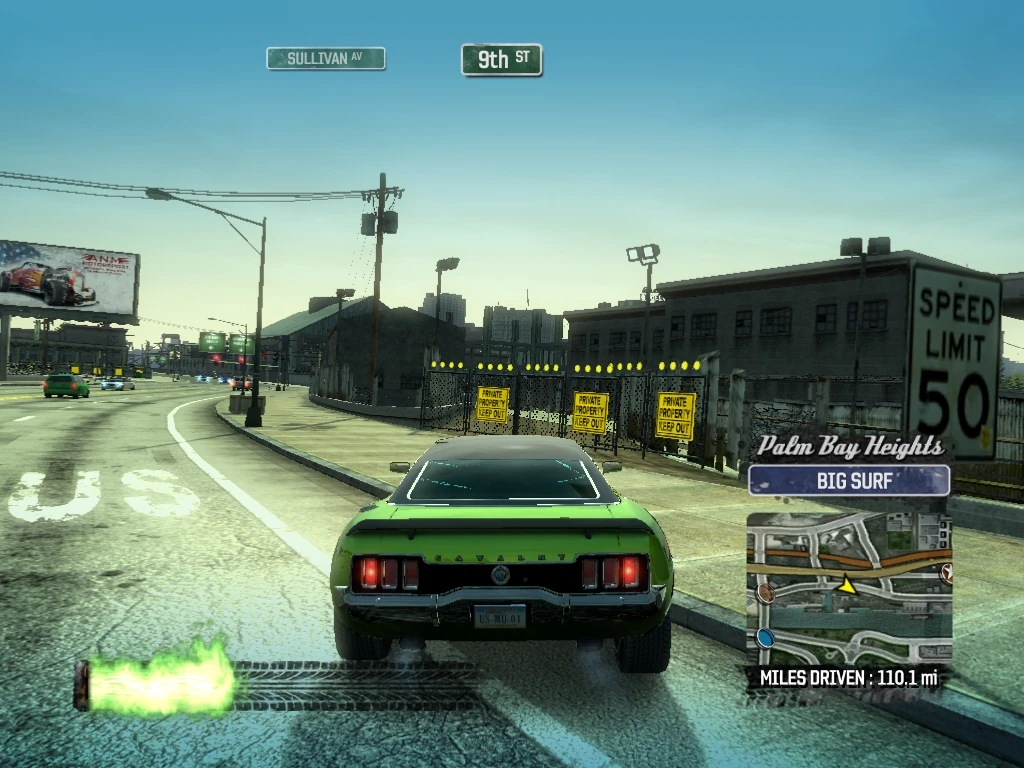
|
| 395 | Palm Bay Heights Big Surf |
Veer left across Sullivan Avenue and drive through Smash Gate 395 and under the structure. | 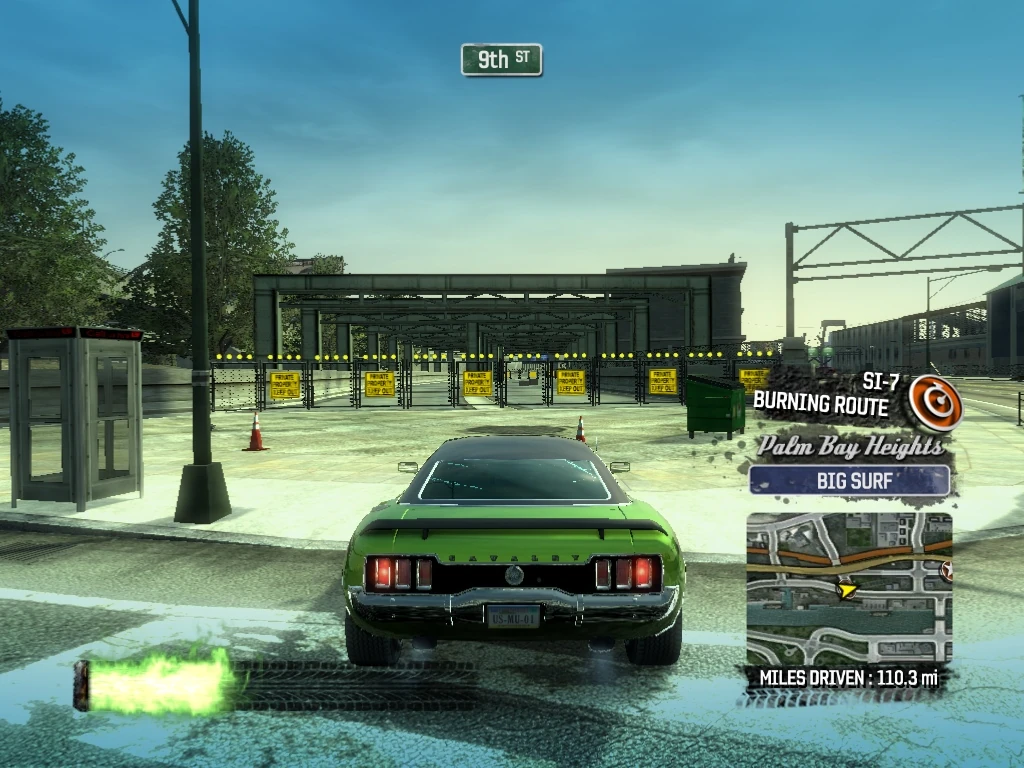
|
| 396 | Palm Bay Heights Big Surf |
Drive through Smash Gate 396 at the other end of the structure and turn right (south) on Moore Avenue. | 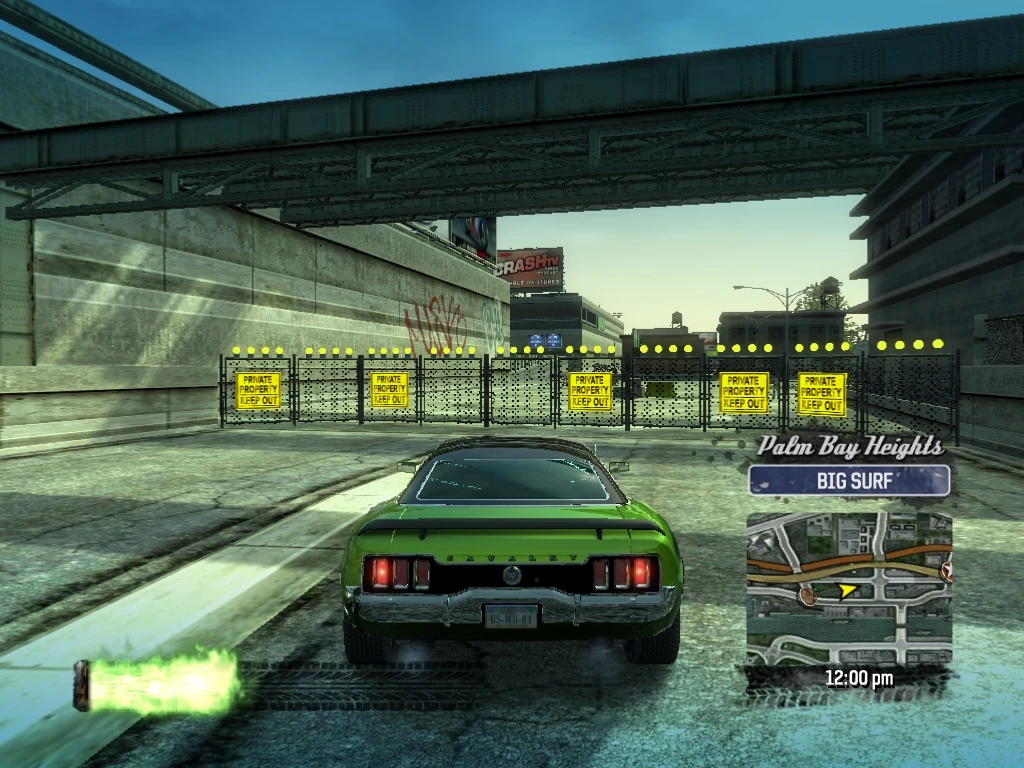
|
| 397 | Palm Bay Heights Big Surf |
Take the next left (east) on 9th Street and circle to the right just before you reach Paradise Avenue and knock down Smash Gate 397. (This leads to the Billboard Smashes from the opposite direction as Smash Gate 393). Turn around and continue east on 9th Street. | 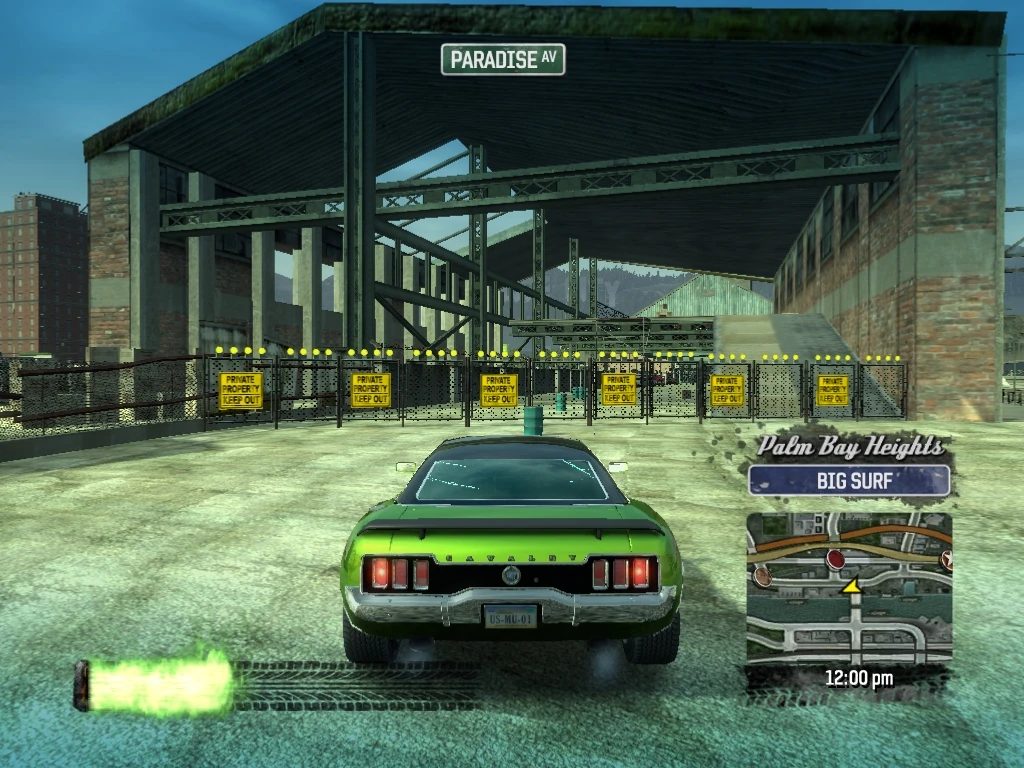
|
| 398 | Palm Bay Heights Big Surf |
Drive past Hawley Avenue and take the next left (north) on Hudson Avenue. Smash Gate 398 is at the entrance to the Parking Garage on the right (across from the Auto Repair) (leads to a couple of Billboard Smashes). For now, just knock it down and continue north on Hudson Avenue. | 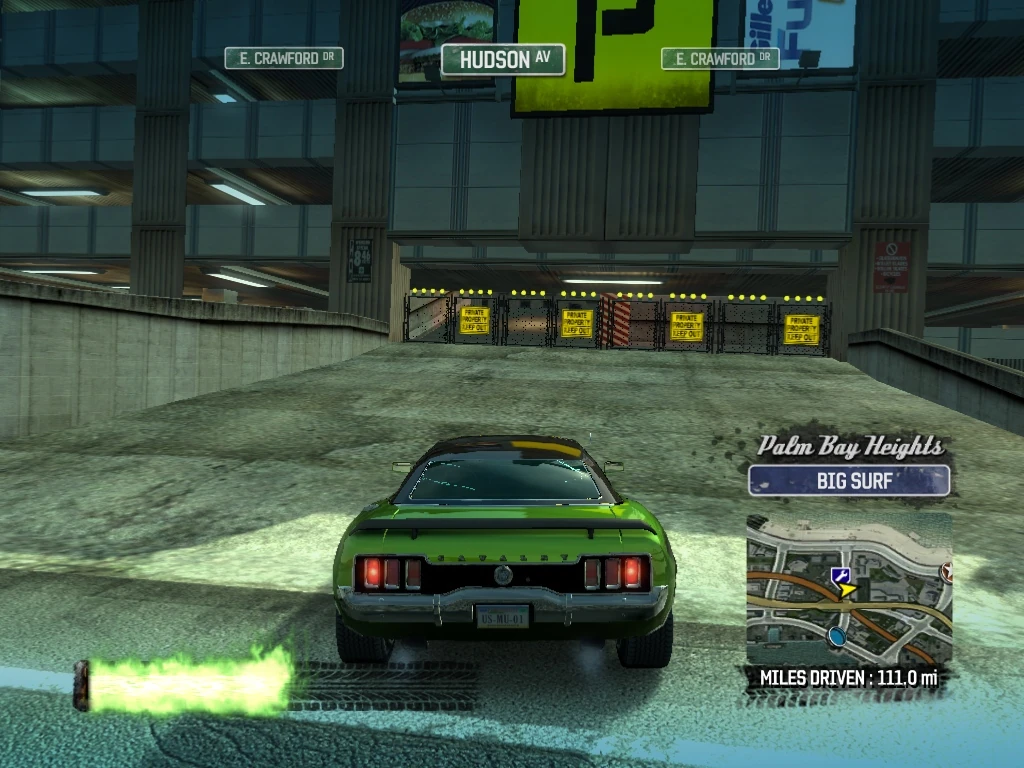
|
| 399 | Palm Bay Heights Big Surf |
Take the next left (west) on E. Crawford Drive. When you get to the Ferris Wheel at the northern curve of the road, drive over to the right sidewalk and along the boardwalk (it's more fun anyway). Just before the incline to get back on E. Crawford before the Crawford Tunnel, veer right and drive through Smash Gate 399, entering an underground construction area. | 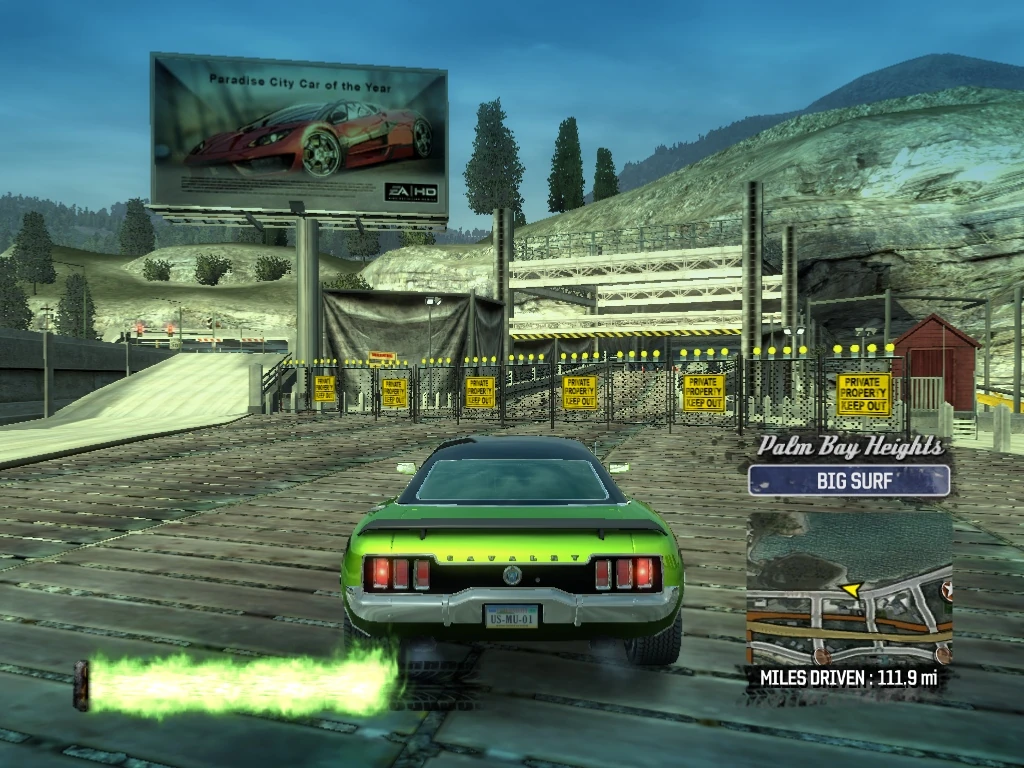
|
| 400 | Palm Bay Heights Ocean View |
When you come to the fork in the path through the construction site - take it! Either path takes you to Smash Gate 400. Drive through it exiting onto Newton Drive just before the Country Club (handy!). You have now completed all the Smash Gates - enjoy the Carson Carbon GT Concept! | 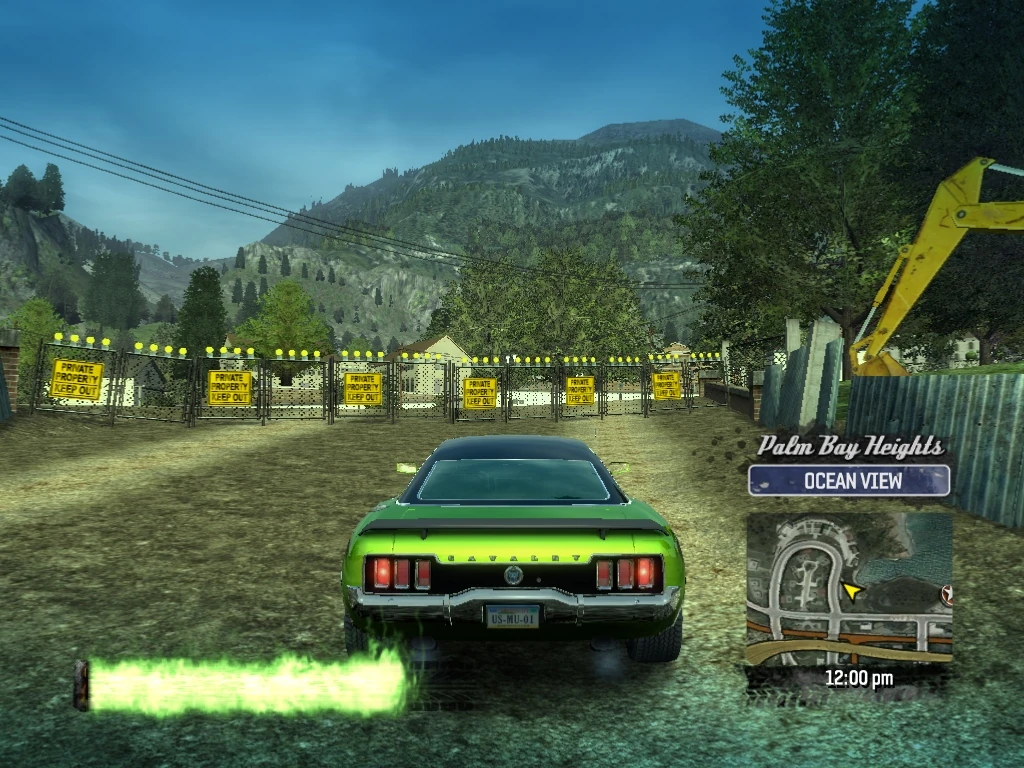
|
Discoveries[]
| Burnout Paradise - Discovery | |
|---|---|
| Paradise City | Billboards (Walkthrough) • Smash Gates (Walkthrough) • Super Jumps (Walkthrough) |
| Big Surf Island | Billboards (Walkthrough) • Mega Jump (Walkthrough) • Smash Gate (Walkthrough) |
| Drive Throughs | Auto Repairs • Yellow Sign Car Parks (Walkthrough) • Gas Stations • Junkyards • Paint Shops |
Notes[]
- In Burnout Paradise's Free February Update the yellow smash gates were changed so that they now pulsate & glow making them easier to track down when cruising the streets of Paradise.