
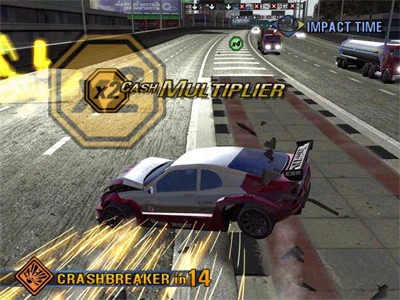
A Crash Event in progress
| Crash (Burnout 3) was Burnopedia's Featured Article in August 2009. |
|---|
Crash Events are special events in Burnout 3: Takedown that ask the player to smash their vehicle into traffic to rack up Crash dollars in 100 different Crash Junctions. This gameplay mode first appeared in Burnout 2: Point of Impact and was later included in Burnout Legends and Burnout Revenge. In Burnout 3 they are separate from the main race World Tour segment but share the same map space.
Modes[]
Each variation of Crash Mode shares the same mechanics but later events are previously played junctions except with differing parameters. World Tour mode is the main Single Player mode in which Crash Events can be accessed allowing you to earn Crash dollars to set records and earn prizes such as Crash Headlines and vehicles. Any Crash Junction unlocked in the World Tour can be played in Multiplayer mode.
There are also three Multiplayer variants for both Online and Offline play.
- Team Crush - Two players choose their own cars and enter a junction together where their final scores are added together at the end.
- Double Impact - Two players choose their own cars and enter a junction together where their final scores are totaled individually at the end.
- Party Crash - Up to 8 players compete on a Crash Junction for the highest score in a round based tournament.
Gameplay Mechanics[]
Basic Gameplay[]
Crash Mode mechanics are quite simple. At its core all the player has to do is to smash into traffic at the junction and score as many Crash dollars as possible. This is expanded with the inclusion of medals which requires more advanced tactics. Before each junction starts the player can watch a preview allowing them to survey the various elements of the junction including traffic placement, volume, speed and timing. The video also shows where the ramps and items are located.
A key aspect to racking up lots of Crash dollars is to crash into the traffic at the correct location. Ramming the back of the last car in the oncoming lane will only damage your car and the vehicle you hit, while hitting the one at the front will also damage all cars behind it which creates a pile-up. Tankers and Big Rigs can have their trailers pushed into adjacent lanes to wreck any approaching cars.
Another method of doing this is by using Impact Time. When a player goes off a ramp, crashes or explodes then they can activate Impact Time which allows them to use the Left Stick to steer their wreck in slow-motion.
Crashbreaker[]
Crashbreaker is the final mechanic in causing total destruction in a Junction. When the required amount of cars have been involved in the crash then the player can detonate their car causing damage to any vehicles in its vicinity and sending smaller ones flying into out-of-reach traffic. Any Tankers caught in the explosion will also detonate causing a more widespread explosion. Several junctions focus on this aspect to get high scores such as Marina Mayhem.
Activating an earned Crashbreaker gives you an extra $5,000 (Tanker explosions earn no bonus but exploded Tankers are worth nearly $100,000).
Pickups[]
Getting Crash $ Multipliers should be the player's priority.
In addition to Crashbreakers and Impact Time a new feature to Burnout 3's Crash Mode are pickups. These can vary from adding Crash dollars to cutting your score in half.
- Dollar Pickups
- Bronze Pickup: Adds $5,000 to Crash $ Total
- Silver Pickup: Adds $10,000 to Crash $ Total
- Gold Pickup: Adds $20,000 to Crash $ Total
- Crash $ Multipliers (these are always added AFTER Dollar Pickups)
- 2x Multiplier: Doubles your Crash $ Total
- 4x Multiplier: Multiples your Crash $ Total by a shocking 4 times. It cancels out the 2x Multiplier if obtained.
- Heartbreaker: Lives up to its namesake by cutting your score in half. Cancels out the above multipliers.
- Other Pickups
- Boost: Boost pickups instantly give you unlimited boost and activates it. As soon as you hit this it can not be stopped.
- Crashbreaker: Touching this automatically detonates your car and adds $10,000 to Crash $ total.
- Stealer (Double Impact Only): Switches the scores of Player 1 and Player 2 at the end of the crash.
Ramps[]
Ramps are used in various Junctions to allow the player to jump over obstacles. Ramps come in different varieties but there are two general types: Flat and Corkscrew.
Flat Ramps come in many different angles to allow the car to fly up either a few feet or many meters into the air. These are great for jumping over obstacle traffic which you may want to hit later in the crash or for flying bonnet-first into a Tanker's load.
Corkscrew Ramps come in only one angle with a large corner of the ramp at a much steeper angle than the rest of the ramp. These cause the car to enter a barrel roll and using Aftertouch can make for some awkward landings.
Boost Start[]
Returning from Burnout 2 is the Boost Start. The Boost start yields immense acceleration comparable to that of the Boost pick-up but at the very start of the event and enables the player to reach the target junction faster. All vehicles without exception can be "Boost Started".
Whether or not to use a Boost Start depends on whether it is advantageous or not. Indeed, sometimes it allows the player to hit traffic earlier and cause more damage but if too quick, the additional Boost can cause them to enter the junction too early and completely miss a majority of the traffic.
To perform a Boost start you must first start revving the wheels with accelerator. Once the countdown begins tap the brake while holding the accelerator and will cause smoke to come from the tyres. Just before the countdown finishes let go of the accelerator and then reapply it once it is finished. If done right boost should come out of the exhaust.
The boost start acceleration vary on the size of the vehicle. The bigger the vehicle, the faster it launches.
Unlockables[]
Playing Crash Mode in the World Tour or Single Event with these conditions can reward the player with Crash Headlines and Heavyweight Vehicles.
Crash Headlines[]
News Headlines are earned when you reach a certain Crash $ total at a specific location. Headlines are not restrained to a singe Crash Junction but rather their location. For instance Trailer Trash and Shut Up and Jump are both viable for the Silver Lake Lunacy Headline as they both are held in Silver Lake. Here are the requirements for each Crash Headline:
| Headline Name | Headline Location | Needed Crash $ |
|---|---|---|
| Bayside Blitz! | Waterfront | $900,000 |
| Downtown Demolition! | Downtown | $650,000 |
| Silver Lake Lunacy! | Silver Lake | $600,000 |
| Winter City Frozen! | Winter City | $800,000 |
| Alpine Smash! | Alpine | $900,000 |
| Riviera Wreck! | Riviera | $750,000 |
| Grape Harvest Crushed! | Vineyard | $850,000 |
| Golden City Madness! | Golden City | $750,000 |
| Dockside Ridge Ruin! | Dockside | $1,000,000 |
| Trouble in Paradise! | Island Paradise | $750,000 |
Earning all Crash Headlines unlocks the Fire Truck.
Heavyweight Vehicles[]
Heavyweight vehicles are vehicles only available in Crash Mode with more weight than other vehicles to cause extra damage. Other class vehicles can be used but these are recommended as they are larger, heavier and have stronger Crashbreakers. Heavyweights are earned by reaching a required Global Crash $ Total with the only exception being the Fire Truck. These requirements are listed below:
| Vehicle | Needed Crash $ |
|---|---|
| Heavy Pickup | $1,000,000 |
| 4WD Racer | $2,000,000 |
| SUV Deluxe | $5,000,000 |
| 4WD Heavy Duty | $10,000,000 |
| B-Team Van | $15,000,000 |
| Delivery Truck | $20,000,000 |
| Tractor Cab | $30,000,000 |
| Longnose Cab | $50,000,000 |
| City Bus | $70,000,000 |
| Trash Truck | $90,000,000 |
| Fire Truck | Collect all Headlines |
List of Junctions[]
| # | Name | Location | Medals |  Crashbreaker in Crashbreaker in
| ||
|---|---|---|---|---|---|---|
| 1. | Trailer Trash | Silver Lake | $55,000 | $85,000 | $140,000 | 6 Wrecks |
| 2. | Cross Traffic | Downtown | $65,000 | $100,000 | $145,000 | 8 Wrecks |
| 3. | Marina Mayhem | Waterfront | $55,000 | $180,000 | $295,000 | 8 Wrecks |
| 4. | Twister | Waterfront | $65,000 | $100,000 | $160,000 | 8 Wrecks |
| 5. | Demolition | Downtown | $55,000 | $150,000 | $190,000 | 8 Wrecks |
| 6. | Shut Up and Jump | Silver Lake | $65,000 | $155,000 | $200,000 | 8 Wrecks |
| 7. | Slip and Slide | Winter City | $75,000 | $200,000 | $350,000 | 10 Wrecks |
| 8. | Grand Slam | Riviera | $60,000 | $200,000 | $280,000 | 10 Wrecks |
| 9. | Roadblock | Alpine | $65,000 | $200,000 | $370,000 | 10 Wrecks |
| 10. | Grapes of Wrath | Vineyard | $70,000 | $175,000 | $285,000 | 10 Wrecks |
| 11. | Pump Up the Tram | Winter City | $70,000 | $265,000 | $500,000 | 10 Wrecks |
| 12. | Get Bent | Riviera | $70,000 | $180,000 | $350,000 | 9 Wrecks |
| 13. | Corner Chaos | Winter City | $70,000 | $200,000 | $450,000 | 10 Wrecks |
| 14. | Jack Knife City | Vineyard | $70,000 | $250,000 | $450,000 | 12 Wrecks |
| 15. | Neon Nightmare | Golden CIty | $65,000 | $200,000 | $400,000 | 10 Wrecks |
| 16. | Paradise Peril | Island Paradise | $80,000 | $250,000 | $400,000 | 12 Wrecks |
| 17. | Rock the Dock | Dockside | $70,000 | $200,000 | $400,000 | 12 Wrecks |
| 18. | Ruined Holiday | Island Paradise | $75,000 | $250,000 | $450,000 | 12 Wrecks |
| 19. | Tuk Down | Golden City | $62,500 | $250,000 | $400,000 | 12 Wrecks |
| 20. | Handle with Care | Golden City | $75,000 | $275,000 | $550,000 | 14 Wrecks |
| 21. | Showdown | Silver Lake | $70,000 | $250,000 | $520,000 | 10 Wrecks |
| 22. | Leap of Faith | Waterfront | $75,000 | $350,000 | $600,000 | 14 Wrecks |
| 23. | Dead End | Downtown | $70,000 | $250,000 | $500,000 | 10 Wrecks |
| 24. | Ticket to Collide | Silver Lake | $70,000 | $200,000 | $390,000 | 12 Wrecks |
| 25. | Wrecks City | Downtown | $70,000 | $250,000 | $450,000 | 10 Wrecks |
| 26. | Danger Zone | Waterfront | $80,000 | $350,000 | $600,000 | 10 Wrecks |
| 27. | Riviera Rampage | Riviera | $70,000 | $250,000 | $500,000 | 12 Wrecks |
| 28. | Riverside Wreck | Winter City | $70,000 | $300,000 | $690,000 | 12 Wrecks |
| 29. | Grape Fear | Vineyard | $75,000 | $300,000 | $650,000 | 14 Wrecks |
| 30. | Don't Look Down | Alpine | $70,000 | $400,000 | $500,000 | 10 Wrecks |
| 31. | Spin the Wheel | Riviera | $70,000 | $250,000 | $450,000 | 12 Wrecks |
| 32. | Field of Screams | Vineyard | $70,000 | $300,000 | $800,000 | 14 Wrecks |
| 33. | Snow Joke | Winter City | $80,000 | $250,000 | $500,000 | 12 Wrecks |
| 34. | Chilly Crash | Alpine | $80,000 | $380,000 | $800,000 | 12 Wrecks |
| 35. | Turn & Burn | Golden City | $70,000 | $380,000 | $800,000 | 15 Wrecks |
| 36. | Exit the Dragon | Dockside | $80,000 | $370,000 | $750,000 | 15 Wrecks |
| 37. | Tropical Storm | Island Paradise | $75,000 | $275,000 | $650,000 | 15 Wrecks |
| 38. | Crossing Crush | Golden City | $80,000 | $390,000 | $750,000 | 12 Wrecks |
| 39. | Freeway Thunder | Golden City | $75,000 | $350,000 | $600,000 | 15 Wrecks |
| 40. | Drive Angry | Island Paradise | $70,000 | $300,000 | $600,000 | 15 Wrecks |
| 41. | Hate to be Late | Downtown | $80,000 | $250,000 | $600,000 | 15 Wrecks |
| 42. | 3 Ways to Fly | Silver Lake | $80,000 | $270,000 | $450,000 | 12 Wrecks |
| 43. | Bay-side Blitz | Waterfront | $70,000 | $240,000 | $500,000 | 12 Wrecks |
| 44. | Hold Tight | Downtown | $80,000 | $250,000 | $500,000 | 12 Wrecks |
| 45. | Bridge Too Far | Silver Lake | $80,000 | $270,000 | $500,000 | 15 Wrecks |
| 46. | Traffic Jammed | Downtown | $80,000 | $250,000 | $450,000 | 10 Wrecks |
| 47. | Exact Change | Alpine | $70,000 | $250,000 | $550,000 | 14 Wrecks |
| 48. | Country Chaos | Vineyard | $80,000 | $200,000 | $500,000 | 12 Wrecks |
| 49. | Cliff Hanger | Riviera | $80,000 | $180,000 | $400,000 | 10 Wrecks |
| 50. | Market Crash | Winter City | $75,000 | $250,000 | $500,000 | 15 Wrecks |
| 51. | Winter Wipe-out | Winter City | $80,000 | $225,000 | $450,000 | 12 Wrecks |
| 52. | High Roller | Riviera | $70,000 | $300,000 | $500,000 | 12 Wrecks |
| 53. | Haul A$$ | Vineyard | $80,000 | $350,000 | $630,000 | 14 Wrecks |
| 54. | Lanes Lunacy | Alpine | $90,000 | $290,000 | $430,000 | 12 Wrecks |
| 55. | Road to Ruin | Golden City | $85,000 | $225,000 | $600,000 | 14 Wrecks |
| 56. | Jungle Rumble | Island Paradise | $80,000 | $350,000 | $600,000 | 15 Wrecks |
| 57. | Reiko-chet | Dockside | $75,000 | $250,000 | $500,000 | 15 Wrecks |
| 58. | Airstrike | Island Paradise | $85,000 | $250,000 | $350,000 | 15 Wrecks |
| 59. | Trash Smash | Golden City | $75,000 | $400,000 | $800,000 | 14 Wrecks |
| 60. | Whirlwind | Dockside | $65,000 | $290,000 | $500,000 | 14 Wrecks |
| 61. | Out Of Control | Silver Lake | $75,000 | $270,000 | $400,000 | 12 Wrecks |
| 62. | Bus Blockade | Downtown | $85,000 | $250,000 | $400,000 | 14 Wrecks |
| 63. | Falling Down | Waterfront | $85,000 | $215,000 | $400,000 | 10 Wrecks |
| 64. | Fear Factor | Silver Lake | $80,000 | $220,000 | $400,000 | 12 Wrecks |
| 65. | T-boned | Waterfront | $75,000 | $470,000 | $850,000 | 14 Wrecks |
| 66. | Sunshine Smash | Waterfront | $90,000 | $400,000 | $800,000 | 14 Wrecks |
| 67. | Snow Plough | Alpine | $80,000 | $200,000 | $500,000 | 12 Wrecks |
| 68. | Crash Landing | Winter City | $80,000 | $270,000 | $390,000 | 14 Wrecks |
| 69. | Break the Bank | Riviera | $70,000 | $400,000 | $700,000 | 15 Wrecks |
| 70. | Bale Out | Vineyard | $70,000 | $250,000 | $600,000 | 14 Wrecks |
| 71. | Go for Broke | Riviera | $80,000 | $250,000 | $400,000 | 12 Wrecks |
| 72. | Medieval Mash | Vineyard | $75,000 | $300,000 | $600,000 | 15 Wrecks |
| 73. | Run for the Bus | Winter City | $75,000 | $275,000 | $600,000 | 15 Wrecks |
| 74. | Corkscrewed | Alpine | $75,000 | $290,000 | $400,000 | 12 Wrecks |
| 75. | Look Both Ways | Dockside | $65,000 | $280,000 | $360,000 | 12 Wrecks |
| 76. | Heavy Hitter | Golden City | $75,000 | $200,000 | $400,000 | 14 Wrecks |
| 77. | Steel Tsunami | Island Paradise | $80,000 | $250,000 | $480,000 | 12 Wrecks |
| 78. | Buckle Up | Dockside | $75,000 | $250,000 | $500,000 | 15 Wrecks |
| 79. | Uphill Struggle | Island Paradise | $70,000 | $250,000 | $600,000 | 14 Wrecks |
| 80. | Eastern Block | Golden City | $70,000 | $300,000 | $550,000 | 12 Wrecks |
| 81. | Pick up the Pieces | Silver Lake | $80,000 | $270,000 | $530,000 | 15 Wrecks |
| 82. | Grid Locked | Downtown | $90,000 | $400,000 | $600,000 | 12 Wrecks |
| 83 | Air Race | Downtown | $90,000 | $200,000 | $500,000 | 12 Wrecks |
| 84. | Hit and Run | Downtown | $80,000 | $250,000 | $500,000 | 15 Wrecks |
| 85. | Look then Leap | Waterfront | $80,000 | $200,000 | $400,000 | 15 Wrecks |
| 86. | Tram-Pulled | Waterfront | $95,000 | $400,000 | $700,000 | 15 Wrecks |
| 87. | On Rampage | Winter City | $90,000 | $400,000 | $800,000 | 14 Wrecks |
| 88. | Jump the Toll | Alpine | $90,000 | $290,000 | $800,000 | 14 Wrecks |
| 89. | Jumping Jam | Riviera | $85,000 | $270,000 | $520,000 | 15 Wrecks |
| 90. | Crash au Van | Vineyard | $95,000 | $265,000 | $400,000 | 10 Wrecks |
| 91. | Cool for Crash | Winter City | $85,000 | $350,000 | $800,000 | 15 Wrecks |
| 92. | Ship Wrecked | Riviera | $85,000 | $300,000 | $600,000 | 15 Wrecks |
| 93. | Gate Crasher | Vineyard | $100,000 | $400,000 | $800,000 | 15 Wrecks |
| 94. | Highway to Hell | Alpine | $80,000 | $275,000 | $700,000 | 12 Wrecks |
| 95. | Crash Fu | Golden City | $80,000 | $300,000 | $600,000 | 15 Wrecks |
| 96. | The Crate Escape | Dockside | $85,000 | $390,000 | $800,000 | 15 Wrecks |
| 97. | Tourist Trap | Island Paradise | $90,000 | $225,000 | $500,000 | 12 Wrecks |
| 98. | Pure Scores | Island Paradise | $90,000 | $300,000 | $600,000 | 12 Wrecks |
| 99. | Lost Luggage | Island Paradise | $90,000 | $250,000 | $450,000 | 12 Wrecks |
| 100. | Crashed Out | Dockside | $95,000 | $300,000 | $700,000 | 15 Wrecks |

